

搭建Springboot+Vue+Element的简单系统流程
今天研究了一下如何把Springboot+Mybatis和Vue+Element结合起来使用 详细写一篇博客来记录一下流程吧,因为途中发现了很多的问题 首先,创建Springboot项目,惯例添加依赖

<?xml version="1.0" encoding="UTF-8"?>
<project xmlns="http://maven.apache.org/POM/4.0.0" xmlns:xsi="http://www.w3.org/2001/XMLSchema-instance"
         xsi:schemaLocation="http://maven.apache.org/POM/4.0.0 https://maven.apache.org/xsd/maven-4.0.0.xsd">
    <modelVersion>4.0.0</modelVersion>
    <parent>
        <groupId>org.springframework.boot</groupId>
        <artifactId>spring-boot-starter-parent</artifactId>
        <version>2.7.16</version>
        <relativePath/> <!-- lookup parent from repository -->
    </parent>
    <groupId>com.example</groupId>
    <artifactId>Mybatisplus</artifactId>
    <version>0.0.1-SNAPSHOT</version>
    <name>Mybatisplus</name>
    <description>Mybatisplus</description>
    <properties>
        <java.version>1.8</java.version>
    </properties>
    <dependencies>
        <dependency>
            <groupId>org.springframework.boot</groupId>
            <artifactId>spring-boot-starter-web</artifactId>
        </dependency>

        <dependency>
            <groupId>org.springframework.boot</groupId>
            <artifactId>spring-boot-starter-test</artifactId>
            <scope>test</scope>
        </dependency>


        <dependency>
            <groupId>com.baomidou</groupId>
            <artifactId>mybatis-plus</artifactId>
            <version>3.4.2</version>
        </dependency>
        <dependency>
            <groupId>mysql</groupId>
            <artifactId>mysql-connector-java</artifactId>
            <version>5.0.7</version>
        </dependency>
        <dependency>
            <groupId>org.mybatis.spring.boot</groupId>
            <artifactId>mybatis-spring-boot-starter</artifactId>
            <version>2.1.3</version>
        </dependency>
        <dependency>
            <groupId>com.alibaba</groupId>
            <artifactId>druid</artifactId>
            <version>1.2.5</version>
        </dependency>
    </dependencies>

    <build>
        <plugins>
            <plugin>
                <groupId>org.springframework.boot</groupId>
                <artifactId>spring-boot-maven-plugin</artifactId>
            </plugin>
        </plugins>
    </build>

</project>
依赖添加完毕之后,创建项目目录,包括mapper、controller、entity

然后配置properties文件
spring.datasource.type=com.alibaba.druid.pool.DruidDataSource
spring.datasource.driver-class-name=com.mysql.jdbc.Driver
spring.datasource.url=jdbc:mysql://localhost:3306/mybatis??useUnicode=true&characterEncoding=utf8
spring.datasource.username=root
spring.datasource.password=*******
mybatis-plus.configuration.log-impl=org.apache.ibatis.logging.stdout.StdOutImpl
server.port:9090
端口可以修改,但是前端访问也要进行修改
然后对springboot主类进行配置
添加
@MapperScan("com.example.Vue2.mapper")
注解,注意路径
然后创建数据库,这里是一个测试的表test2
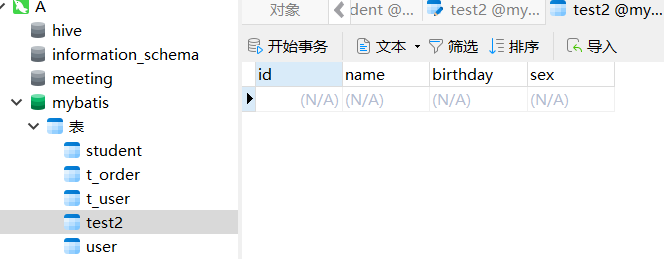
然后根据表内容进行封装,注意,如果你的实体类和表名称不一致,则需要添加@tablename注解,但是建议保持一致避免麻烦
然后是封装,包括get/set和tostring方法
package com.example.vue2.entity;

public class test2 {
    private int id;
    private String name;
    private String birthday;
    private String sex;

    public int getId() {
        return id;
    }

    public void setId(int id) {
        this.id = id;
    }

    public String getName() {
        return name;
    }

    public void setName(String name) {
        this.name = name;
    }

    public String getBirthday() {
        return birthday;
    }

    public void setBirthday(String birthday) {
        this.birthday = birthday;
    }

    public String getSex() {
        return sex;
    }

    public void setSex(String sex) {
        this.sex = sex;
    }

    @Override
    public String toString() {
        return "test2{" +
                "id=" + id +
                ", name='" + name + '\'' +
                ", birthday='" + birthday + '\'' +
                ", sex='" + sex + '\'' +
                '}';
    }
}
然后编写mapper接口
package com.example.vue2.mapper;

import com.example.vue2.entity.test2;
import org.apache.ibatis.annotations.*;

import java.util.List;

@Mapper
public interface test2Mapper {
    @Select("select * from test2")
    public List<test2> find();
    @Insert("insert into test2(name, birthday, sex) values(#{name},#{birthday},#{sex})")
    public int insert(test2 test2);
    @Delete("delete from test2 where id = #{id}")
    public int delete(String id);
    @Update("update test2 set name = #{name},birthday = #{birthday},sex = #{sex} where id = #{id}")
    public int update (test2 test2);
}
这里有个问题记录一下,数据库中的id为主键,不为空且自增,因此在执行insert的时候,由于id添加或许会存在问题,因此最好
直接指明添加的列,这样不容易出现bug
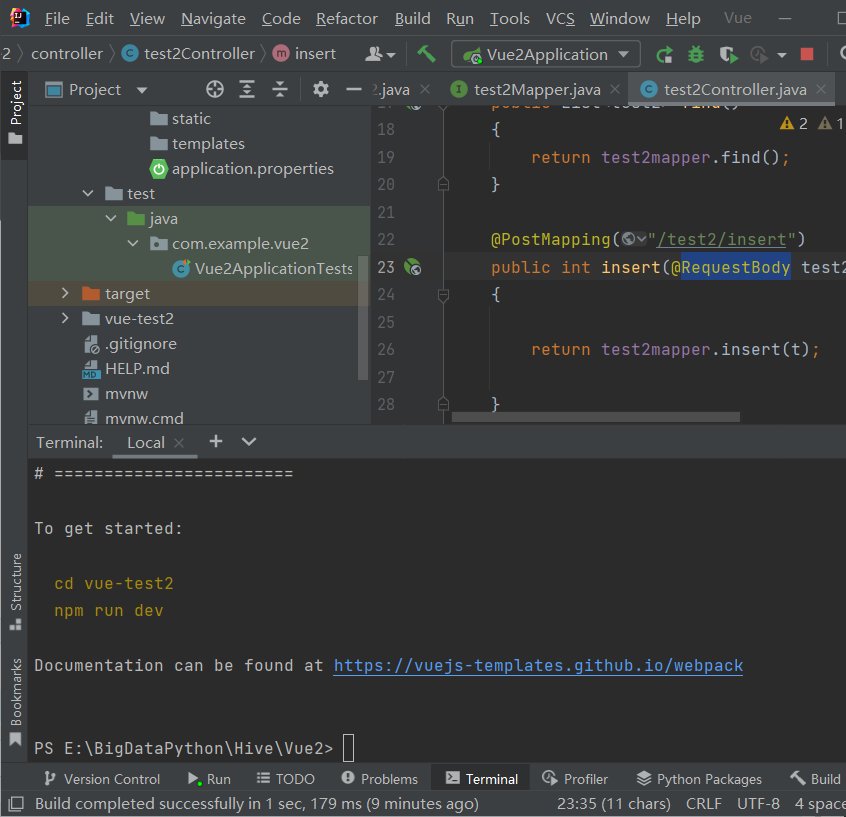
然后就是Controller类
package com.example.vue2.controller;

import com.example.vue2.entity.test2;
import com.example.vue2.mapper.test2Mapper;
import org.springframework.beans.factory.annotation.Autowired;
import org.springframework.web.bind.annotation.*;

import java.util.List;

@CrossOrigin(origins = "*")
@RestController
public class test2Controller {
    @Autowired
    private test2Mapper test2mapper;

    @GetMapping("/test2/findAll")
    public List<test2> find()
    {
        return test2mapper.find();
    }

    @PostMapping("/test/insert")
    public int insert(@RequestBody test2 t)
    {

        return test2mapper.insert(t);

    }

    @PostMapping("/test2/delete/{id}")
    public String delete(@PathVariable("id")String id)
    {
        System.out.println(id);
        int flag = 0;
        flag = test2mapper.delete(id);
        if(flag>0)
        {
            return "删除成功";
        }else
        {
            return "删除失败";
        }
    }

    @PostMapping("/test2/update")
    public String update(@RequestBody test2 student)
    {
        int flag = 0;
        flag = test2mapper.update(student);
        if(flag>0)
        {
            return "更新成功";
        }else
        {
            return "更新失败";
        }

    }

}
这里注意几个问题
1.前端传递的格式假设是 localhost:8080/test/delete/1
(1是id号,前端根据获取到的列id进行拼接的话)
一定要对id进行注解,不然会导致获取不到
@PathVariable("id")
也就是这行
2.前端传递的form,需要@RequestBody进行获取
就例如添加和更新的参数部分
这些都做完之后,后端就算是开发完毕了,测试一下

查询删除和更新都是post操作,在没有开发前端的前提下,可以使用Airpost工具进行测试,但是值得注意的是
Airpost中传递的form-data数据,如果想成功插入,需要去掉@RequestBody注解,但是vue传递的form必须要有
这我不太清楚为什么,但是当前先这样做
测试完成之后,着手进行前端的开发,流程如下
点击springboot项目下方的terminal
相当于打开了命令行,然后输入
vue init webpack vue-test2 --offline
解释一下:这是通过webpack在springboot项目中添加vue模块,但是存在一个问题,如果我直接进行vue init....
是无法成功的 具体原因我不知道为什么 反正显示连接超时,因此我下载了webpack的包,下载连接为:
mirrors / vuejs-templates / webpack · GitCode
https://gitcode.net/mirrors/vuejs-templates/webpack/-/archive/develop/webpack-develop.zip
下载完成之后放到C盘 用户 你的用户名 下的.vue-templates文件夹下,注意两个问题
1.下载的包名需要改成webpack
2.该路径下或许没有这个文件夹,自己创建一个就行了
然后继续

前四项就是项目名称、描述、作者、都可以选默认的
然后这个vue-router是vue的路由管理,建议Y,不然还得自己添加
然后一路都是no,最后选npm就行了
然后就是漫长无尽的等待
npm下vue的东西 不知道是我网络有问题还是其他的什么 反正很卡
下载完之后 cd到项目路径下,然后启动 npm run dev ,有些项目可能是 npm run serve
其实我用cli创建的就是serve启动 但是webpack的就是dev启动 总之他会给你提示的
完成之后
就可以进入快乐的前端开发了
run之后访问一下,可能因为我写的时候后台还跑着另一个vue项目,所以端口自动就在8081了
这样就可以了
然后安装element-ui
npm install element-ui
不得不说 这玩意确实好用
安装完成之后在main.js中添加
import ElementUI from 'element-ui';
import 'element-ui/lib/theme-chalk/index.css';
Vue.use(ElementUI);
这样就可以用了
然后在是src下创建一个views文件夹,用于存放vue页面,可以粗暴的理解为webapps,存放jsp和html的类似文件夹
然后我这里是做了一个简单到爆炸的管理系统,基本上就是一个页面,添加了一个导航栏,然后在某个页面里嵌套了几个页面
例如我先创建了一个登陆页面 login.vue
然后把App.vue中的style注释掉换成下面这个,是为了消除侧边距
<style>
  body {
    padding: 0;
    margin: 0;
  }
  html,body,#app {
    height: 100%;
  }
</style>
然后把logo可以注释掉
然后就是对页面了,这里做了一个简单的登陆页面,不行就直接丢给gpt美化了
页面代码
<template>
    <div class="login-container">
        <el-form :model="ruleForm2" :rules="rules2"
                 status-icon
                 ref="ruleForm2"
                 label-position="left"
                 label-width="0px"
                 class="demo-ruleForm login-page">
            <h3 class="title">系统登录</h3>
            <el-form-item prop="username">
                <el-input type="text"
                          v-model="ruleForm2.username"
                          auto-complete="off"
                          placeholder="用户名"
                ></el-input>
            </el-form-item>
            <el-form-item prop="password">
                <el-input type="password"
                          v-model="ruleForm2.password"
                          auto-complete="off"
                          placeholder="密码"
                ></el-input>
            </el-form-item>
            <el-checkbox
                    v-model="checked"
                    class="rememberme"
            >记住密码
            </el-checkbox>
            <el-form-item style="width:100%;">
                <el-button type="primary" style="width:100%;" @click="handleSubmit" :loading="logining">登录</el-button>
            </el-form-item>
        </el-form>
    </div>
</template>

<script>
    export default {
        name: "login",
        data(){
            return {
                logining: false,
                ruleForm2: {
                    username: 'admin',
                    password: '123456',
                },
                rules2: {
                    username: [{required: true, message: 'please enter your account', trigger: 'blur'}],
                    password: [{required: true, message: 'enter your password', trigger: 'blur'}]
                },
                checked: false
            }
        },
        methods: {
            handleSubmit(event){
                this.$refs.ruleForm2.validate((valid) => {
                    if(valid){
                        this.logining = true;
                        if(this.ruleForm2.username === 'admin' &&
                            this.ruleForm2.password === '123456'){
                            this.logining = false;
                            sessionStorage.setItem('user', this.ruleForm2.username);
                            this.$router.push({path: '/index'});
                        }else{
                            this.logining = false;
                            this.$alert('username or password wrong!', 'info', {
                                confirmButtonText: 'ok'
                            })
                        }
                    }else{
                        console.log('error submit!');
                        return false;
                    }
                })
            }
        }
    }
</script>

<style scoped>

    .login-container {
        width: 100%;
        height: 100%;
    }
    .login-page {
        -webkit-border-radius: 5px;
        border-radius: 5px;
        width: 350px;
        padding: 35px 35px 15px;
        background: #fff;
        border: 1px solid #eaeaea;
        box-shadow: 0 0 25px #cac6c6;
        margin: 0;
        position: relative;
        top: 50%;
        left: 50%;
        transform: translate(-50%, -50%);
    }

    label.el-checkbox.rememberme {
        margin: 0px 0px 15px;
        text-align: left;
    }

    .title{
        text-align: center;
    }
</style>
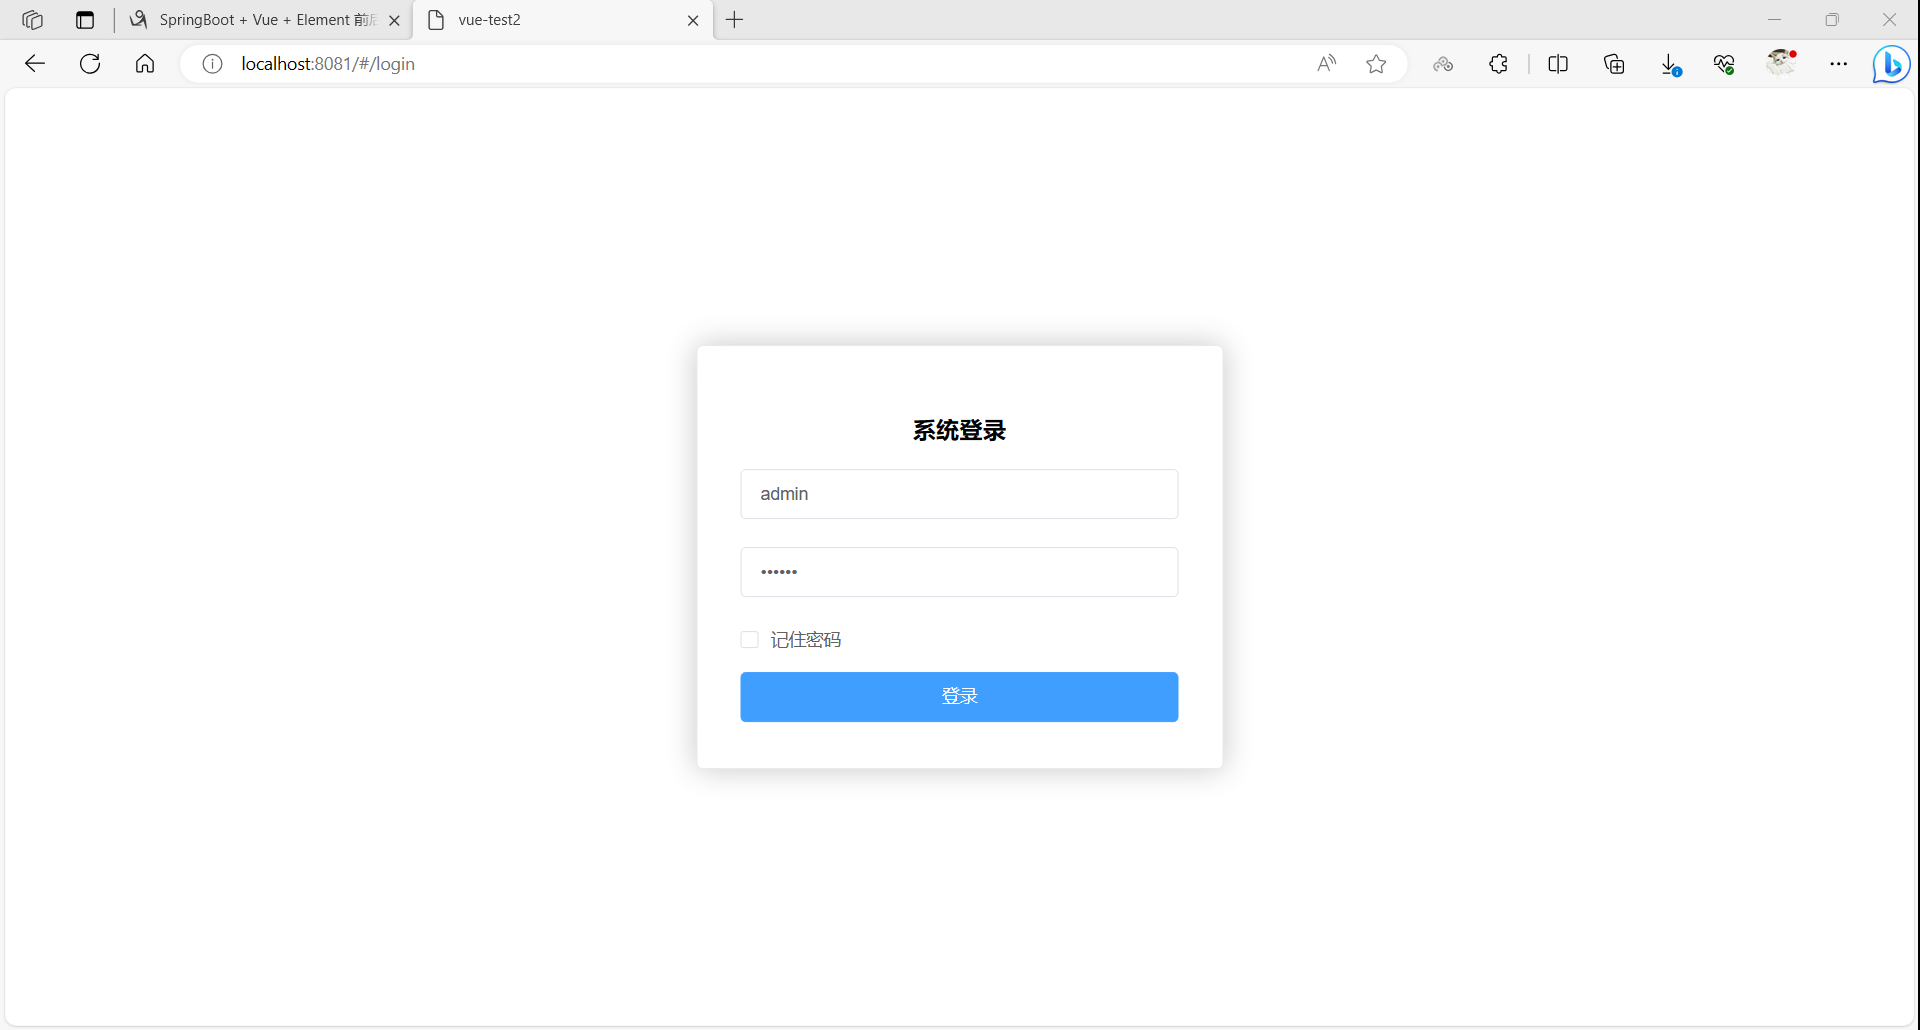
效果图
之后点击登录就会访问index
然后在views下创建一个index.vue,用于实现跳转后的页面,同时配置路由
配置路由就是 引入
import index from '@/view/index'
然后实现
就是在routes里添加,注意逗号
export default new Router({
  routes: [
    {
      path: '/',
      name: 'HelloWorld',
      component: HelloWorld
    },
    {
      path: '/login',
      name: 'login',
      component: login
    },
    {
      path :'/index',
      name :'index',
      component:index
    }
  ]
})
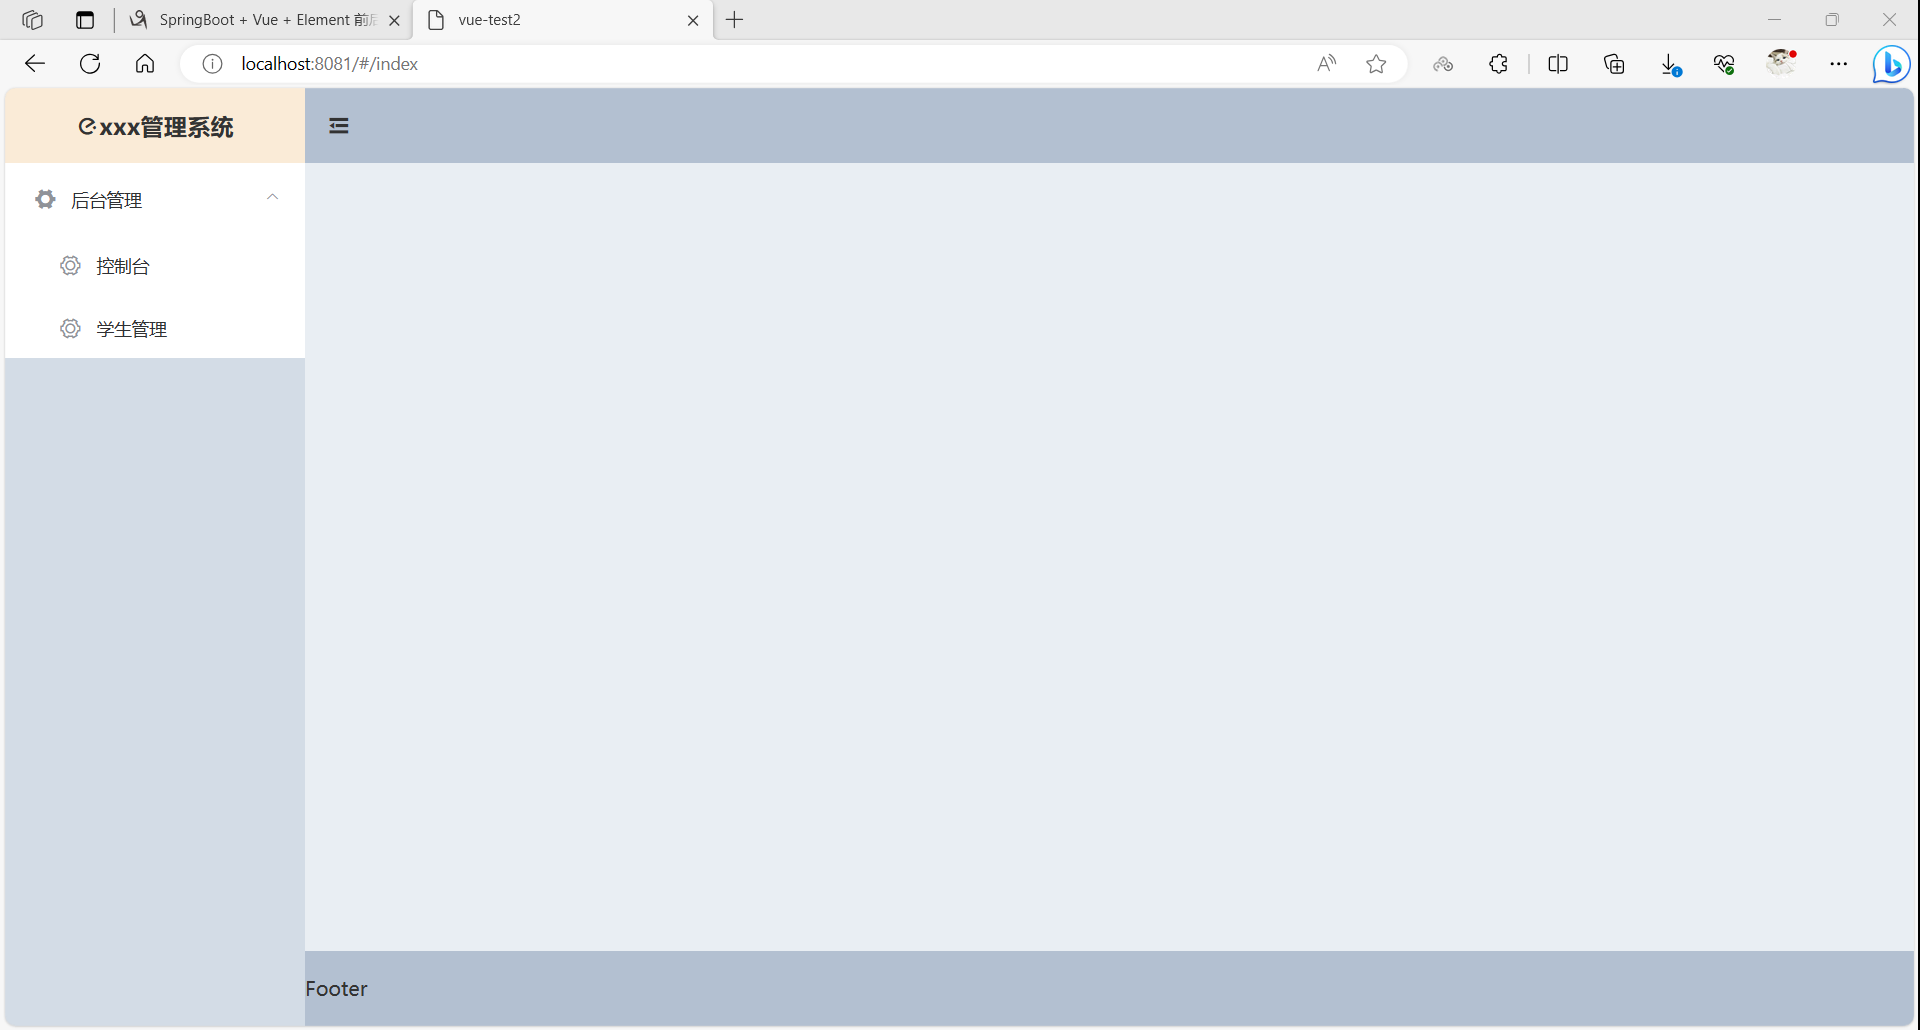
然后实现一个简单的管理系统模板
<template>
  <el-container>
    <!-- width的宽度跟collapse一样动态控制 -->
    <el-aside width="collapse">
      <div class="logo" v-show="open"><h3><i class="el-icon-eleme"></i>xxx管理系统</h3></div>
      <div class="logo" v-show="close"><h3><i class="el-icon-eleme"></i></h3></div>
      <!-- :collapse="isCollapse"  class="el-menu-vertical" 动态控制导航菜单的收起与展开  router:让index作为 path 进行路由跳转 -->
      <el-menu default-active="$route.path"
               router
               :default-openeds="openeds"
               :collapse="isCollapse"
               class="el-menu-vertical">
        <el-submenu index="1">
          <!-- 一级标题 -->
          <template slot="title">
            <i class="el-icon-s-tools"></i>
            <span slot="title">后台管理</span>
          </template>
          <!--  二级标题 -->
            <el-menu-item index="/console">
              <i class="el-icon-setting"></i>
              <span slot="title">控制台</span>
            </el-menu-item>
            <el-menu-item index="/student">
              <i class="el-icon-setting"></i>
              <span slot="title">学生管理</span>
            </el-menu-item>
        </el-submenu>
      </el-menu>

    </el-aside>
    <el-container>
      <el-header>
        <div class="trigger" @click="isShow">
          <!-- 点击展开收起导航和切换对应图标 -->
          <i class="el-icon-s-fold" v-show="open"></i>
          <i class="el-icon-s-unfold" v-show="close"></i>
        </div>
      </el-header>
      <el-main>
        <router-view></router-view>
      </el-main>
      <el-footer>Footer</el-footer>
    </el-container>
  </el-container>
</template>

<script>
  export default {
    name: "index",
    data() {
      return {
        openeds: ["1"],
        isCollapse: false, //导航栏默认为展开
        close: false, //第二个图标默认隐藏
        open: true, //默认显示第一个图标
      }
    },
    methods: {
      isShow() {
        this.isCollapse = !this.isCollapse;
        this.open = !this.open;
        this.close = !this.close;
      },
    }
  }
</script>

<style scoped>
  .el-header, .el-footer {
    background-color: #B3C0D1;
    color: #333;
    line-height: 60px;
    height: 100%;
    padding: 0 !important;
  }

  .el-aside {
    background-color: #D3DCE6;
    color: #333;
    height: 100vh;
  }

  .el-main {
    background-color: #E9EEF3;
    color: #333;
  }

  body > .el-container {
    margin-bottom: 40px;
  }

  .logo {
    height: 60px;
    line-height: 60px;
    background-color: antiquewhite;
    text-align: center;
  }

  .logo h3 {
    margin: 0;
    height: 60px;
  }

  .el-menu {
    border-right-width: 0;
  }

  .el-menu-vertical:not(.el-menu--collapse) {
    width: 240px;
  }

  .trigger {
    height: 60px;
    display: flex;
    align-items: center;
    justify-content: center;
    cursor: pointer;
    width: 54px;
  }

  .trigger i {
    font-size: 20px;
  }

  .trigger:hover {
    background-color: rgb(203, 215, 230);
  }
</style>
然后对控制台和学生管理进行编写
创建console.vue student.vue
这两个子文件都放在了后台管理下,因此都作为index的子路由即可
import console from '@/views/console';
import student from '@/views/student';

 {
      path: '/index',
      name: 'index',
      component: index,
      children:[
        {
          path: '/console',
          name: 'console',
          component: console
        },
        {
          path: '/student',
          name: 'student',
          component: student
        }
      ]
    }
可以在两个页面写一点东西验证一下跳转,然后就是页面内容的编写了
首先,通过axios进行发送请求,因此需要安装axios
同样 npm install axios
然后又是漫长的等待
安装完成之后在main.js中进行设置
import axios from 'axios'
Vue.prototype.$axios = axios

new Vue({
  axios
})
然后就是对页面的设置了,这里是一个简单的表单,实现了基础的增删改查功能
<template>
    <el-card class="box-card">
        <!-- Dialog 对话框 弹出新增和修改表单 -->
        <el-row>
            <el-button size="mini" type="primary" @click="add">新增</el-button>
            <el-dialog :title="title" :visible.sync="dialogFormVisible" width="30%">
                <el-form :model="form"  ref="form">
                    <el-form-item label="id:" hidden>
                        <el-input v-model="form.id"></el-input>
                    </el-form-item>
                    <el-form-item label="姓名:" prop="name">
                        <el-input v-model="form.name" placeholder="请输入姓名" style="width:80%"></el-input>
                    </el-form-item>
                    <el-form-item label="生日:" prop="birthday">
                        <el-input v-model.number="form.birthday" placeholder="请输入年龄" style="width:80%"></el-input>
                    </el-form-item>
                    <el-form-item label="性别:" prop="sex">
                        <el-select v-model="form.sex" placeholder="请选择性别" style="width:80%">
                            <el-option label="男" value="男"></el-option>
                            <el-option label="女" value="女"></el-option>
                        </el-select>
                    </el-form-item>
                </el-form>
                <div slot="footer" class="dialog-footer">
                    <el-button @click="dialogFormVisible = false">取 消</el-button>
                    <el-button type="primary" @click="submit()">提 交</el-button>
                </div>
            </el-dialog>
        </el-row>

        <!-- 表格 -->
        <el-table
                ref="singleTable"
                :data="tableData"
                style="width: 100%">
            <el-table-column
                    type="selection"
                    width="55">
            </el-table-column>
            <el-table-column
                    property="id"
                    label="ID"
                    width="50"
                    align="center">
            </el-table-column>
            <el-table-column
                    property="name"
                    label="姓名"
                    width="120"
                    align="center">
            </el-table-column>
            <el-table-column
                    property="birthday"
                    label="生日"
                    width="120"
                    align="center">
            </el-table-column>
            <el-table-column
                    property="sex"
                    label="性别"
                    width="120"
                    align="center">
            </el-table-column>
            <el-table-column label="操作" align="center">
                <template slot-scope="scope">
                    <el-button
                            size="mini"
                            @click="edit(scope.$index, scope.row)">编辑
                    </el-button>
                    <el-button
                            size="mini"
                            type="danger"
                            @click="remove(scope.$index, scope.row)">删除
                    </el-button>
                </template>
            </el-table-column>
        </el-table>
    </el-card>
</template>

<script>
    export default {
        name: "student",
        data() {
            return {
                title: '',
                currentRow: null,
                dialogFormVisible: false,
                form: {},
                tableData: [],
            }
        },
        methods: {
            // 表单重置初始化
            reset() {
                this.form = {
                    id: null,
                    name: null,
                    birthday:null,
                    sex:null
                }
            },

            // 增
            add() {
                this.reset()
                this.dialogFormVisible = true
                this.title = "新增学生数据"
            },

            // 删
            remove(index, row) {
                console.log(row.id)
                this.$axios({
                    method: 'post',
                    url: 'http://localhost:9090/test2/delete/' + row.id,
                }).then((response) => {
                    this.$message({
                        message: '删除成功!',
                        type: 'success'
                    });
                    this.getList();
                }).catch((error) => {
                })
            },

            // 改
            edit(index, row) {
                this.reset()
                this.form = JSON.parse(JSON.stringify(row));
                this.dialogFormVisible = true
                this.title = "修改学生数据"
            },

            //查
            getList() {
                this.$axios({
                    method: 'get',
                    url: 'http://localhost:9090/test2/findAll',
                }).then((response) => {
                    this.tableData = response.data
                }).catch((error) => {
                })
            },

            //提交按钮
            submit() {
                this.$refs['form'].validate((valid) => {
                    if (valid) {
                        console.log(this.form);
                        if (this.form.id == null) {
                            this.$axios({
                                method: 'post',
                                data: this.form,
                                url: 'http://localhost:9090/test2/insert',
                            }).then((response) => {
                                this.$message({
                                    message: '新增成功!',
                                    type: 'success'
                                });
                                this.dialogFormVisible = false
                                this.getList();
                            }).catch((error) => {
                            })
                        } else {
                            this.$axios({
                                method: 'post',
                                data: this.form,
                                url: 'http://localhost:9090/test2/update',
                            }).then((response) => {
                                this.$message({
                                    message: '修改成功!',
                                    type: 'success'
                                });
                                this.getList();
                                this.dialogFormVisible = false
                            }).catch((error) => {
                            })
                        }
                    } else {
                        return false;
                    }
                })
            }
        },
        mounted() {
            this.getList();
        }
    }
</script>

<style scoped>
</style>
其中,要修改字段就改对应的名称即可,注意这个一开始有个初始化,所以如果字段自己没有要进行设置和添加
然后就是路径一定要正确,基本上对应关系没问题的话就能正常运行
另外一定要说的是
md我还寻思 怎么搞了半天也发不过去
结果想起来刚才测试Apipost的时候 把RequestBody删了然后没重启项目
这个就告诉了我热部署的重要性 人一定要学会对项目热部署啊!!!!!!
倒腾了一整天 总算是搞出了个demo
特别感谢这位大佬的博客,给了我很多指引和启发,虽然一路上也遇到了很多奇怪的bug,但好在努力没有白费
SpringBoot + Vue + Element 前后端分离的管理后台项目简单入门 - 不肯好好学习的家伙 - 博客园 (cnblogs.com)


【推荐】国内首个AI IDE,深度理解中文开发场景,立即下载体验Trae
【推荐】编程新体验,更懂你的AI,立即体验豆包MarsCode编程助手
【推荐】抖音旗下AI助手豆包,你的智能百科全书,全免费不限次数
【推荐】轻量又高性能的 SSH 工具 IShell:AI 加持,快人一步