Using the Telerik Rich Text Editor In Visual Studio LightSwitch
AUG6
Note: You must have Visual Studio Professional (or higher) to complete this tutorial
Telerik has a differentiating LightSwitch control in their Rich Text Editor Control. It allows you to create compelling LightSwitch applications. It allows your end-users to create, import and export Microsoft Word documents. It also contains many other features.
In this example, we will build a small application that allows rich notes to be entered for people.
First, Install the Telerik controls for LightSwitch available here: http://www.telerik.com/products/lightswitch-support.aspx.
We create a New Project.
We call it TelerikNoteTaker.
We add a table.
We add a NoteTaker_People table with the schema above
We clear the length of the Notes field (this sets it to unlimited) because the XAML markup is large.
We also un-check the Display As Default because we do not want it to display in the automatic popup that LightSwitch will create to allow us to edit the data in the table. We only want to edit the name not the notes in the automatic popup that LightSwitch creates.
We add a Screen.
We create a List and Details Screen.
The Screen will show.
We click on the List Column…
We set the Properties according to the image above.
We right-click on the Name column and Delete it (we can enter a name and edit it in the popup that will automatically be created)
We hit F5 to run the application.
We enter some sample data.
We then close the application.
Create The Custom Control
While it is possible to directly implement any Silverlight control in LightSwitch (my book, Creating Visual Studio LightSwitch Custom Controls (Beginner to Intermediate), covers all the methods and the syntax to use), it is actually easer and requires less code, to simply create a Silverlight Custom Control (a .xamlpage), and then put the Silverlight control that you want to implement on that .xaml page.
Create a New Project.
Create a Silverlight Class Library called SilverlightControls.
Make it Silverlight 4 (or higher).
Delete the Class1.cs file that is automatically created.
Add the following references to the Silverlight project:
- System.Windows.Browser.dll
- Main Telerik Assemblies
- Telerik.Windows.Controls.dll
- Telerik.Windows.Controls.ImageEditor.dll
- Telerik.Windows.Controls.Input.dll
- Telerik.Windows.Controls.Navigation.dll
- Telerik.Windows.Controls.RibbonBar.dll
- Telerik.Windows.Controls.RichTextBoxUI.dll
- Telerik.Windows.Data.dll
- Telerik.Windows.Documents.dll
- Format providers for export/import
- Telerik.Windows.Documents.FormatProviders.Html.dll
- Telerik.Windows.Documents.FormatProviders.MsRichTextBoxXaml.dll
- Telerik.Windows.Documents.FormatProviders.OpenXml.dll
- Telerik.Windows.Documents.FormatProviders.Pdf.dll
- Telerik.Windows.Documents.FormatProviders.Rtf.dll
- Telerik.Windows.Documents.FormatProviders.Xaml.dll
- Spell Checking
- Telerik.Windows.Documents.Proofing.dll
- Telerik.Windows.Documents.Proofing.Dictionaries.En-US.dll
Note: Install the Telerik controls for LightSwitch here: http://www.telerik.com/products/lightswitch-support.aspx
Add a New Item.
Add a new Silverlight control and name it TelerikEditor.xaml.
We change the DesignHeight to 600 x 800 and zoom out to 50%.
From the Visual Studio Toolbox, we drag the RadRichTextBox control, and drop it on the design surface.
A configuration wizard will show.
We choose Text Box or Rich Text Box. This option will allow us to select a DataProvider needed to allow us to save data in LightSwitch.
The way the RadRichTextBox control works, is that it simply shows data supplied by the DataProvider that is attached to it. This allows the same control to show XAML (viewable in Silverlight and WPF), HTML (viewable on a normal web page), RTF (Microsoft Word format), or plan Text.
The next screen will allow us to select the DataProvider.
In this example we will choose XAMLDataProvider because the content will only be shown in Silverlight. If we wanted to show the content on a regular web page we would choose the HTMLDataProvder.
For a full discussion of DataProviders see:
http://www.telerik.com/help/silverlight/radrichtextbox-features-data-providers.html
Click Finish.
This will create the RadTextBox.
We then hover the mouse on the left-side blue bar…
…and click on it.
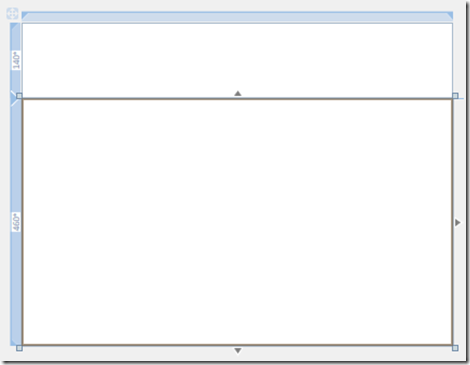
This will add two rows to the page.
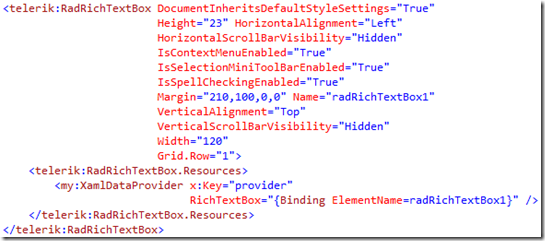
If we look at the XAML markup for the RadRichTextBox control, it will resemble the image above.
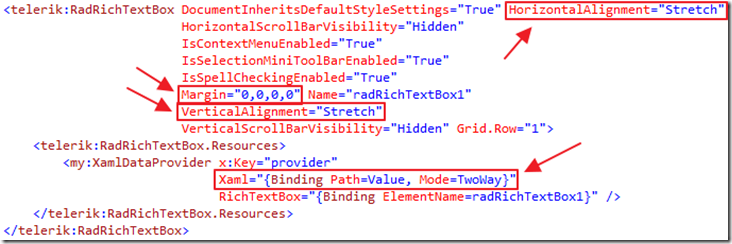
We then make the following changes:
- Remove the Height and Width settings
- Set the Margins to 0
- Set the Alignment to Stretch
- Add the XAML binding to the DataProvider (This is what LightSwitch will bind to. For more on binding Silverlight Custom Controls, see my book,Creating Visual Studio LightSwitch Custom Controls (Beginner to Intermediate)).
The design surface will now resemble the image above.
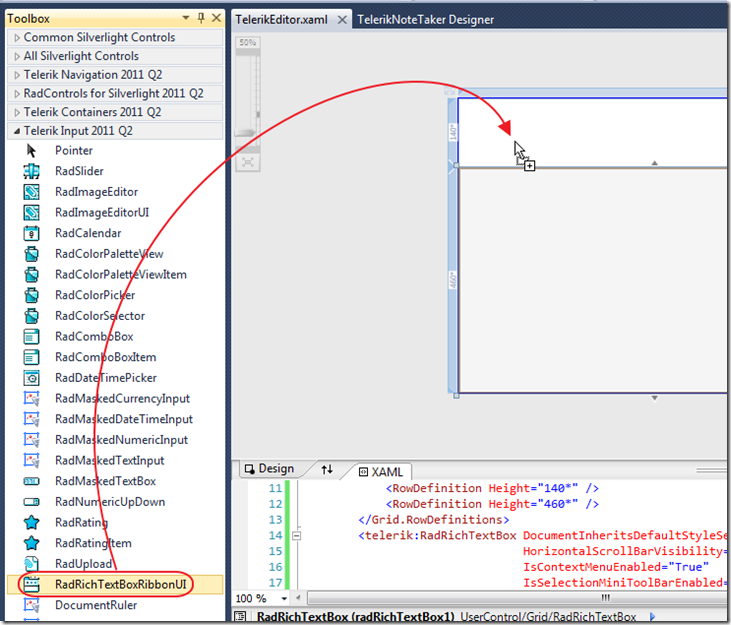
From the Visual Studio Toolbox, we drag the RadRichTextBoxRibbonUI control and drop it on the design surface.
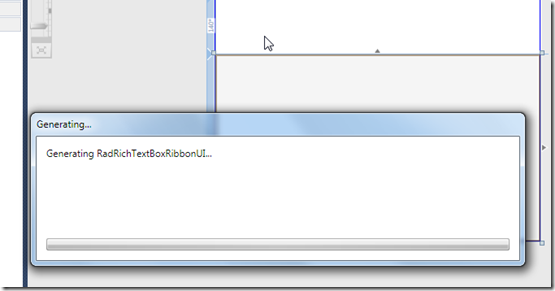
You will see a box pop up while the Telerik control generates the XAML markup.
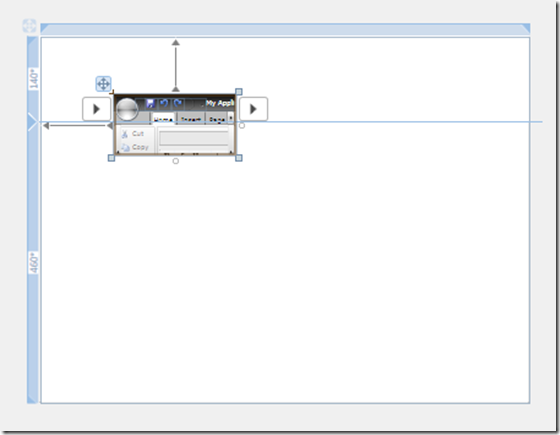
The screen will resemble the image above.
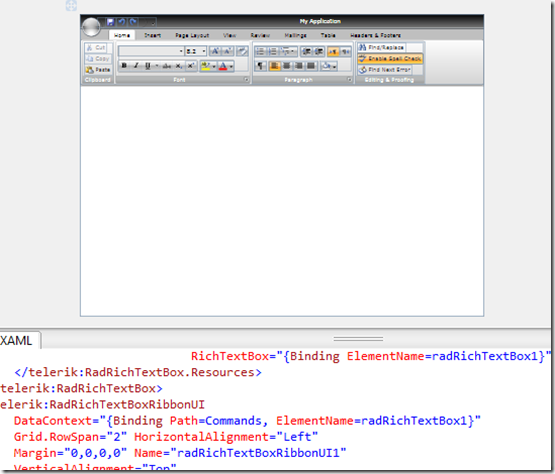
The XAML markup will resemble the image above.
Change the XAML markup to resemble the image above.
- Remove the Height and Width settings
- Set the Margins to 0
The screen will resemble the image above.
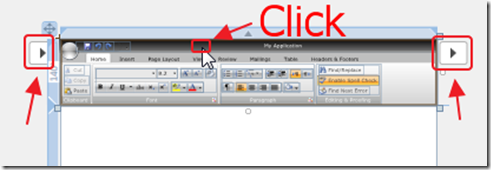
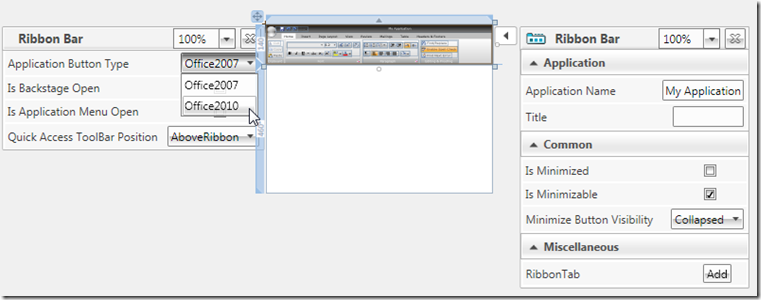
You will note that if you click on the Ribbon Bar control in the Visual Studio editor, additional configuration buttons will appear.
Each configuration button will display a menu that allows additional configuration.
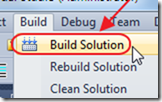
Build the Solution.
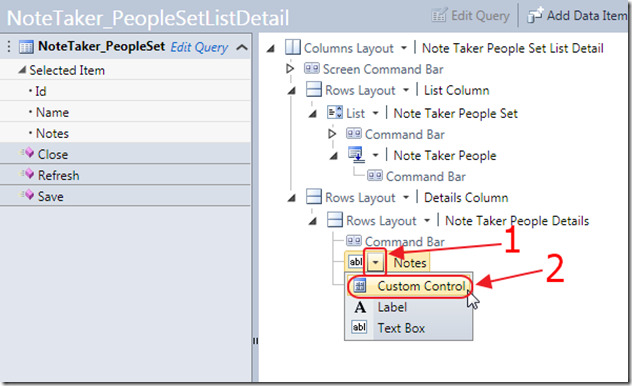
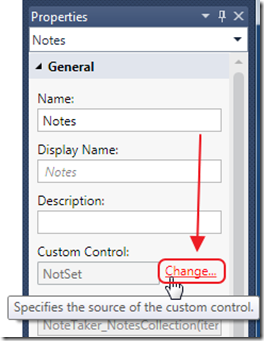
In the LightSwitch screen editor, change the Notes TextBox to a Custom Control.
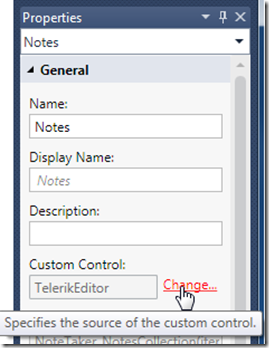
Click Change in the Properties for the Custom Control.
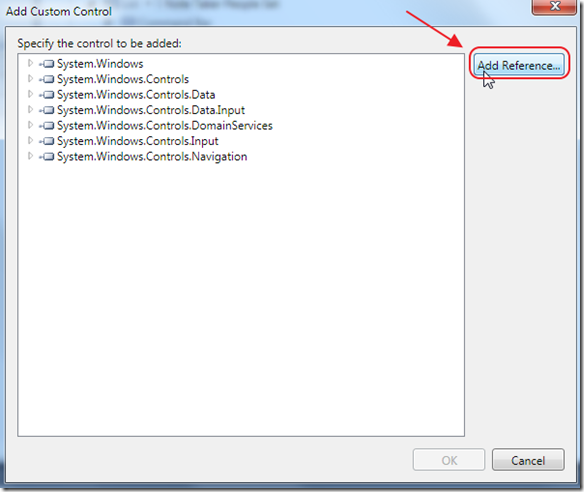
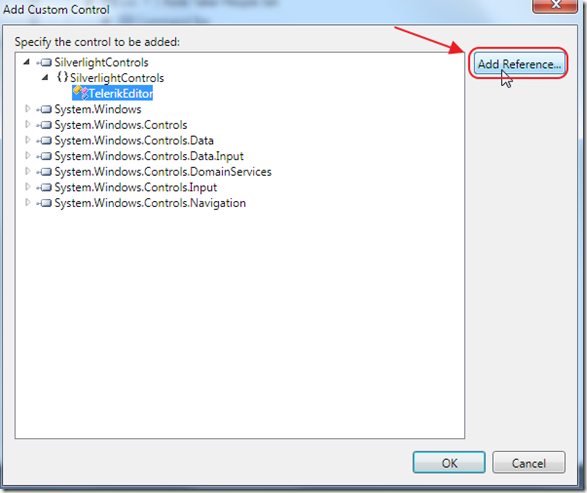
Select Add Reference.
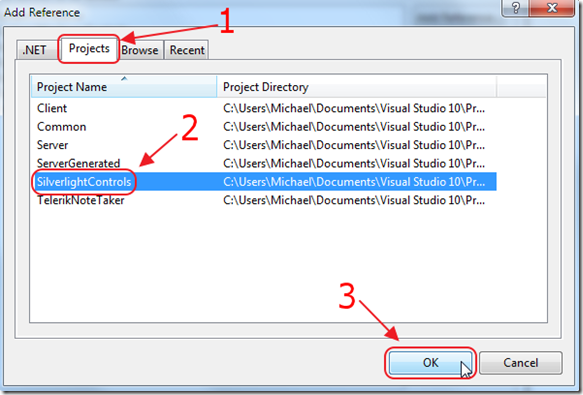
Select the Projects tab and then select the SilverlightControls project.
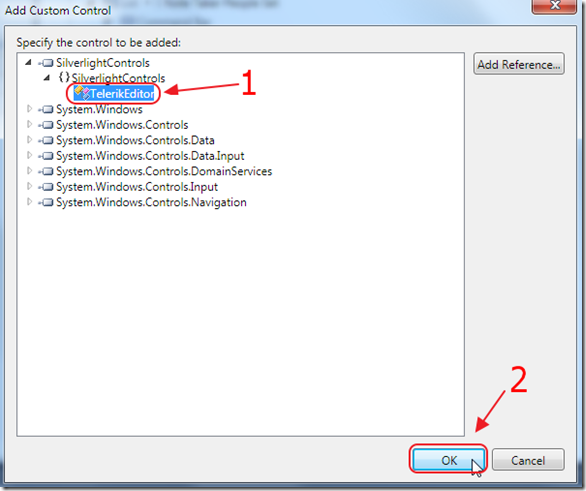
This will allow us to select the TelerikEditor control.
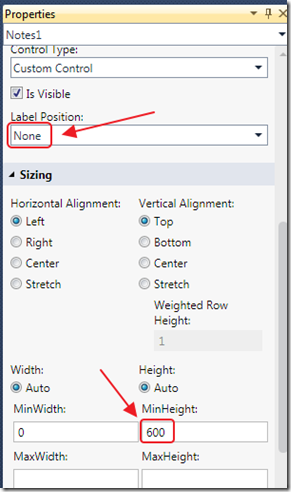
In the Properties for the Custom Control, set the Label Position to None and the MinHeight to 600.
If you try to run the project at this point, you will get an error.
The Telerik assemblies (the .dll’s) need to be added to the LightSwitch project.
In the Properties for the Custom Control, click Change again.
Click Add Reference.
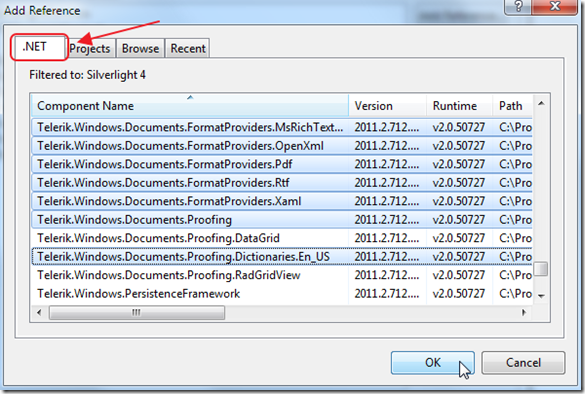
We select the .Net tab, and we add the references we added earlier and click the OK button.
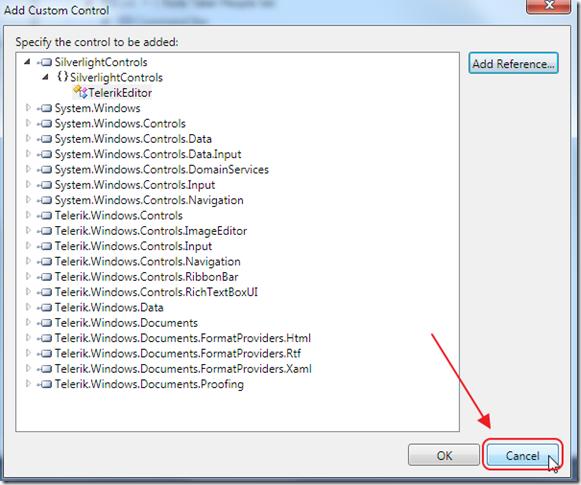
Click Cancel on the Add Custom Control box (we did not want to change any configuration on the custom control, we only wanted to add references) .
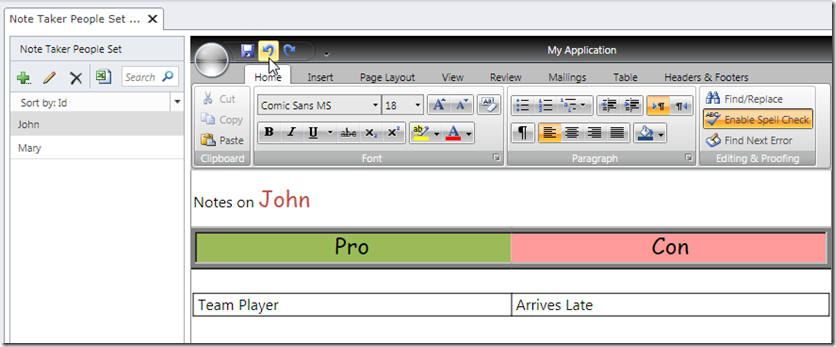
When we run the application, we now have a full featured rich text editor that allows us to open and save Microsoft Word documents and even has undo and redo buttons.
Download Code
The LightSwitch project is available at http://lightswitchhelpwebsite.com/Downloads.aspx


