使用ansible部署lamp
使用Ansible部署Lamp
项目环境:
| 主机 | IP地址 | 用户 |
|---|---|---|
| ansible | 192.168.100.110 | greg |
| node1 | 192.168.100.120 | root |
实验步骤:
部署Apache:
-
首先控制端和受控端需要建立SHH免密关系
[greg@ansible ~]$ ssh-keygen [greg@ansible ansible]$ ssh-copy-id -i ~/.ssh/id_rsa.pub root@node1 -
安装ansible,配置运行环境
[greg@ansible ~]$ sudo dnf -y install ansible [greg@ansible ~]$ mkdir -p ansible/roles [greg@ansible ~]$ cd ansible [greg@ansible ansible]$ cp /etc/ansible/ansible.cfg . [greg@ansible ansible]$ vim ansible.cfg //找到以下设置并修改 ...... inventory =/home/greg/ansible/inventory ...... roles_path =/home/greg/ansible/roles ...... host_key_checking = False ...... remote_user = root -
创建项目相关角色
[greg@ansible ansible]$ cd roles/ [greg@ansible roles]$ ansible-galaxy init apache - Role apache was created successfully [greg@ansible roles]$ ansible-galaxy init php - Role php was created successfully [greg@ansible roles]$ ansible-galaxy init mysql - Role mysql was created successfully [greg@ansible roles]$ ls apache mysql php -
添加相关软件包
[greg@ansible files]$ ls apr-1.6.5.tar.bz2 apr-util-1.6.1.tar.bz2 httpd-2.4.54.tar.bz2 -
创建环境变量脚本
[greg@ansible files]$ vim httpd.sh #!/bin/bash cd echo 'export PATH=$PATH:/usr/local/apache/bin' > /etc/profile.d/apache.sh source /etc/profile.d/apache.sh -
创建yum仓库替换脚本
[greg@ansible files]$ vim yum_repository.sh #!/bin/bash rm -rf /etc/yum.repos.d/* #aliyun Centos-vault-8.5 /usr/bin/curl -o /etc/yum.repos.d/CentOS-Base.repo https://mirrors.aliyun.com/repo/Centos-vault-8.5.2111.repo /usr/bin/sed -i -e '/mirrors.cloud.aliyuncs.com/d' -e '/mirrors.aliyuncs.com/d' /etc/yum.repos.d/CentOS-Base.repo #aliyun epel-release-latest-8 yum install -y https://mirrors.aliyun.com/epel/epel-release-latest-8.noarch.rpm /usr/bin/sed -i 's|^#baseurl=https://download.example/pub|baseurl=https://mirrors.aliyun.com|' /etc/yum.repos.d/epel* /usr/bin/sed -i 's|^metalink|#metalink|' /etc/yum.repos.d/epel* -
将所有需要的工具包都注册为变量
[greg@ansible vars]$ vim main.yml --- # vars file for apache packages: - bzip2 - vim - make - wget - openssl-devel - pcre-devel - expat-devel - libtool - gcc - gcc-c++ - libxml2-devel -
创建
httpd服务的systemd模板[greg@ansible files]$ cat ../templates/httpd.service.j2 Description=httpd server daemon After=network.target [Service] Type=forking ExecStart=/usr/local/apache/bin/apachectl start ExecStop=/usr/local/apache/bin/apachectl stop ExecReload=/bin/kill -HUP $MAINPID [Install] WantedBy=multi-user.target -
创建编译脚本
[greg@ansible files]$ vim apache.sh #!/bin/bash cd /opt/apr-1.6.5 sed -i '/$RM "$cfgfile"/d' configure ./configure --prefix=/usr/local/apr make make install cd /opt/apr-util-1.6.1 ./configure --prefix=/usr/local/apr-util --with-apr=/usr/local/apr make make install cd /opt/httpd-2.4.54 ./configure --prefix=/usr/local/apache \ --sysconfdir=/etc/httpd24 \ --enable-so \ --enable-ssl \ --enable-cgi \ --enable-rewrite \ --with-zlib \ --with-pcre \ --with-apr=/usr/local/apr \ --with-apr-util=/usr/local/apr-util/ \ --enable-modules=most \ --enable-mpms-shared=all \ --with-mpm=prefork make make install -
所有前置工作准备完成
[greg@ansible files]$ ls apache.sh apr-1.6.5.tar.bz2 apr-util-1.6.1.tar.bz2 export.sh httpd-2.4.54.tar.bz2 yum_repository.sh -
开始编写角色模板
[greg@ansible apache]$ vim tasks/main.yml --- # tasks file for apache - name: stop firewalld service: name: firewalld state: stopped enabled: no - name: stop selinux lineinfile: path: /etc/selinux/config regexp: '^SELINUX=' line: SELINUX=disabled - name: setenforce shell: cmd: setenforce 0 - name: create user_apache user: name: apache system: yes shell: /sbin/nologin create_home: no state: present - name: set yum_repository script: yum_repository.sh - name: install packages yum: name: "{{ packages }}" state: present - name: unzip unarchive: src: "{{ item }}" dest: /opt/ loop: - apr-1.6.5.tar.bz2 - apr-util-1.6.1.tar.bz2 - httpd-2.4.54.tar.bz2 - name: make apache script: apache.sh - name: export export.sh script: export.sh - name: create httpd_systemd template: src: httpd.service.j2 dest: /usr/lib/systemd/system/httpd.service - name: apply config shell: cmd: systemctl daemon-reload - name: restart httpd service: name: httpd state: started enabled: yes -
创建
playbook[greg@ansible ansible]$ vim apache.yml --- - name: apache role hosts: node1 roles: - apache -
运行
[greg@ansible ansible]$ ansible-playbook apache.yml -
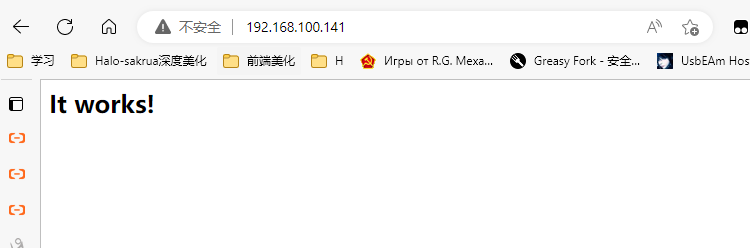
验证
部署MySQL:
-
编写角色模板
playbook[greg@ansible ansible]# cd roles/mysql/ [greg@ansible mysql]# vim tasks/main.yml --- # tasks file for mysql - name: create mysql user: name: mysql system: yes shell: /sbin/nologin create_home: no state: present - name: install pkgs yum: name: "libncurses*" state: present - name: unzip unarchive: src: mysql-5.7.37-linux-glibc2.12-x86_64.tar.gz dest: /usr/local/ - name: create link file: src: /usr/local/mysql-5.7.37-linux-glibc2.12-x86_64 dest: /usr/local/mysql owner: mysql group: mysql state: link - name: create data directory file: path: /opt/data owner: mysql group: mysql state: directory - name: mysql-chushi.sh script: mysql-chushi.sh - name: cp config template: src: my.cnf.j2 dest: /etc/my.cnf - name: replace file1 replace: path: /usr/local/mysql/support-files/mysql.server regexp: "#^(basedir=).*" replace: "basedir=/usr/local/mysql" - name: replace file2 replace: path: /usr/local/mysql/support-files/mysql.server regexp: "#^(datadir=).*" replace: "datadir=/opt/data" - name: cp mysql.service template: src: mysql.service.j2 dest: /usr/lib/systemd/system/mysqld.service - name: apply config shell: cmd: systemctl daemon-reload - name: restart mysqld service: name: mysqld state: started enabled: yes - name: set mysql passwd shell: cmd: /usr/local/mysql/bin/mysql -uroot -e "set password=password('redhat')" - name: set mysql env script: mysql.sh -
传输所需mysql安装包
[greg@ansible files]# ls mysql-5.7.37-linux-glibc2.12-x86_64.tar.gz -
编写初始化脚本
[greg@ansible files]# vim mysql-chushi.sh #!/bin/bash /usr/local/mysql/bin/mysqld --initialize-insecure --user=mysql -- datadir=/opt/data/ ln -sv /usr/local/mysql/include/ /usr/local/include/mysql echo '/usr/local/mysql/lib' > /etc/ld.so.conf.d/mysql.conf ldconfig -
新建模板文件
[greg@ansible files]# cd .. [greg@ansible mysql]# vim templates/my.cnf.j2 [mysqld] basedir = /usr/local/mysql datadir = /opt/data socket = /tmp/mysql.sock port = 3306 pid-file = /opt/data/mysql.pid user = mysql skip-name-resolve -
编写服务单元文件
[greg@ansible mysql]# vim templates/mysql.service.j2 [Unit] Description=mysql server daemon After=network.targe [Service] Type=forking ExecStart=/usr/local/mysql/support-files/mysql.server start ExecStop=/usr/local/mysql/support-files/mysql.server stop ExecReload=/bin/kill -HUP \$MAINPID [Install] WantedBy=multi-user.target -
编写环境变量脚本
[greg@ansible files]# vim mysql.sh #!/bin/bash echo 'export PATH=/usr/local/mysql/bin:/usr/local/mysql/lib:$PATH' >> /etc/profile.d/mysql.sh -
编写执行playbook
[greg@ansible ansible]# vim mysql.yml --- - name: use mysql role hosts: node1 roles: - mysql -
执行
[greg@ansible ansible]# ansible-playbook mysql.yml
部署php
-
编写角色模板
[greg@ansible ansible]# cd roles/php/ [greg@ansible php]# vim tasks/main.yml --- # tasks file for php - name: install pkgs yum: name: "{{ phppkgs }}" state: present - name: unzip unarchive: src: php-7.1.10.tar.gz dest: /opt/ - name: php.sh script: php.sh - name: modify apache config replace: path: /etc/httpd24/httpd.conf regexp: "index.html" replace: "index.php index.html" - name: rm index.html shell: cmd: rm -rf /usr/local/apache/htdocs/index.html - name: edit inde.php template: src: index.php.j2 dest: /usr/local/apache/htdocs/index.php - name: restart httpd service: name: httpd state: restarted enabled: yes -
导入所需php安装包
[greg@ansible php]#cd files/ [greg@ansible files]# ls php-7.1.10.tar.gz -
设置变量phppkgs
[greg@ansible ansible]# cd roles/php/ [greg@ansible php]# vim vars/main.yml --- # vars file for php phppkgs: - libjpeg - libjpeg-devel - libpng - libpng-devel - freetype - freetype-devel - libxml2 - libxml2-devel - zlib - zlib-devel - curl - curl-devel -
创建编译安装脚本php.sh
[greg@ansible files]# vim php.sh #!/bin/bash cd /opt/php-7.1.10 ./configure \ --prefix=/usr/local/php \ --with-apxs2=/usr/local/apache/bin/apxs \ --with-mysqli \ --with-zlib \ --with-curl \ --with-gd \ --with-jpeg-dir \ --with-png-dir \ --with-freetype-dir \ --with-openssl \ --enable-mbstring \ --enable-xml \ --enable-session \ --enable-ftp \ --enable-pdo \ --enable-tokenizer \ --enable-zip make make install cp php.ini-development /usr/local/php/lib/php.ini sed -i 's/;date.timezone =/date\.timezone = \Asia\/Shanghai/' /usr/local/php/lib/php.ini echo "AddType application/x-httpd-php .php" >> /etc/httpd24/httpd.conf echo "AddType application/x-httpd-php-source .phps" >> /etc/httpd24/httpd.conf sed -i '/proxy_module/s/#//g' /etc/httpd24/httpd.conf sed -i '/proxy_fcgi_module/s/#//g' /etc/httpd24/httpd.conf -
新建测试网页模板index.php.j2
[greg@ansible php]# vim templates/index.php.j2 <?php phpinfo(); ?> -
编写执行playbook
[greg@ansible ansible]# vim php.yml --- - name: use php role hosts: node1 roles: - php -
执行
[greg@ansible ansible]# ansible-playbook php.yml -
验证


 浙公网安备 33010602011771号