Kubernetes 篇章(三)
 集群部署
集群部署
准备三台Linux虚拟机(K8S集群三台起步),系统用CentOS7.4,虚拟机配置是2颗CPU和2G内存(K8S最低要求的配置),网络使用桥接网卡方式并使用静态IP
| 主机名 | IP地址 | 角色描述 |
|---|---|---|
| k8s-master-192.168.245.11 | 192.168.245.11 | K8S Master节点/ETCD节点 |
| k8s-node-192.168.245.22 | 192.168.245.22 | K8S Node节点 |
| k8s-node-192.168.245.33 | 192.168.245.33 | K8S Node节点 |
| k8s-harbor-192.168.245.44 | 192.168.245.44 | docker 镜像仓库节点 |
3.1 系统环境初始化
修改主机名
hostnamectl set-hostname k8s-master-192.168.245.11
hostnamectl set-hostname k8s-node-192.168.245.22
hostnamectl set-hostname k8s-node-192.168.245.33
hostnamectl set-hostname k8s-harbor-192.168.245.44
logout
设置系统时区为中国/上海 并 将当前的 UTC 时间写入硬件时钟
timedatectl set-timezone Asia/Shanghai
timedatectl set-local-rtc 0
重启依赖于系统时间的服务
systemctl restart rsyslog
systemctl restart crond
下载阿里源并安装相关依赖
wget -O /etc/yum.repos.d/CentOS-Base.repo https://mirrors.aliyun.com/repo/Centos-7.repo

yum install -y epel-release conntrack ntpdate ntp ipvsadm ipset iptables-services iptables curl sysstat libseccomp wget unzip net-tools git yum-utils jq  device-mapper-persistent-data lvm2
同步时间并添加hosts
ntpdate ntp1.aliyun.com

cat << EOF >> /etc/hosts
192.168.245.11 master
192.168.245.22 node1
192.168.245.33 node2
192.168.245.44 hub.lemon.com
199.232.68.133 raw.githubusercontent.com
EOF
设置防火墙为 Iptables 并设置空规则
systemctl stop firewalld
systemctl disable firewalld

systemctl  start iptables
systemctl  enable iptables

iptables -F  &&  service iptables save
关闭swap、selinux以及系统不需要的服务
swapoff -a
sed -i '/ swap / s/^\(.*\)$/#\1/g' /etc/fsta

setenforce 0
sed -i 's/^SELINUX=enforcing$/SELINUX=permissive/' /etc/selinux/config

systemctl stop postfix && systemctl disable postfix
设置 rsyslogd 和 systemd journald并持久化保存日志的目录
mkdir /var/log/journal
mkdir /etc/systemd/journald.conf.d

cat > /etc/systemd/journald.conf.d/99-prophet.conf <<EOF
[Journal]
# 持久化保存到磁盘
Storage=persistent
# 压缩历史日志
Compress=yes
SyncIntervalSec=5m
RateLimitInterval=30s
RateLimitBurst=1000
# 最大占用空间 10G
SystemMaxUse=10G
# 单日志文件最大 200
MSystemMaxFileSize=200M
# 日志保存时间 2 周
MaxRetentionSec=2week
# 不将日志转发到 syslog
ForwardToSyslog=no
EOF

systemctl restart systemd-journald
3.2 升级系统内核并优化
CentOS 7.x 系统自带的 3.10.x 内核存在一些 Bugs,导致运行的 Docker、Kubernetes 不稳定,例如:
高版本的 docker(1.13 以后) 启用了 3.10 kernel 实验支持的 kernel memory account 功能(无法关闭),当节点压力大如频繁启动和停止容器时会导致 cgroup memory leak;网络设备引用计数泄漏, 会导致类似于报错:"kernel:unregister_netdevice: waiting for eth0 to become free. Usage count = 1";
解决方案:升级内核到 4.4.X 以上;
# 下载内核源并安装最新版本内核
rpm -Uvh http://www.elrepo.org/elrepo-release-7.0-3.el7.elrepo.noarch.rpm

yum --enablerepo=elrepo-kernel install -y kernel-lt
查看可用内核以及内核启动项
cat /boot/grub2/grub.cfg |grep menuentry

grub2-editenv list
升级系统文件并设置开机从新内核启动 & 重启系统
yum update -y

grub2-set-default "CentOS Linux (5.4.188-1.el7.elrepo.x86_64) 7 (Core)"

reboot

uname -r
配置kube-proxy开启ipvs条件
modprobe br_netfilter

cat > /etc/sysconfig/modules/ipvs.modules <<EOF
#!/bin/bash
modprobe -- ip_vs
modprobe -- ip_vs_rr
modprobe -- ip_vs_wrr
modprobe -- ip_vs_sh
modprobe -- nf_conntrack_ipv4
EOF

chmod 755 /etc/sysconfig/modules/ipvs.modules

bash /etc/sysconfig/modules/ipvs.modules

lsmod | grep -e ip_vs -e nf_conntrack_ipv4

chmod a+x /etc/rc.d/rc.local

echo 'bash /etc/sysconfig/modules/ipvs.modules' >> /etc/rc.local
优化内核参数
cat > /etc/sysctl.d/kubernetes.conf <<EOF
# 关闭IPV6协议
net.ipv6.conf.all.disable_ipv6=1
# 开启网桥模式
net.bridge.bridge-nf-call-iptables=1
net.bridge.bridge-nf-call-ip6tables=1
# 开启路由转发
net.ipv4.ip_forward=1
net.ipv4.tcp_tw_recycle=0
# 禁止使用 swap 空间,只有当系统 OOM 时才允许使用它
vm.swappiness=0
# 不检查物理内存是否够用
vm.overcommit_memory=1
# 开启 OOM
vm.panic_on_oom=0
fs.inotify.max_user_watches=1048576
fs.inotify.max_user_instances=8192
# 开启的文件句柄数目
fs.file-max=52706963
# 开启对大的文件数目
fs.nr_open=52706963
net.netfilter.nf_conntrack_max=2310720
vm.dirty_bytes=15728640
EOF

sysctl -p /etc/sysctl.d/kubernetes.conf   # 开机自动加载
3.3 安装Docker|kubeadm|kubectl
下载阿里的docker源、Centos7源、kubernetes源
cd /etc/yum.repos.d/
wget https://mirrors.aliyun.com/docker-ce/linux/centos/docker-ce.repo

cat <<EOF>> kubernetes.repo
[kubernetes]
name=Kubernetes
baseurl=https://mirrors.aliyun.com/kubernetes/yum/repos/kubernetes-el7-x86_64/
enabled=1
gpgcheck=0
EOF

yum clean all && yum makecache && cd
安装docke,并将其镜像源换掉
yum -y install docker-ce-18.09.6
mkdir -p /etc/docker

cat > /etc/docker/daemon.json <<EOF
{
    "registry-mirrors": ["https://p8hkkij9.mirror.aliyuncs.com"],
    "exec-opts": ["native.cgroupdriver=systemd"]
}
EOF

systemctl start docker
systemctl enable docker
安装 Kubeadm|kubectl|kubelet
yum install -y --setopt=obsoletes=0 kubeadm-1.17.17-0 kubectl-1.17.17-0 kubelet-1.17.17-0

systemctl enable kubelet
3.4 初始化主节点
在安装kubernetes集群之前,必须要提前准备好集群需要的镜像,所需镜像可以通过下面命令查看
kubeadm config images list
k8s.gcr.io/kube-apiserver:v1.17.17
k8s.gcr.io/kube-controller-manager:v1.17.17
k8s.gcr.io/kube-scheduler:v1.17.17
k8s.gcr.io/kube-proxy:v1.17.17
k8s.gcr.io/pause:3.1
k8s.gcr.io/etcd:3.4.3-0
k8s.gcr.io/coredns:1.6.5

# 这些镜像都在kubernetes的仓库中,由于网络原因,无法连接,下面提供了一种替换方案
k8s节点上提前下载k8s镜像
cat image-k8s-v1_17_17.sh
#/bin/bash
images=(
  kube-apiserver:v1.17.17
  kube-controller-manager:v1.17.17
  kube-scheduler:v1.17.17
  kube-proxy:v1.17.17
  pause:3.1
  etcd:3.4.3-0
  coredns:1.6.5
)

for imageName in ${images[@]};do
	docker pull registry.cn-hangzhou.aliyuncs.com/google_containers/$imageName
	docker tag registry.cn-hangzhou.aliyuncs.com/google_containers/$imageName k8s.gcr.io/$imageName
	docker rmi registry.cn-hangzhou.aliyuncs.com/google_containers/$imageName
done

# 执行脚本
bash image-k8s-v1_17_17.sh

# 检查镜像是否完善
docker images
REPOSITORY                           TAG        IMAGE ID       CREATED         SIZE
k8s.gcr.io/kube-proxy                v1.17.17   3ef67d180564   14 months ago   117MB
k8s.gcr.io/kube-apiserver            v1.17.17   38db32e0f351   14 months ago   171MB
k8s.gcr.io/kube-controller-manager   v1.17.17   0ddd96ecb9e5   14 months ago   161MB
k8s.gcr.io/kube-scheduler            v1.17.17   d415ebbf09db   14 months ago   94.4MB
k8s.gcr.io/coredns                   1.6.5      70f311871ae1   2 years ago     41.6MB
k8s.gcr.io/etcd                      3.4.3-0    303ce5db0e90   2 years ago     288MB
k8s.gcr.io/pause                     3.1        da86e6ba6ca1   4 years ago     742kB

# 获取kubeadm默认初始化配置模板
kubeadm config print init-defaults > kubeadm-config.yaml
修改kubeadm默认初始化配置模板
apiVersion: kubeadm.k8s.io/v1beta2
bootstrapTokens:
- groups:
  - system:bootstrappers:kubeadm:default-node-token
  token: abcdef.0123456789abcdef
  ttl: 24h0m0s
  usages:
  - signing
  - authentication
kind: InitConfiguration
localAPIEndpoint:
  # 填写好master节点的IP地址
  advertiseAddress: 192.168.245.11
  bindPort: 6443
nodeRegistration:
  criSocket: /var/run/dockershim.sock
  name: k8s-master-192.168.245.11
  taints:
  - effect: NoSchedule
    key: node-role.kubernetes.io/master
---
apiServer:
  timeoutForControlPlane: 4m0s
apiVersion: kubeadm.k8s.io/v1beta2
certificatesDir: /etc/kubernetes/pki
clusterName: kubernetes
controllerManager: {}
dns:
  type: CoreDNS
etcd:
  local:
    dataDir: /var/lib/etcd
imageRepository: k8s.gcr.io
kind: ClusterConfiguration
# 选择初始化的k8s集群版本镜像
kubernetesVersion: v1.17.17
networking:
  dnsDomain: cluster.local
  # 原因是一会要用的flannel来解决pod的扁平化网络,而flannel默认的网段就是10.244.0.0/16,所以这就将pod的IP段设置为和flannel相同的IP段,免得后期再做修改
  podSubnet: 10.244.0.0/16
  serviceSubnet: 10.96.0.0/12
scheduler: {}
---
# 下面这一段的意思是将默认的iptables调度方式改为为IPVS
apiVersion: kubeproxy.config.k8s.io/v1alpha1
kind: KubeProxyConfiguration
featureGates:
  SupportIPVSProxyMode: true
mode: ipvs
初始化k8s集群;
--upload-certs:可以让后来加入的主节点自动加入证书;注:v1.15或以前的版本参数是--experimental-upload-certs
[root@master1 ~]# kubeadm init --config=kubeadm-config.yaml --upload-certs | tee kubeadm-init.log
3.5 加入主节点以及其余工作节点
主节点上创建kube目录并将其admin.conf拷贝过去以及属主属组的配置,并在各node节点上传入token。
[root@master1 ~]# cat kubeadm-init.log
Your Kubernetes control-plane has initialized successfully!

To start using your cluster, you need to run the following as a regular user:

  mkdir -p $HOME/.kube
  sudo cp -i /etc/kubernetes/admin.conf $HOME/.kube/config
  sudo chown $(id -u):$(id -g) $HOME/.kube/config

You should now deploy a pod network to the cluster.
Run "kubectl apply -f [podnetwork].yaml" with one of the options listed at:
  https://kubernetes.io/docs/concepts/cluster-administration/addons/

Then you can join any number of worker nodes by running the following on each as root:

kubeadm join 192.168.245.11:6443 --token abcdef.0123456789abcdef \
    --discovery-token-ca-cert-hash sha256:9947f8d0b53c719a6ec028b7ce438f7e754acde084e3cb5bd999ab71e1ec7264

# 上面操作完后检查各节点的kubelet服务是否已经打开
systemctl status kubelet | grep running
   Active: active (running) since Wed 2022-04-06 16:34:25 CST; 51s ago
检查节点的扁平化网络状态为NotReady
kubectl get node
NAME                        STATUS     ROLES    AGE     VERSION
k8s-master-192.168.245.11   NotReady   master   6m28s   v1.17.17
k8s-node-192.168.245.22     NotReady   <none>   3m37s   v1.17.17
k8s-node-192.168.245.33     NotReady   <none>   3m6s    v1.17.17
这就需要下面来部署flannel来解决扁平化网络问题
3.6 安装 CNI - flannel网络
# 部署flannel全覆盖网络
kubectl apply -f https://raw.githubusercontent.com/coreos/flannel/master/Documentation/kube-flannel.yml

# 再来检查节点状态
kubectl get node
NAME                        STATUS   ROLES    AGE   VERSION
k8s-master-192.168.245.11   Ready    master   27m   v1.17.17
k8s-node-192.168.245.22     Ready    <none>   24m   v1.17.17
k8s-node-192.168.245.33     Ready    <none>   24m   v1.17.17
3.7 查看节点和容器状态
kubectl get nodes -o wide
NAME      STATUS   ROLES    AGE   VERSION   INTERNAL-IP   EXTERNAL-IP   OS-IMAGE                KERNEL-VERSION                CONTAINER-RUNTIME
master1   Ready    master   20m   v1.15.1   192.168.2.1   <none>        CentOS Linux 7 (Core)   4.4.236-1.el7.elrepo.x86_64   docker://18.9.6
node1     Ready    <none>   10m   v1.15.1   192.168.2.2   <none>        CentOS Linux 7 (Core)   4.4.236-1.el7.elrepo.x86_64   docker://18.9.6
node2     Ready    <none>   10m   v1.15.1   192.168.2.3   <none>        CentOS Linux 7 (Core)   4.4.236-1.el7.elrepo.x86_64   docker://18.9.6

kubectl get pods -A -owide
NAMESPACE     NAME                                                READY   STATUS    RESTARTS   AGE   IP               NODE                        NOMINATED NODE   READINESS GATES
kube-system   coredns-6955765f44-92m6k                            1/1     Running   0          26m   10.244.2.3       k8s-node-192.168.245.33     <none>           <none>
kube-system   coredns-6955765f44-jmlxm                            1/1     Running   0          26m   10.244.2.2       k8s-node-192.168.245.33     <none>           <none>
kube-system   etcd-k8s-master-192.168.245.11                      1/1     Running   0          26m   192.168.245.11   k8s-master-192.168.245.11   <none>           <none>
kube-system   kube-apiserver-k8s-master-192.168.245.11            1/1     Running   0          26m   192.168.245.11   k8s-master-192.168.245.11   <none>           <none>
kube-system   kube-controller-manager-k8s-master-192.168.245.11   1/1     Running   0          26m   192.168.245.11   k8s-master-192.168.245.11   <none>           <none>
kube-system   kube-flannel-ds-d2jft                               1/1     Running   0          20m   192.168.245.33   k8s-node-192.168.245.33     <none>           <none>
kube-system   kube-flannel-ds-d96lx                               1/1     Running   0          16m   192.168.245.11   k8s-master-192.168.245.11   <none>           <none>
kube-system   kube-flannel-ds-nbvm2                               1/1     Running   0          20m   192.168.245.22   k8s-node-192.168.245.22     <none>           <none>
kube-system   kube-proxy-62wpx                                    1/1     Running   0          23m   192.168.245.22   k8s-node-192.168.245.22     <none>           <none>
kube-system   kube-proxy-rpvpg                                    1/1     Running   0          23m   192.168.245.33   k8s-node-192.168.245.33     <none>           <none>
kube-system   kube-proxy-sdgd2                                    1/1     Running   0          26m   192.168.245.11   k8s-master-192.168.245.11   <none>           <none>
kube-system   kube-scheduler-k8s-master-192.168.245.11            1/1     Running   0          26m   192.168.245.11   k8s-master-192.168.245.11   <none>           <none>

..............................................................................................................................................................................................................................................................................................................................................................
3.8 搭建配置harbor私有仓库
安装Harbor需要先安装docker和docker-compose,上面的系统初始化、系统升级和优化、安装Docker的步骤这里不再陈述
# 在所有docker节点的daemon.json文件上添加下面信任配置
cat /etc/docker/daemon.json
{
    "registry-mirrors": ["https://p8hkkij9.mirror.aliyuncs.com"],
    "exec-opts": ["native.cgroupdriver=systemd"],
    "insecure-registries": ["https://hub.lemon.com"]
}
#~~ 这里先不急着重启docker,等一会颁发完证书之后在重启
在Harbor节点上安装docker-compose
curl -L "https://github.com/docker/compose/releases/download/1.24.1/docker-compose-$(uname -s)-$(uname -m)" -o /usr/local/bin/docker-compose

chmod a+x /usr/local/bin/docker-compose

docker-compose --version
docker-compose version 1.24.1, build 4667896b
安装Harbor私有hub,创建CA证书
[root@k8s-harbor-192 ~]# which openssl
/usr/bin/openssl
[root@k8s-harbor-192 ~]# mkdir -p /data/ssl && cd /data/ssl/
[root@k8s-harbor-192 ssl]# openssl req -newkey rsa:4096 -nodes -sha256 -keyout ca.key -x509 -days 365 -out ca.crt
Generating a 4096 bit RSA private key
....................................++
...............................................................................................................................................................................................................................................................++
writing new private key to 'ca.key'
-----
You are about to be asked to enter information that will be incorporated
into your certificate request.
What you are about to enter is what is called a Distinguished Name or a DN.
There are quite a few fields but you can leave some blank
For some fields there will be a default value,
If you enter '.', the field will be left blank.
-----
Country Name (2 letter code) [XX]:CN
State or Province Name (full name) []:Beijing
Locality Name (eg, city) [Default City]:Beijing
Organization Name (eg, company) [Default Company Ltd]:lemon
Organizational Unit Name (eg, section) []:hub
Common Name (eg, your name or your server's hostname) []:hub.lemon.com
Email Address []:
[root@k8s-harbor-192 ssl]# ls -lrth ca.*
-rw-r--r-- 1 root root 3.2K Apr  6 17:17 ca.key
-rw-r--r-- 1 root root 2.0K Apr  6 17:17 ca.crt
创建生成证书签名请求
[root@k8s-harbor-192 ssl]# openssl req -newkey rsa:4096 -nodes -sha256 -keyout hub.lemon.com.key -out hub.lemon.com.csr
Generating a 4096 bit RSA private key
...................................................................................................................................++
...++
writing new private key to 'hub.lemon.com.key'
-----
You are about to be asked to enter information that will be incorporated
into your certificate request.
What you are about to enter is what is called a Distinguished Name or a DN.
There are quite a few fields but you can leave some blank
For some fields there will be a default value,
If you enter '.', the field will be left blank.
-----
Country Name (2 letter code) [XX]:CN
State or Province Name (full name) []:Beijing
Locality Name (eg, city) [Default City]:Beijing
Organization Name (eg, company) [Default Company Ltd]:lemon
Organizational Unit Name (eg, section) []:hub
Common Name (eg, your name or your server's hostname) []:hub.lemon.com
Email Address []:

Please enter the following 'extra' attributes
to be sent with your certificate request
A challenge password []:
An optional company name []:
[root@k8s-harbor-192 ssl]# ls -lrth hub.*
-rw-r--r-- 1 root root 3.2K Apr  6 17:19 hub.lemon.com.key
-rw-r--r-- 1 root root 1.7K Apr  6 17:19 hub.lemon.com.csr
生成注册表主机证书
[root@k8s-harbor-192 ssl]# openssl x509 -req -days 365 -in hub.lemon.com.csr -CA ca.crt -CAkey ca.key -CAcreateserial -out hub.lemon.com.crt
Signature ok
subject=/C=CN/ST=Beijing/L=Beijing/O=lemon/OU=hub/CN=hub.lemon.com
Getting CA Private Key

[root@k8s-harbor-192 ssl]# ls -lrth    # 查看生成的证书
total 24K
-rw-r--r-- 1 root root 3.2K Apr  6 17:17 ca.key
-rw-r--r-- 1 root root 2.0K Apr  6 17:17 ca.crt
-rw-r--r-- 1 root root 3.2K Apr  6 17:19 hub.lemon.com.key
-rw-r--r-- 1 root root 1.7K Apr  6 17:19 hub.lemon.com.csr
-rw-r--r-- 1 root root   17 Apr  6 17:21 ca.srl
-rw-r--r-- 1 root root 1.9K Apr  6 17:21 hub.lemon.com.crt
信任自签发的域名证书; 由于linux操作系统不信任自签发的CA证书,所以需要把证书加入到系统的信任证书里
# 添加自签证书到系统
[root@k8s-harbor-192 ssl]# cp hub.lemon.com.crt /etc/pki/ca-trust/source/anchors/
[root@k8s-harbor-192 ssl]# ls -lh /etc/pki/ca-trust/source/anchors/
total 4.0K
-rw-r--r-- 1 root root 1.9K Apr  6 17:22 hub.lemon.com.crt

# 让系统CA信任立刻生效
[root@k8s-harbor-192 ssl]# update-ca-trust enable
[root@k8s-harbor-192 ssl]# update-ca-trust extract

# 如果已经启动Docker了,必须要重启(所有节点);如果安装过Harbor以后再重启的话,有可能会出现harbor连不上的情况,需要重新把Harbor启动的容器和镜像删除后,重新install一遍
systemctl restart docker
拷贝证书并下载harbor安装包进行配置
# 创建harbor的证书目录
[root@k8s-harbor-192 ssl]# mkdir -p /usr/local/harbor/ssh
# 复制域名证到harbor要安装的路径
[root@k8s-harbor-192 ssl]# cp hub.lemon.com.crt hub.lemon.com.key /usr/local/harbor/ssh/
# 下载harbor安装包并解压到相应路径(版本:v2.4.2)
下载地址:https://github.com/goharbor/harbor/releases
[root@k8s-harbor-192 ~]# tar xf harbor-offline-installer-v2.4.2.tgz
[root@k8s-harbor-192 ~]# mv harbor/* /usr/local/harbor/
[root@k8s-harbor-192 ~]# ls -lrth /usr/local/harbor/ && cd /usr/local/harbor/
total 601M
-rwxr-xr-x 1 root root 1.9K Mar 15 11:48 prepare
-rw-r--r-- 1 root root 12K Mar 15 11:48 LICENSE
-rwxr-xr-x 1 root root 2.5K Mar 15 11:48 install.sh
-rw-r--r-- 1 root root 9.5K Mar 15 11:48 harbor.yml.tmpl
-rw-r--r-- 1 root root 3.3K Mar 15 11:48 common.sh
-rw-r--r-- 1 root root 601M Mar 15 11:49 harbor.v2.4.2.tar.gz
drwxr-xr-x 2 root root 56 Apr 6 17:25 ssh
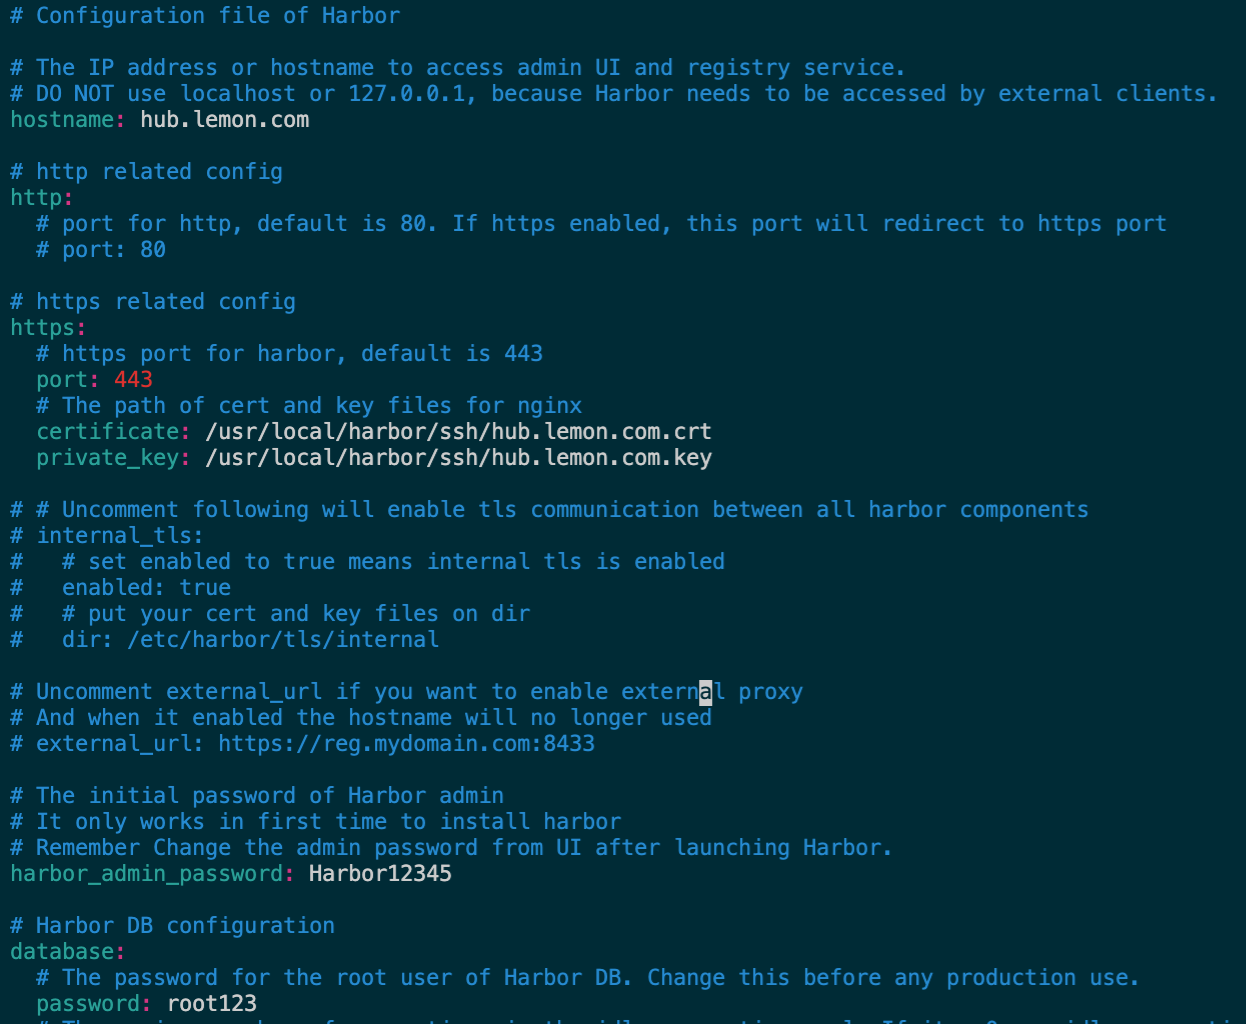
# harbor配置备份 & 修改配置文件
[root@k8s-harbor-192 harbor]# cp harbor.yml.tmpl harbor.yml
[root@k8s-harbor-192 harbor]# vim harbor.yml
生成配置并下载所需镜像 & 启动 harbor 容器
# 下载harbor所需镜像
[root@k8s-harbor-192 harbor]# ./prepare
[root@k8s-harbor-192 harbor]# docker images|grep goharbor/prepare
goharbor/prepare                v2.4.2    d2100ed70ba4   3 weeks ago   269MB

# 启动Harbor
[root@k8s-harbor-192 harbor]# ./install.sh --with-notary --with-chartmuseum
✔ ----Harbor has been installed and started successfully.----

# 检查相关容器
[root@k8s-harbor-192 harbor]# docker ps
CONTAINER ID   IMAGE                                  COMMAND                  CREATED         STATUS                   PORTS                                                                 NAMES
3d0c6596aa1b   goharbor/harbor-jobservice:v2.4.2      "/harbor/entrypoint.…"   2 minutes ago   Up 2 minutes (healthy)                                                                         harbor-jobservice
837e3dd81a9a   goharbor/nginx-photon:v2.4.2           "nginx -g 'daemon of…"   2 minutes ago   Up 2 minutes (healthy)   0.0.0.0:4443->4443/tcp, 0.0.0.0:80->8080/tcp, 0.0.0.0:443->8443/tcp   nginx
bc6d76cc5781   goharbor/notary-server-photon:v2.4.2   "/bin/sh -c 'migrate…"   2 minutes ago   Up 2 minutes                                                                                   notary-server
589d4a006165   goharbor/harbor-core:v2.4.2            "/harbor/entrypoint.…"   2 minutes ago   Up 2 minutes (healthy)                                                                         harbor-core
35141f83aed6   goharbor/notary-signer-photon:v2.4.2   "/bin/sh -c 'migrate…"   2 minutes ago   Up 2 minutes                                                                                   notary-signer
4c81f3858eff   goharbor/redis-photon:v2.4.2           "redis-server /etc/r…"   2 minutes ago   Up 2 minutes (healthy)                                                                         redis
f0d12eda86f3   goharbor/registry-photon:v2.4.2        "/home/harbor/entryp…"   2 minutes ago   Up 2 minutes (healthy)                                                                         registry
42d424f716b1   goharbor/chartmuseum-photon:v2.4.2     "./docker-entrypoint…"   2 minutes ago   Up 2 minutes (healthy)                                                                         chartmuseum
1355a0a29355   goharbor/harbor-portal:v2.4.2          "nginx -g 'daemon of…"   2 minutes ago   Up 2 minutes (healthy)                                                                         harbor-portal
6ee4256400b0   goharbor/harbor-db:v2.4.2              "/docker-entrypoint.…"   2 minutes ago   Up 2 minutes (healthy)                                                                         harbor-db
2b244e8e8beb   goharbor/harbor-registryctl:v2.4.2     "/home/harbor/start.…"   2 minutes ago   Up 2 minutes (healthy)                                                                         registryctl
d64a5ec70cd8   goharbor/harbor-log:v2.4.2             "/bin/sh -c /usr/loc…"   2 minutes ago   Up 2 minutes (healthy)   127.0.0.1:1514->10514/tcp                                             harbor-log
..............................................................................................................................................................................................................................................................................................................................................................
harbor日志以及启动停止相关
# Harbor日志文件存放路径为/var/log/harbor/
# 如果需要修改Harbor的配置文件harbor.yml,因为Harbor是基于docker-compose服务编排的,我们可以使用docker-compose命令重启Harbor。不修改配置文件,重启Harbor命令:docker-compose start | stop | restart
1、停止Harbor
[root@k8s-harbor-192 harbor]# docker-compose -f /usr/local/harbor/docker-compose.yml down

2、启动Harbor
[root@k8s-harbor-192 harbor]# docker-compose -f /usr/local/harbor/docker-compose.yml up -d
配置harbor开机自启
[root@k8s-harbor-192 harbor]# cat <<END>> /etc/rc.local
> docker-compose -f /usr/local/harbor/docker-compose.yml up -d
> END

[root@harbor ~]# chmod u+x /etc/rc.d/rc.local
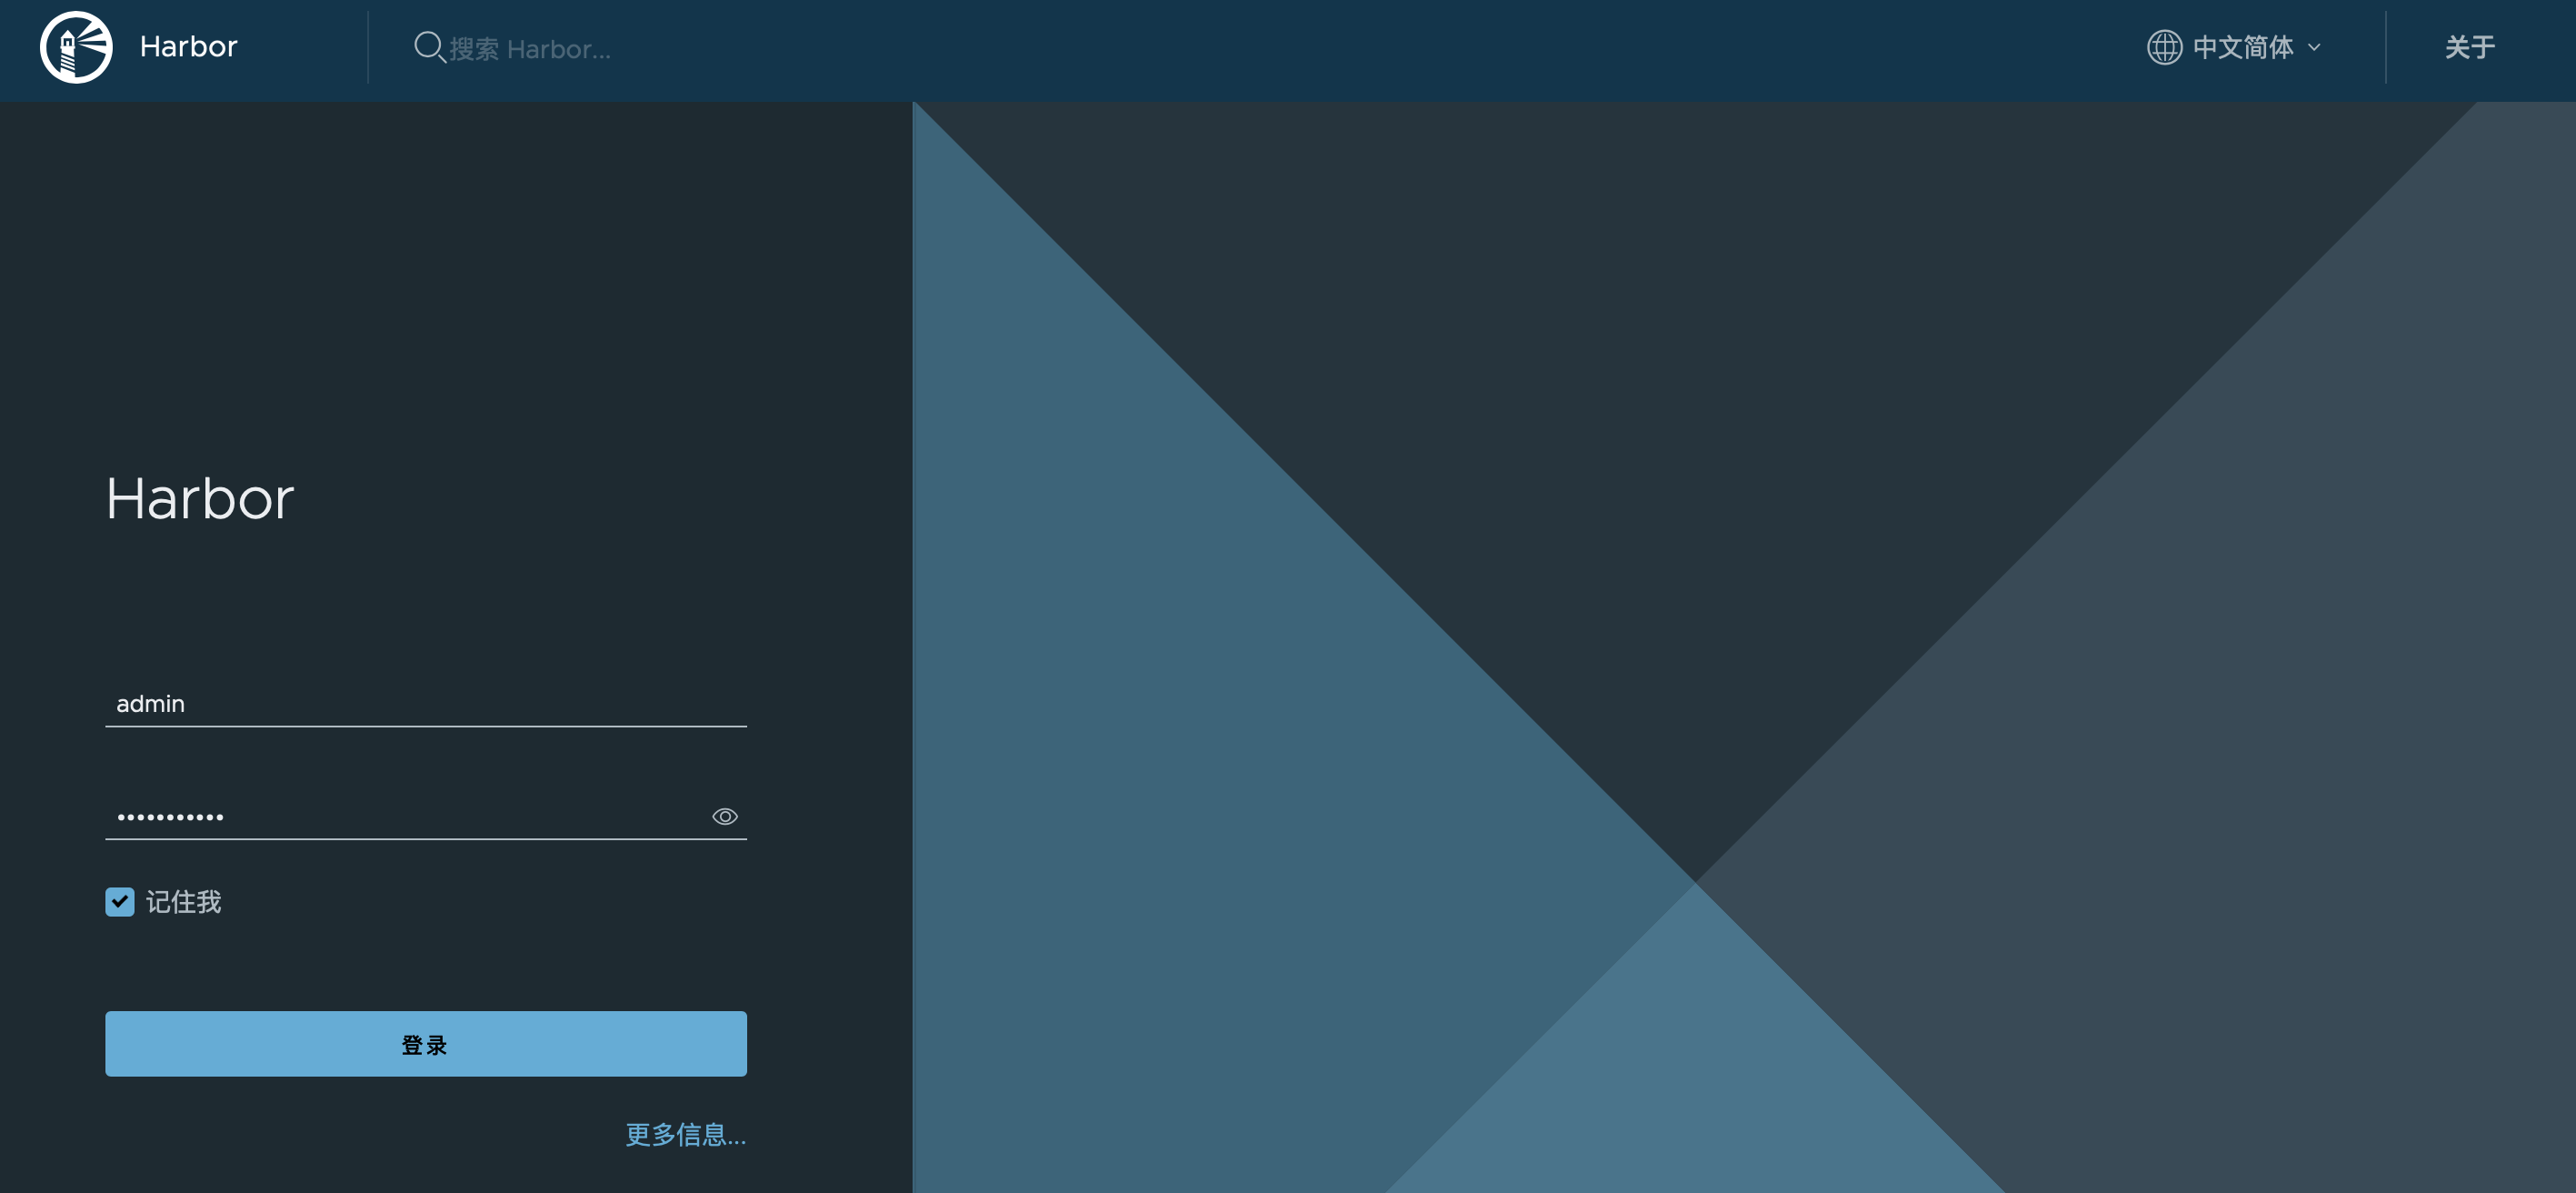
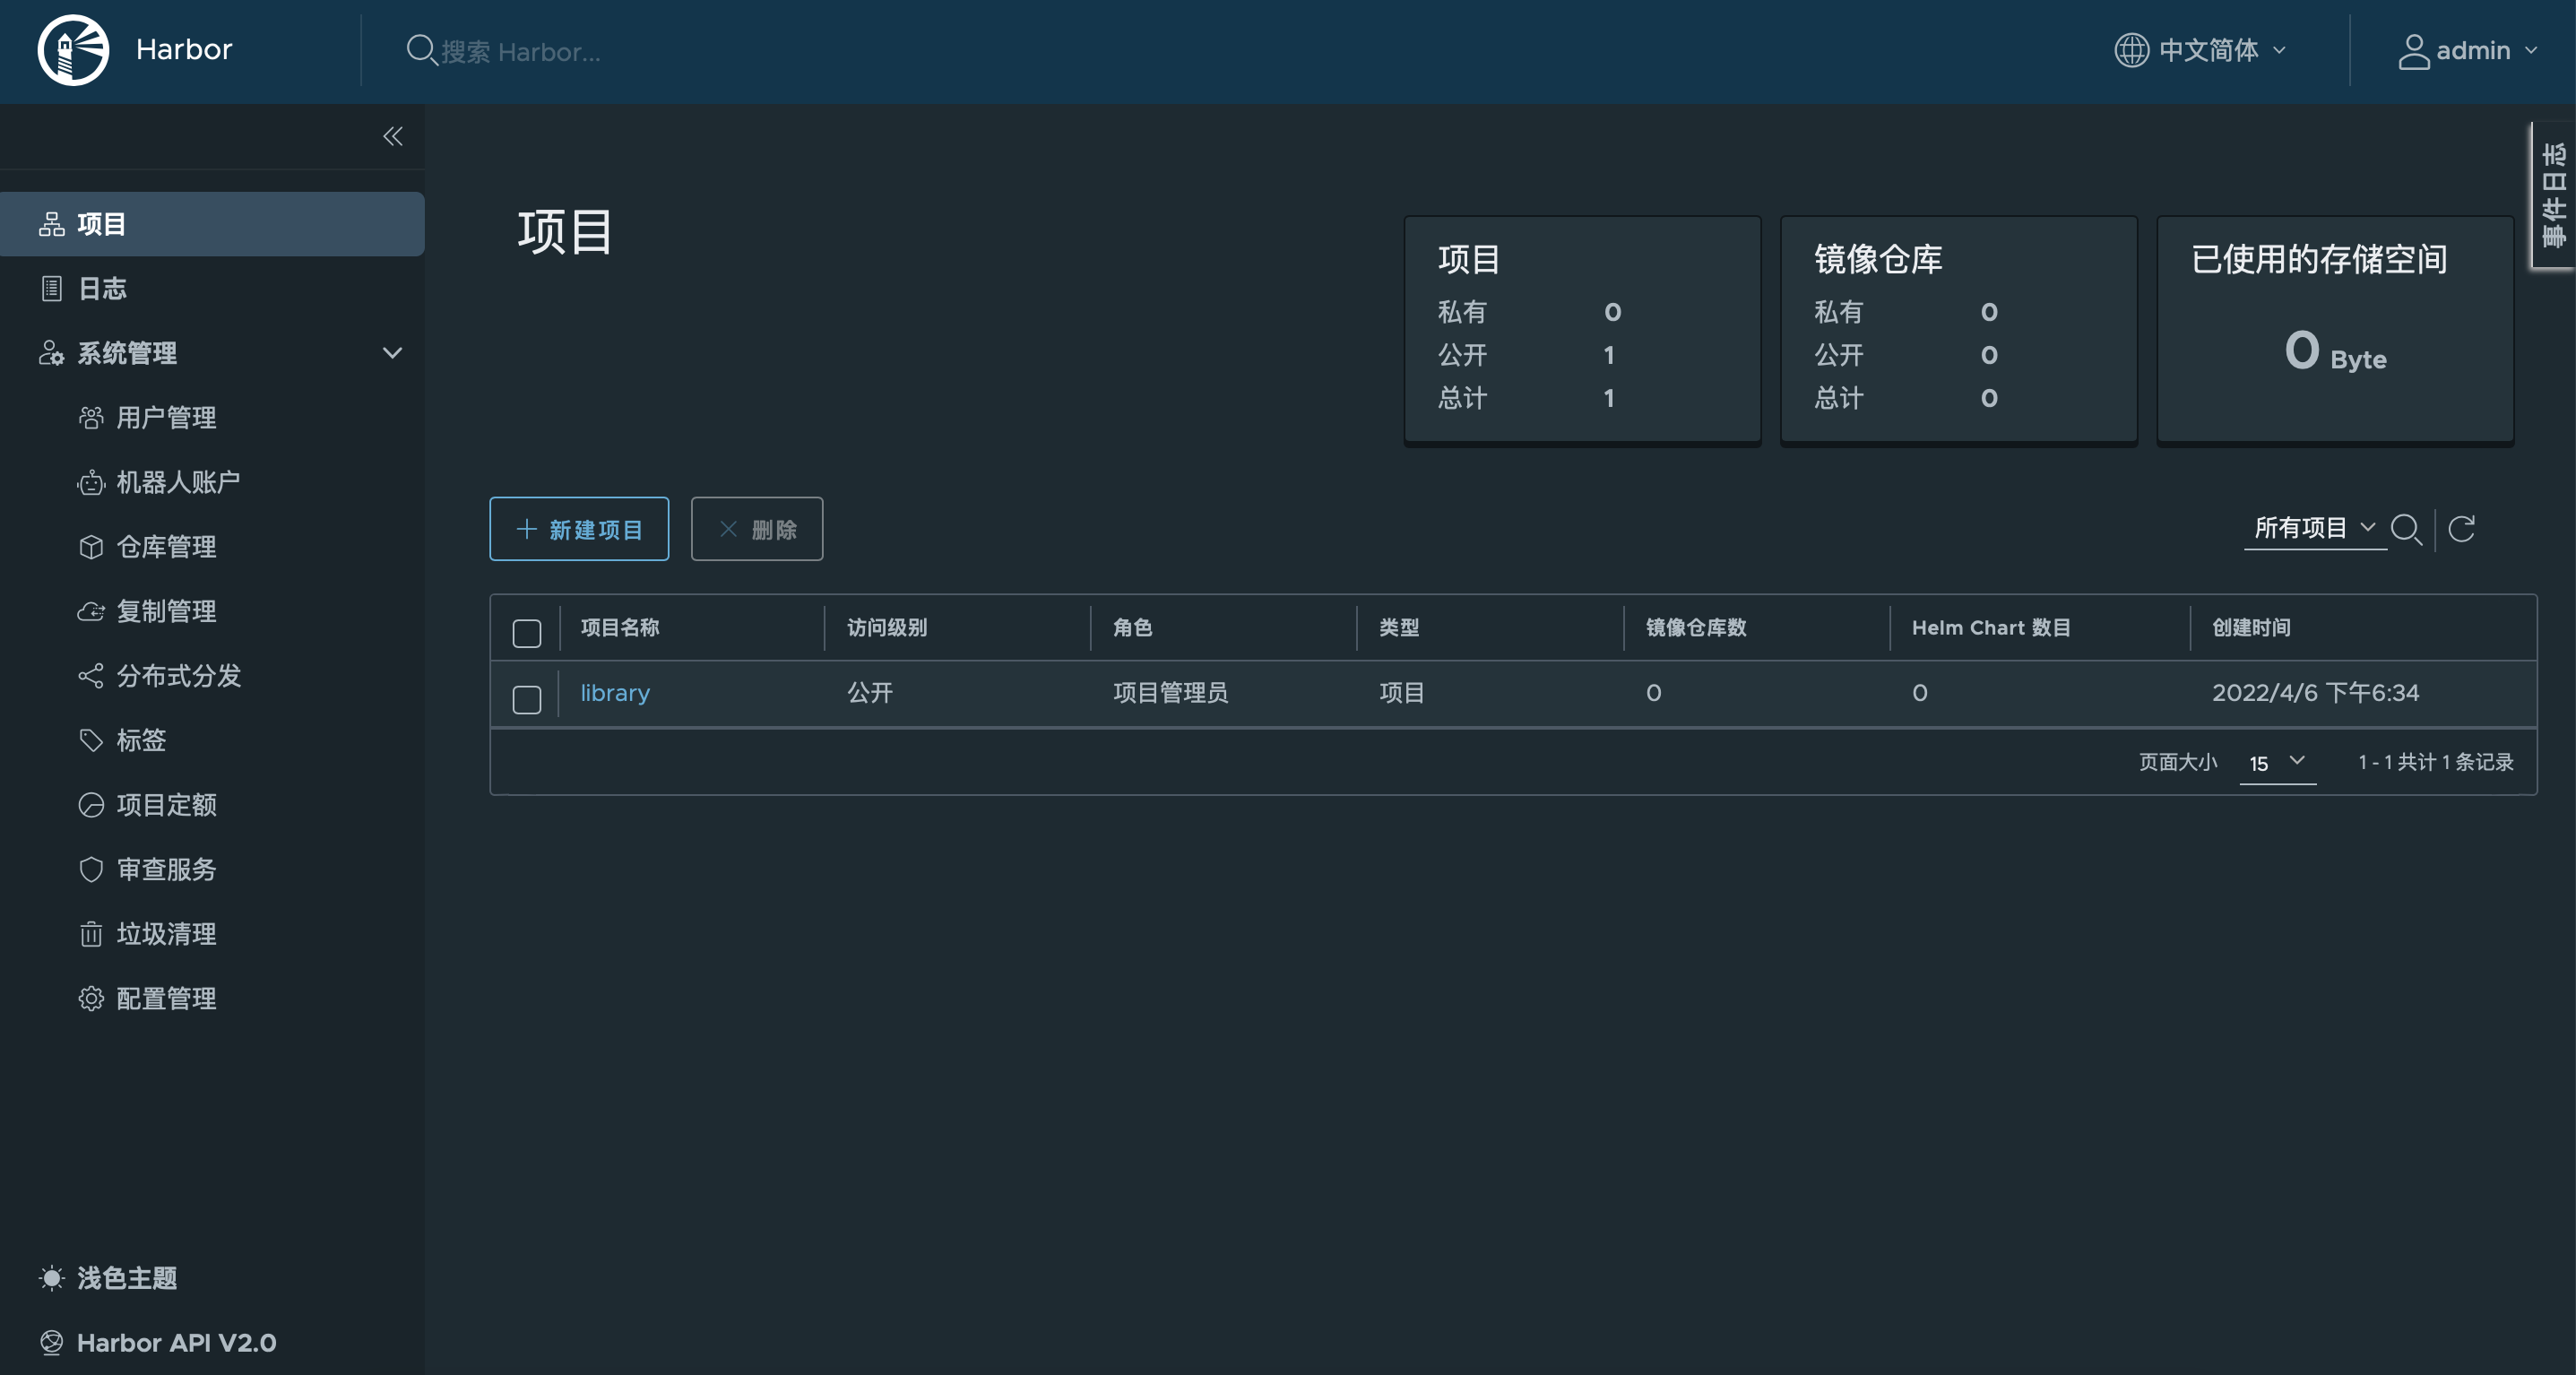
登录Harbor仓库并进行浏览器访问
[root@k8s-harbor-192 harbor]# docker login https://hub.lemon.com
Username: admin
Password:
WARNING! Your password will be stored unencrypted in /root/.docker/config.json.
Configure a credential helper to remove this warning. See
https://docs.docker.com/engine/reference/commandline/login/#credentials-store

Login Succeeded
客户端测试是否能够访问(须在客户端加入hosts): https://hub.lemon.com/
随便在一个节点上用docker使用harbor仓库
[root@k8s-master-192 ~]# docker login https://hub.lemon.com
Username: admin
Password:
WARNING! Your password will be stored unencrypted in /root/.docker/config.json.
Configure a credential helper to remove this warning. See
https://docs.docker.com/engine/reference/commandline/login/#credentials-store
Login Succeeded
[root@k8s-master-192 ~]# docker tag httpd:latest hub.lemon.com/library/httpd:v1 #打好标签
[root@k8s-master-192 ~]# docker rmi httpd:latest
Untagged: httpd:latest
Untagged: httpd@sha256:0954cc1af252d824860b2c5dc0a10720af2b7a3d3435581ca788dff8480c7b32
[root@k8s-master-192 ~]# docker images|grep lemon
hub.lemon.com/library/httpd v1 dabbfbe0c57b 3 months ago 144MB
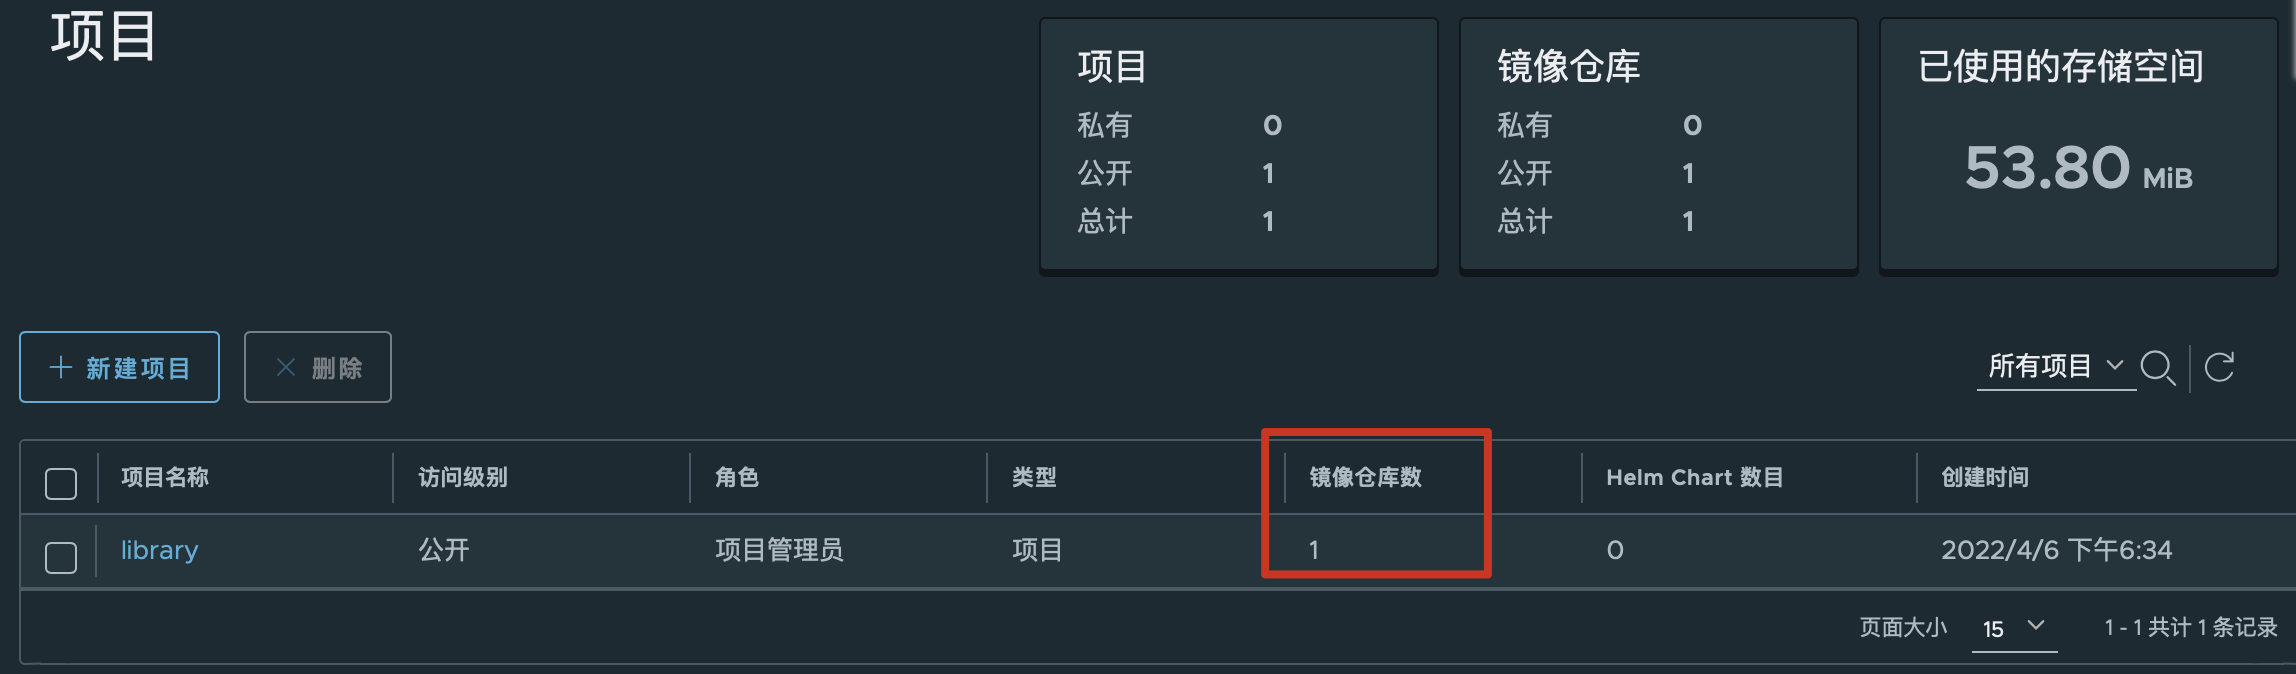
# 推送至harbor仓库
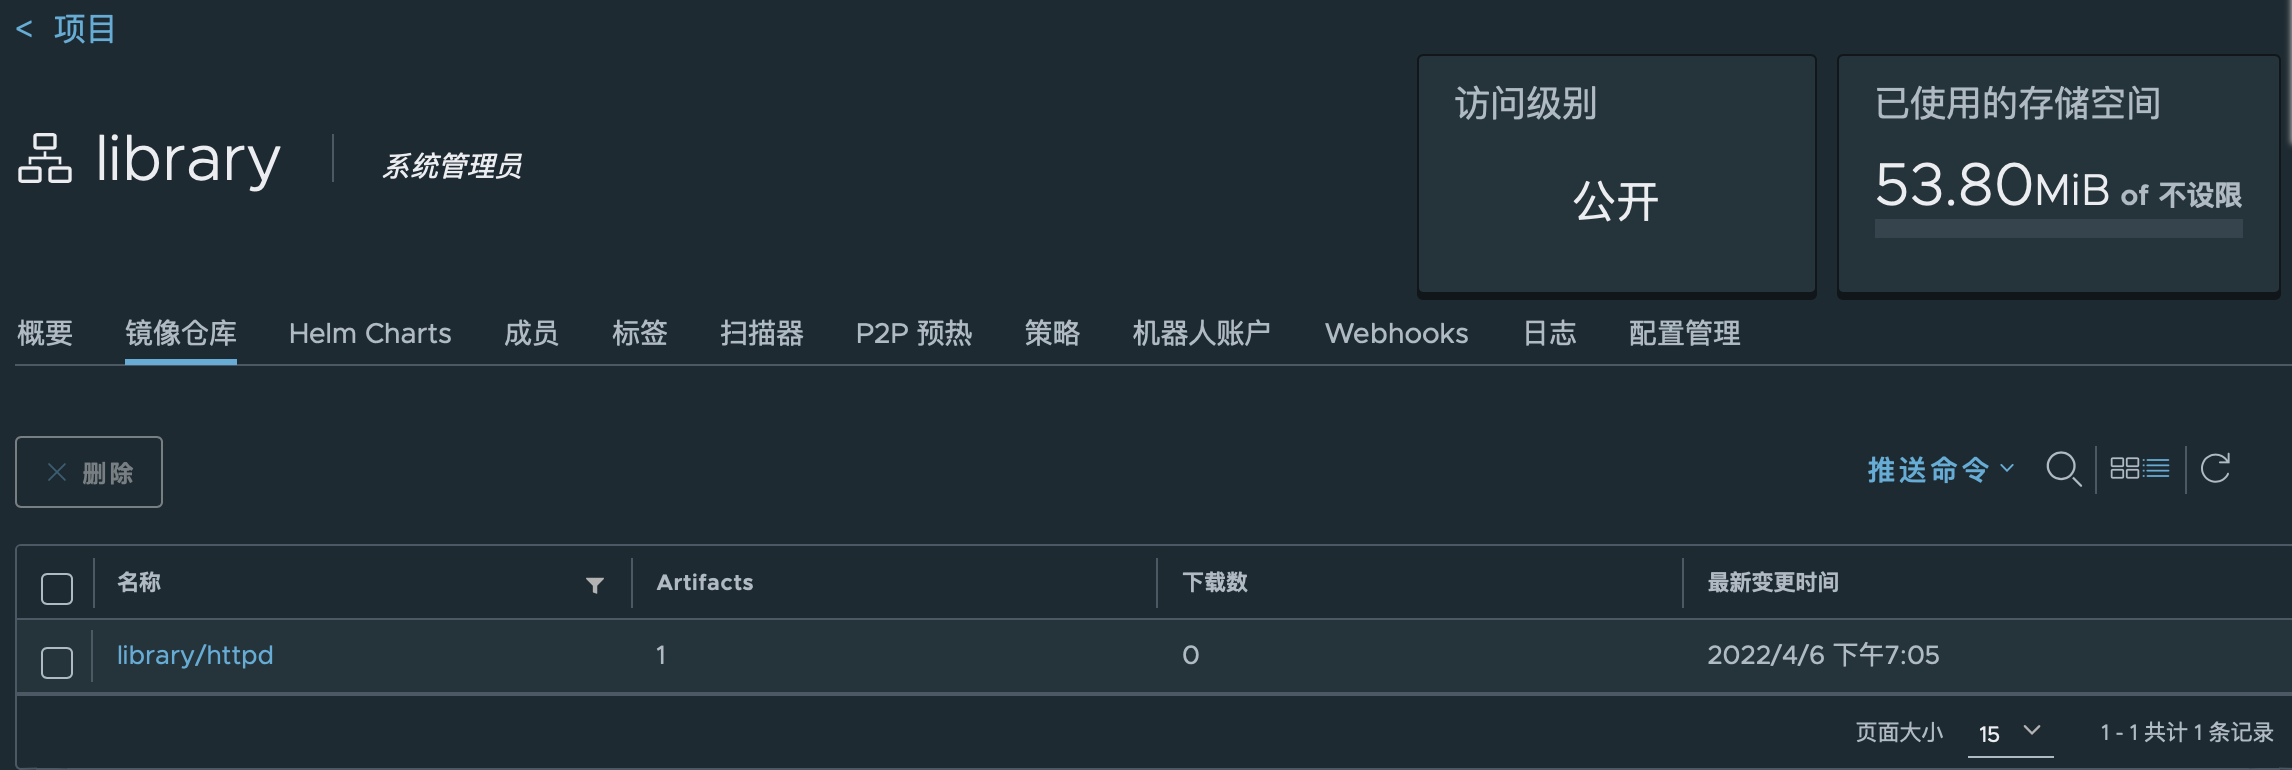
[root@k8s-master-192 ~]# docker push hub.lemon.com/library/httpd:v1
The push refers to repository [hub.lemon.com/library/httpd]
deefaa620a71: Pushed
9cff3206f9a6: Pushed
15e4bf5d0804: Pushed
1da636a1aa95: Pushed
2edcec3590a4: Pushed
v1: digest: sha256:57c1e4ff150e2782a25c8cebb80b574f81f06b74944caf972f27e21b76074194 size: 1365
.................................................................................................................
回到浏览器查看
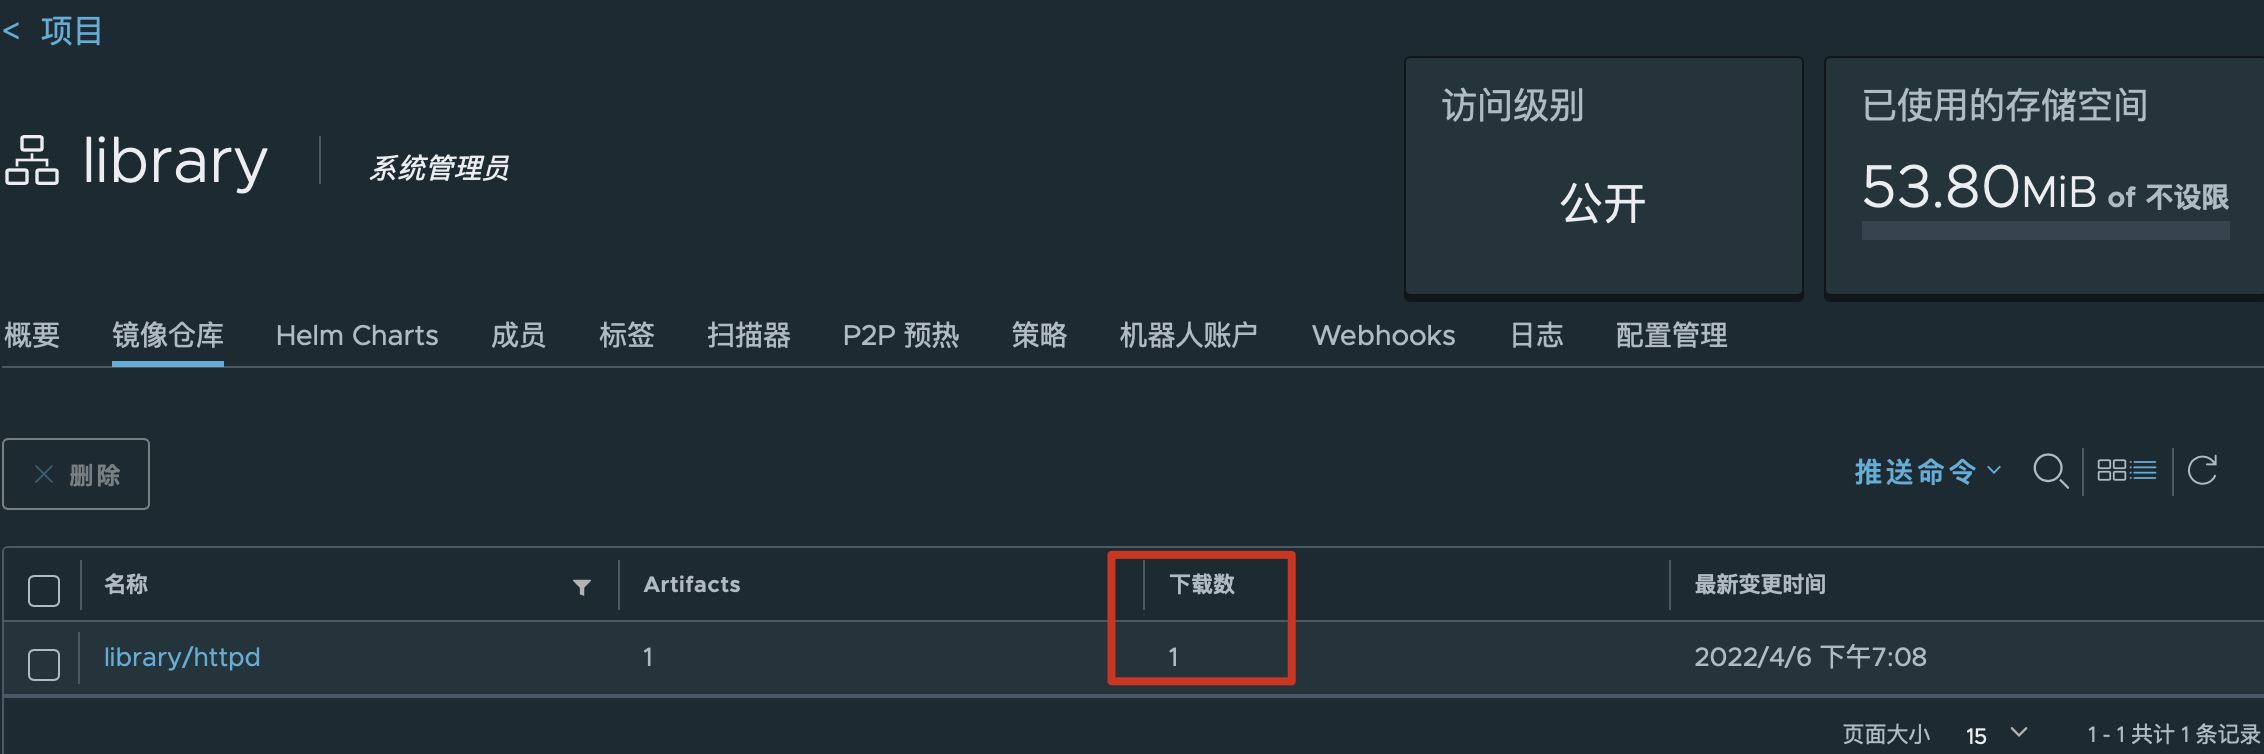
# Kubernetes拉取harbor库镜像创建pod
# 在此之前先将打标签的镜像删除
[root@k8s-master-192 ~]# docker rmi hub.lemon.com/library/httpd:v1

# 基于harbor仓库的镜像启动Pod
[root@k8s-master-192 ~]# kubectl run httpd-01 --image=hub.lemon.com/library/httpd:v1 --port=80 --replicas=1
kubectl run --generator=deployment/apps.v1 is DEPRECATED and will be removed in a future version. Use kubectl run --generator=run-pod/v1 or kubectl create instead.
deployment.apps/httpd-01 created

# 查看所有deployment
[root@k8s-master-192 ~]# kubectl get deployment -owide
NAME       READY   UP-TO-DATE   AVAILABLE   AGE   CONTAINERS   IMAGES                           SELECTOR
httpd-01   1/1     1            1           28s   httpd-01     hub.lemon.com/library/httpd:v1   run=httpd-01

# 查看所有rs(RESTARTS副本)
[root@k8s-master-192 ~]# kubectl get rs -owide
NAME                  DESIRED   CURRENT   READY   AGE   CONTAINERS   IMAGES                           SELECTOR
httpd-01-858664b999   1         1         1       42s   httpd-01     hub.lemon.com/library/httpd:v1   pod-template-hash=858664b999,run=httpd-01

# 查看所有pod
[root@k8s-master-192 ~]# kubectl get pod -owide -n default
NAME                        READY   STATUS    RESTARTS   AGE   IP           NODE                      NOMINATED NODE   READINESS GATES
httpd-01-858664b999-222hx   1/1     Running   0          59s   10.244.1.2   k8s-node-192.168.245.22   <none>           <none>

# 交互式执行容器命令
[root@k8s-master-192 ~]# kubectl exec -it httpd-01-858664b999-222hx -n default --  ls
bin  build  cgi-bin  conf  error  htdocs  icons  include  logs  modules

# 访问这个pod的IP
[root@k8s-master-192 ~]# curl 10.244.1.2
<html><body><h1>It works!</h1></body></html>

# 删除所有已经退出的容器
docker rm -v $(docker ps -qa -f status=exited)
..................................................................................................................................................................................................................
3.9 基本的使用下K8S
查看pod的详细信息
[root@k8s-master-192 ~]# kubectl -n default get pod -o wide
NAME                        READY   STATUS    RESTARTS   AGE     IP           NODE                      NOMINATED NODE   READINESS GATES
httpd-01-858664b999-222hx   1/1     Running   0          4m20s   10.244.1.2   k8s-node-192.168.245.22   <none>           <none>

# 测试删除这个pod容器后,k8s会不会重新策划这个pod
[root@k8s-master-192 ~]# kubectl -n default delete pod httpd-01-858664b999-222hx

# 验证, 可以看到k8s看到副本的期望值不符合之后,就会马上新起来一个pod来满足这个期望值
[root@k8s-master-192 ~]# kubectl -n default get pod -o wide
NAME                        READY   STATUS    RESTARTS   AGE   IP           NODE                      NOMINATED NODE   READINESS GATES
httpd-01-858664b999-c5pg4   1/1     Running   0          14s   10.244.2.6   k8s-node-192.168.245.33   <none>           <none>
..................................................................................................................................................................................................................
在生产环境下发现一个副本的pod已经不够用了,需要扩容
[root@k8s-master-192 ~]# kubectl -n default scale --replicas=3  deployment/httpd-01

[root@k8s-master-192 ~]# kubectl get deployment -owide
NAME       READY   UP-TO-DATE   AVAILABLE   AGE     CONTAINERS   IMAGES                           SELECTOR
httpd-01   3/3     3            3           5m45s   httpd-01     hub.lemon.com/library/httpd:v1   run=httpd-01

[root@master1 ~]# kubectl get pod
NAME                        READY   STATUS    RESTARTS   AGE
httpd-01-6c9fbcfb65-9hlhv   1/1     Running   1          12h
httpd-01-6c9fbcfb65-hjhjn   1/1     Running   0          51s
httpd-01-6c9fbcfb65-x52hh   1/1     Running   0          51s

[root@k8s-master-192 ~]# kubectl get pod -owide
NAME                        READY   STATUS    RESTARTS   AGE   IP           NODE                      NOMINATED NODE   READINESS GATES
httpd-01-858664b999-6dlhn   1/1     Running   0          32s   10.244.1.4   k8s-node-192.168.245.22   <none>           <none>
httpd-01-858664b999-c5pg4   1/1     Running   0          67s   10.244.2.6   k8s-node-192.168.245.33   <none>           <none>
httpd-01-858664b999-kpdjd   1/1     Running   0          32s   10.244.1.3   k8s-node-192.168.245.22   <none>           <none>
..................................................................................................................................................................................................................
能够看到,已经扩容成功
但是现在又引来了一个新的问题,我有三个容器,端口一样,但ip确是不一样的,外界该要怎么访问这个pod呢?答:使用SVC来实现
[root@k8s-master-192 ~]# kubectl expose --help|grep -A 1 'Create a service for an nginx'
  # Create a service for an nginx deployment, which serves on port 80 and connects to the containers on port 8000.
  kubectl expose deployment nginx --port=80 --target-port=8000

 # 查看一下deployment名称
[root@k8s-master-192 ~]# kubectl get deployment
NAME       READY   UP-TO-DATE   AVAILABLE   AGE
httpd-01   3/3     3            3           6m42s

# 创建svc
[root@k8s-master-192 ~]# kubectl expose deployment httpd-01 --port=88 --target-port=80
service/httpd-01 exposed

 # 查看一下svc地址
[root@k8s-master-192 ~]# kubectl get svc -o wide
NAME         TYPE        CLUSTER-IP       EXTERNAL-IP   PORT(S)   AGE    SELECTOR
httpd-01     ClusterIP   10.107.242.190   <none>        88/TCP    10s    run=httpd-01
kubernetes   ClusterIP   10.96.0.1        <none>        443/TCP   164m   <none>

# 这里为了好验证负载均衡,在访问之前先修改容器网页
[root@k8s-master-192 ~]# kubectl get pod -o wide
NAME                        READY   STATUS    RESTARTS   AGE     IP           NODE                      NOMINATED NODE   READINESS GATES
httpd-01-858664b999-6dlhn   1/1     Running   0          2m44s   10.244.1.4   k8s-node-192.168.245.22   <none>           <none>
httpd-01-858664b999-c5pg4   1/1     Running   0          3m19s   10.244.2.6   k8s-node-192.168.245.33   <none>           <none>
httpd-01-858664b999-kpdjd   1/1     Running   0          2m44s   10.244.1.3   k8s-node-192.168.245.22   <none>           <none>

[root@k8s-master-192 ~]# kubectl exec -it httpd-01-858664b999-6dlhn bash
root@httpd-01-858664b999-6dlhn:/usr/local/apache2# echo 'node-10.244.1.4' > htdocs/index.html

[root@k8s-master-192 ~]# kubectl exec -it httpd-01-858664b999-c5pg4 bash
root@httpd-01-858664b999-c5pg4:/usr/local/apache2#  echo 'node-10.244.2.6' > htdocs/index.html

[root@k8s-master-192 ~]# kubectl exec -it httpd-01-858664b999-kpdjd bash
root@httpd-01-858664b999-kpdjd:/usr/local/apache2# echo 'node-10.244.1.3' > htdocs/index.html

# 访问SVC从而以负载均衡的方式访问到pod副本
[root@k8s-master-192 ~]# curl 10.107.242.190:88
node-10.244.2.6
[root@k8s-master-192 ~]# curl 10.107.242.190:88
node-10.244.1.4
[root@k8s-master-192 ~]# curl 10.107.242.190:88
node-10.244.1.3

# 原理:查看下ipvsadm规则
[root@k8s-master-192 ~]# ipvsadm -Ln
IP Virtual Server version 1.2.1 (size=4096)
Prot LocalAddress:Port Scheduler Flags
  -> RemoteAddress:Port           Forward Weight ActiveConn InActConn
TCP  10.96.0.1:443 rr
  -> 192.168.245.11:6443          Masq    1      1          0
TCP  10.96.0.10:53 rr
  -> 10.244.2.4:53                Masq    1      0          0
  -> 10.244.2.5:53                Masq    1      0          0
TCP  10.96.0.10:9153 rr
  -> 10.244.2.4:9153              Masq    1      0          0
  -> 10.244.2.5:9153              Masq    1      0          0
# 这就是刚才创建的SVC,实际上他就是一个转发规则
TCP  10.107.242.190:88 rr
  -> 10.244.1.3:80                Masq    1      0          1
  -> 10.244.1.4:80                Masq    1      0          1
  -> 10.244.2.6:80                Masq    1      0          1
UDP  10.96.0.10:53 rr
  -> 10.244.2.4:53                Masq    1      0          0
  -> 10.244.2.5:53                Masq    1      0          0
..................................................................................................................................................................................................................
上面做的其实只能在内部访问,如果像对外开放的话,需将原本svc的type类型改为NodePort类型,因为默认的ClusterIP类型只是针对这个集群,封闭不对外暴露的。
[root@master1 ~]# kubectl edit svc httpd-01
apiVersion: v1
kind: Service
metadata:
  creationTimestamp: "2022-04-06T11:15:35Z"
  labels:
    run: httpd-01
  name: httpd-01
  namespace: default
  resourceVersion: "25582"
  selfLink: /api/v1/namespaces/default/services/httpd-01
  uid: 02912733-e1c5-46e1-9cea-0672a28750cd
spec:
  clusterIP: 10.107.242.190
  externalTrafficPolicy: Cluster
  ports:
  - nodePort: 32566
    port: 88
    protocol: TCP
    targetPort: 80
  selector:
    run: httpd-01
  sessionAffinity: None
  type: NodePort
status:
  loadBalancer: {}

# 再来查看这个svc的类型
[root@k8s-master-192 ~]# kubectl get svc -o wide
NAME         TYPE        CLUSTER-IP       EXTERNAL-IP   PORT(S)        AGE     SELECTOR
httpd-01     NodePort    10.107.242.190   <none>        88:32566/TCP   8m36s   run=httpd-01
kubernetes   ClusterIP   10.96.0.1        <none>        443/TCP        172m    <none>

# 会发现它基于上面的88端口对外打开了一个随机端口32552提供服务,而且是将所有k8s节点都打开了这个端口号对外服务
[root@k8s-master-192 ~]# netstat -antpu | grep 32566
tcp6       0      0 :::32566                :::*                    LISTEN      20888/kube-proxy

[root@k8s-node-192 ~]# netstat -antpu | grep 32566
tcp6       0      0 :::32566                :::*                    LISTEN      21398/kube-proxy

[root@k8s-node-192 ~]# netstat -antpu | grep 32566
tcp6       0      0 :::32566                :::*                    LISTEN      22381/kube-proxy

# 外界访问

..................................................................................................................................................................................................................


至此整体kubernetes集群架构搭建完成

 浙公网安备 33010602011771号