瞎写系列-Vue跨域 获取本地服务器数据(购物商品数据)
因为正好有个一个作业 所以随便在博客上写写
代码:https://gitee.com/akyaky/vue-cross-domain-test
数据库篇
数据库没什么好说的 数据什么的自己加 用sql语句或者可视化工具都行
这里我用的是mysql+Navicat Premium的组合
具体 如下 即 名称 图片链接 价格

我们要做的就是用javaweb获取到这些数据然后发送到vue网页上
javaweb/ssm篇(提前搞好对应java架包)
万事先写类 写一个商品类
 1 package com.xu.bean;
 2
 3 public class Goods {
 4     private String name;
 5     private String url;
 6     private String price;
 7     public String getName() {
 8         return name;
 9     }
10
11     public void setName(String name) {
12         this.name = name;
13     }
14
15     public String getUrl() {
16         return url;
17     }
18
19     public void setUrl(String url) {
20         this.url = url;
21     }
22
23     public String getPrice() {
24         return price;
25     }
26
27     public void setPrice(String price) {
28         this.price = price;
29     }
30
31     @Override
32     public String toString() {
33         return "goods{" +
34                 "name='" + name + '\'' +
35                 ", url='" + url + '\'' +
36                 ", price='" + price + '\'' +
37                 '}';
38     }
39
40 }
我们应该去链接数据库 固定文件db.properties 放在resources
driver=com.mysql.cj.jdbc.Driver
url=jdbc:mysql://localhost:3306/shopping?useSSL=false&serverTimezone=UTC
username=root
password=123456
从上往下依次是 驱动 url 用户名 密码 如果有不一样的比如用户名/密码/表面/端口 需要进行改动
有了这个之后我们应该获取然后链接数据库
DBUtils文件
 1 package com.xu.utils;
 2
 3 import java.sql.*;
 4 import java.util.ResourceBundle;
 5
 6 public class DBUtils {
 7     private static String driver;
 8     private static String url;
 9     private static String username;
10     private static String password;
11
12     static{//获取数据,加载驱动
13         //获取db文件
14         ResourceBundle bundle = ResourceBundle.getBundle("db");
15         //加载数据
16         driver = bundle.getString("driver");
17         url = bundle.getString("url");
18         username = bundle.getString("username");
19         password = bundle.getString("password");
20         //jdbc连接数据库
21         try {
22             //Class.forName是初始化给定的类 这样就能分辨数据库类型 初始化对应数据库的类
23             Class.forName(driver);
24         } catch (ClassNotFoundException e) {
25             e.printStackTrace();
26         }
27
28     }
29
30     public static Connection  getConnection(){
31         Connection conn = null;
32         try {
33             //获取数据库的连接
34             conn = DriverManager.getConnection(url, username, password);
35         } catch (SQLException e) {
36             e.printStackTrace();
37         }
38         return conn;
39     }
40    //一个关闭功能 用来关闭中间产生的ResultSet Statement Connection
41     public static void close(ResultSet rs, Statement stmt,Connection conn){
42         if(rs!=null){
43             try {
44                 rs.close();
45             } catch (SQLException e) {
46                 e.printStackTrace();
47             }
48         }
49         if(stmt!=null){
50             try {
51                 stmt.close();
52             } catch (SQLException e) {
53                 e.printStackTrace();
54             }
55         }
56         if(conn!=null){
57             try {
58                 conn.close();
59             } catch (SQLException e) {
60                 e.printStackTrace();
61             }
62         }
63
64     }
65
66 }
写一个接口和实现类 得到商品数据
接口
1 package com.xu.dao;
2
3 import com.xu.bean.Goods;
4
5 import java.util.List;
6
7 public interface GoodsDao {
8     public List<Goods> getgoods();
9 }
实现
 1 package com.xu.dao;
 2
 3 import com.xu.bean.Goods;
 4 import com.xu.utils.DBUtils;
 5
 6 import java.sql.Connection;
 7 import java.sql.PreparedStatement;
 8 import java.sql.ResultSet;
 9 import java.sql.SQLException;
10 import java.util.ArrayList;
11 import java.util.List;
12
13 public class GoodsDaoImp implements GoodsDao {
14     public List<Goods> getgoods() {
15         //List集合存放Goods类型 多态
16         List<Goods> recordList = new ArrayList<Goods>();
17         //得到数据库连接conn
18         Connection conn = DBUtils.getConnection();
19         try {
20             //PreparedStatement用来进行一次性操作连接
21             PreparedStatement ps = conn.prepareStatement("select * from goods");
22             //将得到的结果返回给ResultSet类型的rs
23             ResultSet rs= ps.executeQuery();
24             //遍历一下把rs里的数据放入recordList
25             while(rs.next()){
26                 Goods g=new Goods();
27                 g.setName(rs.getString("name"));
28                 g.setUrl(rs.getString("picture"));
29                 g.setPrice(rs.getString("Price"));
30                 recordList.add(g);
31             }
32             //关闭连接
33             DBUtils.close(rs,ps,conn);
34             //返回一下recordList数据
35             return recordList;
36         } catch (SQLException e) {
37             e.printStackTrace();
38         }
39         return null;
40     }
41 }
还差最后一步将数据放到本地服务器上然后还能看见
LoginServlet
 1 package com.xu.web;
 2
 3 import com.alibaba.fastjson.JSONObject;
 4 import com.xu.bean.Goods;
 5 import com.xu.dao.GoodsDao;
 6 import com.xu.dao.GoodsDaoImp;
 7 import org.apache.commons.beanutils.BeanUtils;
 8
 9 import javax.servlet.ServletException;
10 import javax.servlet.annotation.WebServlet;
11 import javax.servlet.http.HttpServlet;
12 import javax.servlet.http.HttpServletRequest;
13 import javax.servlet.http.HttpServletResponse;
14 import java.io.IOException;
15 import java.io.PrintWriter;
16 import java.util.List;
17 //注解 如果地址是/adv则读取信息
18 @WebServlet(urlPatterns = "/adv")
19 public class LoginServlet extends HttpServlet {
20     //重写doGet方法
21     @Override
22     protected void doGet(HttpServletRequest request, HttpServletResponse response) throws ServletException, IOException {
23         //头信息
24         response.setContentType("application/json;charset=utf-8");
25
26         //这里new一个Goods
27         Goods good=new Goods();
28         try {
29             //将request中的参数映射到User Bean中的set和get方法
30             BeanUtils.populate(good,request.getParameterMap());
31             //创建类接口调用方法获取数据
32             GoodsDao gs=new GoodsDaoImp();
33             //将数据库获取的数据给List集合
34             List<Goods> recordList=gs.getgoods();
35             //写入到网页
36             PrintWriter writer = response.getWriter();
37             String  jsonObject = JSONObject.toJSON(recordList).toString();
38             writer.write(jsonObject);
39             //控制台输出测试
40             System.out.println("json字符串"+jsonObject);
41 //            if(u!=null){//分发转发
42 //                request.getSession().setAttribute("user",u);
43 ////              response.sendRedirect(request.getContextPath()+"/home.html");
44 //                //http://localhost:9000/mvc_web/
45 //                response.sendRedirect(request.getContextPath()+"/home.jsp");
46 //            }
47
48         } catch (Exception e) {
49             e.printStackTrace();
50         }
51     }
52     //默认不重写
53     @Override
54     protected void doPost(HttpServletRequest req, HttpServletResponse resp) throws ServletException, IOException {
55         doGet(req,resp);
56     }
57 }
放在tomcat上运行一下
访问/adb 得到

成功!
Vue篇
首先配置一下
manifest.json->源码识图 最后加入
 1 "vueVersion" : "2",
 2     "h5":{
 3          "devServer":{
 4           "host":"localhost",
 5           "port":8080,
 6           "disableHostCheck":true,
 7           "proxy":{
 8            "/" :{
 9             "target":"http://localhost:9999/untitled3_war/",
10             "changeOrigin":true,
11             "secure":false
12                   }
13                     }
14                      }
15         }
16 }
target是你的tomcat工件的网址 其他的暂时不用改
然后写一个简单的页面
 1 <template>
 2     <view class="content">
 3         <scroll-view scroll-y>
 4             <!--遍历取goods里面的内容 链接用url-->
 5             <view v-for="(item,index) in goods" :key="index" class="content">
 6                 <p>{{item.name}}</p>
 7                 <image :src="item.url"></image>
 8                 <p>价格:{{item.price}}</p>
 9             </view>
10         </scroll-view>
11
12
13     </view>
14 </template>
15
16 <script>
17     export default {
18         data() {
19             return {
20                 goods:[
21                 ]
22             }
23         },
24         onLoad() {
25
26         },
27         onReady(){
28             //请求
29             uni.request({
30                 //使用#ifdef 区分浏览器与小程序 因为加载不一样
31                 // #ifdef H5
32                 url:"/adv",
33                 // #endif
34                 // #ifdef MP-WEIXIN
35                 url:"http://localhost:9999/untitled3_war/adv",
36                 // #endif
37                 //获取成功则
38                 success: (res) => {
39                     //控制台输出
40                     console.log(res.data)
41                     //加入goods中
42                     this.goods=res.data
43                 }
44             })
45         },
46         methods: {
47     },
48 }
49 </script>
50
51 <style>
52     .content {
53         display: flex;
54         flex-direction: column;
55         align-items: center;
56         justify-content: center;
57         border:5px solid red;
58     }
59
60 </style>
61 <!-- 无聊的阿库娅 -->
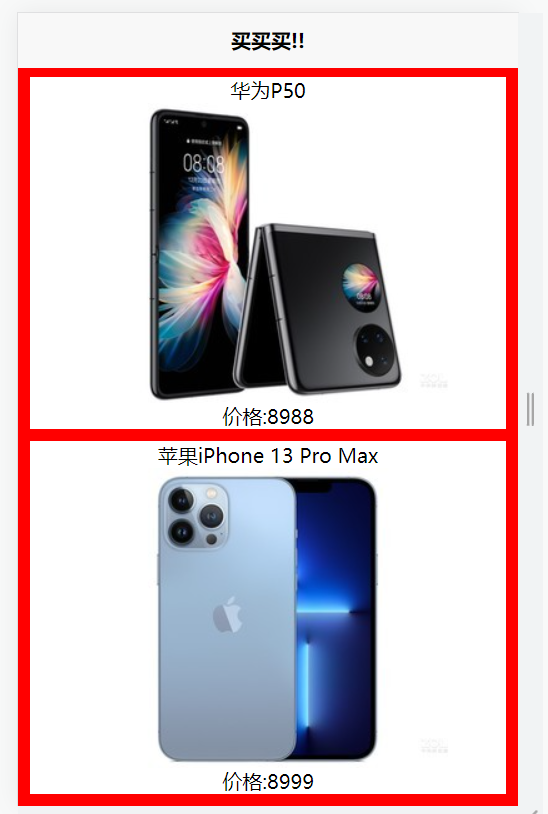
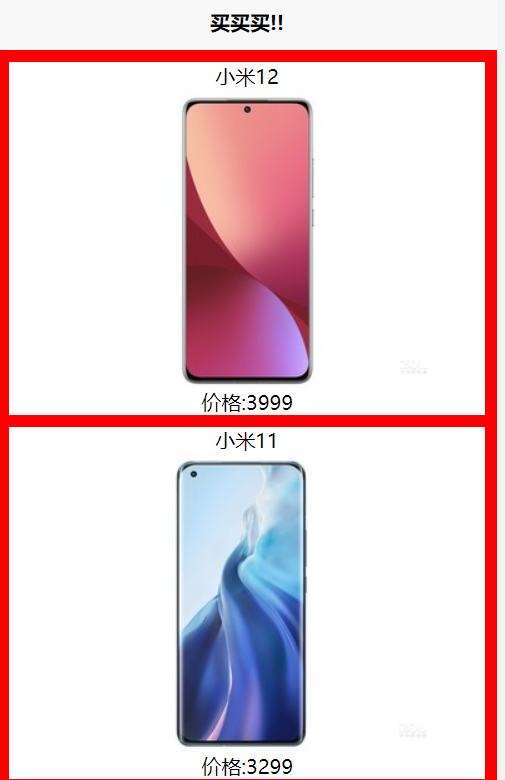
好了看一下网页


能够正常获取了 如果不能获取可以检查上面的步骤 记得更改各种东西 比如用户名 服务器网址等 这里不在赘述


