
[AWS] Lab - Create and execute a Lambda
Compute Power in the Cloud
In this hands-on exercise, you will write your first Lambda function using Node.js.
-
Prerequisites:
- AWS account
- An Amazon S3 bucket is required for this trigger to work
-
By the end of this lab, you will be able to:
- Author a Lambda function using Node.js via the console
- Test a Lambda function via the console
Follow the exercise instructions given below:
Step 0. Prerequisite: Create an S3 bucket
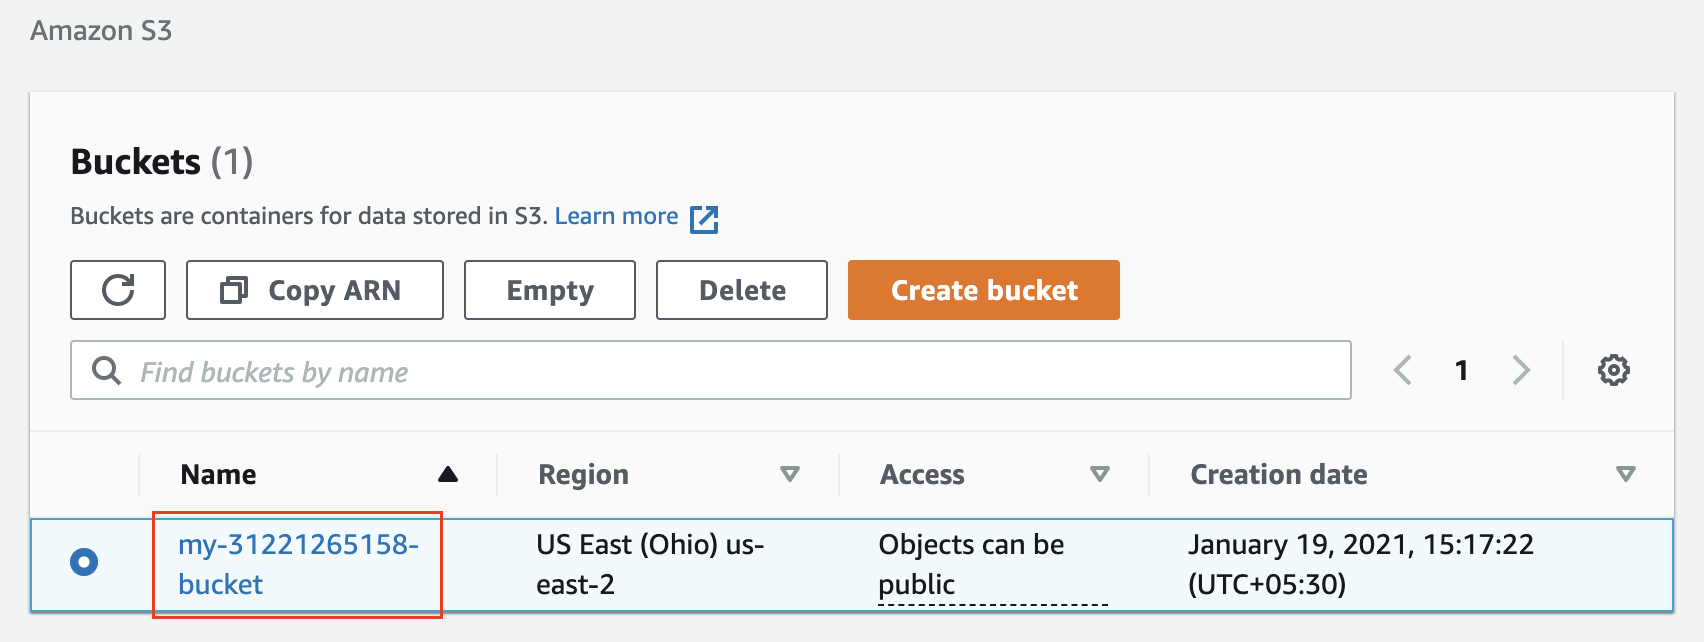
AWS S3 is a file storage service. Though, we will learn S3 in detail in the upcoming lesson, let's create an S3 bucket (folder) for this exercise.
- Go to the S3 dashboard, and click on the Create bucket.
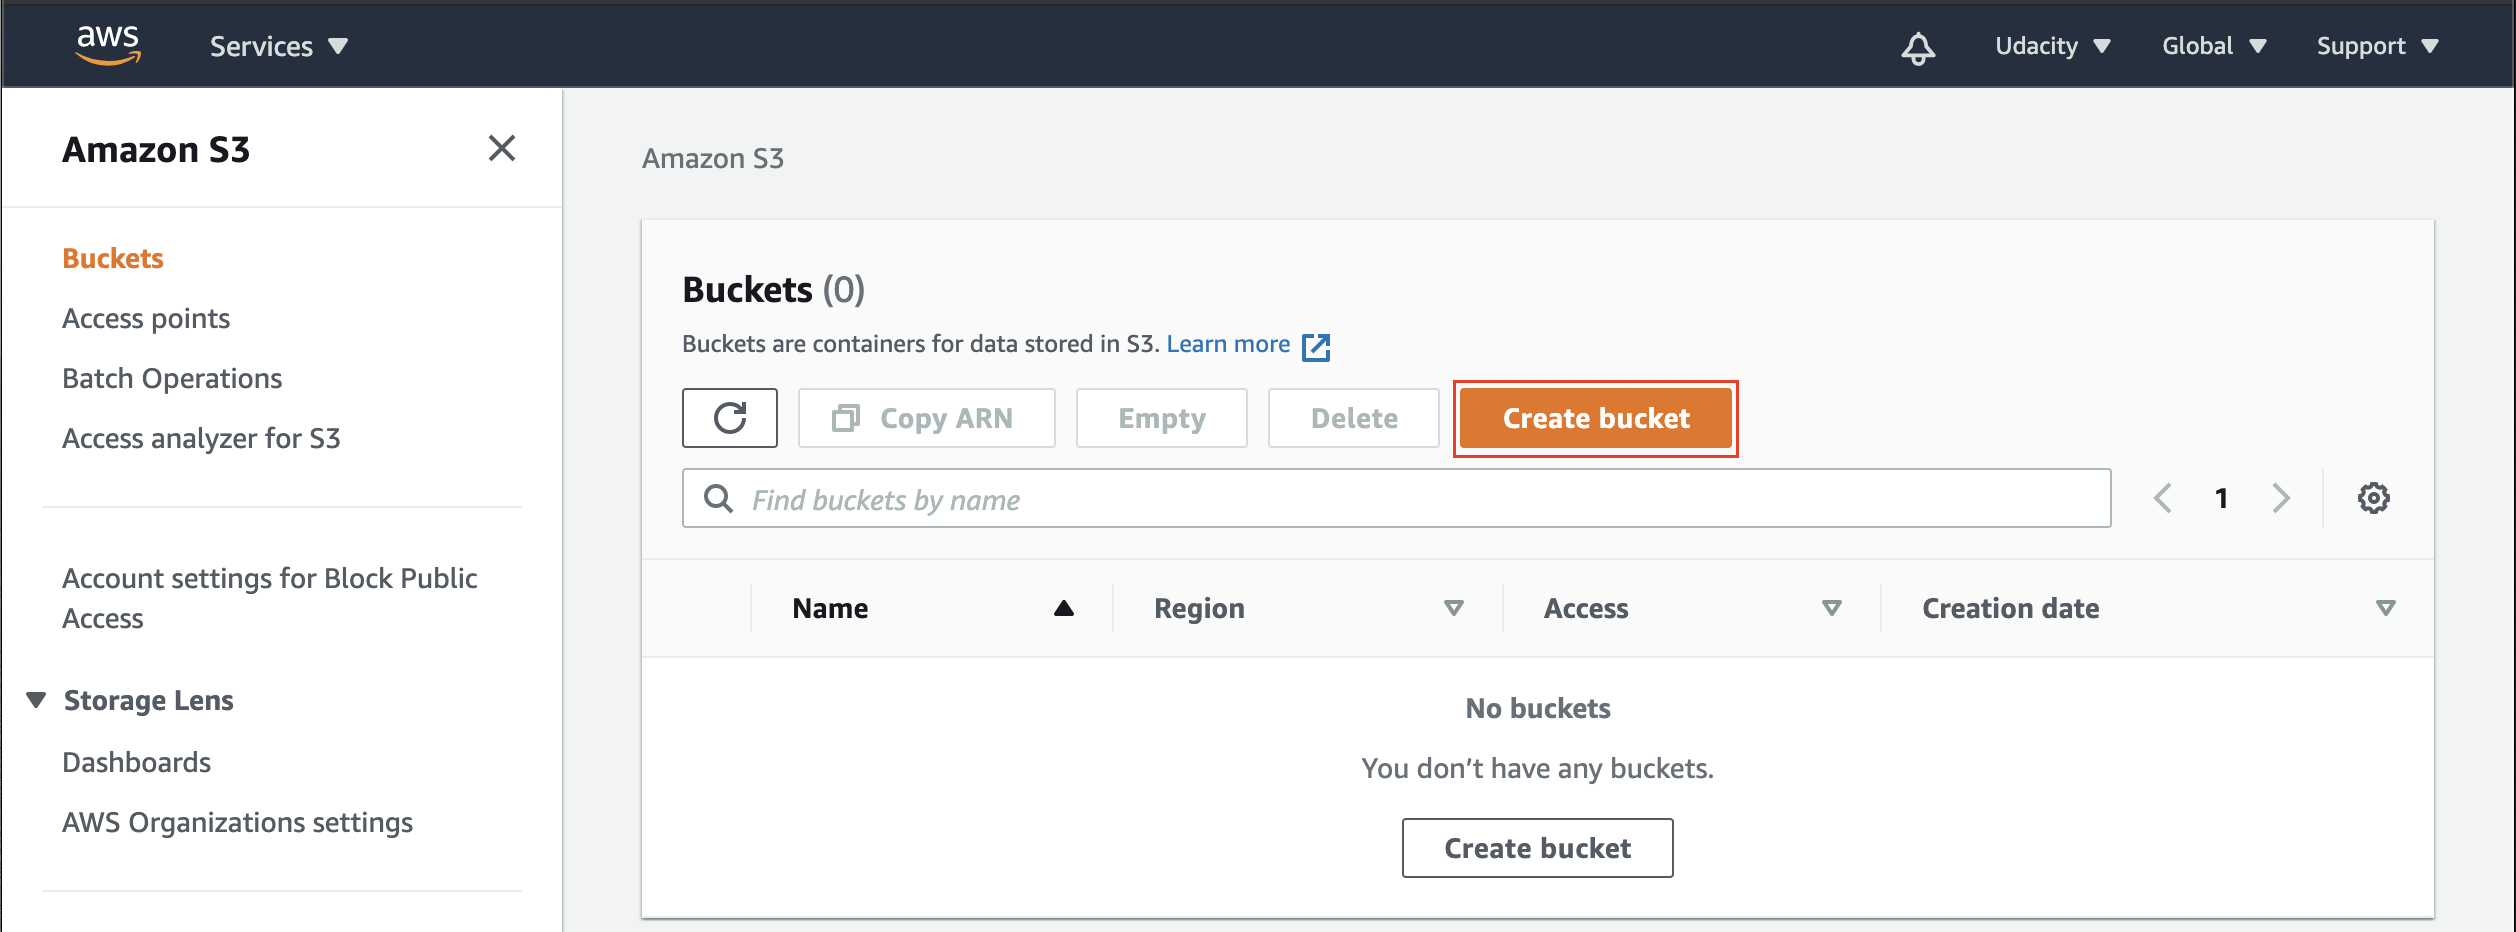
Snapshot: S3 → Buckets dashboard. View all of the S3 buckets in your account.
- Enter the bucket name, and make it visible to the public. The name should be unique worldwide, you can use the convention as
my-<aws account id>-bucket. Leave other fields as default, and create the bucket.
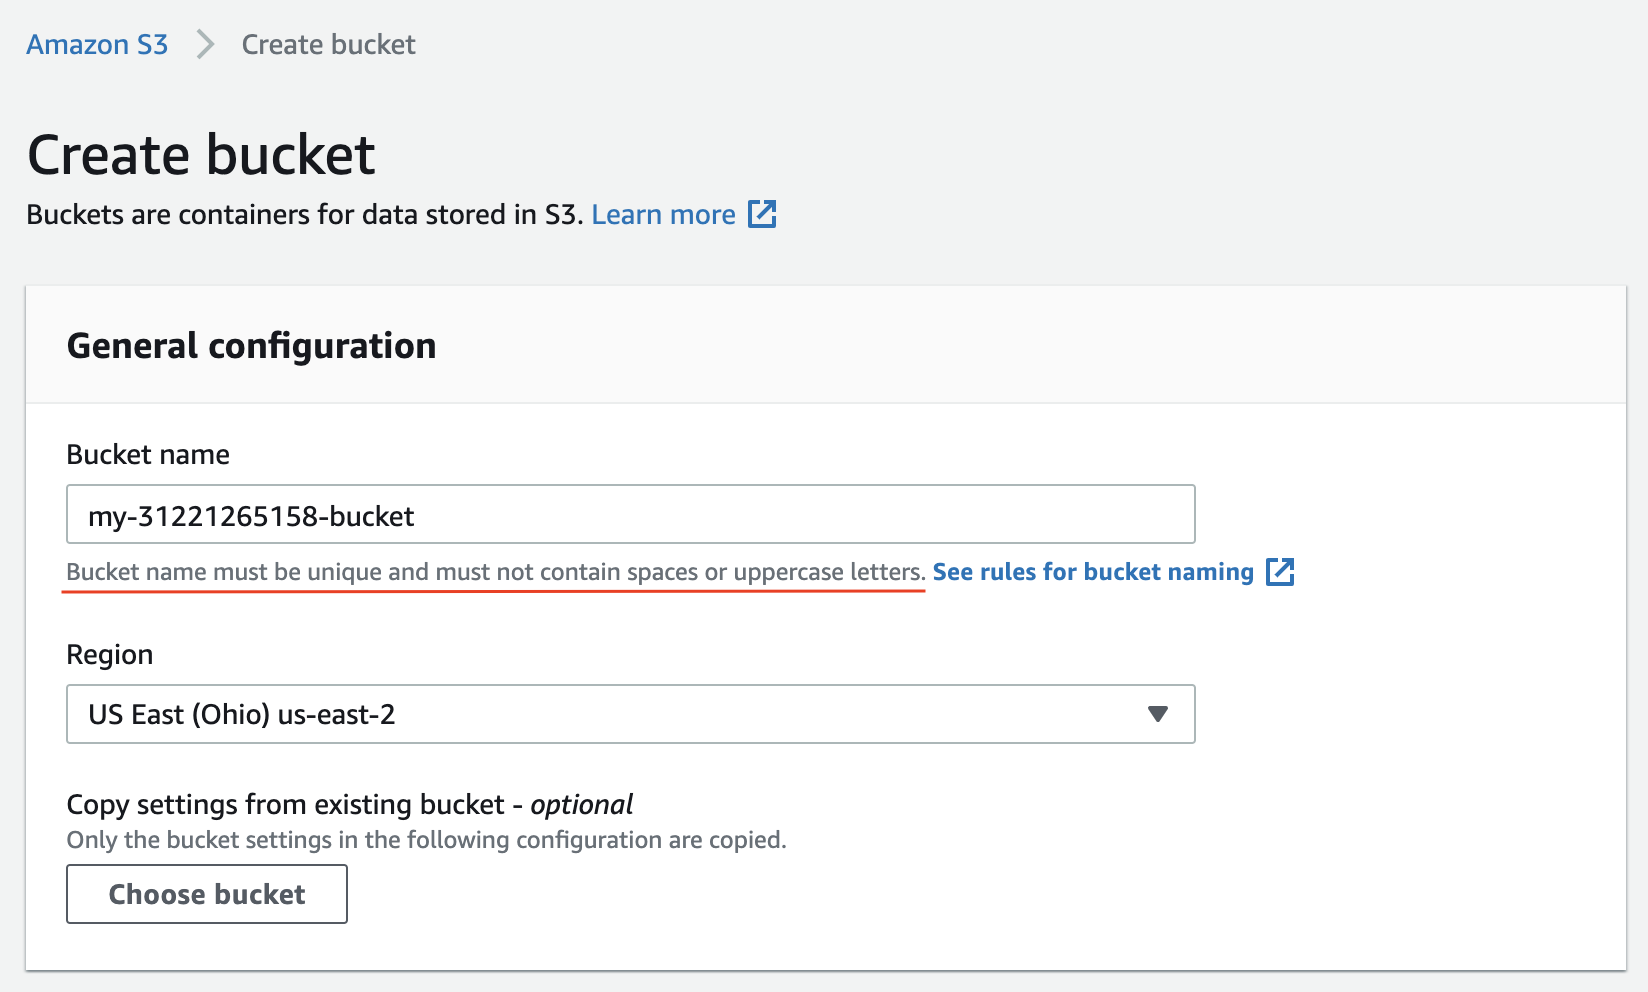
Give a unique name to your bucket
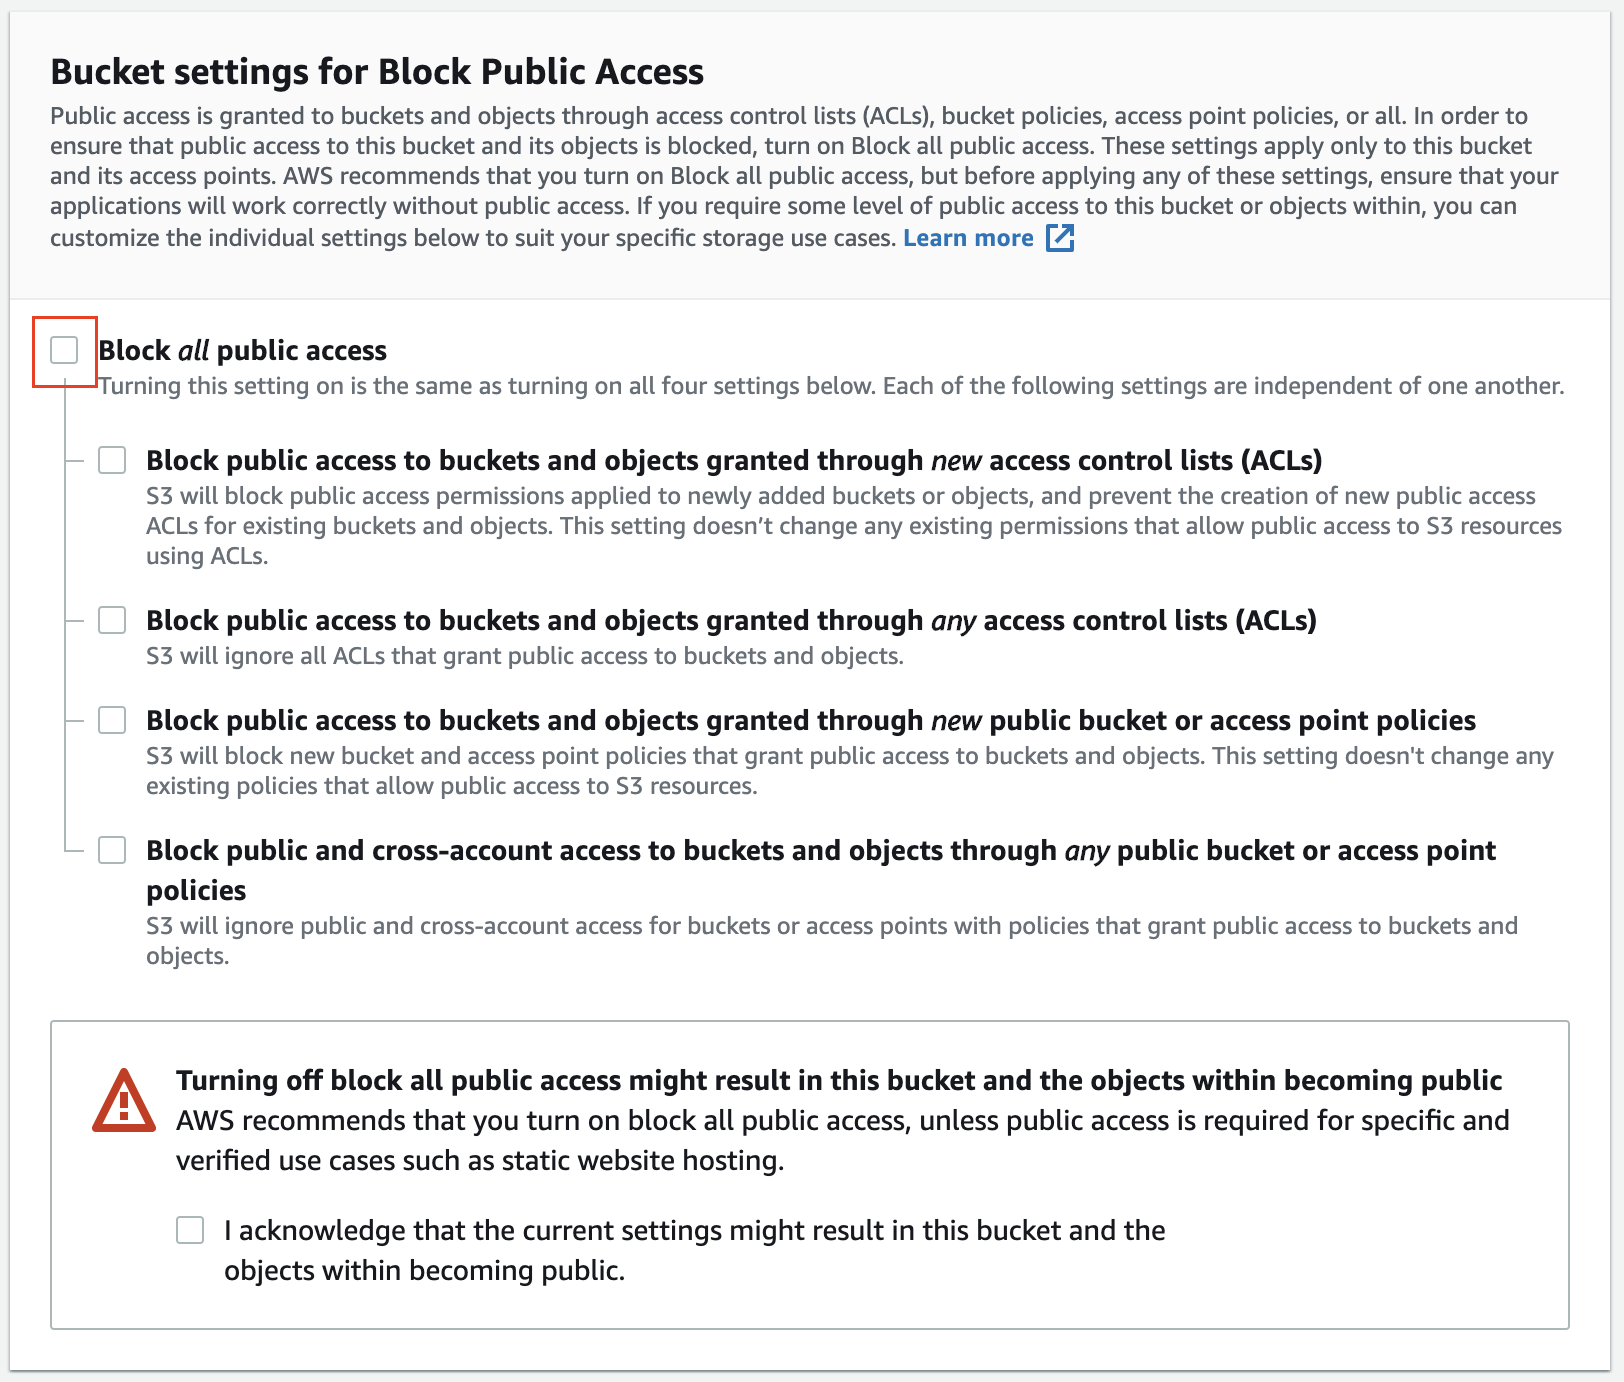
Make the bucket publicly accessible
Step 1. Create a Lambda Function
- From the AWS Management Console page, select the Lambda service.
- Use the Create function wizard, and select the Author from scratch option.
- Use the following basic information to create a function:
| Field | Value |
|---|---|
| Function name | Your choice |
| Runtime | Node.js 12.x |
| Permissions | Use default |
By default, Lambda will create an execution role with permissions to upload logs to Amazon CloudWatch Logs.
Step 2: Add a Trigger
Next, the wizard will automatically display the details of the newly created function. Add a trigger under the Designer section .
- Click Add Trigger
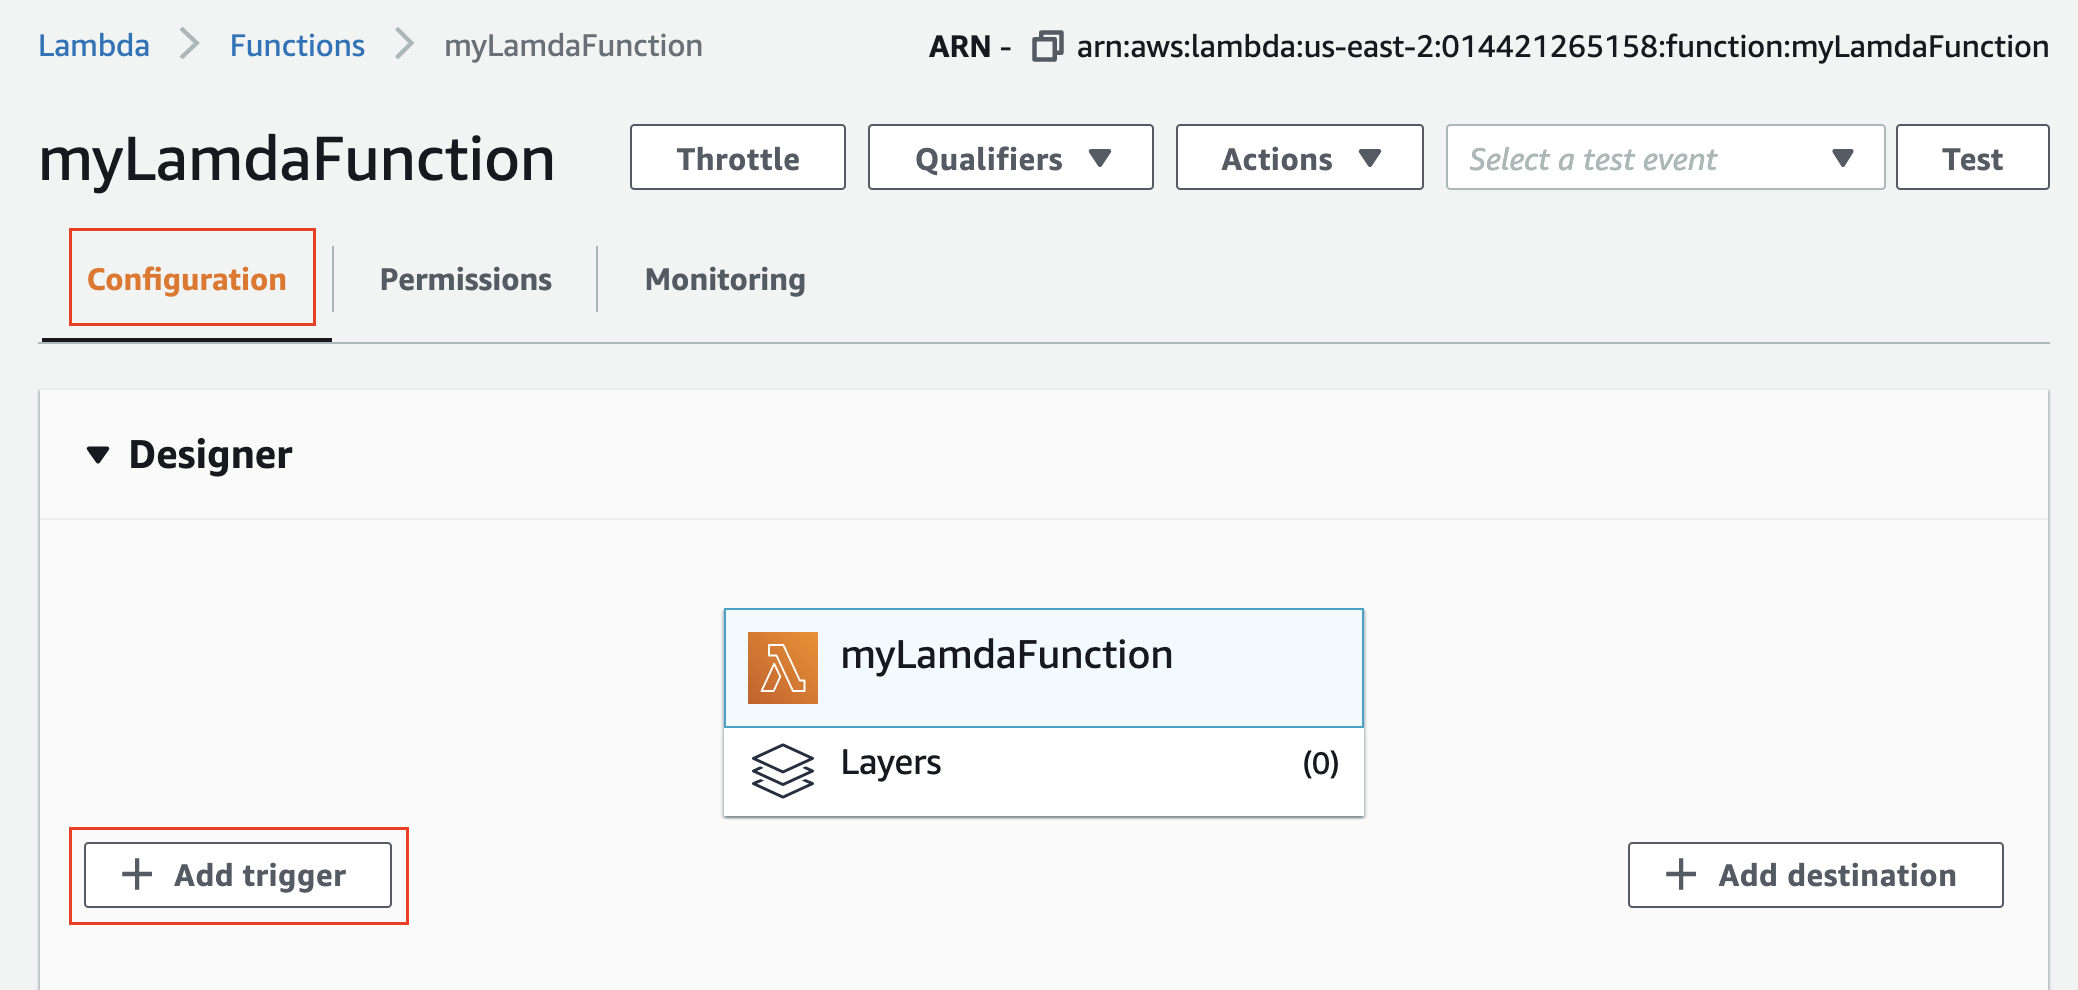
The Designer section
- On the Add Trigger screen, select “S3” as the trigger
- Select the S3 bucket name for the Bucket
- For Event Type, select “All object create events”.
This means that anytime a file is created (or uploaded) to the selected S3 bucket, the lambda function will be triggered .
- Acknowledge the Recursive invocation message
- Click the Add button . Congratulations, you’ve added a trigger!
In the Designer section, click on the name of the Lambda to have the Function Code section reappear
Step 3. Configure Test event
Next, the wizard will automatically display the details of the newly created function.
- Click on the Test button on the upper right-hand corner, to configure test event(s).
- Ensure the Event template is
Hello World. - For the Event name enter
TestEvent. - Update the JSON to the statement below, replacing the string value with your name.
{
"key1": "Place your name here"
}
Step 4. Modify a Lambda Function
- Go to the Function code section, where you can view the following default JS code:
exports.handler = async (event) => { // TODO implement const response = { statusCode: 200, body: JSON.stringify('Hello from Lambda!'), }; return response; }; - Replace the code on Line 5 with the statement below, and save your code:
body: JSON.stringify('Hello ' + event.key1 + ' from Lambda!'),
- Deploy your saved function by clicking on the Deploy button at the top-right of the current section.
- Edit the Basic Settings section, and save the following values:
| Field | Value |
|---|---|
| Description | Udacity Function |
| Timeout | 10 minutes |
- Make sure the Execution role filed uses an existing role.
Step 5. Test a Lambda Function
- Click the Test button in the upper right-hand corner again to test your function.
- The output will be displayed in the
Execution resultssection at the top. Expand the Details to review the output.
Congratulations on writing your first Lambda function!
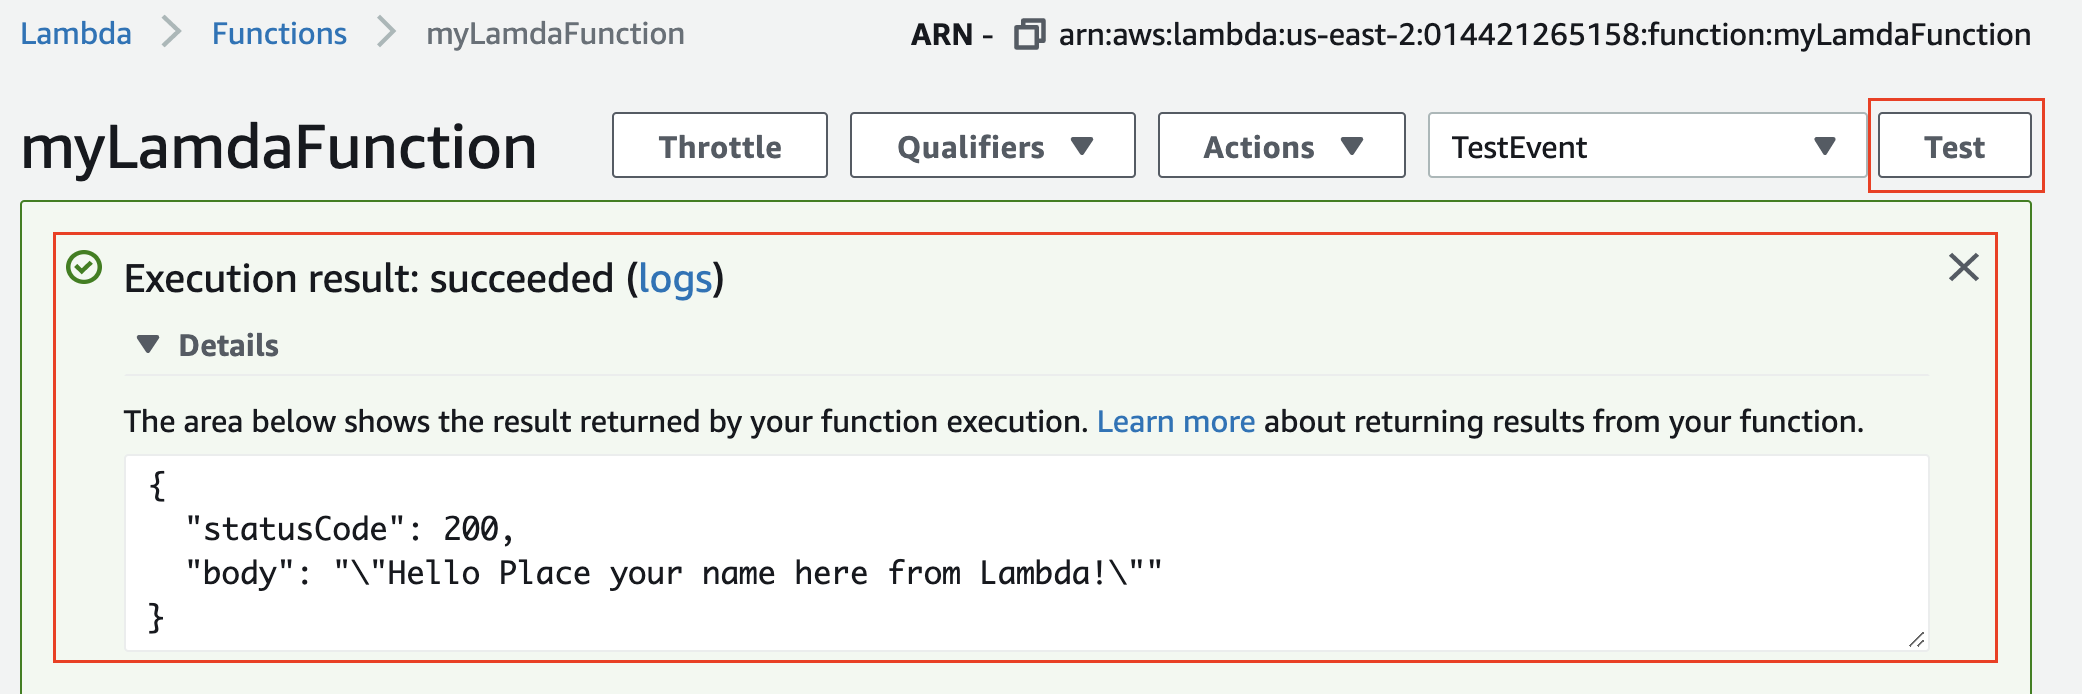
Test output
Step 6. Add files to the bucket
- From the S3 dashboard, click on the name of the bucket you have created in the first step above.
Click on the bucket name to view its content
- Upload a few files to the bucket, from your local computer.

Start the Upload wizard
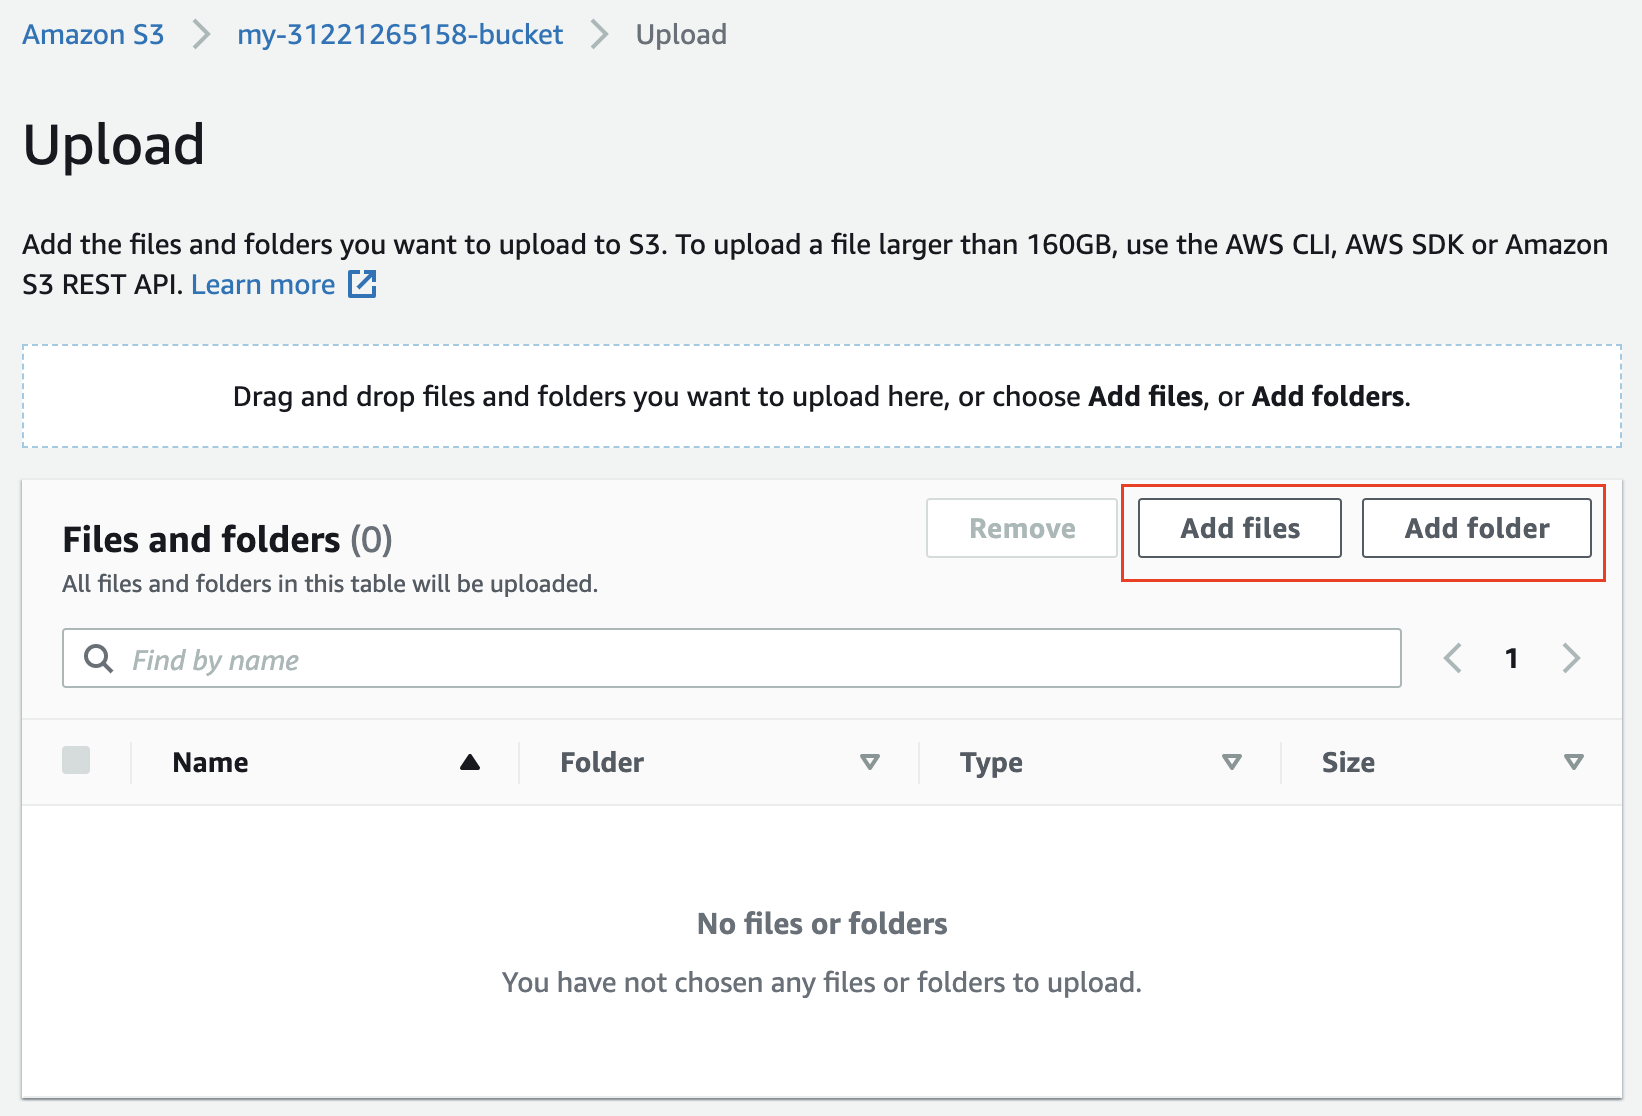
Add multiple files and folders, and finally, click on the Upload button below
Step 7. Check if the Lambda function is triggered
- Go back to the Lambda console, and select your function to view its details.
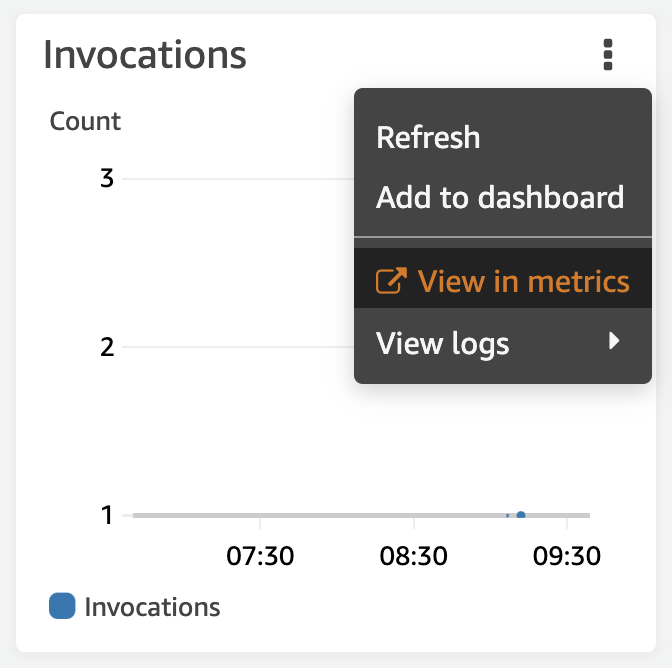
- Click on the Monitoring tab to view the metrics that show the number of times the Lambda function is triggered as a response to file(s) upload in the S3 bucket.
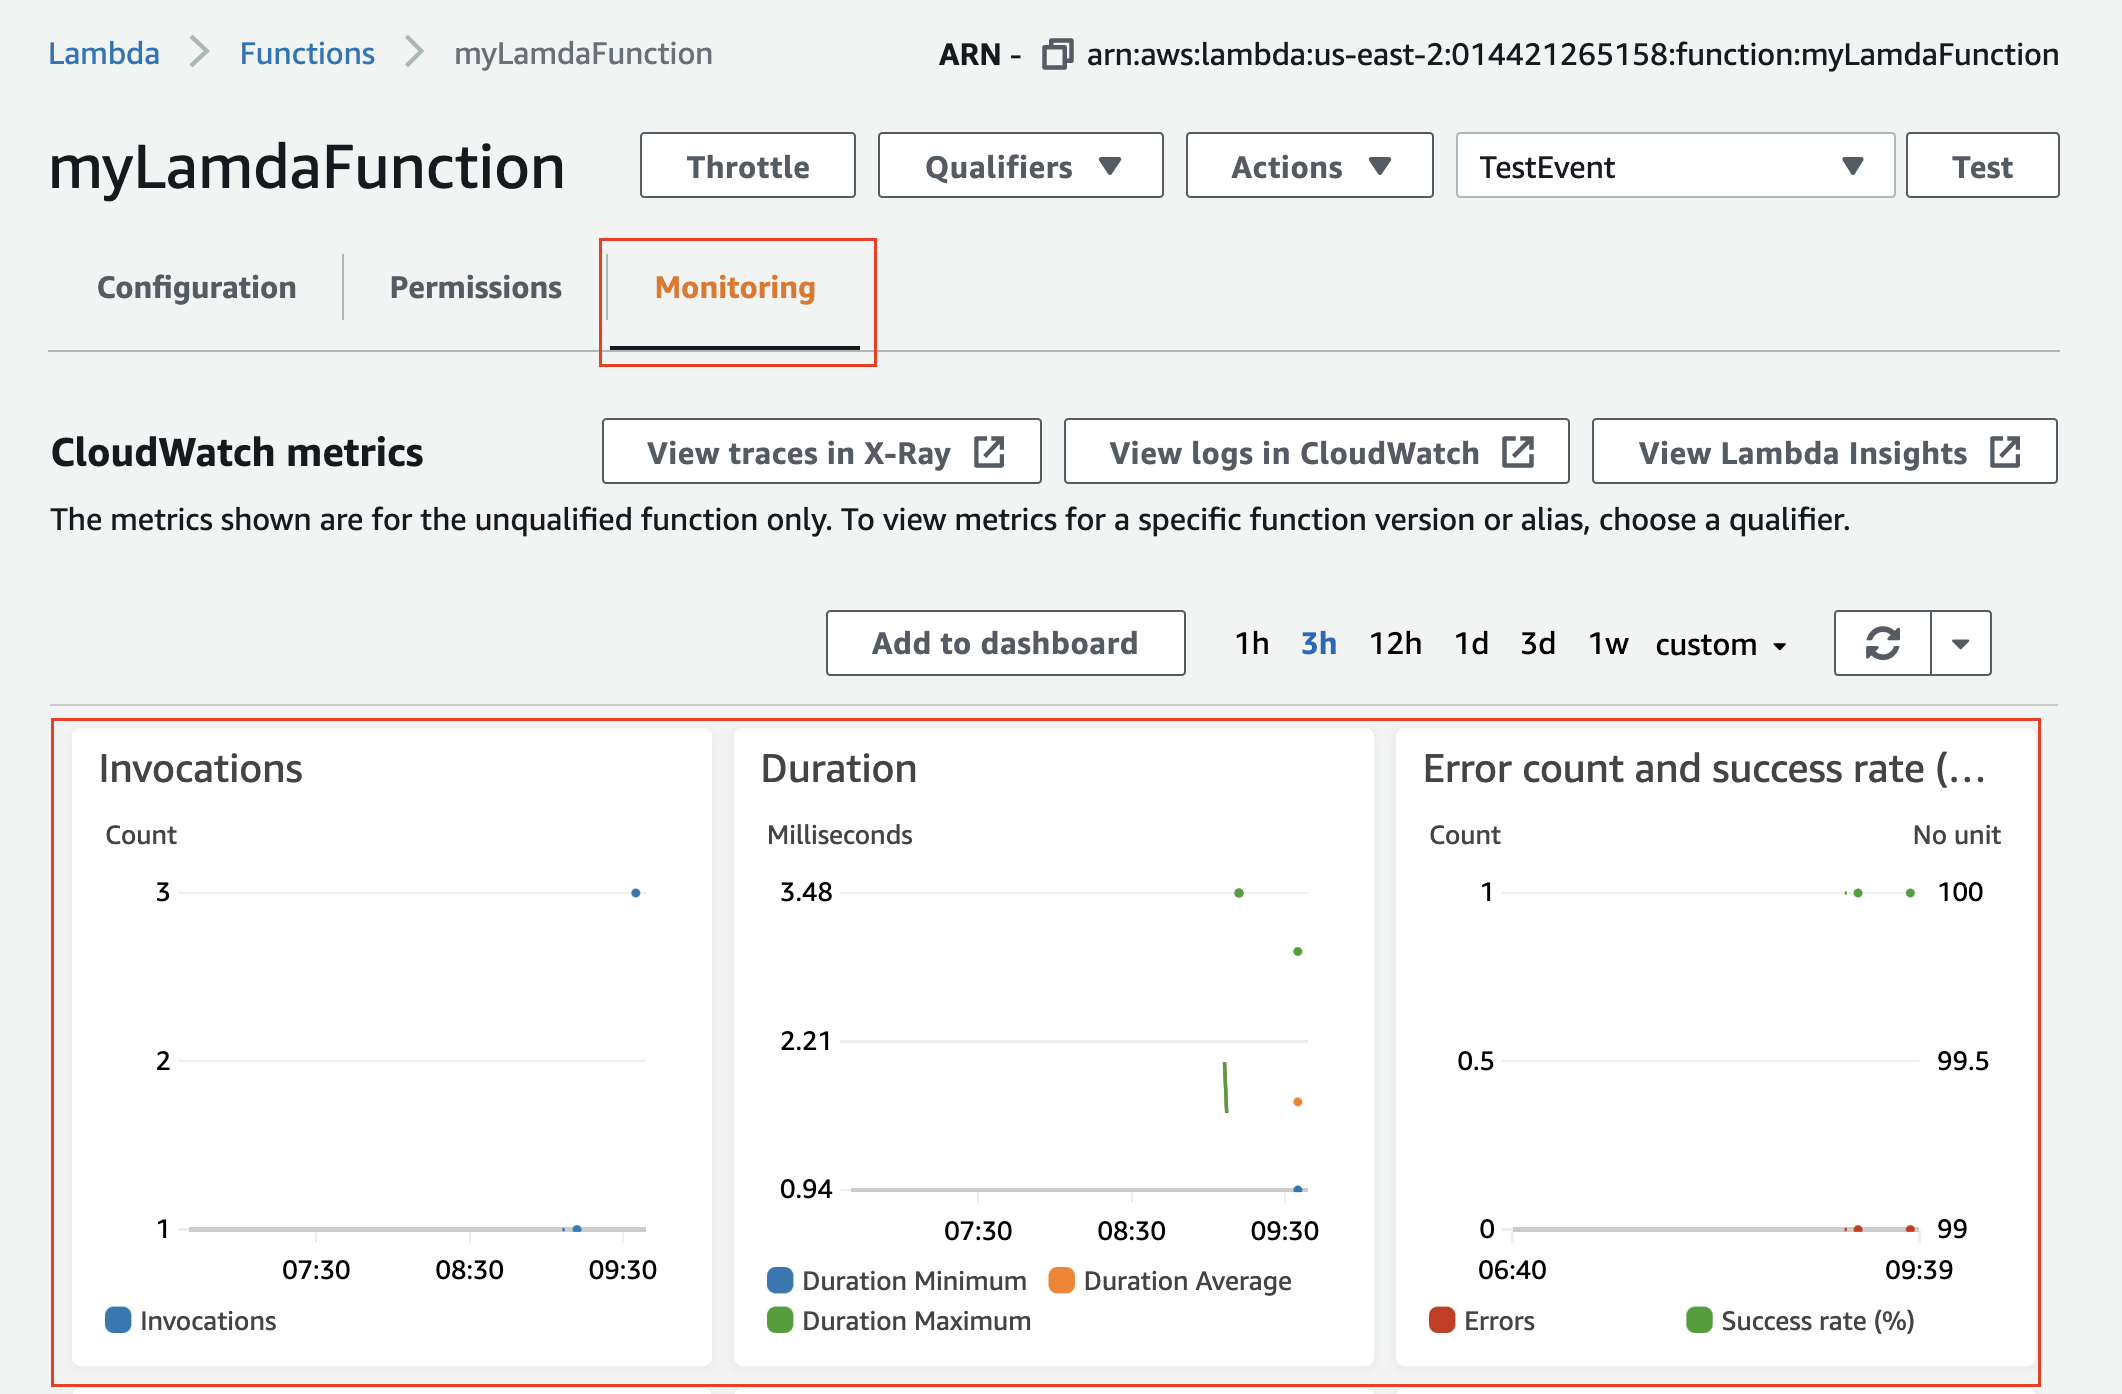
View the Monitoring tab in the Lambda console
- You can view the detailed Invocations chart in the CloudWatch console.
View the metrics in the CloudWatch console
- The detailed graph in the CloudWatch console shows that the Lambda function was triggered thrice. See the snapshot below.
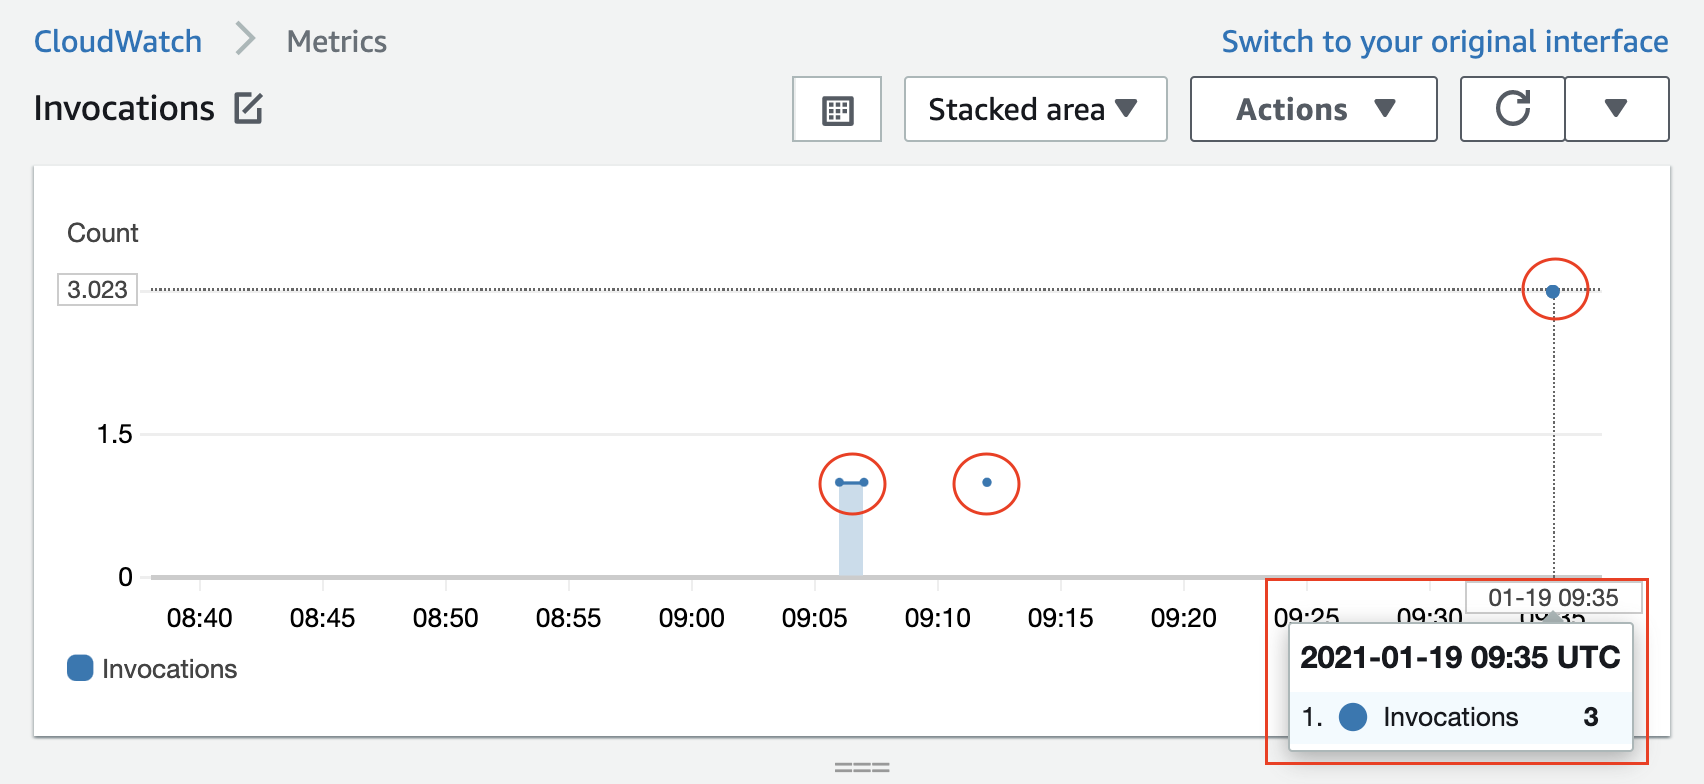
CloudWatch metrics showing the number of invocations of the Lambda function. Recall that anytime a file is created (or uploaded) to the selected S3 bucket, the lambda will be triggered .
Step 8. Delete resources
- Do not forget to delete the Lambda function, and the S3 bucket after the exercise is over.
- To delete the Lambda function, go back to the Lambda console, select the checkbox against the function name, and choose the delete action.
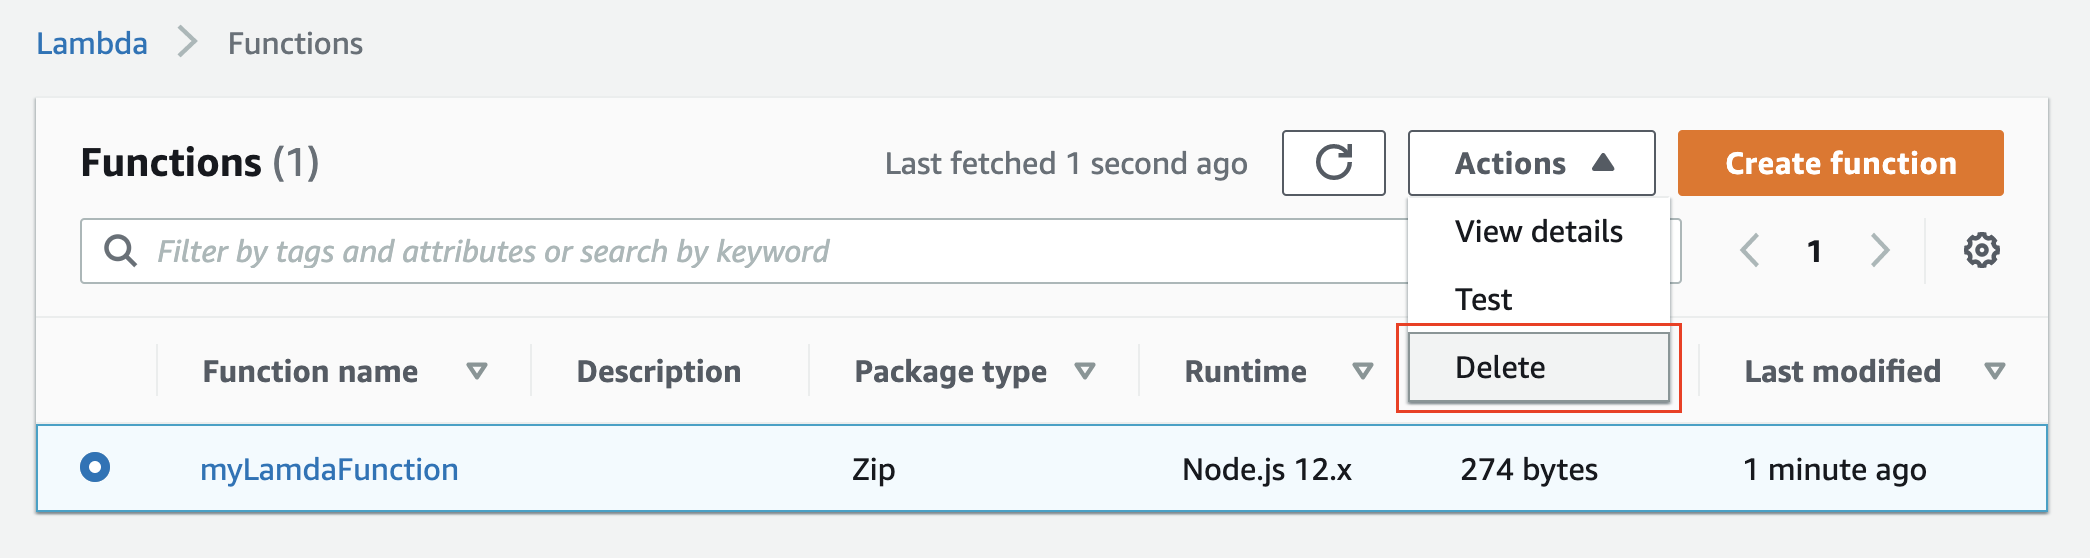
Delete a Lambda function
- To delete the S3 bucket, go back to the S3 console, select the bucket checkbox against the bucket name, and empty and then delete the bucket.
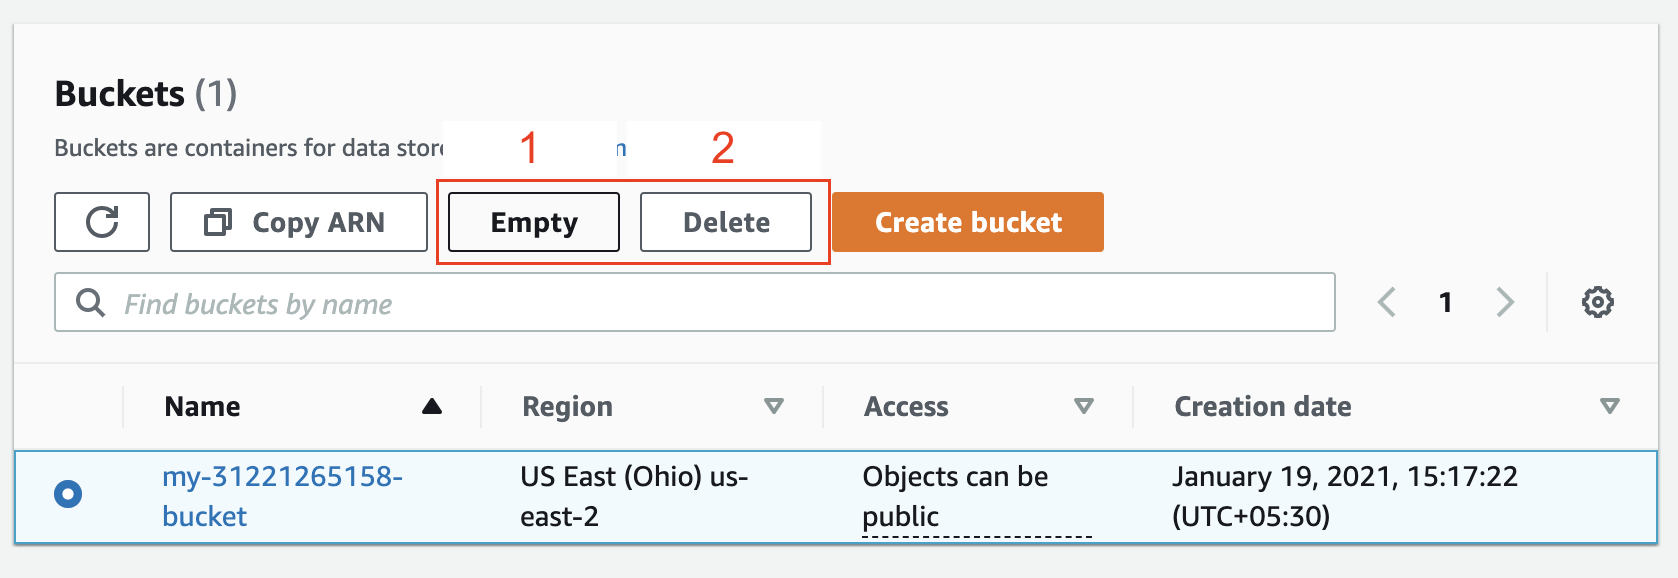
Once the exercise is over, empty and delete the bucket

 浙公网安备 33010602011771号