
[AWS] Build an App with AWS CDK
Install:
npm i -g aws-cdk
Init a project:
cdk init sample-app --language=typescript
To verify it works:
npm run build
Should have no error.
Developement:
npm run watch
To watch typescript files changes
See a preview of what you will be deploying:
cdk diff # similar to git diff
Deploy:
cdk deploy
CloudFormation Stack:
Cloud Development Kit is built on top of CloudFormation which is an AWS service that allows you to describe a stack in AWS using a static file (either YAML or JSON).
In essence - it's going to convert our code written in TypeScript, to JavaScript, which will be then converted to CloudFormation and CloudFormation will be used to deploy our infrastructure.
Sounds complicated, right? Luckily CDK abstracts a lot of things away from us, so we get to focus on solving our problems instead of writing YAML by hand.
Create a lambda function:
Install:
npm i --save @aws-cdk/asw-lambda @types/aws-lambda
in root folder, create a new folder 'lambda', and create a hello.ts file:
// we are going to call this function via APIGatewayEvent which is used for http requests
exports.handler = async function (event: AWSLambda.APIGatewayEvent) {
  //  this is a neat trick to prettify the console log
  console.log("request:", JSON.stringify(event, null, 2));

  // this is what calling this lambda function will return
  return {
    statusCode: 200,
    headers: { "Content-Type": "text/plain" },
    body: `Hello, egghead friends!`,
  };
};
Then in the main application file:
import * as cdk from "@aws-cdk/core";
import * as lambda from "@aws-cdk/aws-lambda";
export class CdkDemoStack extends cdk.Stack {
  constructor(scope: cdk.App, id: string, props?: cdk.StackProps) {
    super(scope, id, props);
  }

  helloLambda = new lambda.Function(this, "HelloLambdaKey", {
    // find code from lambda folder
    code: lambda.Code.fromAsset("lambda"),
    // hello.ts file: export handler function
    // therefore 'hello.handler'
    handler: "hello.handler",
    runtime: lambda.Runtime.NODEJS_12_X,
  });
}
Let's go to the AWS management console, search for Cloudformation, click on Stacks, and checkout what we've deployed.
Under the Resources we can see:
- AWS::IAM::Role
- AWS::Lambda::Function
- AWS::CDK::Metadata
Click on the lambda function id to explore it. You'll be able to use the entire code, which starts with use strict and finishes with the sourcemap (because this was code was transpiled from typescript).
Further down the page, you'll see Tags associated with this function (those were added automatically).
We currently don't have any Triggers so click on Test and Configure test event to test it manually. Choose Api Gateway AWS Proxy. Name the test then click Create.
Once you click Test again the lambda function will be called and you should see the console.log with "Hello, egghead friends!" (or your own text).
API Gateway:
Serverless technologies like AWS Lambda allow us to build our applications out of small, independent functions that can be called based on events such as an API call.
By default, it's not possible to call a lambda function from the Internet - it's safely stored within AWS cloud, following the principle of least privilege.
In order to create a REST API to call a lambda function we need to use API Gateway. Luckily, with AWS CDK, we can create a LambdaRestApi in 3 lines of code and this is exactly what we're going to learn in this quick lesson!
Run:
npm install --save @aws-cdk/aws-apigateway
Then import it to the stack file:
import * as apiGateway from "@aws-cdk/aws-apigateway";
Now we will use apiGateway to create a REST API for our application.
import * as cdk from "@aws-cdk/core";
import * as lambda from "@aws-cdk/aws-lambda";
import * as apiGateway from "@aws-cdk/aws-apigateway";

export class TodoAppStack extends cdk.Stack {
    constructor(scope: cdk.App, id: string, props?: cdk.StackProps) {
        super(scope, id, props);

        const helloLambda = new lambda.Function(this, "HelloLambda", {
            code: lambda.Code.fromAsset("lambda"),
            handler: "hello.handler",
            runtime: lambda.Runtime.NODEJS_12_X,
            memorySize: 256,
            timeout: cdk.Duration.seconds(10)
        });

        new apiGateway.LambdaRestApi(this, "Endpoint", {
            handler: helloLambda
        });
    }
}
//lambda/hello.ts

exports.handler = async function (event: AWSLambda.APIGatewayEvent) {
    console.log("event: ", JSON.stringify(event, null, 2));

    return {
        statusCode: 200,
        headers: { "Content-Type": "text/plain" },
        body: `Hello, egghead friends! You've hit ${event.path}` // url
    };
};
Once you've deployed succesfully, the terminal will output a URL. Click on it to see your lambda function live on the internet.
You can also check your newly created resourced in the aws console. If you click on your lambda function you'll also see that this function now has a trigger (API Gateway) associated with it.
Environment variable:
Environment variables are really useful in programming - they allow us to avoid hardcoding secrets (such as API keys) in our code with added bonus of using different values depending on the environment (hence the name!).
In this quick lesson we're going to learn how to pass environment variables to an AWS Lambda function deployed with Cloud Development Kit (in a single line of code!)
const helloLambda = new lambda.Function(this, "HelloLambda", {
    environment: { isProduction: "absolutely not" }
});
S3:
Install:
npm install --save @aws-cdk/aws-s3
import * as s3 from "@aws-cdk/aws-s3";

const logoBucket = new s3.Bucket(this, "LogoBucket", {
      publicReadAccess: true // make it public accessable
  });
Trigger a lambda function on file upload:
npm install --save @aws-cdk/aws-s3-notifications
import * as s3Notifications from @aws-cdk/aws-s3-notifications;

// attaching a notification to our logo bocket
logoBucket.addEventNotification(
      // everytime a new file is added to our bucket
      s3.EventType.OBJECT_CREATED,
      // execute our lambda function
      new s3Notifications.LambdaDestination(helloLambda)
  );
In the aws console, go to Services and search for s3. Upload a file to the bucket then check if the lambda function was triggered by going back to Services and looking for lambda.
👍 You can see your recently accessed aws dashboards in the History sidebar on the left.
In your lambda dashboard notice how a new function was added (for me it was: TodoAppStack-BucketNotificationsHandler050a0587b75-1BQ2LOUD7KPXI).
Click on the HelloLambda function, then click Monitoring and View logs in CloudWatch.
Then click on the latest log and expand the event log (it will mention things like eventVersion, eventSource etc) and look for the information about your recently uploaded image.
object": {
            "key": "Screenshot+2020-05-13+at+07.24.34.png",
            "size": 19145,
            "eTag": "40502d42d31dab5fe8581bd3d7ce0202",
            "sequencer": "005EBCD5882BF314F4"
        }
Upload a file to S3 automaticlly:
npm install --save @aws-cdk/aws-s3-deployment
import * as s3Deployment from "@aws-cdk/aws-s3-deployment";

new s3Deployment.BucketDeployment(this, "DeployLogo", {
        destinationBucket: logoBucket,
        // an array of sources
        sources: [s3Deployment.Source.asset("./assets")]
    });
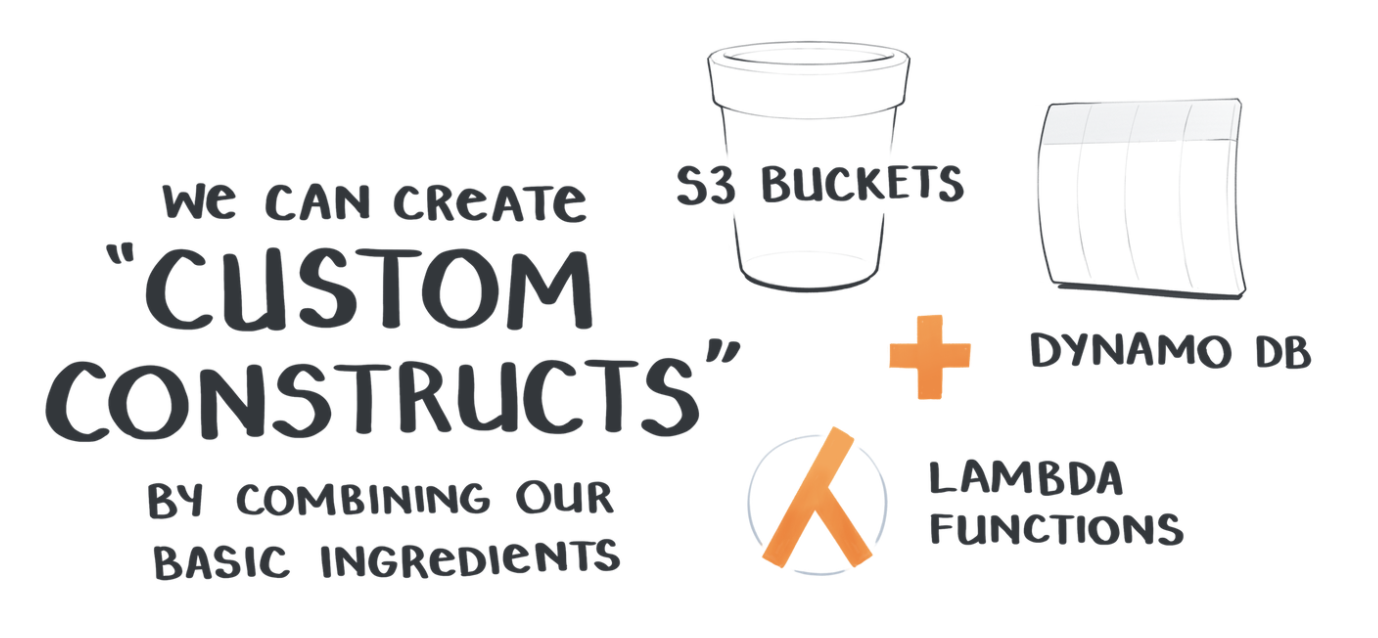
Create a custom AWS CDK construct:
Now that we know a lot about shipping cloud resources with CDK it's time to start creating a serverless backend for our todo application.
We could add the database and new lambda functions to our main stack but after a while it might get difficult to maintain.
Instead, in this lesson we're going learn how to create our very own custom CDK construct
Learn more about CDK constructs here
Create a new file next to our stack file (in the lib directory), called todo-backend.ts:
Import aws-cdk/core then, let's type our custom construct (which is going to look a lot like the logoBucket code from our stack file).
export class TodoBackend extends cdk.Construct {
  // so we can export it later
    public readonly handler: lambda.Function;

    constructor(scope: cdk.Construct, id: string, props?: cdk.StackProps) {
        super(scope, id);
    }
}
Then import the construct into our main stack app and create an instance of it:
import { TodoBackend } from "./todo-backend";

const todoBackend = new TodoBackend(this, "TodoBackend");
Add DynamoDB:
Install:
npm install --save @aws-cdk/aws-dynamodb
Import dynamodb to our backend then create a new dynamo db table.
export class TodoBackend extends cdk.Construct {
  // so we can export it later
    public readonly handler: lambda.Function;

    constructor(scope: cdk.Construct, id: string, props?: cdk.StackProps) {
        super(scope, id);
    }

    // save it as a const since we'll use it in a little bit
      const todosTable = new dynamodb.Table(this, "TodoTable", {
        //a unique key
            partitionKey: { name: "id", type: dynamodb.AttributeType.STRING }
        });

}
Get all items from DynamoDB table:
Create todoHandler.ts (we can also delete the other hello lambda function since we just used it for testing).
import AWS = require("aws-sdk");
// the table name that we get from an env variable
const tableName = process.env.TABLE_NAME || "";
// for interacting with dynamoDB from JavaScript / nodeJS
const dynamo = new AWS.DynamoDB.DocumentClient();

const createResponse = (
    body: string | AWS.DynamoDB.DocumentClient.ItemList,
    statusCode = 200
) => {
    return {
        statusCode,
        body: JSON.stringify(body, null, 2)
    };
};
// DynamoDB Scan operation scans and returns all of the items in the db
const getAllTodos = async () => {
    const scanResult = await dynamo
        .scan({
            TableName: tableName
        })
        .promise();

    return scanResult;
};
// async function that respons to apiGateway events
exports.handler = async function(event: AWSLambda.APIGatewayEvent) {
    try {
        const { httpMethod, body: requestBody } = event;
        // GET request
        if (httpMethod === "GET") {
            const response = await getAllTodos();

            return createResponse(response.Items || []);
        }
        return createResponse(
            `We only accept GET requests for now, not ${httpMethod}`,
            500
        );
    } catch (error) {
        console.log(error);
        return createResponse(error, 500);
    }
};
We'll have to make some changes to our todo-backend file. Let's make a new lambda function:
import * as cdk from "@aws-cdk/core";
import * as dynamodb from "@aws-cdk/aws-dynamodb";
import * as lambda from "@aws-cdk/aws-lambda";

export class TodoBackend extends cdk.Construct {
    public readonly handler: lambda.Function;

    constructor(scope: cdk.Construct, id: string, props?: cdk.StackProps) {
        super(scope, id);

        const todosTable = new dynamodb.Table(this, "TodoDatabase", {
            partitionKey: { name: "id", type: dynamodb.AttributeType.STRING }
        });

        this.handler = new lambda.Function(this, "TodoHandler", {
            code: lambda.Code.fromAsset("lambda"),
            handler: "todoHandler.handler",
            runtime: lambda.Runtime.NODEJS_12_X,
            environment: {
                TABLE_NAME: todosTable.tableName
            }
        });
       // add scan right for the lambda function
       todosTable.grantReadWriteData(this.handler);
    }
}
And create and delete requests:
/// <reference types="aws-sdk" />
import AWS = require("aws-sdk");

const tableName = process.env.TABLE_NAME || "";
const dynamo = new AWS.DynamoDB.DocumentClient();

const createResponse = (
    body: string | AWS.DynamoDB.DocumentClient.ItemList,
    statusCode = 200
) => {
    return {
        statusCode,
        body: JSON.stringify(body, null, 2)
    };
};

const getAllTodos = async () => {
    const scanResult = await dynamo
        .scan({
            TableName: tableName
        })
        .promise();

    return scanResult;
};

const addTodoItem = async (data: { todo: string; id: string }) => {
    const { id, todo } = data;
    if (todo && todo !== "") {
        await dynamo
            .put({
                TableName: tableName,
                Item: {
                    id: "totally_random_id",
                    todo
                }
            })
            .promise();
    }

    return todo;
};

const deleteTodoItem = async (data: { id: string }) => {
    const { id } = data;

    if (id && id !== "") {
        await dynamo
            .delete({
                TableName: tableName,
                Key: {
                    id
                }
            })
            .promise();
    }

    return id;
};

exports.handler = async function (event: AWSLambda.APIGatewayEvent) {
    try {
        const { httpMethod, body: requestBody } = event;

        if (httpMethod === "GET") {
            const response = await getAllTodos();

            return createResponse(response.Items || []);
        }

        if (!requestBody) {
            return createResponse("Missing request body", 500);
        }

        const data = JSON.parse(requestBody);

        if (httpMethod === "POST") {
            const todo = await addTodoItem(data);
            return todo
                ? createResponse(`${todo} added to the database`)
                : createResponse("Todo is missing", 500);
        }

        if (httpMethod === "DELETE") {
            const id = await deleteTodoItem(data);
            return id
                ? createResponse(
                      `Todo item with an id of ${id} deleted from the database`
                  )
                : createResponse("ID is missing", 500);
        }

        return createResponse(
            `We only accept GET, POST, OPTIONS and DELETE, not ${httpMethod}`,
            500
        );
    } catch (error) {
        console.log(error);
        return createResponse(error, 500);
    }
};
Connect React app to a serverless backend deployed with CDK and fix CORS issues
Our serverless backend and infrastructure (that we both created and deployed ourselves with CDK!) is ready so we can connect it to our React app.
In this quick lesson we're going to learn how to connect the React app from the source code of this course to our API as well as how to add appropriate CORS headers to our API response.
In todoHandler.ts:
// update

const createResponse = (
    body: string | AWS.DynamoDB.DocumentClient.ItemList,
    statusCode = 200
) => {
    return {
        statusCode,
        headers: {
            "Access-Control-Allow-Origin": "*",
            "Access-Control-Allow-Methods": "OPTIONS,GET,POST,DELETE"
        },
        body: JSON.stringify(body, null, 2)
    };
};
We need to support OPTIONS request inside handler as well:
exports.handler = async function (event: AWSLambda.APIGatewayEvent) {
    try {
        const { httpMethod, body: requestBody } = event;

        if (httpMethod === "OPTIONS") {
            return createResponse("OK");
        }

        if (httpMethod === "GET") {
            const response = await getAllTodos();

            return createResponse(response.Items || []);
        }

        if (!requestBody) {
            return createResponse("Missing request body", 500);
        }

        const data = JSON.parse(requestBody);

        if (httpMethod === "POST") {
            const todo = await addTodoItem(data);
            return todo
                ? createResponse(`${todo} added to the database`)
                : createResponse("Todo is missing", 500);
        }

        if (httpMethod === "DELETE") {
            const id = await deleteTodoItem(data);
            return id
                ? createResponse(
                      `Todo item with an id of ${id} deleted from the database`
                  )
                : createResponse("ID is missing", 500);
        }

        return createResponse(
            `We only accept GET, POST, OPTIONS and DELETE, not ${httpMethod}`,
            500
        );
    } catch (error) {
        console.log(error);
        return createResponse(error, 500);
    }
};
Add a custom CloudFormation stack output with CDK
Once we deploy static assets to an S3 bucket it's good to know, well, where are they exactly - saying that "they're in the cloud" is not a good answer.
We can find the S3 bucket and other resources in AWS Console manually but there's a better solution - creating custom CloudFormation stack outputs that are displayed in the terminal once we deploy.
In this quick lesson we're going to learn how to create a custom CloudFormation stack output in order to output the path to an egghead logo in order to add it to our app.
Let's fix the missing logo at the bottom of our todo application. We need to tell our frontend application to source it from our s3 logoBucket.
Instead, searching for the logo url in our aws console (not a true hacker move!, we can output the url in our terminal with each deployment.
To do that, let's modify the output in our stack file by adding this:
In stack:
  new cdk.CfnOutput(this, "LogoPath", {
    // add the name of your bucket and your file (in the assets folder)
      value: `https://${logoBucket.bucketDomainName}/testFile.png`
  });
Once you deploy, you should see the logo path in the outputs section.
Deploy a site with HTTPS support behind a CDN with CDK
Deploying a static site to S3 works really well unless we consider the fact that you cannot add HTTPS support to the site directly in S3. In order to do that - a CloudFront distribution is required.
While it is possible to setup CloudFront with CDK on our own, we don't always have to do anything on our own.
Instead, we can use constructs that were created by the community.
In this quick lesson we're going to learn how to use CDK-SPA-Deploy construct in order to deploy our app to S3 (using createBasicSite construct) and deploy it with HTTPS support and behind a CloudFront CDN distribution.
Install:
npm install --save cdk-spa-deploy
Import it to the stack file:
import { SPADeploy } from "cdk-spa-deploy";
Add:
new SPADeploy(this, "WebsiteDeployment").createSiteWithCloudfront({
    indexDoc: "index.html",
    websiteFolder: "../frontend/build"
});
Full stack code:
import * as cdk from "@aws-cdk/core";
import * as apiGateway from "@aws-cdk/aws-apigateway";
import * as s3 from "@aws-cdk/aws-s3";
import * as s3Deployment from "@aws-cdk/aws-s3-deployment";
import { TodoDatabase } from "./todo-database";
import { SPADeploy } from "cdk-spa-deploy";

export class TodoAppStack extends cdk.Stack {
    constructor(scope: cdk.App, id: string, props?: cdk.StackProps) {
        super(scope, id, props);

        const todoDatabase = new TodoDatabase(this, "TodoDatabase");

        new apiGateway.LambdaRestApi(this, "Endpoint", {
            handler: todoDatabase.handler
        });

        const logoBucket = new s3.Bucket(this, "LogoBucket", {
            publicReadAccess: true
        });

        new s3Deployment.BucketDeployment(this, "DeployLogo", {
            destinationBucket: logoBucket,
            sources: [s3Deployment.Source.asset("./assets")]
        });

        new SPADeploy(this, "WebsiteDeployment").createSiteWithCloudfront({
        indexDoc: "index.html",
        websiteFolder: "../frontend/build"
     });
} }

 浙公网安备 33010602011771号