JavaScript的DOM操作(二)
一:window.history对象
历史记录,通过历史记录可以操作页面前进或者后退
window.history.back();后退
window.history.forward();前进
window.history.go(n); n是正数代表前进n个页面,n是负数代表后退n个页面。
二:window.location对象
location地址栏
var s = window.location.href;获取当前页面的地址
window.location.href="http://www.baidu.com";修改页面地址,会跳转页面
window.location.hostname: 主机名,域名,网站名,可用变量接收
window.location.pathname: 路径名,可用变量接收
三:window.status对象
status状态栏,可以给状态栏添加要显示的文字
window.status="要在状态栏显示的内容";设置状态栏文字
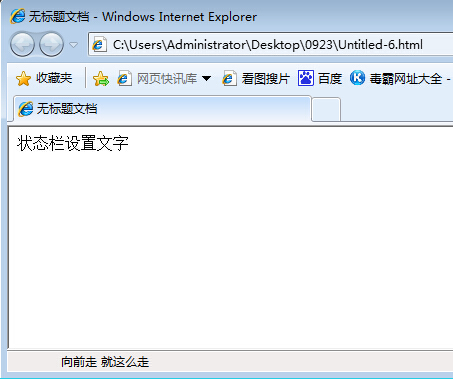
例子:在状态栏显示:“向前走 就这么走”,并且让这写文字由左向右移动:
function s()
{
    window.status = "向前走 就这么走";
    window.setTimeout("run()",100);
}
function run()
{
    if(window.status.length>=60)
    {
        window.status = "向前走 就这么走";
    }
    else
    {
        window.status = " "+window.status;
    }
    window.setTimeout("run()",100);

}
效果如下图:

四:window.document对象
1. 找到元素
docunment.getElementById("id");根据id找,最多找一个
var a =docunment.getElementById("id");
docunment.getElementByName("name");根据name找,找出来的是数组
docunment.getElementByTagName("name");根据标签名找,找出来的是数组
docunment.getElementByClassName("name") 根据classname找,找出来的是数组
2.操作内容
(1)非表单元素:
获取内容:alert(a.innerHTML);标签里的html代码和文字都获取了
如:body中有这么一个div:
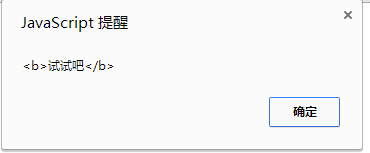
<div id="me"><b>试试吧</b></div>
在script中用innerHTML获取div中的内容:
var a= document.getElementById("me");
alert(a.innerHTML);
结果如下图:

alert(a.innerText);只取里面的文字
alert(a.outHTML);包括标签本身的内容(简单了解)
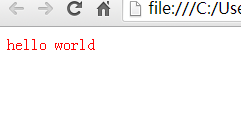
设置内容:a.innerHTML = "<font color=red >hello world </font>";
如果用设置内容代码结果如下,div中的内容被替换了:

a.innerText会将赋的东西原样呈现
清空内容:赋值个空字符串
(2)表单元素:
两种方式获取:
var t = document.f1.t1; form表单ID为f1里面的ID为t1的input
var t = document.getElementById("id"); 直接用ID获取
alert(t.value); 获取input中的value值
alert(t.innerHTML); 获取<textarea> 这里的值 </textarea>
t.value="内容改变";
*****一个小知识点:
<a href="www.baidu.com" onclick ="return flase">转向百度</a> 加了return flase则不会跳转,return true则会跳转
按钮也一样,如果按钮中return flase 则不会进行提交。
*****
例子:输入姓名为空或者是空格的话return一个flase,点提交的时候不提交内容,输入的内容不为空才提交:
前一段是压缩空格:
function   Trim(m){
while((m.length>0)&&(m.charAt(0)==' '))
m   =   m.substring(1, m.length);
while((m.length>0)&&(m.charAt(m.length-1)==' '))
m = m.substring(0, m.length-1);
return m;
}
function checkName()
{
    var a = document.getElementById("t1");
    a.value = Trim(a.value);
    if(a.value.length == 0)
    {
        alert("姓名不能为空");
        return false;
    }
    else
    {
        return true;
    }
}
测试结果如下,没有输入内容或者输入空格时:

输入姓名的时候提交,看地址栏里面已经提交上了名字:

3.操作属性
找到按钮的ID,var a = document.getElementById("id");
a.setAttribute("属性名","属性值"); 设置一个属性,添加或更改都可以:disabled
a.getAttribute("属性名");获取属性的值
a.removeAttribute("属性名");移除一个属性
(1)例子:做一个问题,如果输入的答案正确则弹出正确,错误弹出错误;
这里在text里面写了一个daan属性,里面存了答案的值,点击检查答案的时候cheak输入的内容和答案是否一样:
body中的代码:
<form>中华民国成立于哪一年?
<input type="text" daan="1912年" value="" id="t1" name="t1" />
<input type="button" onclick="check()" id="t2" name="t2" value="检查答案" />
</form>
Script中的代码:
function check()
{
    var a=document.getElementById("t1");
    var a1=a.value;
    var a2=a.getAttribute("daan");
    if(a1==a2)
    {
        alert("恭喜你答对了!");
    }
    else
    {
        alert("笨蛋!");
    }
}
正确时的结果如下:

(2)例子:同意按钮,倒计时10秒,同意按钮变为可提交的。
这里用了操作属性:disable,来改变按钮的状态
body中的代码:
<form>
<input type="submit" id="b1" name="b1" value="同意(9)" disabled="disabled" />
</form>
Script中的代码:
var n=10;
var a= document.getElementById("b1");
function bian()
{
    n--;
    if(n==0)
    {
        a.removeAttribute("disabled");
        a.value="同意";
        return;
    }
    else
    {
        a.value= "同意("+n+")";
        window.setTimeout("bian()",1000);
    }
}
window.setTimeout("bian()",1000);
结果如下图:

4.操作样式
找到ID,var a = document.getElementById("id");
a.style.样式="" ; 操作此ID样式的属性
样式为CSS中的样式,所有的样式都可以用代码进行操作
document.body.stye.backgroundColor="颜色"; 整个窗口的背景色
5.操作样式的class:
a.className="样式表中的classname" 操作一批样式
(1)例子:换窗口的背图片,每隔三秒换一次,循环不止;点上一张、下一张可以切换,这时停止了自动转换。
body的代码:
<body style=" background-image:url(image/1.jpg);">
<iframe id="ff" src="preload.html" width="0" height="0" frameborder="0"></iframe>
<div class="pages" id="p1" onclick="dodo(-1)">前一张</div>
<div class="pages" id="p2" onclick="dodo(1)">后一张</div>
</body>
样式表:
<style type="text/css">
.pages
{
    border:1px solid gray;
    padding:15px 15px 15px 15px;
    position:fixed;
    top:200px;
    text-align:center;
    color:white;
    background-color:#C3C;
    font-weight:bold;

}
#p1
{
    left:10px;
}
#p2
{
    right:10px;
}
</style>
script中的代码,用数组来存储图片的地址,每隔3秒调用一次huan()函数来换成下一张:
var jpg =new Array();
jpg[0]="url(image/1.jpg)";
jpg[1]="url(image/2.jpg)";
jpg[2]="url(image/3.jpg)";
jpg[3]="url(image/4.jpg)";
jpg[4]="url(image/5.jpg)";
jpg[5]="url(image/6.jpg)";
var xb=0;
var n=0;
function huan()
{
    xb++;
    if(xb == jpg.length)
    {
        xb=0;
    }

    document.body.style.backgroundImage=jpg[xb];
    if(n==0)
    {
    var id = window.setTimeout("huan()",3000);
    }


}
function dodo(m)
{
    n=1;
    xb = xb+m;
    if(xb < 0)
    {
        xb = jpg.length-1;
    }
    else if(xb >= jpg.length)
    {
        xb = 0;
    }
    document.body.style.backgroundImage=jpg[xb];
}
window.setTimeout("huan()",3000);
效果图如下:

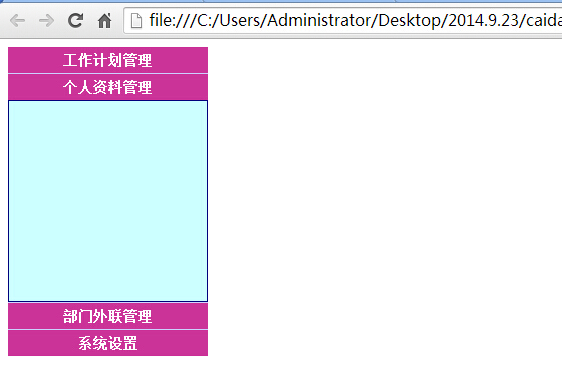
(2)例子:一系列菜单,点击菜单上的一项展开里面的内容,再次点击关闭:
这里是利用了div的display样式,原设置display为none隐藏,点击的时候将display设置为block显示出来,再次点击设置为none隐藏。
body中的代码:点击哪一个将哪一个下面div的ID传到dodo()函数里面进行操作。
<div id="main">
    <div class="topic" onclick="dodo('l1')">工作计划管理</div>
    <div class="list" id="l1"> </div>
    <div class="topic" onclick="dodo('l2')">个人资料管理</div>
    <div class="list" id="l2"></div>
    <div class="topic" onclick="dodo('l3')">部门外联管理</div>
    <div class="list" id="l3"></div>
    <div class="topic" onclick="dodo('l4')">系统设置</div>
    <div class="list" id="l4"></div>
</div>
CSS代码:
<style type="text/css">
#main
{
    width:200px;
    background-color:#CCF;
}
.topic
{
    font-weight:bold;
    text-align:center;
    background-color:#C39;
    color:white;
    font-size:14px;
    padding:5px 0px 5px 0px;
    margin-top:1px;

}
.list
{
    border:1px solid navy;
    height:200px;
    background-color:#CFF;
    display:none;
}
</style>
Script中的代码:
function dodo(listid)
{

    var dd = document.getElementById(listid);
    if(dd.style.display != "block")
    {
        dd.style.display="block";
    }
    else
    {
        dd.style.display="none";
    }

}
效果如下:

如果要设置只能打开一个的话Script中的代码变为如下即可:
function dodo(listid)
{
       var dd = document.getElementById(listid);
    var ll = document.getElementsByClassName("list");
    for(var i=0;i<ll.length;i++)
    {
        ll[i].style.display="none";
    }

    dd.style.display="block";

}


