拦截器与文件上传
拦截器与文件上传
三种上传方案:
1、上传到tomcat服务器(不能及时刷新)
2、上传到指定文件目录,添加服务器与真实目录的映射关系,从而解耦上传文件与tomcat的关系
文件服务器(目前公司用的最常用的方法)
3、在数据库表中建立二进制字段,将图片存储到数据库(处理上百万的数据不方便)
完成图片上传:
写两个方法:1.上传图片2.跳转文件上传页面。
 1     private File file;
 2     private String fileContentType;
 3     private String fileFileName;
 4 /**
 5      * 直接上传图片
 6      * @return
 7      * @throws IOException
 8      */
 9     public String upload() throws IOException {
10         //注意:在Linux下是没有E盘的 linnx下只有一个盘符,那么意味着,当打包到linux服务器的时候需要改动代码
11         //这个时候通常是这么解决的,将targetPath对应目录串,配置到资源文件中,通过Properties类进行动态读取
12         //那么当需要将项目发布到Linux服务器的时候,只需要改变xxx.preperties文件中targetPath=/caoluo/img
13
14         //实际图片存储的位置
15         String targetDir="D:/杂七杂八/上传图片";
16
17         //存到数据库中的地址
18         String severPath="/upload";
19         FileUtils.copyFile(file, new File(targetDir+"/"+fileFileName));
20         //注意: 数据库存放是网络请求地址,而不是本地存放图片地址
21         clz.setPic(severPath+"/"+fileFileName);
22         this.clzDao.edit(clz);
23         return "toList";
24     }
25     /**
26      * 跳转文件上传页面
27      * @return
28      */
29     public String preUpload() {
30         Clazz c=this.clzDao.list(clz, null).get(0);
31         request.setAttribute("clz", c);
32         return "toUpload";
33     }
struts_sy.xml配置
 1 <?xml version="1.0" encoding="UTF-8"?>
 2 <!DOCTYPE struts PUBLIC
 3     "-//Apache Software Foundation//DTD Struts Configuration 2.5//EN"
 4     "http://struts.apache.org/dtds/struts-2.5.dtd">
 5 <struts>
 6     <package name="sy" extends="base" namespace="/sy">
 7         <action name="/clz_*" class="com.web.ClazzAction" method="{1}">
 8            <result name="list">/clzList.jsp</result>
 9            <result name="preSave">/clzEdit.jsp</result>
10            <result name="toList" type="redirectAction">/clz_list</result>
11            <result name="toUpload">/upload.jsp</result>
12         </action>
13     </package>
14 </struts>
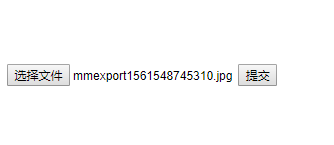
然后写一个上传图片的jsp页面
 1 <body>
 2 <form action="${pageContext.request.contextPath }/sy/clz_upload.action" method="post" enctype="multipart/form-data">
 3         <input type="hidden" name="cid" value="${clz.cid }"> <br>
 4         <input type="hidden" name="cname" value="${clz.cname }"> <br>
 5         <input type="hidden" name="cteacher" value="${clz.cteacher }"> <br>
 6         <!-- 注意:name对应的值决定了 自控制器action属性的命名 -->
 7         <input type="file" name="file">
 8         <input type="submit">
 9     </form>
10 </body>
在server.xml中添加一行代码
<!-- Access log processes all example. Documentation at: /docs/config/valve.html Note: The pattern used is equivalent to using pattern="common" --> <Valve className="org.apache.catalina.valves.AccessLogValve" directory="logs" pattern="%h %l %u %t "%r" %s %b" prefix="localhost_access_log" suffix=".txt"/> <Context path="/T_caoluo/upload" docBase="D:/杂七杂八/上传图片/"/> <Context docBase="T_caoluo" path="/T_caoluo" reloadable="true" source="org.eclipse.jst.jee.server:T_caoluo"/></Host> </Engine> </Service>
首页显示图片:
1 <c:forEach items="${clzList }" var="c"> 2 <tr> 3 <td>${c.cid }</td> 4 <td>${c.cname }</td> 5 <td>${c.cteacher }</td> 6 <td> 7 <img alt="" style="width: 60px;height: 60px" src="${pageContext.request.contextPath }${c.pic }"> 8 </td> 9 <td> 10 <a href="${pageContext.request.contextPath }/sy/clz_preSave.action?cid=${c.cid }">修改</a> 11 <a href="${pageContext.request.contextPath }/sy/clz_del.action?cid=${c.cid }">删除</a> 12 <a href="${pageContext.request.contextPath }/sy/clz_preUpload.action?cid=${c.cid }">上传图片</a> 13 </td> 14 </tr> 15 </c:forEach>
然后运行:
选择一个图片确认上传

效果图:

拦截器:
 1 public class OneInterceptor implements Interceptor{
 2
 3     @Override
 4     public void destroy() {
 5         // TODO Auto-generated method stub
 6
 7     }
 8
 9     @Override
10     public void init() {
11         // TODO Auto-generated method stub
12
13     }
14
15     @Override
16     public String intercept(ActionInvocation arg0) throws Exception {
17         System.out.println("======OneInterceptor======1");
18         String invoke=arg0.invoke();
19         System.out.println("=======OneInterceptor======2");
20         return invoke;
21     }
 1 public class TwoInterceptor implements Interceptor{
 2
 3         @Override
 4         public void destroy() {
 5             // TODO Auto-generated method stub
 6
 7         }
 8
 9         @Override
10         public void init() {
11             // TODO Auto-generated method stub
12
13         }
14
15         @Override
16         public String intercept(ActionInvocation arg0) throws Exception {
17             System.out.println("======TwoInterceptor======1");
18             String invoke=arg0.invoke();
19             System.out.println("=======TwoInterceptor======2");
20             return invoke;
21         }
22
23     }
配置:
<package name="sy" extends="base" namespace="/sy">
<interceptors>
<interceptor name="one" class="com.interceptor.OneInterceptor"></interceptor>
<interceptor name="two" class="com.interceptor.TwoInterceptor"></interceptor>
</interceptors>
<action name="/clz_*" class="com.web.ClazzAction" method="{1}">
<interceptor-ref name="one"></interceptor-ref>
<interceptor-ref name="two"></interceptor-ref>
<result name="list">/clzList.jsp</result>
<result name="preSave">/clzEdit.jsp</result>
<result name="toList" type="redirectAction">/clz_list</result>
<result name="toUpload">/upload.jsp</result>
</action>
</package>

拦截成功;


