
WebAPI下使用JWT验证
JWT(JSON Web Token)是目前最流行的跨域身份验证解决方案。
JWT 的特点:
无状态:JWT 包含认证信息,token 只需要保存在客户端,服务端不需要保存会话信息,所以 JWT 是无状态的。
这一点使得服务器压力大大降低,增加了系统的可用性和可扩展性。但是无状态同时也是 JWT 最大的缺点,服务器无法主动让 token 失效。
安全性:客户端每次请求都会携带 token,可以有效避免 CSRF 攻击,同时 token 会自动过期,可以减少 token 被盗用的情况,服务器会通过 jwt 签名验证 token,可以避免 token 被篡改。
可见性:JWT 的 payload 部分可以直接通过 Base64 解码,所以可存储一些其他业务逻辑所必要的非敏感信息。
JWT 含有7个官方字段:
- iss (issuer):签发人
- exp (expiration time):过期时间
- sub (subject):主题
- aud (audience):受众
- nbf (Not Before):生效时间
- iat (Issued At):签发时间
- jti (JWT ID):编号
直接上代码:
Nuget:Microsoft.AspNetCore.Authentication.JwtBearer、Swashbuckle.AspNetCore.Filters
0.添加一个JwtHelper类
public class JwtHelper
{
    public static string IssueJwt(string userId)
    {
        var claims = new List<Claim>
            {
                new Claim(JwtRegisteredClaimNames.Jti,userId),//编号
                new Claim(JwtRegisteredClaimNames.Iat,$"{new DateTimeOffset(DateTime.Now).ToUnixTimeSeconds()}"),//签发时间
                new Claim(JwtRegisteredClaimNames.Nbf,$"{new DateTimeOffset(DateTime.Now).ToUnixTimeSeconds()}"),//生效时间
                new Claim(JwtRegisteredClaimNames.Exp,$"{new DateTimeOffset(DateTime.Now.AddSeconds(60)).ToUnixTimeSeconds()}"),// 过期时间(生命周期) 60秒
                new Claim(JwtRegisteredClaimNames.Iss,JwtSettings.Issuer), //签发者
                new Claim(JwtRegisteredClaimNames.Aud,JwtSettings.Audience) //接收者
            };
        var key = new SymmetricSecurityKey(Encoding.UTF8.GetBytes(JwtSettings.SecretKey));//密钥
        var creds = new SigningCredentials(key, SecurityAlgorithms.HmacSha256);
        JwtSecurityToken jwt = new JwtSecurityToken(
            claims: claims,// 声明的集合
            expires: DateTime.Now.AddSeconds(30), // 过期时间 此处设置的过期时间会覆盖上面的过期时间
            signingCredentials: creds
            );
        // 生成 jwt字符串
        return new JwtSecurityTokenHandler().WriteToken(jwt);
    }
}
1.配置文件 appsettings.json 里面添加配置信息:
"AllowedHosts": "*",
  "JwtSettings": {
    "Audience": "zk",
    "Issuer": "123",
    "SecretKey": "keykeykeykeykeykeykeykeykeykey=="
  }
2.整个类来存放静态变量,获取配置信息的值:
public class JwtSettings
{
    public static IConfigurationRoot config;
    static JwtSettings()
    {
        //获取配置文件信息
        var builder = new ConfigurationBuilder();
        config = builder.SetBasePath(Directory.GetCurrentDirectory()).AddJsonFile("appsettings.json").Build();
    }

    /// <summary>
    /// 签发人
    /// </summary>
    public static string Audience => config["JwtSettings:Audience"];
    /// <summary>
    /// 受众
    /// </summary>
    public static string Issuer => config["JwtSettings:Issuer"];
    /// <summary>
    /// 签名
    /// </summary>
    public static string SecretKey => config["JwtSettings:SecretKey"];
}
3.在Startup.cs中ConfigureServices方法中添加服务:
//添加jwt验证
services.AddAuthentication(JwtBearerDefaults.AuthenticationScheme)
    .AddJwtBearer(o =>
    {
        o.TokenValidationParameters = new TokenValidationParameters()
        {
            ValidateAudience = true,//是否验证Audience
            ValidateIssuer = true,//是否验证Issuer
            ValidateIssuerSigningKey = true,//是否验证SecurityKey
            ValidateLifetime = true,//是否验证失效时间
            ClockSkew = TimeSpan.FromSeconds(10),//默认是300,也就是5分钟后,假如生命周期设置的是30秒,还需要加上这300秒
            ValidAudience = JwtSettings.Audience,
            ValidIssuer = JwtSettings.Issuer,//Audience、Issuer这两项和前面签发jwt的设置一致
            IssuerSigningKey = new SymmetricSecurityKey(Encoding.UTF8.GetBytes(JwtSettings.SecretKey))//用于签名验证
        };
    });
在ConfigureServices方法中进行配置Swagger:
services.AddSwaggerGen(c =>
{
    c.SwaggerDoc("v1", new OpenApiInfo { Title = "API", Version = "v1" });
    // 为 Swagger 设置xml文档注释路径
    var xmlFile = $"{Assembly.GetExecutingAssembly().GetName().Name}.xml";
    var xmlPath = Path.Combine(AppContext.BaseDirectory, xmlFile);
    // 添加控制器层注释,true表示显示控制器注释
    c.IncludeXmlComments(xmlPath, true);

    //开启加权小锁
    c.OperationFilter<AddResponseHeadersFilter>();
    c.OperationFilter<AppendAuthorizeToSummaryOperationFilter>();
    //在Heder中添加Token 传递到后台
    c.OperationFilter<SecurityRequirementsOperationFilter>();
    c.AddSecurityDefinition("oauth2", new OpenApiSecurityScheme
    {
        Description = "JWT授权(数据将在请求头中进行传输) 直接在下框中输入Bearer {token}(注意两者之间有一个空格)",
        Name = "Authorization",//jwt默认的参数名称,
        In = ParameterLocation.Header,//jwt默认存放Autorization信息的位置(header中)
        Type = SecuritySchemeType.ApiKey
    });
});
4.在Startup.cs中Configure方法中配置管道:
//添加jwt验证
app.UseAuthentication();
app.UseAuthorization();
5.添加模拟登陆api,生成Token:
[Route("api/[controller]")]
[ApiController]
public class AuthorizeController : ControllerBase
{
    [AllowAnonymous]
    [HttpGet]
    public IActionResult Get(string userName, string pwd)
    {
        //验证用户
        //省略具体实现……
        //得到userid
        var userid = "userid_look";
        return Ok(
            //以userid生成Token
            JwtHelper.IssueJwt(userid)
        );
    }
}
6.可以使用了:
[HttpGet]
[Authorize] //添加权限校验特性标签后,该api需要token才能访问
public string Get()
{
    return "OK";
}
swagger测试jwt步骤:
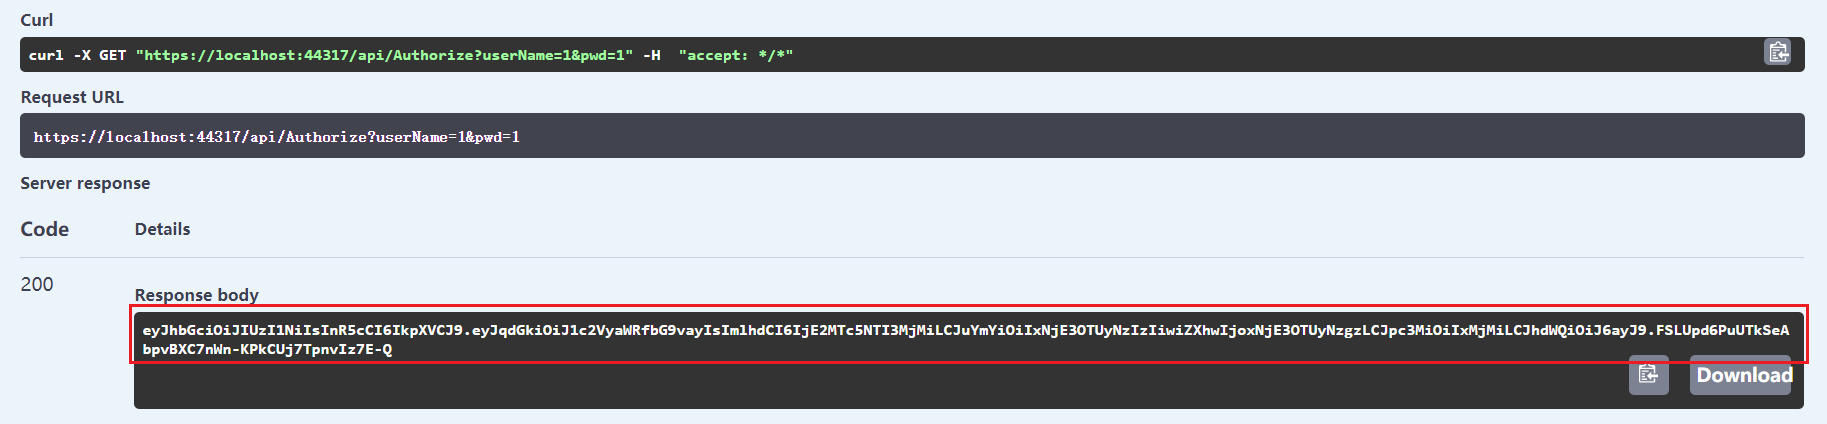
1.访问Authorize控制器Get方法获得token:
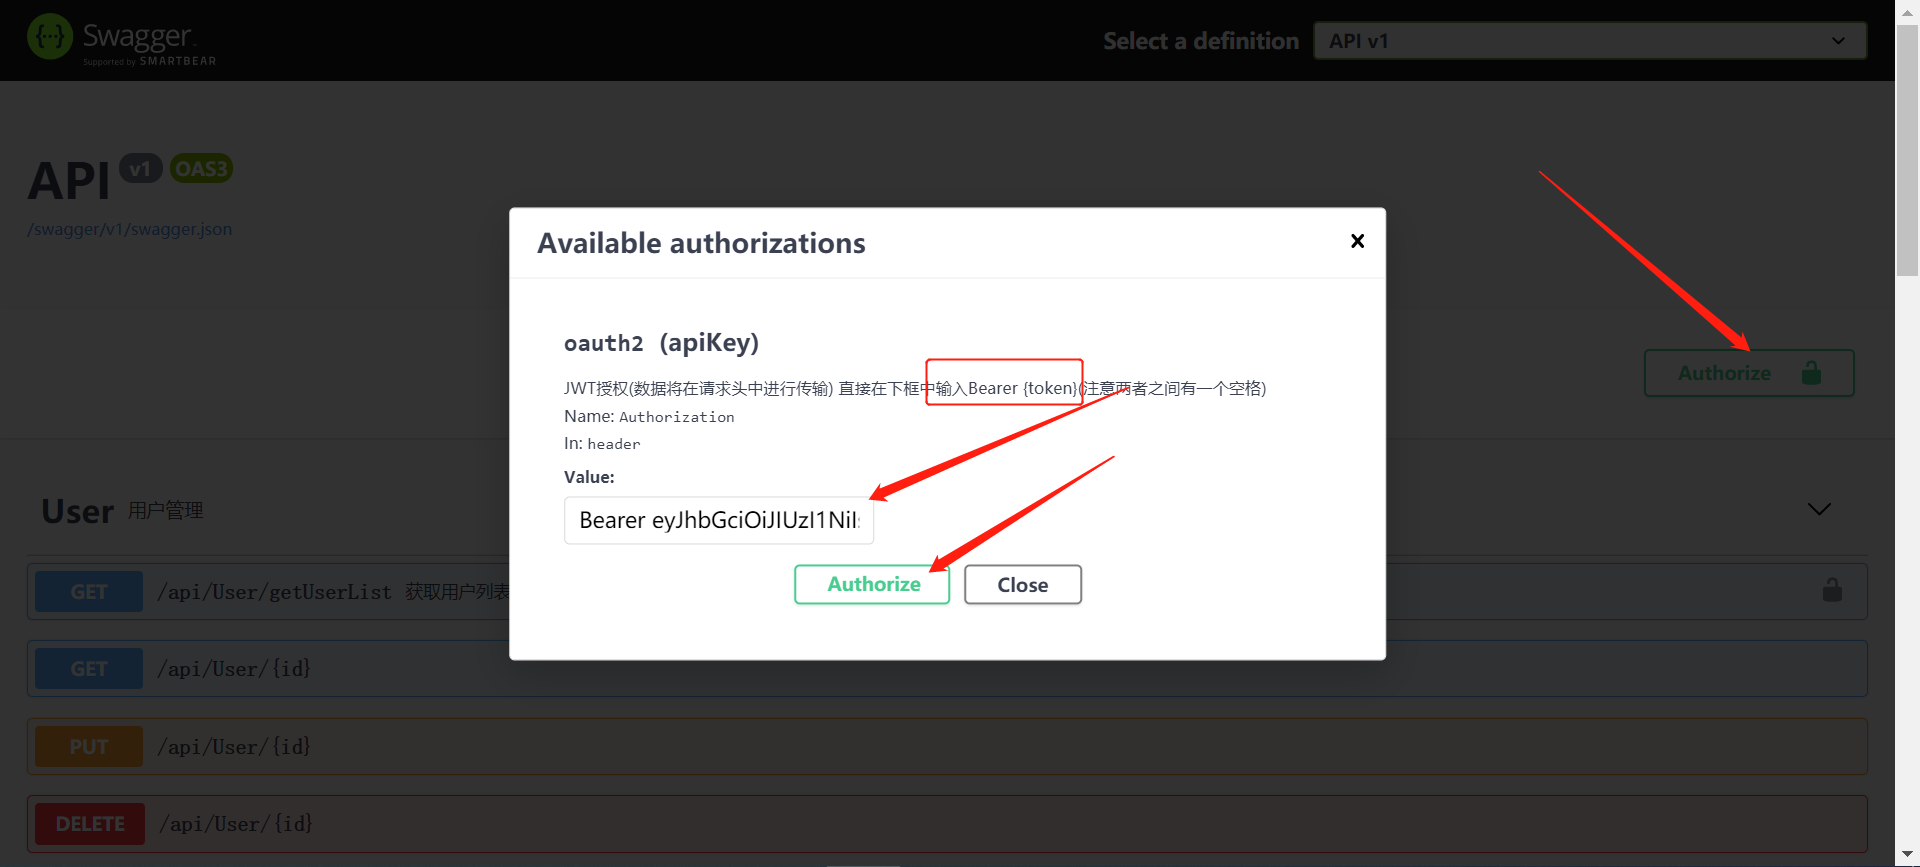
2.复制token,按下图操作:
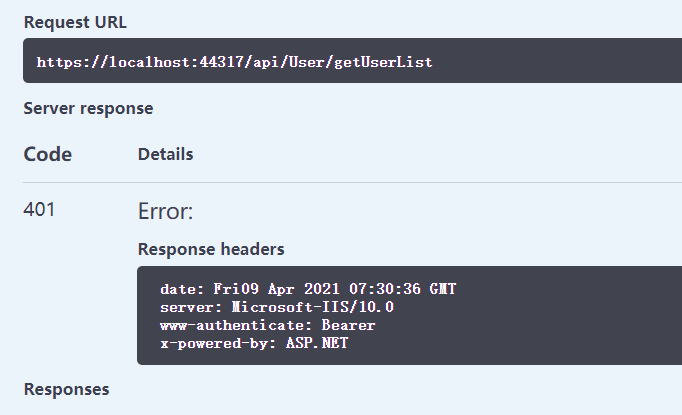
如果不获取token来访问方法,报下图错误:
扩展:网页错误代码表示的含义
400 请求出错,语法格式有误,服务器无法理解
401 未授权
403 禁止访问
404 找不到文件
500 服务器内部错误
C# 解析token:https://www.cnblogs.com/fanfan-90/p/12911203.html
C# 获得Url请求头中的token值:https://www.cnblogs.com/bindot/p/jwt_token.html
private readonly JwtSecurityTokenHandler _jwtSecurityToken = new JwtSecurityTokenHandler();


//获取token
string authHeader = this.Request.Headers["Authorization"];//Header中的token
if (authHeader == null || !authHeader.StartsWith("Bearer"))
{
    result.Code = -1; result.Message = "url请求头不含token!";
    return result;
}
string token = authHeader.Substring("Bearer ".Length).Trim();
var user_id = _jwtSecurityToken.ReadJwtToken(token).Id;
token在线解析:https://www.box3.cn/tools/jwt.html
时间戳转换:http://www.metools.info/code/c31.html
参考:https://www.sohu.com/a/320794114_468635
http://www.fwhyy.com/2020/04/using-jwt-to-implement-interface-authentication-in-dotnet-core-3/

 浙公网安备 33010602011771号