What is Git? The 5 Minute Tutorial.
It’s been about one week since I started the iOS immersive class at The Flatiron School in NYC. To say I’ve learned a lot in 7 days is an understatement. The content, instructors, and classmates are all top-notch and I’m so grateful that I have this opportunity. One of the first topics we tackled was Git and GitHub.
Any programming knowledge I had prior to Flatiron was self-taught and there were plenty of holes in the shaky house of knowledge that I had built. This became apparent whenever my Google results presented StackOverflow answers referring to ideas and concepts that were completely foreign to me. Git was one of these!
What is Git?
Git is not GitHub. That’s first, but we’ll get back to this.
Let me give you the official definition of Git:
Git is a free and open source distributed version control system designed to handle everything from small to very large projects with speed and efficiency.
Now…let me give you my definition:
Git is a crazy piece of software that allows you to save and work with your files in a way that allows you to go back in time when you break your program.
This will make more sense as I walk through how you can use it in your project. Tutorial time!
Before we begin, install Git from https://git-scm.com/ Also, I’ll be using a Mac for this tutorial. ALSO — my screen shots might look different than yours because I’ve added some customizations to my Terminal. It’s all good.
Ok, let’s start!
1] Create a folder on your Desktop called “TestProject”. Open Terminal and navigate to this folder! Type in the following and then press Enter:
cd /Users/YOURUSERNAME/Desktop/TestProject


“cd” means “Change Directory”
2] Now that you’re in the folder, enter the following into Terminal and press Enter:
git init
This creates a hidden folder inside your project folder that you don’t have to worry about. This hidden folder contains the secret sauce. It will actually keep track of all the changes you make to your project, and allow you to go back in time to different versions of your project.
3] We have an empty project. So let’s add a new file!
touch newFile.txt
Touch creates a new, blank file (If the touch command doesn’t work for you, simply create a new file using any text editor and save it as newFile.txt into our TestProject folder). Hooray — you’ve successfully made a change to your project. And guess what? Git is aware of this. And to prove it, enter this into your Terminal and press enter:
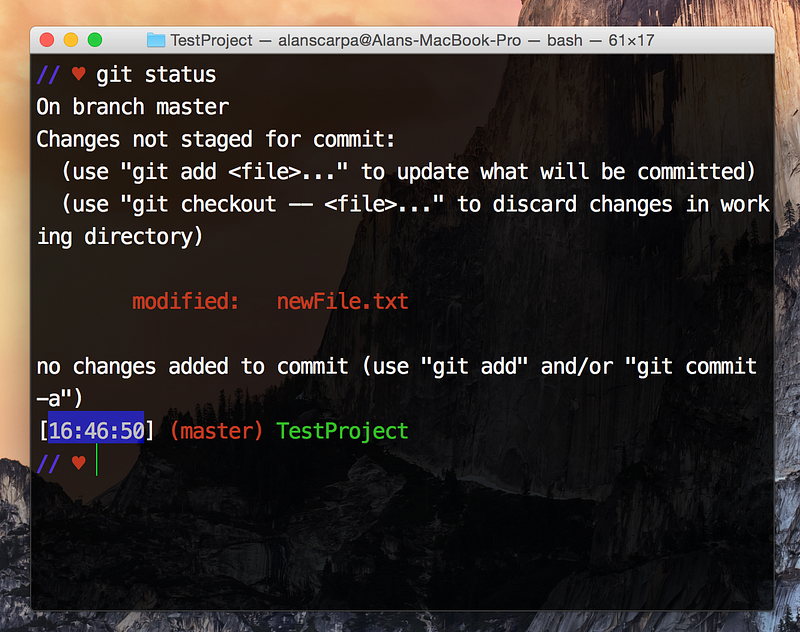
git status
You should see something like this:


See that? Git knows that you made a change to your project and it shows that in red. Good stuff!
Now let’s tell Git to remember this version of your project, so if you ever want to go back to this point in time in your project’s life, you can!
4] The way you tell Git to remember this version of your project, is a two step process. First, you must “add” the files. Then you “commit” these added files. For the sake of this tutorial, just know that you have to do these two steps and in that order to tell Git, “Hey — remember this version of my project for me!” This is how we will do it:
git add .
The “.” means “all the files in my project’s folder”. This is convenient when you’ve made changes to a bunch of different files. You could also do:
git add newFile.txt
Now, the next and last, important step is to commit these added files!
git commit -am 'Add a new text file'
This attaches a “message” to your commit and the text in the quotes following it, is your message — for you — to remind you of what you did.
Why is the mssage in present tense and more info on making good commits can be seen here: https://github.com/erlang/otp/wiki/Writing-good-commit-messages
Congrats! You made a commit! What does that mean? It means you can basically time travel.
Note: when you “add” files, you are adding them to a “staging area”. This staging area is where your files sit until you commit them. If you change your files after you add them but before you commit them, then you must re-add them for the commit to work correctly!
5] Let’s make a change to your project. Open up newFile.txt and add some text to it and save. Ok, go do it.
Did you change up your text file? Good. Now back in your Terminal, type:
git status
You should see….

Git is so smart! See that red text? It knows that you made changes to your newFile.txt. So, not only does it know when you add or delete files, but it knows if you add or delete what’s inside those files! This is why you should add/commit all the time, because if you end up making changes to some files that breaks your program — you can always just go back in time to a previous commit when your project was actually working!
Ok, now that we’ve modified our newFile.txt, let’s commit it! But don’t forget — first add it!
git add .
git commit -m “Modified text file”
6] Let’s go back in time.


Type this into Terminal and press Enter:
git log
You should see something like this:

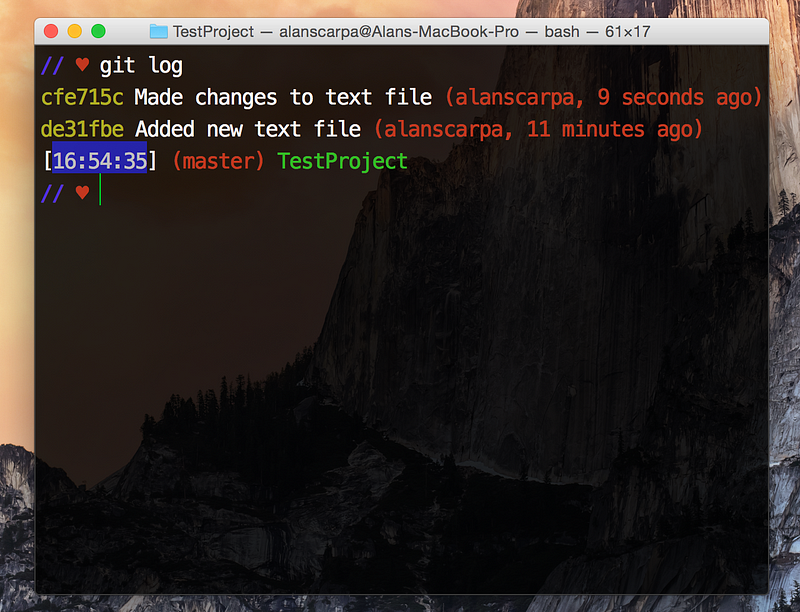
That’s your timeline (history) full of commits! Only two at the moment but you can imagine what it might look like after some time. Your “commit number” is the funky combo of numbers and letters on the left. It actually isn’t called a “commit number”, it’s called a hash. In order to go back to a different version of your project, just put this in Terminal and press Enter:
git checkout YOURCOMMITNUMBER
In this case, my hash was de31fbe.
Now open up your newFile.txt
See that magic? It’s blank! Your text is gone because your project was reverted to the first commit, and we had nothing in newFile.txt when we made our first commit.
Want to go back to the future? By that I mean, go back to a time when you had text in your newFile.txt file.
Easy enough! Just do the same command as before except use the other hash. In my case it would look like this…
git checkout cfe715c
Now try that and then open up your newFile.txt. Like magic, your content is back!
You’ve now scratched the surface of how Git works. Start using it right away on any project. It’s pretty amazing.
Next up…how to use Git with GitHub.

 浙公网安备 33010602011771号