Spring Boot和Shiro整合
全部代码附上
链接: https://pan.baidu.com/s/1DrIJhtsNoQ2CEDWEKi9tsQ 密码: ca2r
创建maven项目,添加依赖:
 1 <?xml version="1.0" encoding="UTF-8"?>
 2
 3 <project xmlns="http://maven.apache.org/POM/4.0.0" xmlns:xsi="http://www.w3.org/2001/XMLSchema-instance"
 4   xsi:schemaLocation="http://maven.apache.org/POM/4.0.0 http://maven.apache.org/xsd/maven-4.0.0.xsd">
 5   <modelVersion>4.0.0</modelVersion>
 6   <parent>
 7     <groupId>org.springframework.boot</groupId>
 8     <artifactId>spring-boot-starter-parent</artifactId>
 9     <version>2.2.5.RELEASE</version>
10     <relativePath/> <!-- lookup parent from repository -->
11   </parent>
12   <groupId>top.bigking</groupId>
13   <artifactId>ShiroTest</artifactId>
14   <version>1.0-SNAPSHOT</version>
15   <packaging>jar</packaging>
16
17   <name>ShiroTest Maven Webapp</name>
18   <!-- FIXME change it to the project's website -->
19   <url>http://www.example.com</url>
20
21   <properties>
22     <project.build.sourceEncoding>UTF-8</project.build.sourceEncoding>
23     <maven.compiler.source>1.8</maven.compiler.source>
24     <maven.compiler.target>1.8</maven.compiler.target>
25   </properties>
26
27   <dependencies>
28     <dependency>
29       <groupId>org.springframework.boot</groupId>
30       <artifactId>spring-boot-starter-web</artifactId>
31     </dependency>
32   </dependencies>
33
34 </project>
注意其中需要添加的,spring boot的父工程依赖,web启动器,以及打包方式修改为jar
创建SpringBoot启动类:

 1 package top.bigking;
 2
 3 import org.springframework.boot.SpringApplication;
 4 import org.springframework.boot.autoconfigure.SpringBootApplication;
 5
 6 /**
 7  * @Author ABKing
 8  * @since 2020/4/5 上午10:52
 9  **/
10 @SpringBootApplication
11 public class ShiroTestApplication {
12     public static void main(String[] args) {
13         SpringApplication.run(ShiroTestApplication.class, args);
14     }
15 }
然后为了使spring boot生效,我们接下来搭建thymeleaf
在pom.xml中添加依赖
1     <dependency>
2       <groupId>org.springframework.boot</groupId>
3       <artifactId>spring-boot-starter-thymeleaf</artifactId>
4     </dependency>
添加top.bigking.controller包,在这个包下增加UserController类
 1 package top.bigking.controller;
 2
 3 import org.springframework.stereotype.Controller;
 4 import org.springframework.ui.Model;
 5 import org.springframework.web.bind.annotation.RequestMapping;
 6
 7 /**
 8  * @Author ABKing
 9  * @since 2020/4/5 上午11:02
10  **/
11 @Controller
12 @RequestMapping("user")
13 public class UserController {
14     /**
15      * 测试thymeleaf
16      * @param model
17      * @return
18      */
19     @RequestMapping("testThymeleaf")
20     public String testThymeleaf(Model model){
21         model.addAttribute("username", "ABKing");
22         //返回testThymeleaf.html
23         return "testThymeleaf";
24     }
25 }
接下来编写testThymeleaf.html文件
在src/main/resources目录下创建

 1 <!DOCTYPE html>
 2 <html xmlns:th="http://www.thymeleaf.org">
 3     <meta charset="UTF-8">
 4     <title>testThymeleaf</title>
 5 </head>
 6 <body>
 7     <h3 th:text="${username}"></h3>
 8     <hr/>
 9 进入用户添加功能:<a href="user/add">添加用户</a><br/>
10 进入用户修改功能:<a href="user/update">用户更新</a>
11 </body>
12 </html>
启动spring boot
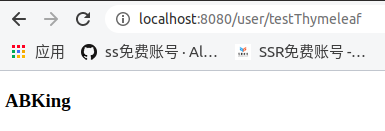
至此,spring boot搭建成功。
我们接下来搭建shiro
添加依赖:
1     <dependency>
2       <groupId>org.apache.shiro</groupId>
3       <artifactId>shiro-spring</artifactId>
4       <version>1.4.0</version>
5     </dependency>
自定义Realm
 1 package top.bigking.shiro;
 2
 3 import org.apache.shiro.authc.AuthenticationException;
 4 import org.apache.shiro.authc.AuthenticationInfo;
 5 import org.apache.shiro.authc.AuthenticationToken;
 6 import org.apache.shiro.authz.AuthorizationInfo;
 7 import org.apache.shiro.realm.AuthorizingRealm;
 8 import org.apache.shiro.subject.PrincipalCollection;
 9
10 /**
11  * 自定义Realm
12  * @Author ABKing
13  * @since 2020/4/5 上午11:33
14  **/
15 public class UserRealm extends AuthorizingRealm {
16     /**
17      * 执行授权逻辑
18      * @param principalCollection
19      * @return
20      */
21     @Override
22     protected AuthorizationInfo doGetAuthorizationInfo(PrincipalCollection principalCollection) {
23         System.out.println("执行授权逻辑");
24         return null;
25     }
26
27     /**
28      * 执行认证逻辑
29      * @param authenticationToken
30      * @return
31      * @throws AuthenticationException
32      */
33     @Override
34     protected AuthenticationInfo doGetAuthenticationInfo(AuthenticationToken authenticationToken) throws AuthenticationException {
35         System.out.println("执行认证逻辑");
36         return null;
37     }
38 }
编写shiro的配置类
 1 package top.bigking.shiro;
 2
 3 import org.apache.shiro.spring.web.ShiroFilterFactoryBean;
 4 import org.apache.shiro.web.mgt.DefaultWebSecurityManager;
 5 import org.springframework.beans.factory.annotation.Qualifier;
 6 import org.springframework.context.annotation.Bean;
 7 import org.springframework.context.annotation.Configuration;
 8
 9 import java.util.LinkedHashMap;
10 import java.util.Map;
11
12 /**
13  * @Author ABKing
14  * @since 2020/4/5 上午11:30
15  **/
16 @Configuration
17 public class ShiroConfig {
18     /**
19      * 创建ShiroFilterFactoryBean
20      */
21     @Bean
22     public ShiroFilterFactoryBean getShiroFilterFactoryBean(@Qualifier("securityManager") DefaultWebSecurityManager securityManager){
23         ShiroFilterFactoryBean shiroFilterFactoryBean = new ShiroFilterFactoryBean();
24         //设置安全管理器DefaultWebSecurityManager
25         shiroFilterFactoryBean.setSecurityManager(securityManager);
26
27         /**
28          * Shiro内置过滤器,可以实现权限相关的拦截器
29          *  常用的过滤器:
30          *      anon: 无需认证(登录)可以访问
31          *      authc: 必须认证才可以访问
32          *      user: 如果使用rememberMe的功能可以直接访问
33          *      perms: 该资源必须得到角色权限才可以访问
34          *      role: 该资源必须得到角色权限才可以访问
35          */
36         Map<String, String> filterMap = new LinkedHashMap<>();
37 //        filterMap.put("/user/add", "authc");
38 //        filterMap.put("/user/update", "authc");
39         //对于相似的资源,需要将anon的设置放在authc前面,anon才会生效,因为Shiro是从上往下匹配URL的,匹配成功便不再匹配了
40         filterMap.put("/user/someThingCommon", "anon");
41         filterMap.put("/user/*", "authc");
42         //修改调整的登录页面,否则就是默认的login.jsp
43         shiroFilterFactoryBean.setLoginUrl("/login");
44         shiroFilterFactoryBean.setFilterChainDefinitionMap(filterMap);
45         return shiroFilterFactoryBean;
46     }
47
48     /**
49      * 创建DefaultWebSecurityManager
50      */
51     @Bean(name = "securityManager")
52     public DefaultWebSecurityManager getDefaultWebSecurityManager(@Qualifier("userRealm") UserRealm userRealm){
53         DefaultWebSecurityManager defaultWebSecurityManager = new DefaultWebSecurityManager();
54         //关联Realm
55         defaultWebSecurityManager.setRealm(userRealm);
56         return defaultWebSecurityManager;
57     }
58
59     /**
60      * 创建Realm
61      */
62     @Bean(name = "userRealm")
63     public UserRealm getRealm(){
64         return new UserRealm();
65     }
66 }
注意第37,38行,前面的斜杠不能少,否则无法拦截
对于相似的资源,需要将anon的设置放在authc前面,anon才会生效,因为Shiro是从上往下匹配URL的,匹配成功便不再匹配了
-----
--
-
金麟岂是池中物,一遇风云便化龙!

 浙公网安备 33010602011771号