


如何实现UI自动化?DevExpress Winforms帮你忙
DevExpress Winforms Controls 内置140多个UI控件和库,完美构建流畅、美观且易于使用的应用程序。无论是Office风格的界面,还是分析处理大批量的业务数据,DevExpress WinForms都能轻松胜任。DevExpress广泛应用于ECM企业内容管理、 成本管控、进程监督、生产调度,在企业/政务信息化管理中占据一席重要之地。
【适用范围】:各种桌面、Web应用程序开发,尤其是WinForms应用程序开发。
在针对Visual Studio 2019的发行说明中,Microsoft 宣布Coded UI测试的生命周期终止。
Microsoft建议将Appium with WinAppDriver 一起用于测试桌面和UWP应用,此消息引起广大用户的兴趣:DevExpress控件是否与Appium兼容?经过DevExpress团队的反复测试,答案是肯定的!使用Appium创建自动UI测试的方法如下。
1. 跳转到 https://github.com/Microsoft/WinAppDriver/releases然后下载两个APP,
- WinAppDriver - 允许您运行测试,需要安装。
- WinAppDriver UI Recorder - 允许您在运行时记录测试,不需要安装 - 将下载的存档解压到任何文件夹。
2. 在Windows中打开Developer Mode。
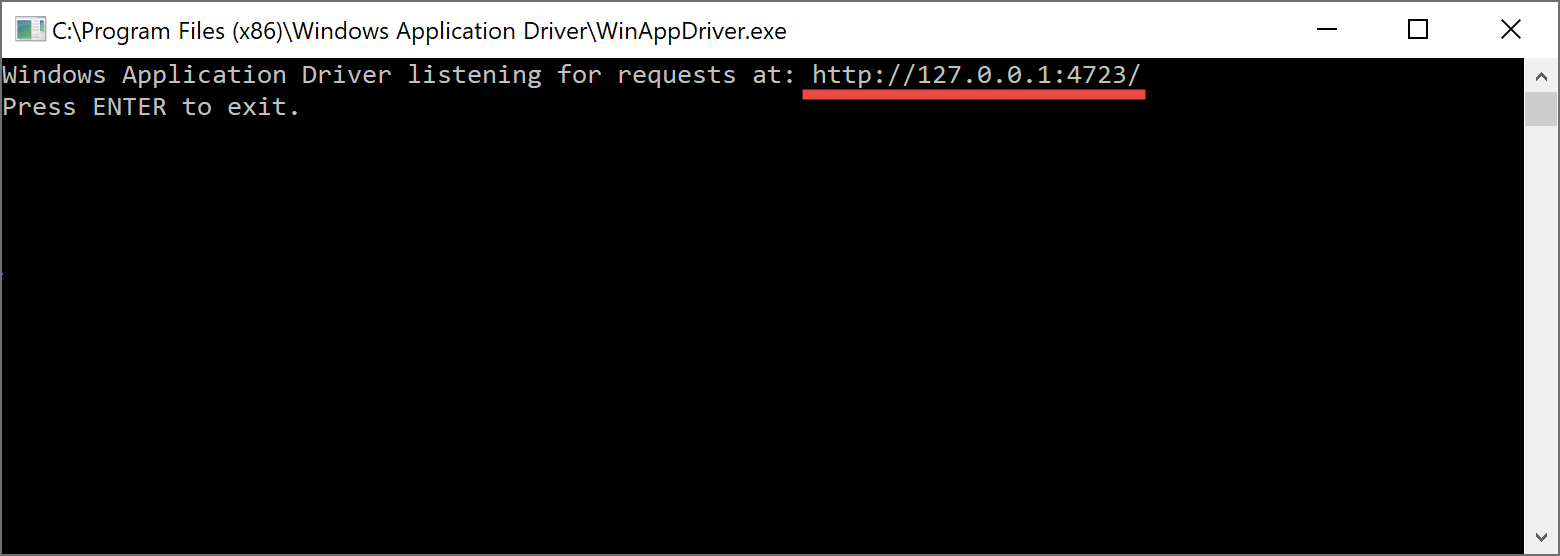
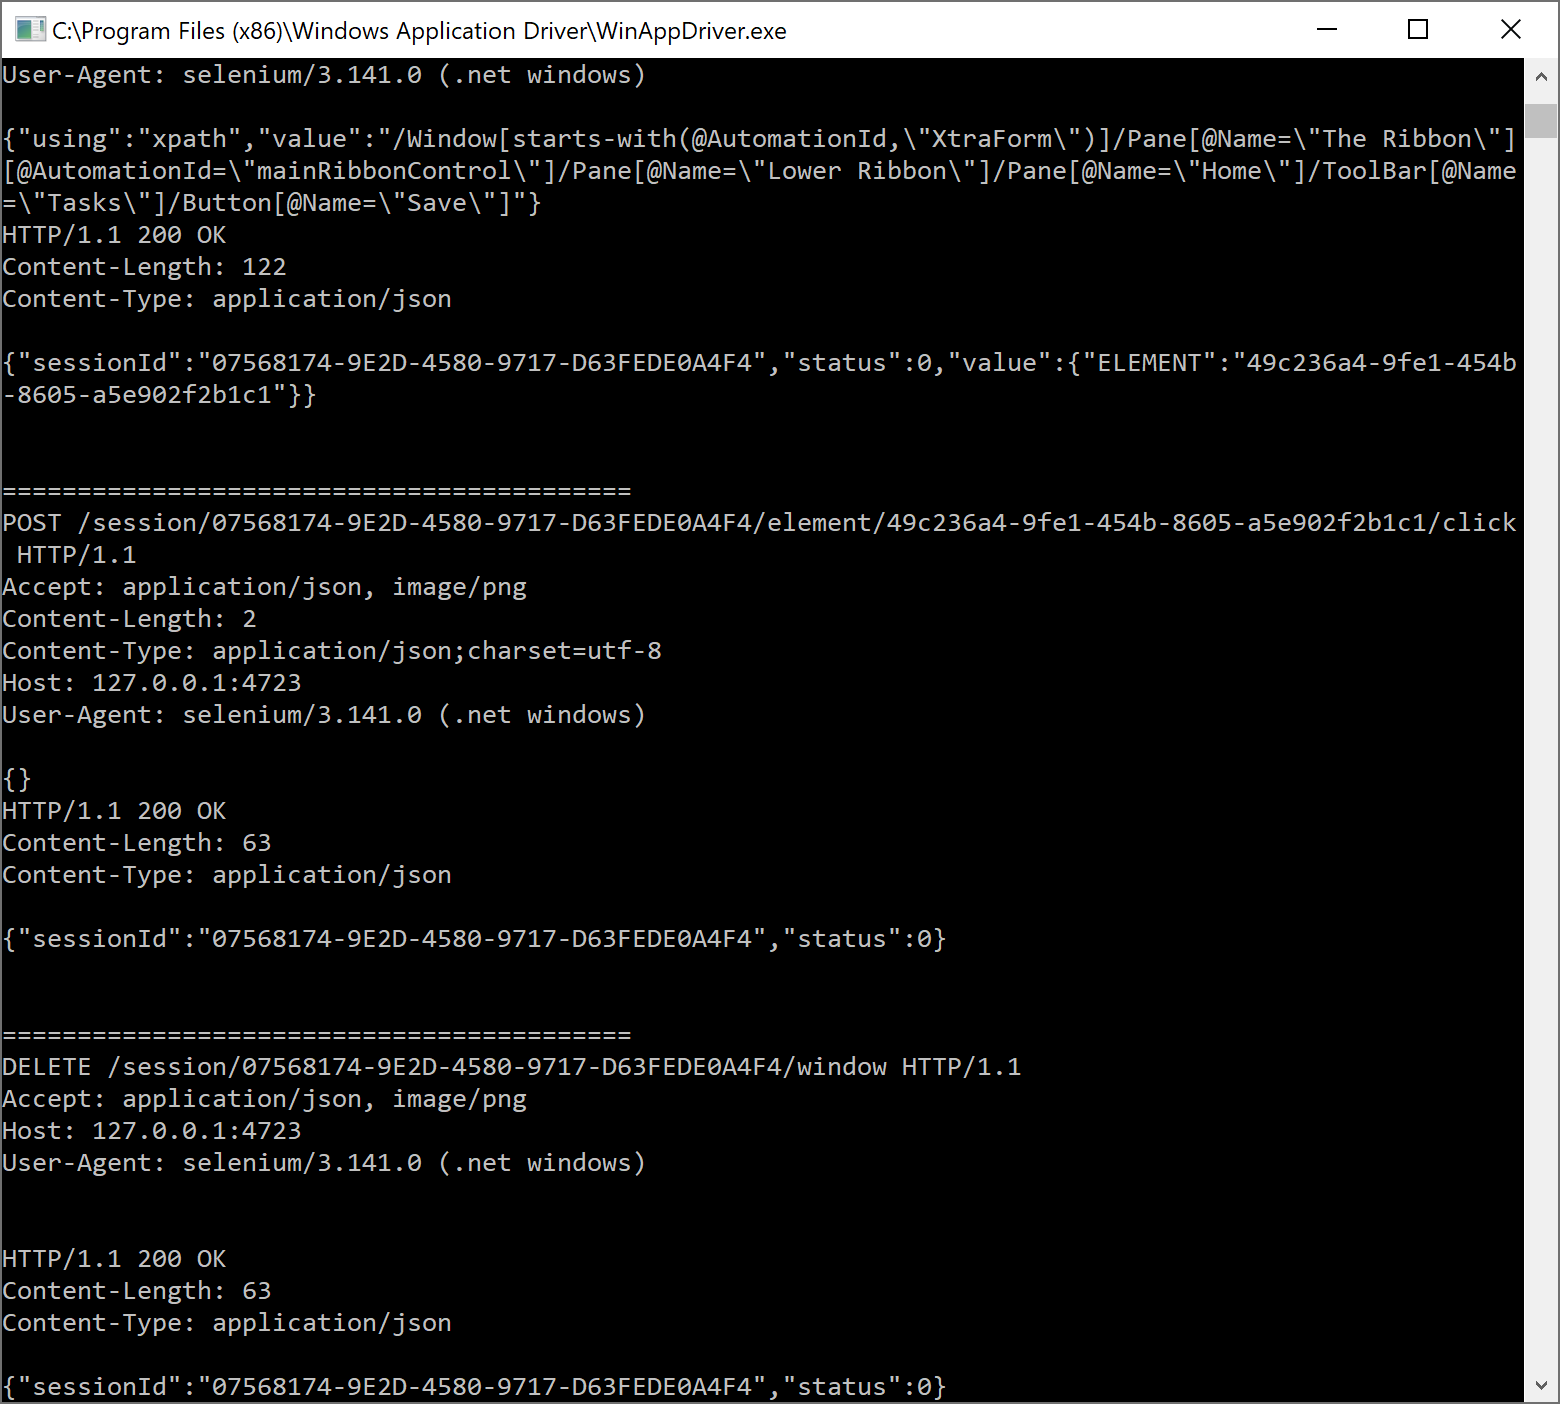
3. 以管理员身份运行WinAppDriver.exe并使其运行,请注意应用程序正在侦听的地址,稍后您将需要它。
4. 打开您要测试的Visual Studio解决方案,或创建一个新的示例解决方案。
5. 将新的单元测试项目添加到解决方案。
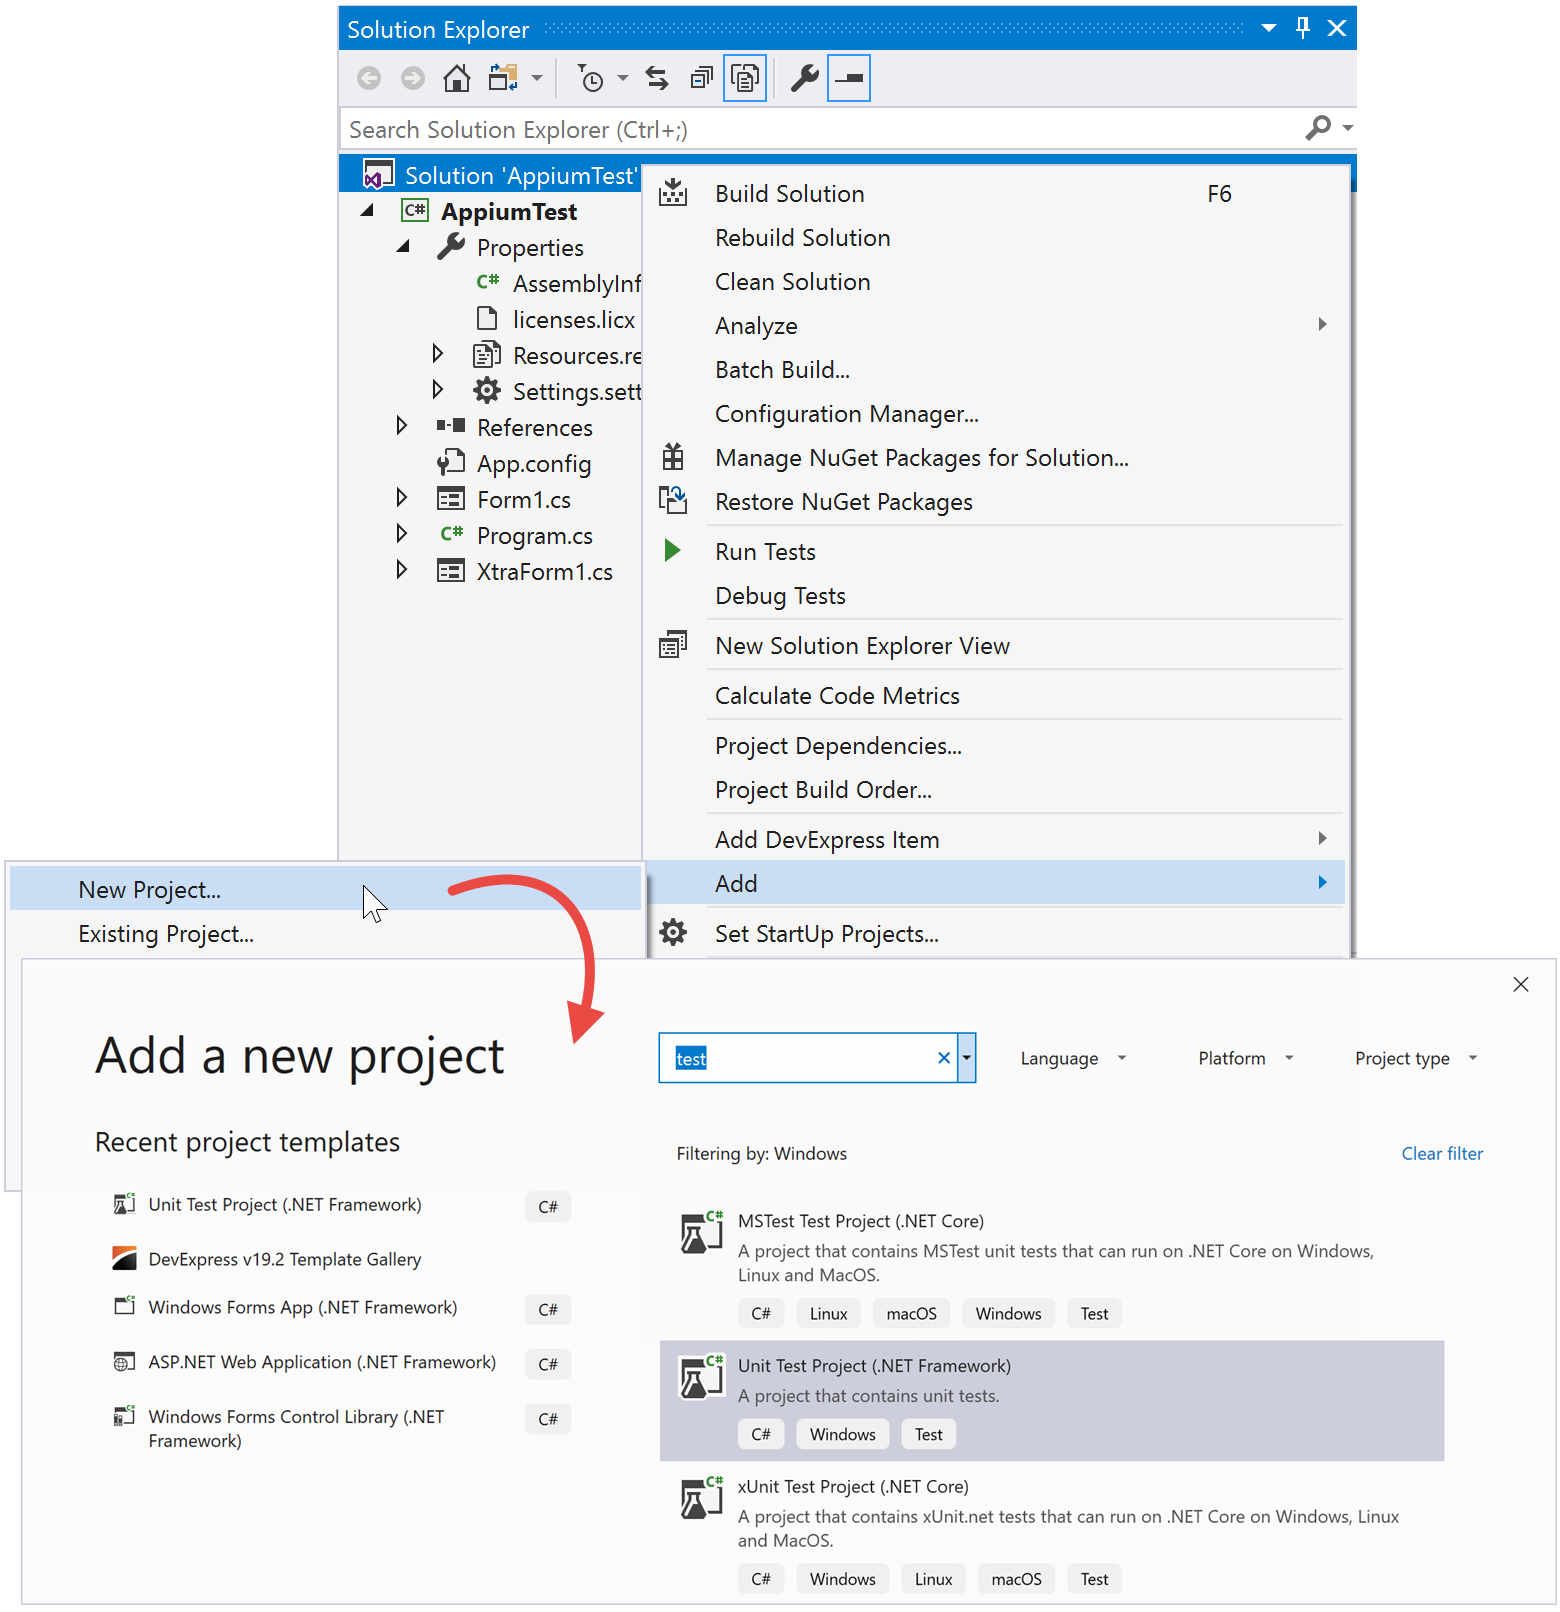
6. 在Solution Explorer中右键单击Unit Test project,然后选择“Manage NuGet Packages…”,安装最新的稳定Appium.WebDriver程序包。
7. 打开Unit Test项目的UnitTest1.cs文件,并添加两个类:MainDemoSession(定义开始和结束测试会话的方法)和Helper(包含查找被测试的UI元素的方法),将步骤3中的地址用作WindowsApplicationDriverUrl值。
1 2 3 4 5 6 7 8 9 10 11 12 13 14 15 16 17 18 19 20 21 22 23 24 25 26 27 28 29 30 31 32 33 34 35 36 37 38 39 40 41 42 43 44 45 46 47 48 49 50 51 52 53 54 55 56 | public class MainDemoSession{protected const string WindowsApplicationDriverUrl = "http://127.0.0.1:4723";private const string ApplicationPath = @"C:\Users\...\AppiumTest.exe";protected static WindowsDriver<WindowsElement> desktopSession;public static void Setup(TestContext context) { // Launch a new instance of the tested application if (desktopSession == null) { // Create a new session to launch the tested applicationAppiumOptions options = new AppiumOptions(); options.AddAdditionalCapability("app", ApplicationPath); desktopSession = new WindowsDriver<WindowsElement>( new Uri(WindowsApplicationDriverUrl), options); Assert.IsNotNull(desktopSession); Assert.IsNotNull(desktopSession.SessionId);// Set implicit timeout to 1.5 seconds //to make element search to retry every 500 ms //for at most three times desktopSession.Manage().Timeouts().ImplicitWait = TimeSpan.FromSeconds(1.5); } }public static void TearDown() { // Close the application and delete the session if (desktopSession != null) { desktopSession.Close(); desktopSession.Quit(); desktopSession = null; } } }public static class Helper { public static WindowsElement FindElementByAbsoluteXPath( this WindowsDriver<WindowsElement> desktopSession, string xPath, int nTryCount = 3) { WindowsElement uiTarget = null; while (nTryCount-- > 0) { try { uiTarget = desktopSession.FindElementByXPath(xPath); } catch { } if (uiTarget != null) { break; } else { System.Threading.Thread.Sleep(400); } } return uiTarget; } } |
8. 修改自动生成的UnitTest1类,如下所示:
1 2 3 4 5 6 7 8 9 10 11 12 13 14 | [TestClass]public class UnitTest1 : MainDemoSession{[TestMethod]public void TestMethod1(){//test start//test finish } [ClassInitialize] public static void ClassInitialize(TestContext context) { Setup(context); }[ClassCleanup] public static void ClassCleanup() { TearDown(); } } |
9. 运行您的应用程序,并将其拖到主系统显示屏上(如果您具有多屏幕设置)。
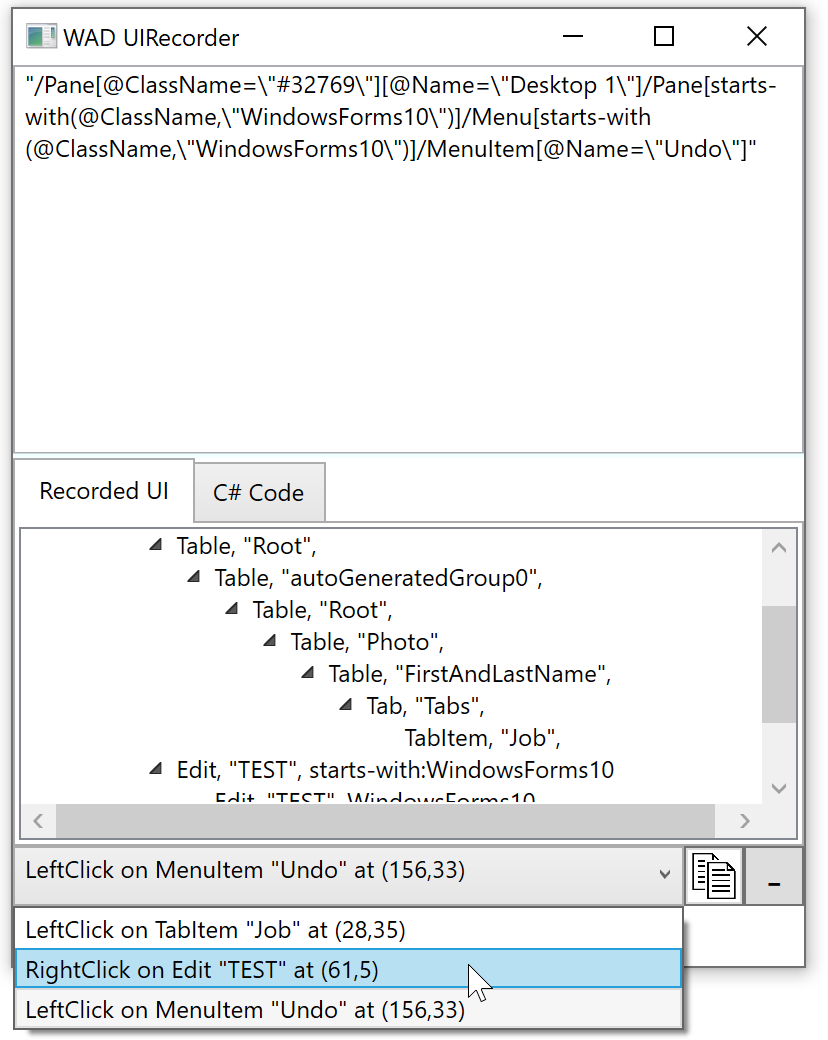
10. 启动WinAppDriver UI Recorder然后点击“Record”, 将鼠标悬停在要与之交互的第一个UI元素上,然后等待它开始闪烁蓝色。Recorder的状态栏会将其文本从“Active”更改为“XPath Ready”。
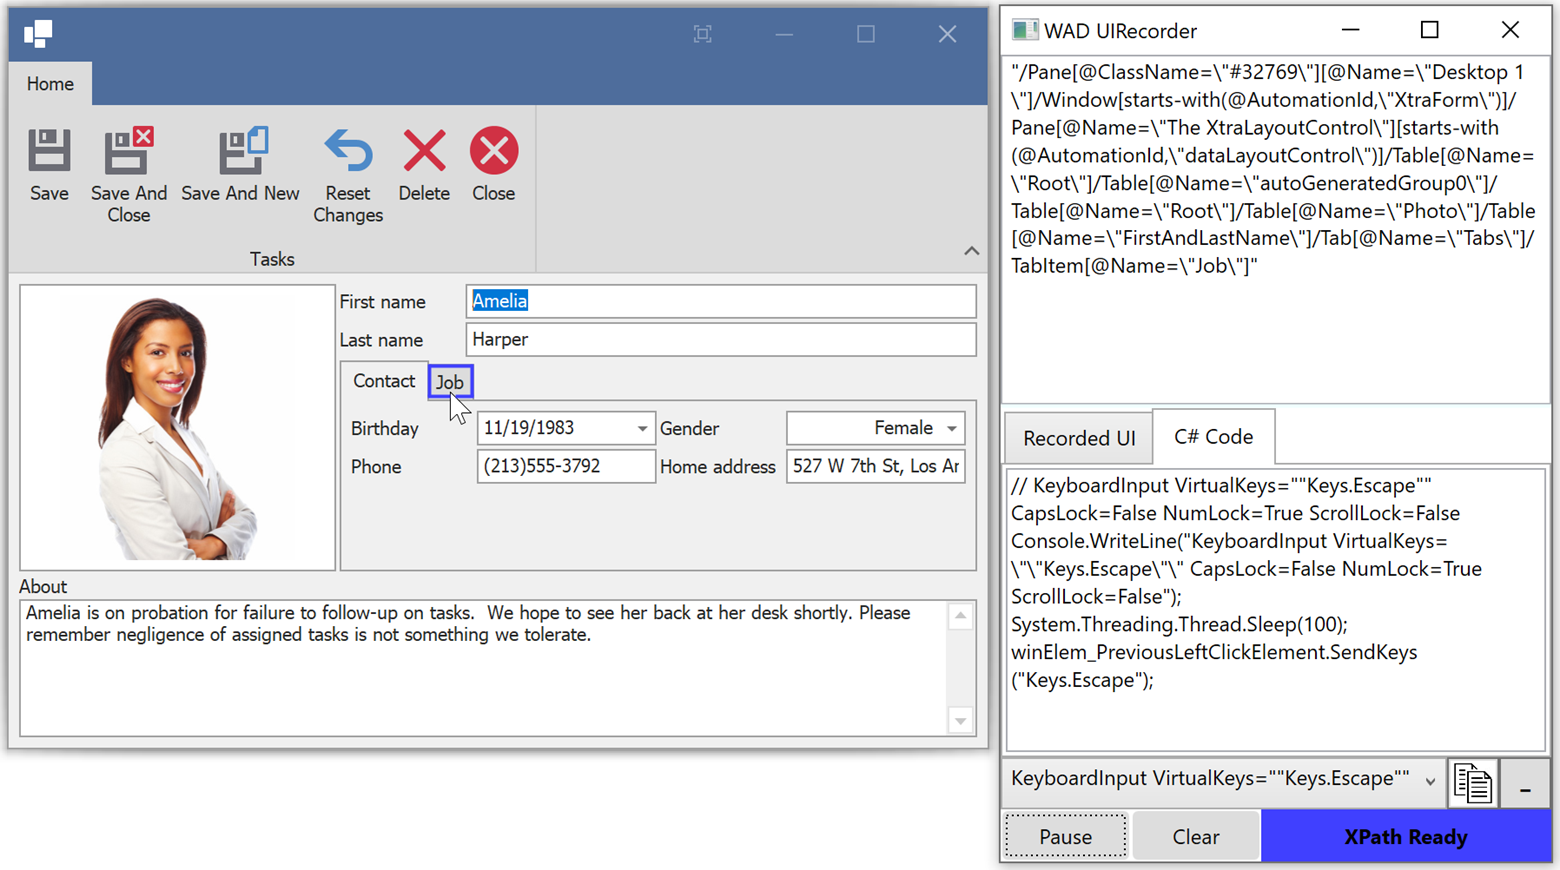
11. 当该元素闪烁时,recorder已准备就绪,您可以执行UI操作:单击此元素、将其拖动、输入新值等。完成此元素后,将鼠标悬停在另一个UI元素上,等待 recorder的确认并重复该过程。
12. 记录了要重现的一系列步骤后,请在recorder中单击“Pause”,您可以打开actions selector确保已记录所有UI操作。
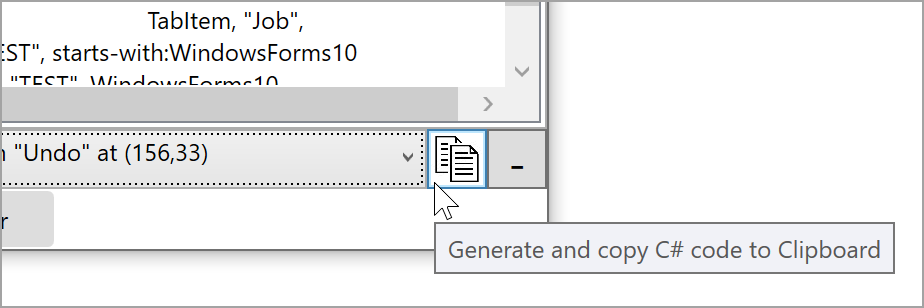
13. 单击“Generate and copy C# code to Clipboard”按钮来复制所有记录的操作代码,将此代码粘贴到UnitTest1.TestMethod1方法中。 例如,下面的代码选择“Job”标签。
1 2 3 4 5 6 7 8 9 10 11 12 13 14 15 16 17 18 19 20 21 | [TestMethod] public void TestMethod1() {//test start// LeftClick on TabItem "Job" at (20,31)Console.WriteLine("LeftClick on TabItem \"Job\" at (20,31)");string xpath_LeftClickTabItemJob_20_31 = "/Pane\[@ClassName=\"#32769\"\][@Name=\"Desktop 1\"]/Window\[starts-with(@AutomationId,\"XtraForm\")]/Pane[@Name=\"The XtraLayoutControl\"\][starts-with(@AutomationId,\"dataLayoutControl\")]/Table[@Name=\"Root\"]/Table[@Name=\"autoGeneratedGroup0\"]/Table[@Name=\"Root\"]/Table[@Name=\"Photo\"]/Table[@Name=\"FirstAndLastName\"]/Tab[@Name=\"Tabs\"]/TabItem[@Name=\"Job\"]";var winElem_LeftClickTabItemJob_20_31 = desktopSession.FindElementByAbsoluteXPath(xpath_LeftClickTabItemJob_20_31);if (winElem_LeftClickTabItemJob_20_31 != null){winElem_LeftClickTabItemJob_20_31.Click();}else{Console.WriteLine($"Failed to find element using xpath: {xpath_LeftClickTabItemJob_20_31}");return;}//test finish} |
14. 在内部测试期间,自动生成的代码可能无法通过其完整路径找到UI元素:
/Pane\[@ClassName=\"#32769\"\][@Name=\"Desktop 1\"]/Window[starts-with…
如果发生这种情况,请缩短所有元素路径,使其以“ / Window”开头。
string xpath_LeftClickTabItemJob_20_31 = "/Window[starts-with(@AutomationId...";
此外,您可以使用Assert.Fail而不是Console.WriteLine来调试测试(如果找不到UI元素,则可以)。
Assert.Fail($"Failed to find element...");
15. 在Visual Studio中右键单击Unit Test project,然后单击“Run Tests”。测试将启动您的应用程序,重复所有记录的步骤,然后关闭应用程序。 所有测试操作都记录在步骤3中启动的WinAppDriver控制台中。
您可以通过与Coded UI相同的方式启动Appium测试,唯一的区别是您需要在测试执行计算机上运行WinAppDriver。
DevExpress v19.2全新发布,最新动态请持续关注DevExpress中文网!
DevExpress中文网官网QQ群:540330292 欢迎一起进群讨论


【推荐】国内首个AI IDE,深度理解中文开发场景,立即下载体验Trae
【推荐】编程新体验,更懂你的AI,立即体验豆包MarsCode编程助手
【推荐】抖音旗下AI助手豆包,你的智能百科全书,全免费不限次数
【推荐】轻量又高性能的 SSH 工具 IShell:AI 加持,快人一步
· SQL Server 2025 AI相关能力初探
· Linux系列:如何用 C#调用 C方法造成内存泄露
· AI与.NET技术实操系列(二):开始使用ML.NET
· 记一次.NET内存居高不下排查解决与启示
· 探究高空视频全景AR技术的实现原理
· 阿里最新开源QwQ-32B,效果媲美deepseek-r1满血版,部署成本又又又降低了!
· 单线程的Redis速度为什么快?
· SQL Server 2025 AI相关能力初探
· AI编程工具终极对决:字节Trae VS Cursor,谁才是开发者新宠?
· 展开说说关于C#中ORM框架的用法!
2017-12-05 MyEclipse 2017 CI 9 发布(附下载)