1、 管理机部署
1.1 创建项目、安装相关命令
[root@m1 ~]
[root@m1 ~]
[root@m1 ~]
[root@m1 ~]
[root@m1 ~]
1.2 修改主机清单调试所有机器
[root@m1 ~]
[web01]
192.168.15.7 ansible_ssh_user=root ansible_ssh_port=22 ansible_ssh_pass='1'
[web02]
192.168.15.8 ansible_ssh_user=root ansible_ssh_port=22 ansible_ssh_pass='1'
[web03]
192.168.15.9 ansible_ssh_user=root ansible_ssh_port=22 ansible_ssh_pass='1'
[web:children]
web01
web02
web03
[lb01]
192.168.15.5 ansible_ssh_user=root ansible_ssh_port=22 ansible_ssh_pass='1'
[lb02]
192.168.15.6 ansible_ssh_user=root ansible_ssh_port=22 ansible_ssh_pass='1'
[lb:children]
lb01
lb02
[nfs]
192.168.15.31 ansible_ssh_user=root ansible_ssh_port=22 ansible_ssh_pass='1'
[db]
192.168.15.61 ansible_ssh_user=root ansible_ssh_port=22 ansible_ssh_pass='1'
[prometheus]
192.168.15.71 ansible_ssh_user=root ansible_ssh_port=22 ansible_ssh_pass='1'
[root@m1 project]
host_key_checking = False
[root@m1 ~]
1.3 安装插件准备代码包
[root@m1 ~]
[root@m1 ~]
[root@m1 ~]
[root@m1 opt]
[root@m1 ~]
[root@m1 linux20]
[root@m1 linux20]
ALLOWED_HOSTS = ['*' ]
DATABASES = {}
[root@m1 linux20]
[root@m1 linux20]
[root@m1 linux20]
[uwsgi]
socket = :8000
chdir = /opt/linux20
wsgi-file = linux20/wsgi.py
module = linux20.wsgi
master = true
processes = 4
vacuum = true
[root@m1 linux20]
[root@m1 linux20]
[root@m1 opt]
2、 部署公共roles
2.1 初始化公共角色
[root@m01 project]
2.2 编辑任务文件
[root@m01 project]
- name: 关闭防火墙
service:
name: firewalld
state: stopped
enabled: no
- name: 关闭Selinux
selinux:
state: disabled
- name: 安装NFS
yum:
name: nfs-utils
state: present
when:
- ansible_distribution == "CentOS"
- name: 创建全局用户组
group:
name: www
state: present
gid: 666
- name: 创建全局用户
user:
name: www
comment: 全局应用程序用户
uid: 666
group: www
shell: /sbin/nologin
state: present
create_home: false
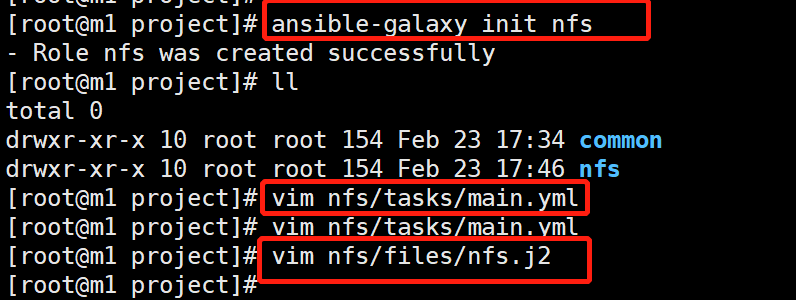
3、安装部署NFS
3.1 初始化角色
[root@m01 project]
3.2 编辑任务文件
[root@m01 project]
- name: 安装RpcBind
yum:
name: rpcbind
state: present
when:
- ansible_distribution == "CentOS"
- name: 创建挂载点
file:
path: /backup
owner: www
group: www
mode: 777
state: directory
- name: 创建NFS配置文件
template:
src: ./nfs.j2
dest: /etc/exports
- name: 启动NFS和rpcbind
service:
name: "{{ item }}"
state: restarted
with_items:
- nfs-server
- rpcbind
3.3 编辑配置文件
[root@m01 project]
/backup 192.168.15.0/24(rw,sync ,all_squash,anonuid=666,anongid=666)
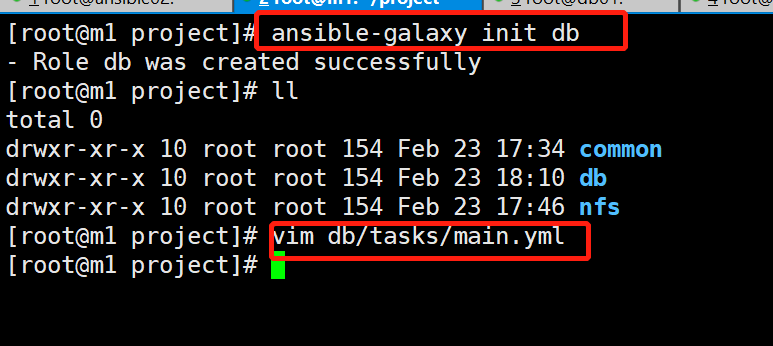
4、 部署数据库db
4.1 初始化角色
[root@m01 project]
4.2 编辑任务文件
[root@m01 project]
- name: 安装MariaDB和mariadb-server
yum:
name: "{{ item }}"
state: present
with_items:
- mariadb
- mariadb-server
- name: 启动Mariadb和rpcbind
service:
name: mariadb
state: restarted
- name: 创建远程连接用户和数据库
shell: /usr/bin/mysql -uroot -e "GRANT ALL PRIVILEGES ON *.* TO 'root'@'%' IDENTIFIED BY 'test@666' WITH GRANT OPTION;FLUSH PRIVILEGES;CREATE DATABASE django;"
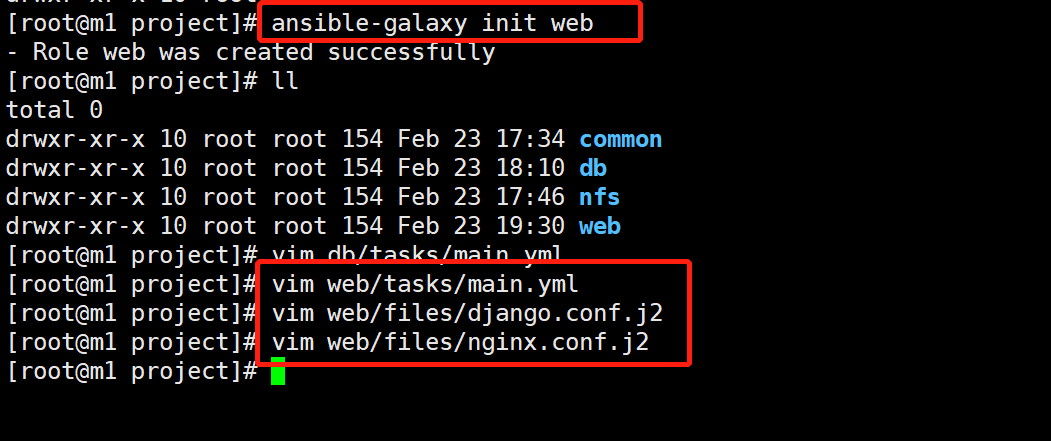
5、部署WEB
5.1 初始化角色
[root@m01 project]
5.2 编辑任务文件
[root@m01 project]
- name: 卸载nginx、httpd残留
yum:
name: "{{ item }}"
state: absent
with_items:
- nginx
- httpd
- name: 安装Nginx、python3、python3-devel
yum:
name: "{{ item }}"
state: present
with_items:
- nginx
- python3
- python3-devel
- name: 安装Django
shell: pip3 install django -i https://pypi.doubanio.com/simple/ --trusted-host pypi.doubanio.com
- name: 安装uwsgi
shell: pip3 install uwsgi -i https://pypi.doubanio.com/simple/ --trusted-host pypi.doubanio.com
- name: 上传代码
unarchive:
src: ./linux20.tar.gz
dest: /opt/
remote_src: no
- name: 上传Nginx配置文件
template:
src: ./nginx.conf.j2
dest: /etc/nginx/nginx.conf
- name: 上传Nginx主机配置文件
template:
src: ./django.conf.j2
dest: /etc/nginx/conf.d/default.conf
- name: 启动UWSGI
shell: cd /opt/linux20 && /usr/local/bin/uwsgi -d --ini myweb.ini
- name: 启动Nginx
service:
name: nginx
state: restarted
5.3 编辑配置文件
[root@m01 project]
server {
listen 80;
server_name www.django.com;
location / {
include uwsgi_params;
uwsgi_pass 127.0.0.1:8000;
uwsgi_read_timeout 2;
uwsgi_param UWSGI_SCRIPT linux20.wsgi;
uwsgi_param UWSGI_CHDIR /opt/linux20;
index index.html index.htm;
client_max_body_size 35m;
}
}
[root@m1 project]
user www;
worker_processes auto;
error_log /var/log/nginx/error.log notice;
pid /var/run/nginx.pid;
events {
worker_connections 1024;
}
http {
include /etc/nginx/mime.types;
default_type application/octet-stream;
log_format main '$remote_addr - $remote_user [$time_local] "$request" '
'$status $body_bytes_sent "$http_referer" '
'"$http_user_agent" "$http_x_forwarded_for"' ;
access_log /var/log/nginx/access.log main;
sendfile on;
keepalive_timeout 65;
include /etc/nginx/conf.d/*.conf;
}
5.4 上传代码包
[root@m1 ~]
6、部署负载均衡lb
6.1 初始化角色
[root@m01 project]
6.2 编辑任务文件
[root@m01 project]
---
- name: 安装高可用软件和nginx
yum:
name: "{{ item }}"
state: present
with_items:
- nginx
- keepalived
- name: 配置Nginx
template:
src: ./nginx.conf.j2
dest: /etc/nginx/nginx.conf
- name: 配置Upstream
template:
src: ./upstream.conf.j2
dest: /etc/nginx/upstream.conf
- name: 配置lb
template:
src: ./lb.conf.j2
dest: /etc/nginx/conf.d/default.conf
- name: 配置keepalived
template:
src: ./keepalived.conf.j2
dest: /etc/keepalived/keepalived.conf
- name: 启动Nginx和Keepalived
service:
name: "{{ item }}"
state: restarted
with_items:
- nginx
- keepalived
6.3 编辑配置文件
[root@m01 project]
user www;
worker_processes auto;
error_log /var/log/nginx/error.log notice;
pid /var/run/nginx.pid;
events {
worker_connections 1024;
}
http {
include /etc/nginx/mime.types;
default_type application/octet-stream;
log_format main '$remote_addr - $remote_user [$time_local] "$request" '
'$status $body_bytes_sent "$http_referer" '
'"$http_user_agent" "$http_x_forwarded_for"' ;
access_log /var/log/nginx/access.log main;
sendfile on;
keepalive_timeout 65;
include /etc/nginx/conf.d/*.conf;
}
[root@m01 project]
upstream web {
server 192.168.15.7;
server 192.168.15.8;
server 192.168.15.9;
}
server {
listen 80;
server_name www.django.com;
location / {
proxy_pass http://web;
include upstream.conf;
}
}
[root@m01 project]
! Configuration File for keepalived
global_defs {
router_id {{ ansible_fqdn }}
}
vrrp_instance VI_1 {
{% if ansible_fqdn == "lb01" %}
state MASTER
priority 100
{% else %}
state BACKUP
priority 90
{% endif %}
interface eth0
virtual_router_id 50
advert_int 1
authentication {
auth_type PASS
auth_pass 1111
}
virtual_ipaddress {
192.168.15.3
}
}
[root@m01 project]
proxy_redirect off;
proxy_set_header X-Real-IP $remote_addr ;
proxy_set_header X-Forwarded-For $proxy_add_x_forwarded_for ;
proxy_set_header Host $host ;
client_max_body_size 10m;
client_body_buffer_size 128k;
proxy_intercept_errors on;
proxy_connect_timeout 90;
proxy_send_timeout 90;
proxy_read_timeout 90;
proxy_buffer_size 4k;
proxy_buffers 4 32k;
proxy_busy_buffers_size 64k;
proxy_temp_file_write_size 64k;
7、 部署监控prometheus
prometheus监控的架构:
grafana(显示图表:只在监控上安装) --> server(存储和处理监控数据:只在监控上安装)--> agent(获取监控数据:所有机器安装)
7.1 初始化角色
[root@m01 project]
7.2 下载监控相关的插件包
[root@m1 files]
[root@m1 files]
[root@m1 files]
[root@m1 files]
7.3 编辑任务文件
[root@m01 project]
- name: 安装部署NodeExporter
unarchive:
src: ./node_exporter-1.3.1.linux-amd64.tar.gz
dest: /usr/local/
- name: 注册NodeExpoeter systemd服务
copy:
src: node-exporter.service
dest: /usr/lib/systemd/system/
- name: 启动NodeExporter服务
systemd:
name: node-exporter
daemon_reload: yes
state: restarted
- name: 安装部署MysqldExporter
unarchive:
src: ./mysqld_exporter-0.13.0.linux-amd64.tar.gz
dest: /usr/local/
when: ansible_fqdn == "db01"
- name: 注册MysqldExporter systemd服务
copy:
src: mysqld-exporter.service
dest: /usr/lib/systemd/system/
when: ansible_fqdn == "db01"
- name: 上传密码文件
copy:
src: ./.my.cnf
dest: /usr/local/mysqld_exporter-0.13.0.linux-amd64/
when: ansible_fqdn == "db01"
- name: 启动MysqldExporter服务
systemd:
name: mysqld-exporter
daemon_reload: yes
state: restarted
when: ansible_fqdn == "db01"
- name: 部署Prometheus
unarchive:
src: ./prometheus-2.33.4.linux-amd64.tar.gz
dest: /usr/local/
when: ansible_fqdn == "prometheus"
- name: 注册Prometheus systemd服务
copy:
src: prometheus.service
dest: /usr/lib/systemd/system/
when: ansible_fqdn == "prometheus"
- name: 修改Prometheus的配置文件
template:
src: ./prometheus.yml
dest: /usr/local/prometheus-2.33.4.linux-amd64/
when: ansible_fqdn == "prometheus"
- name: 启动Prometheus服务
systemd:
name: prometheus
daemon_reload: yes
state: restarted
when: ansible_fqdn == "prometheus"
- name: 上传Grafana安装包
copy:
src: ./grafana-8.4.1-1.x86_64.rpm
dest: /opt/
when: ansible_fqdn == "prometheus"
- name: 安装Grafana
shell: "cd /opt/ && yum install grafana-8.4.1-1.x86_64.rpm -y"
when: ansible_fqdn == "prometheus"
- name: 启动Grafana服务
systemd:
name: grafana-server
daemon_reload: yes
state: restarted
when: ansible_fqdn == "prometheus"
7.4 编辑注册文件
[root@m1 files]
[Unit]
Description=Prometheus
[Service]
ExecStart=/usr/local/mysqld_exporter-0.1.0.linux-amd64/mysqld_exporter --config.my-cnf=/usr/local/mysqld_exporter-0.1.0.linux-amd64/.my.cnf --web.listen-address=:9104
Restart=on-failure
[Install]
WantedBy=multi-user.target
[root@m1 files]
[Unit]
Description=This is prometheus node exporter
After=node_exporter.service
[Service]
Type=simple
ExecStart=/usr/local/node_exporter-1.3.1.linux-amd64/node_exporter
ExecReload=/bin/kill -HUP
KillMode=process
Restart=on-failure
[Install]
WantedBy=multi-user.target
[root@m1 files]
[Unit]
Description=Prometheus
[Service]
ExecStart=/usr/local/prometheus-2.33.4.linux-amd64/prometheus --config.file=/usr/local/prometheus-2.33.4.linux-amd64/prometheus.yml --web.enable-lifecycle
Restart=on-failure
[Install]
WantedBy=multi-user.target
[root@m1 files]
[Unit]
Description=Prometheus
[Service]
ExecStart=/usr/local/prometheus-2.33.4.linux-amd64/prometheus --config.file=/usr/local/prometheus-2.33.4.linux-amd64/prometheus.yml --web.enable-lifecycle
Restart=on-failure
[Install]
WantedBy=multi-user.target
7.5 编辑配置文件
[root@m1 templates]
global:
scrape_interval: 15s
evaluation_interval: 15s
alerting:
alertmanagers:
- static_configs:
- targets:
rule_files:
scrape_configs:
- job_name: "prometheus"
static_configs:
- targets: ["localhost:9090" ]
- job_name: "Linux主机监控"
static_configs:
- targets:
- "192.168.15.7:9100"
- "192.168.15.8:9100"
- "192.168.15.9:9100"
- "192.168.15.31:9100"
- "192.168.15.61:9100"
- "192.168.15.71:9100"
- "192.168.15.81:9100"
- "192.168.15.5:9100"
- "192.168.15.6:9100"
- job_name: "MySQL监控"
static_configs:
- targets:
- "192.168.15.61:9104"
7.6 编辑密码文件
[root@m1 files]
[client]
host=192.168.15.61
user=root
password=test @666
8、编写并执行剧本
8.1 编写剧本
[root@m1 ~]
[root@m1 ~]
- hosts: all
name: 全局初始化
roles:
- common
- hosts: nfs
name: NFS相关操作
roles:
- nfs
- hosts: db01
name: 数据库相关操作
roles:
- db
- hosts: web
name: WEB相关操作
roles:
- web
- hosts: lb
name: 负载均衡相关操作
roles:
- lb
- hosts: all
name: 安装部署监控
roles:
- prometheus
8.2 执行剧本
root@m1 ~]
[root@m1 ~]
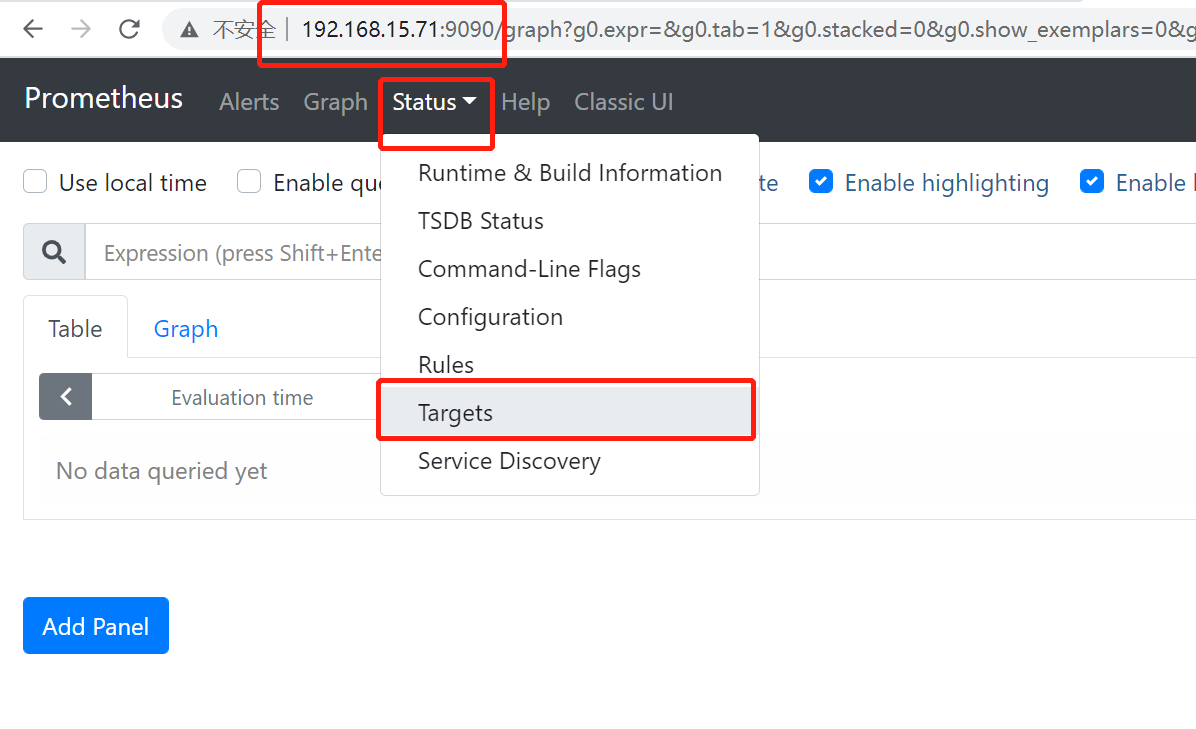
9、实现监控
1.浏览器访问ip:http://192.168.15.71:9090/进入prometheus监控页面
2.statue选择targets
3.浏览器访问ip:http://192.168.15.71:3000/进入grafana图表页面,输入账号密码
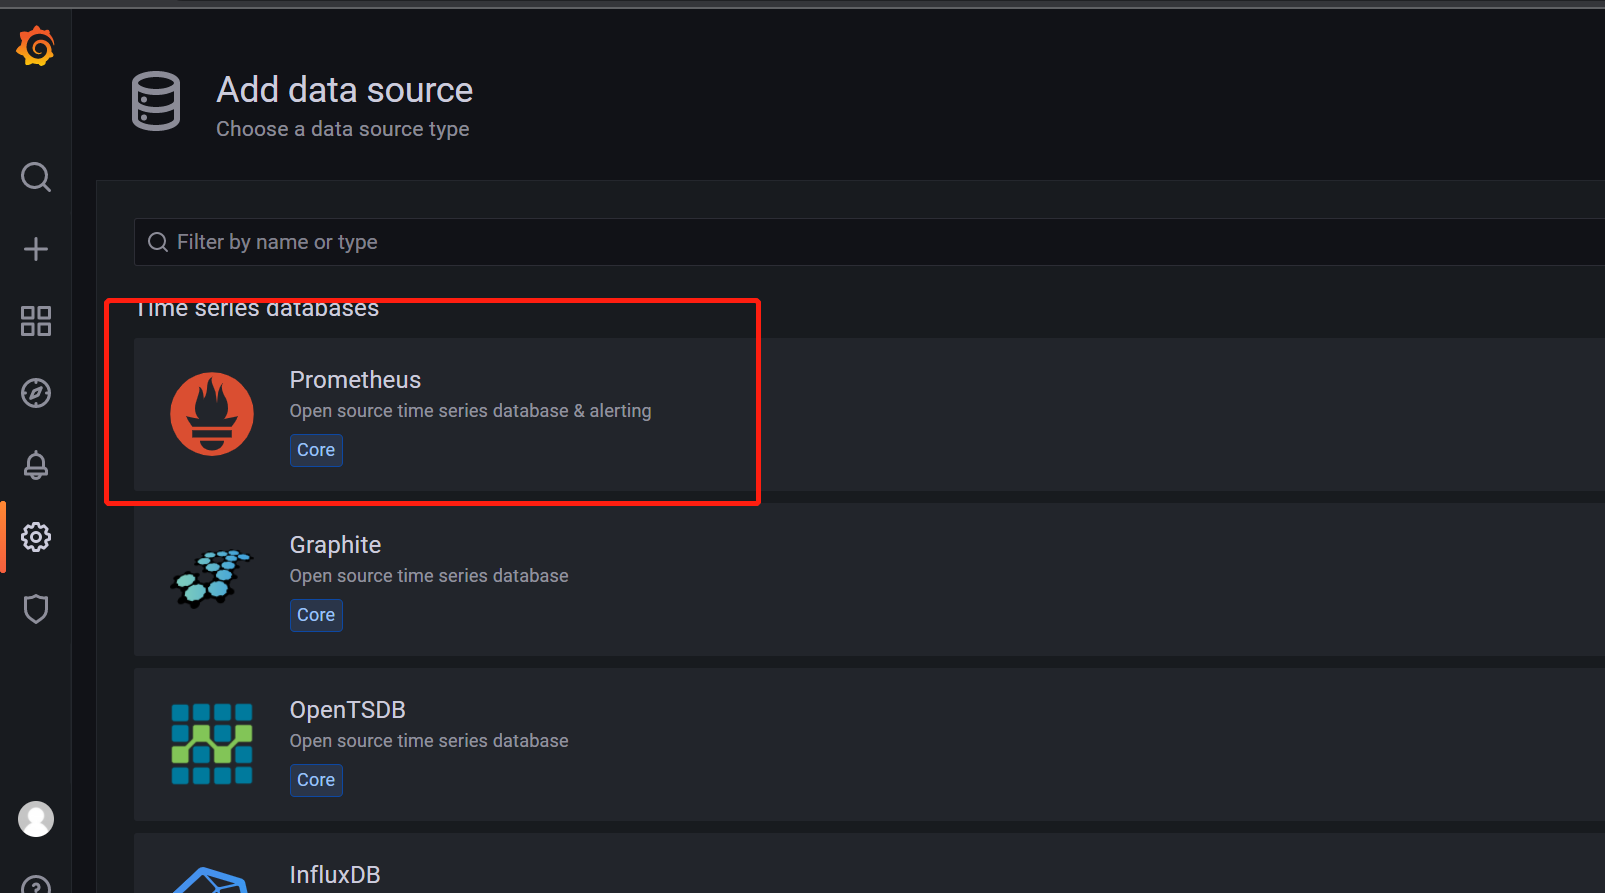
4.点设置图标,点Data sources,选prometheus
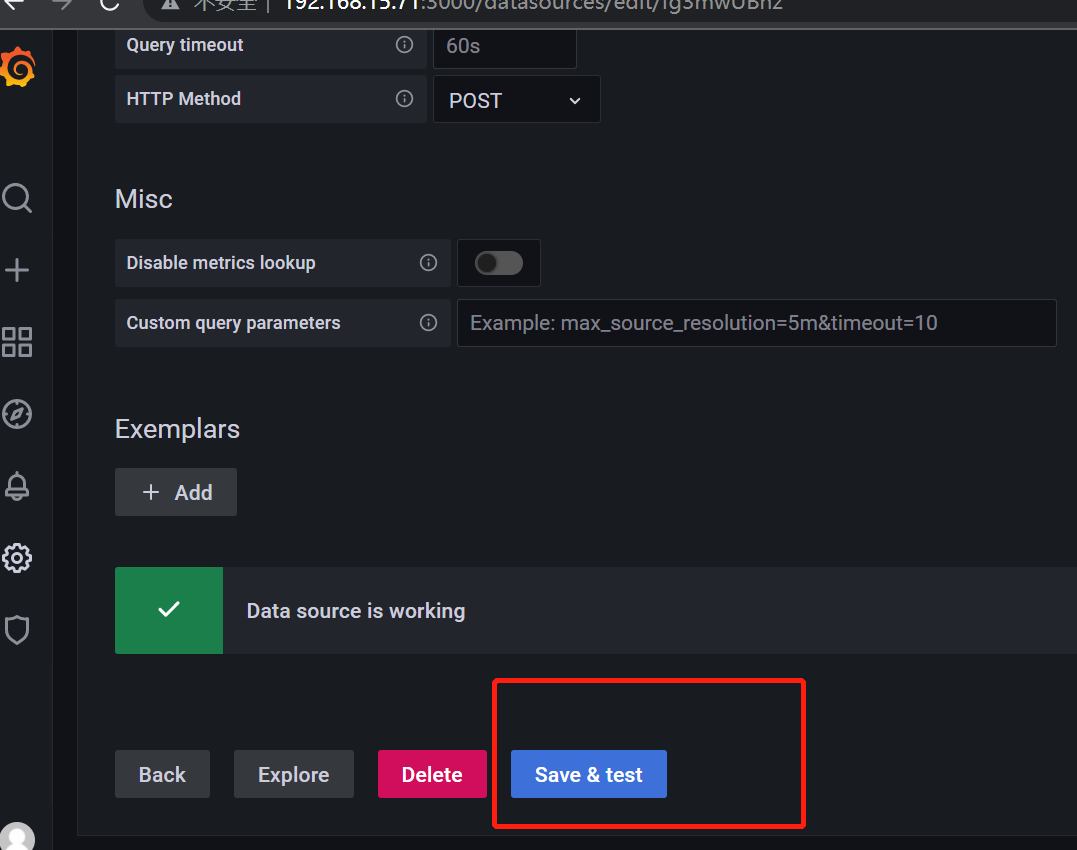
5.修改url:192.168.15.71:9090,拉到页面底部save & test
6.回到grafana官网:https://grafana.com/products/cloud/
7.页面顶端菜单栏选择Products,点Dashboards
8.左边菜单栏Data sources 选择prometheus
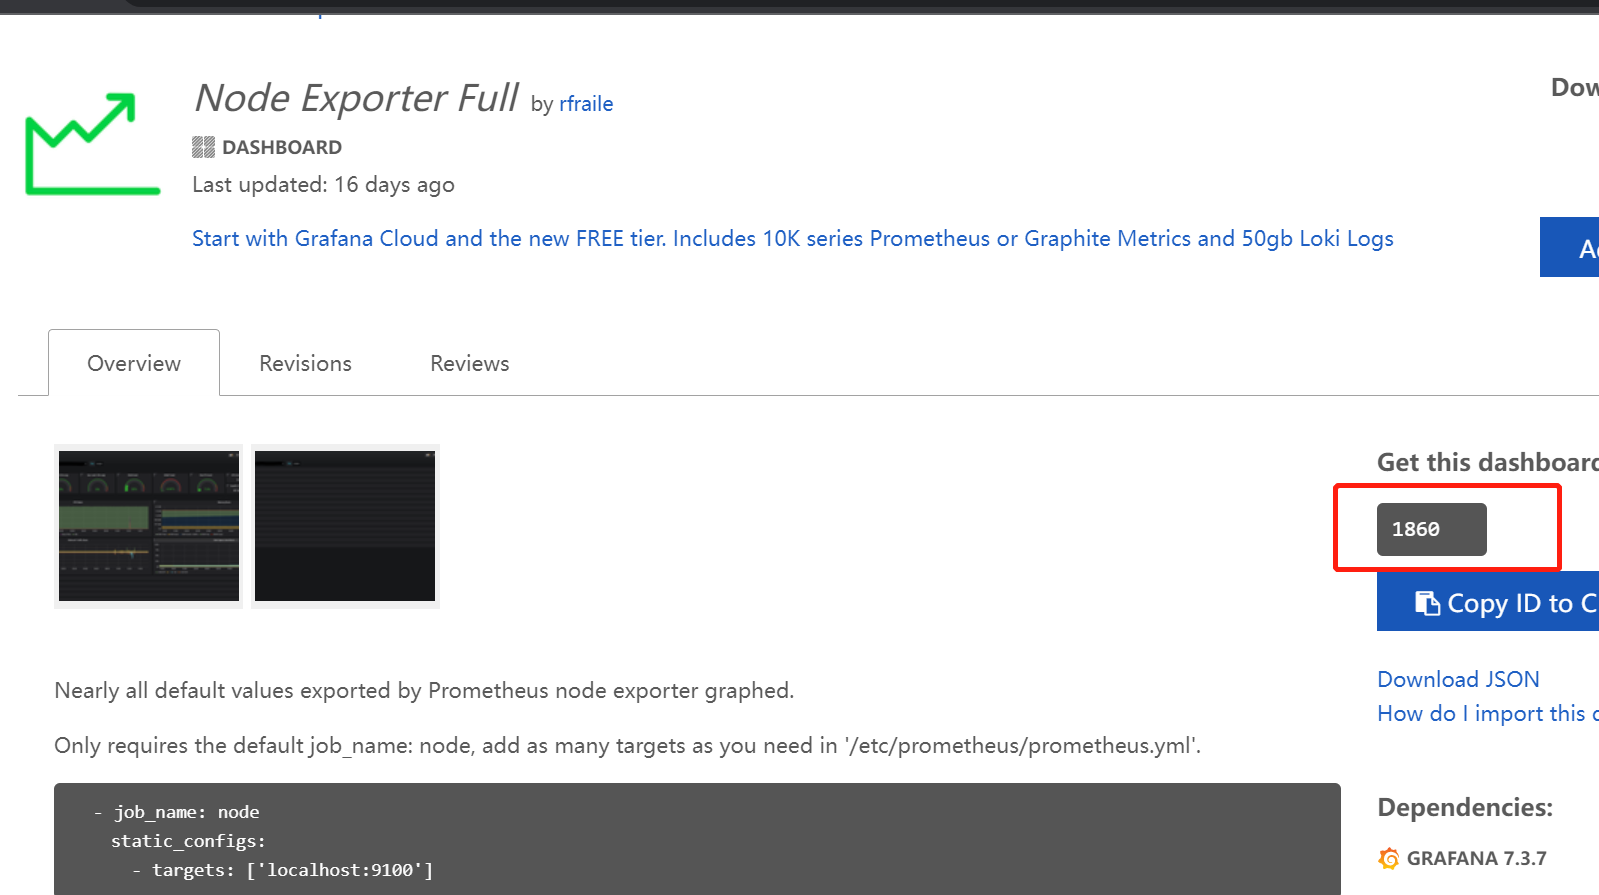
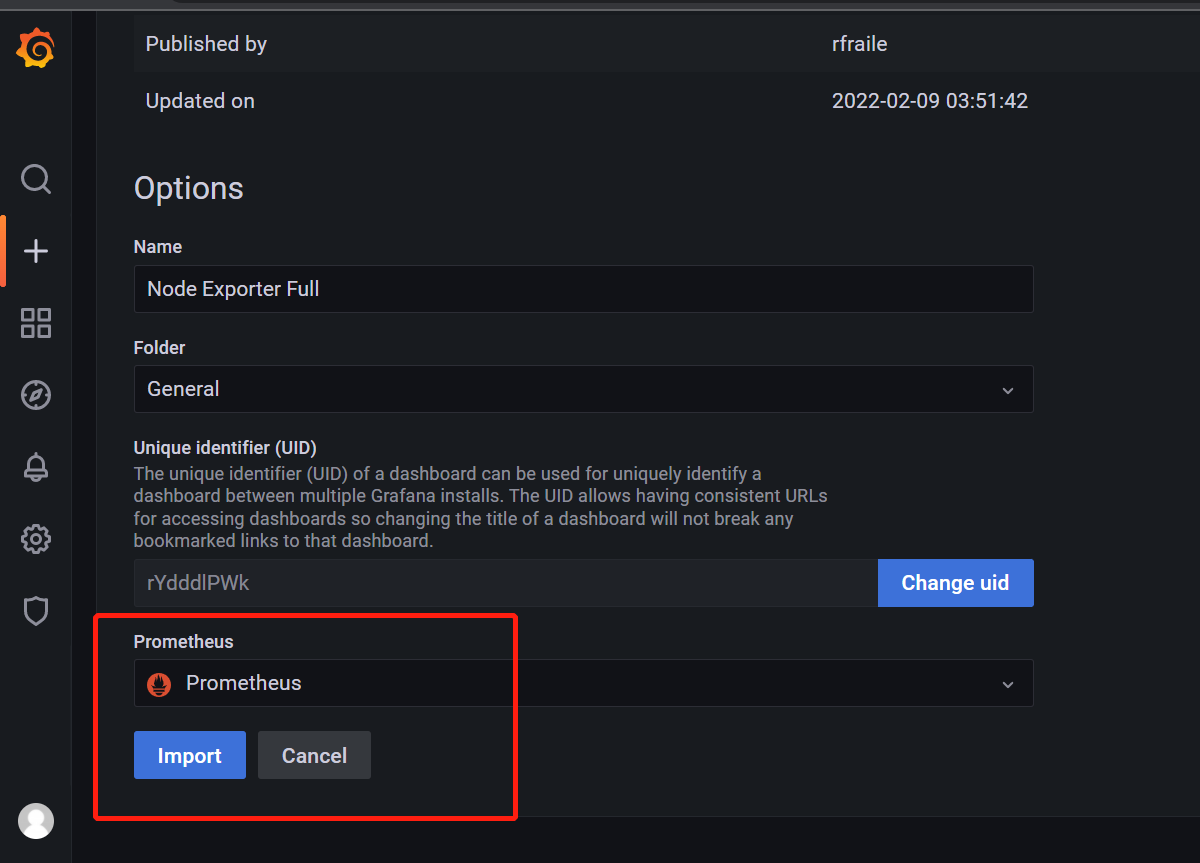
9.选择Node Exporter Full,复制仪表板ID 1860
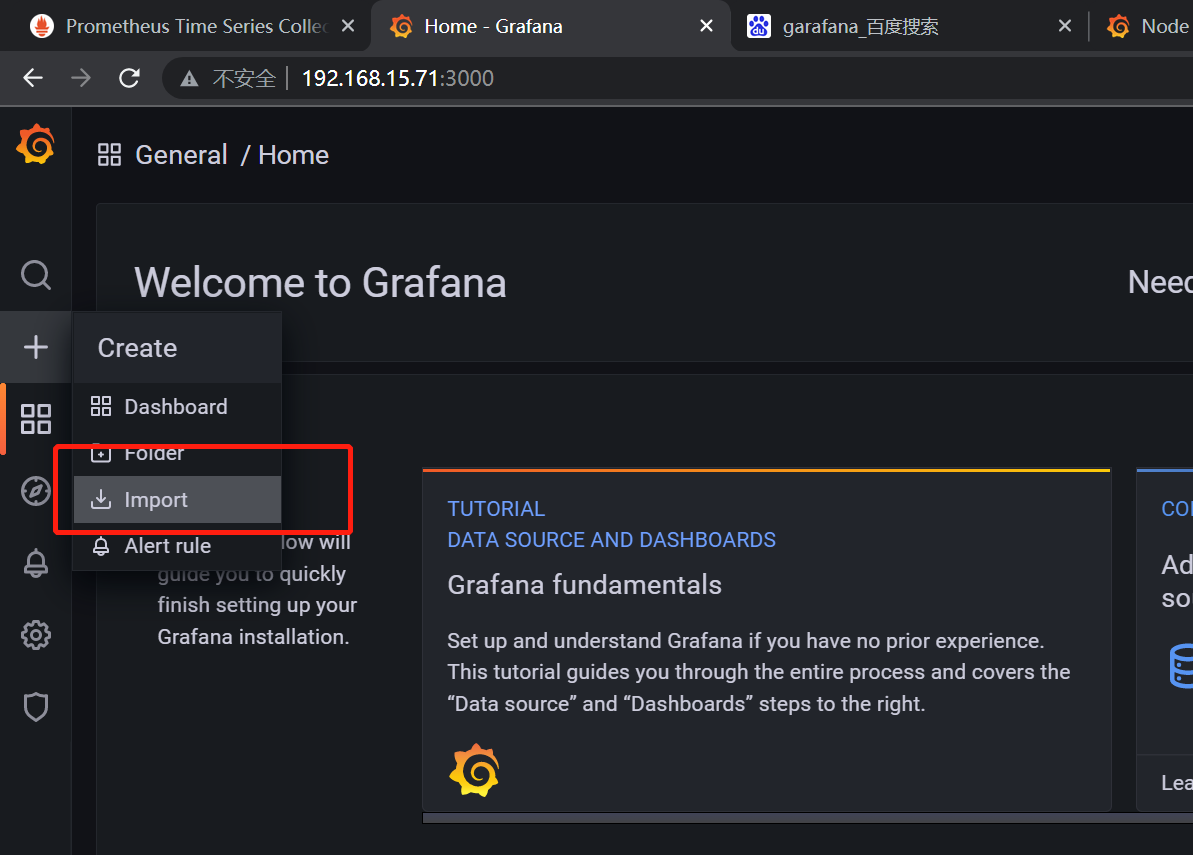
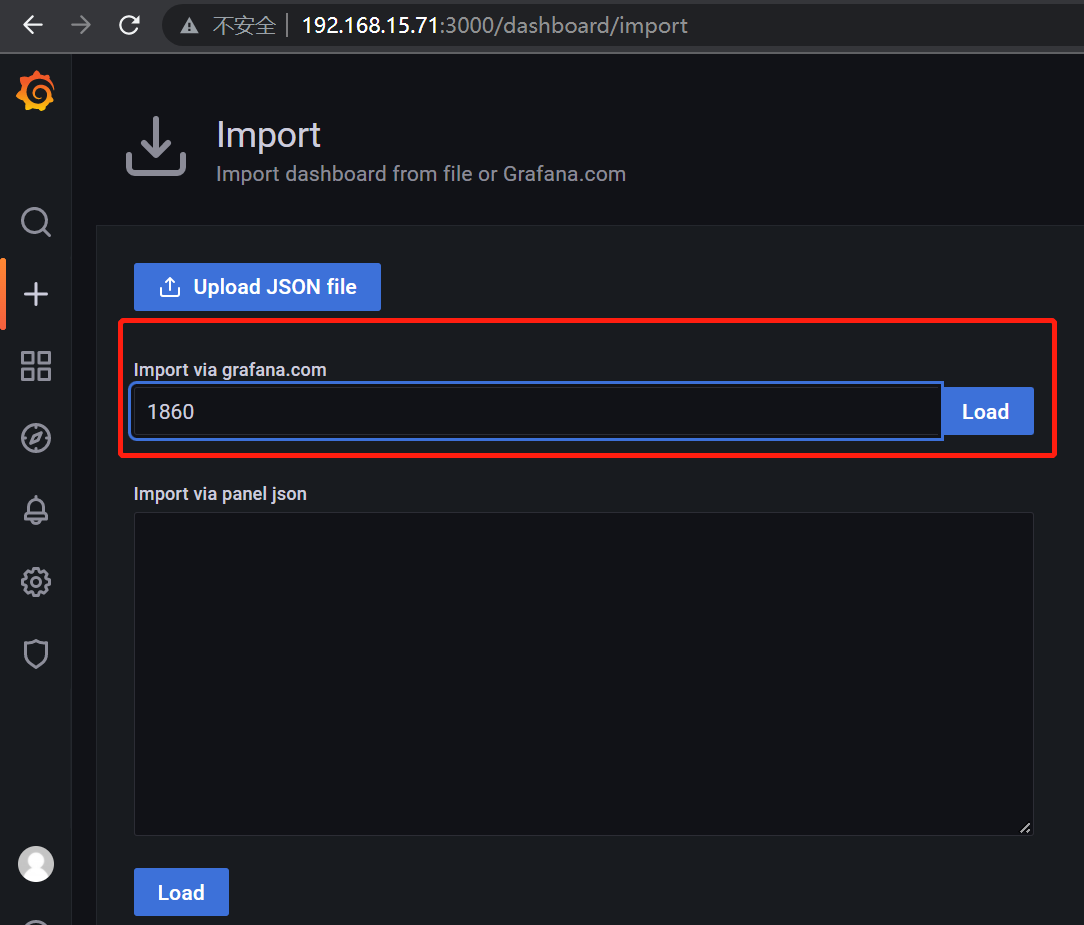
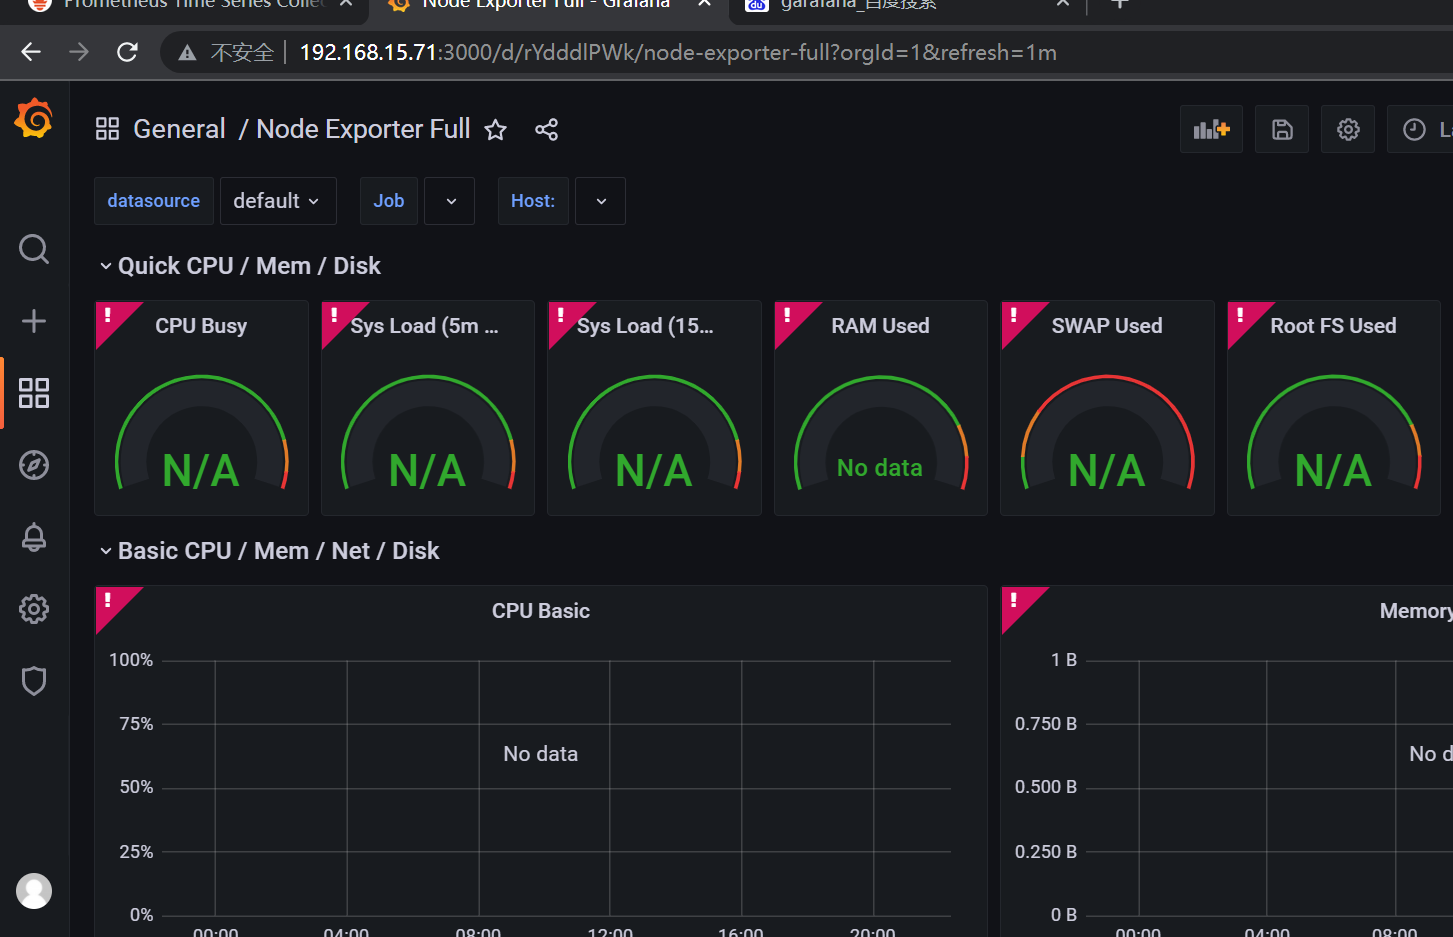
10.回到3000的grafana监控页面,点+号下面的import,输入1860点load,选prometheus然后点import即可查看图表。


【推荐】国内首个AI IDE,深度理解中文开发场景,立即下载体验Trae
【推荐】编程新体验,更懂你的AI,立即体验豆包MarsCode编程助手
【推荐】抖音旗下AI助手豆包,你的智能百科全书,全免费不限次数
【推荐】轻量又高性能的 SSH 工具 IShell:AI 加持,快人一步
· TypeScript + Deepseek 打造卜卦网站:技术与玄学的结合
· 阿里巴巴 QwQ-32B真的超越了 DeepSeek R-1吗?
· 【译】Visual Studio 中新的强大生产力特性
· 【设计模式】告别冗长if-else语句:使用策略模式优化代码结构
· AI与.NET技术实操系列(六):基于图像分类模型对图像进行分类