
linux基础之Nginx和Uwsgi 详述
目录
Nginx和Uwsgi
1、什么是web服务
web就是B/S架构:“Browser/Server”的缩写,即“浏览器/服务器”模式。
2、web服务器软件
2.1 apache
apache : httpd,最早期使用的web服务,性能不高,操作难。

网络模型:
	select : 效率低(windows只支持这个模型)
	poll
	epoll
2.2 Nginx
Nginx是一个开源且高性能、可靠的http web服务、代理服务。
Nginx如果部署在Windows里面会使用select模型,如果部署在linux里面就使用epoll模型。
官网:https://nginx.org/
软件:https://nginx.org/download/
3、部署Nginx(客户端)
3.1 yum安装
使用官方的源,配置简单,适合小白
[root@web01 ~]# vim /etc/yum.repos.d/nginx.repo
[nginx-stable]
name=nginx stable repo
baseurl=http://nginx.org/packages/centos/$releasever/$basearch/
gpgcheck=1
enabled=1
gpgkey=https://nginx.org/keys/nginx_signing.key
module_hotfixes=true
[nginx-mainline]
name=nginx mainline repo
baseurl=http://nginx.org/packages/mainline/centos/$releasever/$basearch/
gpgcheck=1
enabled=0
gpgkey=https://nginx.org/keys/nginx_signing.key
module_hotfixes=true
[root@web01 ~]# yum install nginx -y
[root@web01 ~]# systemctl stop httpd
[root@web01 ~]# systemctl start nginx
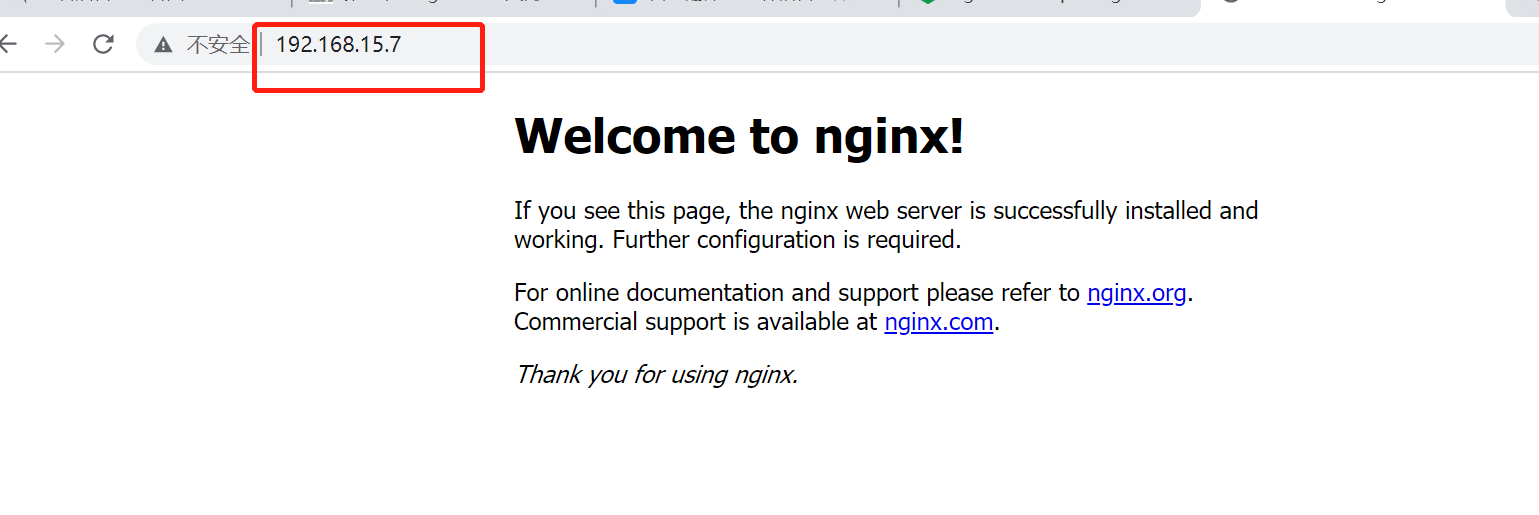
# 检查:在浏览器访问192.168.15.7 (该ip为部署好的虚拟机公网ip),如果出现welcome to nginx!则为成功部署。
3.2 二进制安装
二进制包里面包括了已经编译完成,可以直接运行的程序。你通过sudo apt-get install来进行下载和解包(安装),执行完该指令后就可以马上使用了。因此这种方式简单快捷,适合比较固定、无需改动的程序。
3.3 编译安装
在客户端安装,不建议小白,容易出错

1.下载源代码包
[root@web01 ~]#  wget https://nginx.org/download/nginx-1.20.2.tar.gz

2.解压
[root@web01 ~]# tar -xf nginx-1.20.2.tar.gz

3.cd 到文件夹
[root@web01 nginx-1.20.2]# cd nginx-1.20.2

4.做系统设置
[root@web01 nginx-1.20.2]# ./configure

5.安装
[root@web01 nginx-1.20.2]# make
[root@web01 nginx-1.20.2]# make install
4、平滑增加Nginx模块
一般情况下不会需要增加,企业里面需要的模块都已经装了。增加模块必须重新编译,把编译过的目录删掉然后重新编译。
# 在web02进行测试
# 把web01的文件scp到wenb02,然后快速部署一下
# 用./config --help查看所有的参数
# 安装过程中如果报错没有库,就直接yum安装

[root@web02 ~]#  wget https://nginx.org/download/nginx-1.20.2.tar.gz
[root@web02 ~]# tar -xf nginx-1.20.2.tar.gz
[root@web02 ~]# cd nginx-1.20.2
[root@web02 nginx-1.20.2]#./configure  --with-http_ssl_module
[root@web02 nginx-1.20.2]# yum install openssl openssl-devel -y
[root@web02 nginx-1.20.2]#./configure  --with-http_ssl_module
[root@web02 nginx-1.20.2]# make
[root@web02 nginx-1.20.2]# make install
[root@web02 nginx-1.20.2]# cd /usr/local/nginx/
[root@web02 nginx]# /usr/local/nginx/sbin/nginx -v
[root@web02 nginx]# /usr/local/nginx/sbin/nginx -V
5、nginx命令(参数)
1.nginx -h :打印nginx所有的参数命令

2.-v : 打印版本号
[root@web01 ~]# nginx -v
nginx version: nginx/1.20.2

3.-V : 打印版本号和配置项
[root@web01 ~]# nginx -V
nginx version: nginx/1.20.2
built by gcc 4.8.5 20150623 (Red Hat 4.8.5-44) (GCC)
built with OpenSSL 1.0.2k-fips  26 Jan 2017
TLS SNI support enabled
configure arguments: --prefix=/etc/nginx

4.-t : 检查配置文件是否正确
[root@web01 ~]# nginx -t
nginx: the configuration file /etc/nginx/nginx.conf syntax is ok
nginx: configuration file /etc/nginx/nginx.conf test is successful

5.-T : 测试配置文件并启动

6.-q :打印错误日志

7.-s : 操作进程
	stop	:停止
	quit	:退出
	reopen	:重启(关机之后再启动)
	reload	:重载(重新读取配置文件)
8.-p : 指定nginx的工作目录
9.-e : 指定错误日志路径
10.-c : 指定配置文件的路径
11.-g : 设置一个全局的Nginx配置项
[root@web01 ~]# nginx -g 'daemon off;'
6、nginx配置文件
# 获取nginx配置文件内容:注意配置文件修改后都需要重启nginx才会生效
[root@mysql02 ~]# cat /etc/nginx/nginx.conf

user  nginx;
worker_processes  auto;

error_log  /var/log/nginx/error.log notice;
pid        /var/run/nginx.pid;

events {
    worker_connections  1024;
}

http {
    include       /etc/nginx/mime.types;
    default_type  application/octet-stream;

    log_format  main  '$remote_addr - $remote_user [$time_local] "$request" '
                      '$status $body_bytes_sent "$http_referer" '
                      '"$http_user_agent" "$http_x_forwarded_for"';

    access_log  /var/log/nginx/access.log  main;

    sendfile        on;
    #tcp_nopush     on;

    keepalive_timeout  65;

    #gzip  on;

    include /etc/nginx/conf.d/*.conf;
}
6.1 全局配置
1.user : 指定Nginx的启动用户
# 在配置文件user改为www,重启nginx,执行ps -ef | grep niginx查看当前启动用户为www
[root@web03 nginx]# vim etc/nginx/nginx.conf
  user nginx 修改为 user www
[root@web03 nginx]# systemctl restart nginx
[root@web03 nginx]# ps -ef|grep nginx

2.worker_processes	 : 定义Nginx的worker进程数
auto == CPU数量 :auto等价于cpu的数量
# 可以在配置文件修改数量后重启nginx并查看
[root@web03 nginx]# vim etc/nginx/nginx.conf
  worker_processes  auto 修改为 worker_processes 10
[root@web03 nginx]# systemctl restart nginx
[root@web03 nginx]# ps -ef|grep nginx

3.error_log : 错误日志路径
  error_log  /var/log/nginx/error.log notice

4.pid : pid进程号的存放文件路径
  pid        /var/run/nginx.pid
6.2 模块配置
6.2.1 events 模块配置
1. worker_connections :每一个worker进程最多同时接入多少个请求
	worker_connections  1024 :每一个worker进程最多同时接入1024个请求

2. use : 指定Nginx的网络模型(# linux默认使用epoll,即文件中默认存在 use epoll; 不需要手动配置)
6.2.2 http 模块配置( web服务的模块)
1. include : 加载外部的配置项,降低当前配置文件的复杂度(# /etc/nginx/mime.types也是一个配置文件)
  include       /etc/nginx/mime.types

2. default_type : 如果找不到文件的类型,则按照指定默认类型处理
  default_type  application/octet-stream

3. log_format : 定义日志格式
# 新增一个json格式,注释掉源格式,然后重启nginx,复制一个新会话监控日志,在浏览器访问该ip,然后查看新增日志信息已经换成jason格式了。json格式日志在企业中使用比较多。
  log_format json '{"@timestamp":"$time_iso8601",'
  '"host":"$server_addr",'
  '"service":"nginxTest",'
  '"trace":"$upstream_http_ctx_transaction_id",'
  '"log":"log",'
  '"clientip":"$remote_addr",'
  '"remote_user":"$remote_user",'
  '"request":"$request",'
  '"http_user_agent":"$http_user_agent",'
  '"size":$body_bytes_sent,'
  '"responsetime":$request_time,'
  '"upstreamtime":"$upstream_response_time",'
  '"upstreamhost":"$upstream_addr",'
  '"http_host":"$host",'
  '"url":"$uri",'
  '"domain":"$host",'
  '"xff":"$http_x_forwarded_for",'
  '"referer":"$http_referer",'
  '"status":"$status"}';
  access_log /var/log/nginx/access.log json ;
  # access_log  /var/log/nginx/access.log  main;

4. sendfile : 高效读取文件
  sendfile        on

5. keepalive_timeout : 长链接保持连接的秒数(HTTP 1.0版本:短链接; HTTP 1.1版本:长连接)
  keepalive_timeout  65

6. /etc/nginx/conf.d/*.conf配置
  server : 网址模块:每个server都生成一个网站服务
	listen 		: 监听的端口
    server_name  : 定义域名

  location	 : 访问路径
	root 		 : 指定网址路径
    index 	 : 指定网址的索引文件(默认访问这个文件)
7、搭建网页游戏
1.上传代码并配置权限
[root@web03 ~]# cd /opt/
[root@web03 opt]# mkdir Super_Marie
[root@web03 opt]# ll
[root@web03 opt]# cd Super_Marie/
[root@web03 Super_Marie]# 上传代码压缩包
[root@web03 Super_Marie]# 解压压缩包
[root@web03 html5-mario]# cd /etc/nginx/conf.d/
[root@web03 conf.d]# groupadd www -g 666
[root@web03 conf.d]# useradd www -u 666 -g 666 -M -r -s /sbin/nologin
[root@web03 conf.d]# chown -R www.www /opt/*
[root@web03 conf.d]# chown -R www.www /opt/Super_Marie/*
[root@web03 conf.d]# chown -R www.www /etc/nginx/conf.d/*

2.编辑配置文件
[root@web03 conf.d]# vim /etc/nginx/conf.d/game.conf
server {
    listen 80;
    server_name game.test.com;
    location / {
        root /opt/Super_Marie;
        index index.html;
    }
}
# 注意: root后跟的目录需要可以直接访问到游戏的代码文件,而不能是包含代码文件的文件夹

3.测试配置文件是否正常
[root@web03 conf.d]# nginx -t
nginx: the configuration file /etc/nginx/nginx.conf syntax is ok
nginx: configuration file /etc/nginx/nginx.conf test is successful

4.重启Nginx
[root@web03 conf.d]# systemctl restart nginx

5.域名解析
C:\Windows\System32\drivers\etc\hosts
修改为:
172.16.1.9 game.test.com
8、nginx虚拟主机
8.1 基于多IP的方式
1.切换路径
[root@web03 conf.d]# cd /etc/nginx/conf.d/

2.编辑配置文件
[root@web03 conf.d]# vim game1.conf
# 修改为以下内容后保存退出:

server {
    listen 80;
    server_name 192.168.15.7;
    location / {
	root /opt/Super_Marie;
        index index.html;
    }
}
server {
    listen 80;
    server_name 172.16.1.9;
    location / {
        root /opt/Chinese_chess;
        index index.html;
    }
}

3.测试配置文件是否正常
[root@web03 conf.d]# nginx -t

4.重启nginx
[root@web03 conf.d]# systemctl restart nginx

5.浏览器访问 172.16.1.9 和 192.168.15.7进行测试
8.2 基于多端口的方式
1.切换路径
[root@web03 conf.d]# cd /etc/nginx/conf.d/

2.编辑配置文件
[root@web03 conf.d]# vim game2.conf
# 修改为以下内容后保存退出:

server {
    listen 80;
    server_name 192.168.15.9;
    location / {
        root /opt/Super_Marie;
        index index.html;
    }
}
server {
    listen 81;
    server_name 192.168.15.9;
    location / {
        root /opt/Chinese_chess;
        index index.html;
    }
}

3.测试配置文件是否正常
[root@web03 conf.d]# nginx -t

4.重启nginx
[root@web03 conf.d]# systemctl restart nginx

5.浏览器访问 172.16.1.9:80 和 1172.16.1.9:81 进行测试
8.3 基于多域名的方式
1.切换路径
[root@web03 conf.d]# cd /etc/nginx/conf.d/

2.编辑配置文件
[root@web03 conf.d]# vim game3.conf
# 修改为以下内容后保存退出:

server {
	listen 80;
	server_name www.game.test.com;
	location / {
	root /opt/Super_Marie;
	index index.html;
	}
}

server {
	listen 80;
	server_name www.game1.test.com;
	location / {
	root /opt/Chinese_chess;
	index index.html;
	}
}

3.测试配置文件是否正常
[root@web03 conf.d]# nginx -t

4.重启nginx
[root@web03 conf.d]# systemctl restart nginx

5.域名解析:电脑编辑:
C:\Windows\System32\drivers\etc\hosts
修改为:
172.16.1.9  www.game.test.com www.game1.test.com

6.浏览器访问 www.game.test.com 和 www.game1.test.com 进行测试
9、nginx日志(***重要)
网站状态码报500的比例 : 可以作为网站性能的一部分判断标准
网站的访问来源;网站排错

# 查看错误日志
[root@web03 conf.d]# cat /var/log/nginx/error.log

log_format  main  '$remote_addr - $remote_user [$time_local] "$request" '
                      '$status $body_bytes_sent "$http_referer" '
                      '"$http_user_agent" "$http_x_forwarded_for"';

* $remote_addr  : 客户端IP(如果走openvpn访问那就是记录安装vpn的客户端ip)
* $http_x_forwarded_for  : 真实的客户端IP(在反向代理中生效)
$remote_user :
	# JWT :Json web token (JWT), 是为了在网络应用环境间传递声明而执行的一种基于JSON的开放标准((RFC 7519).该token被设计为紧凑且安全的,特别适用于分布式站点的单点登录(SSO)场景。JWT的声明一般被用来在身份提供者和服务提供者间传递被认证的用户身份信息,以便于从资源服务器获取资源,也可以增加一些额外的其它业务逻辑所必须的声明信息,该token也可直接被用于认证,也可被加密。
[$time_local] : 东八区时间
$request : 访问类型:分为GET /POEST /PUT /DELETE
$status :状态
$body_bytes_sent: 文件的字节数
$http_referer : 访问的域名
$http_x_forwarded_for : 客户端浏览器标识

# 知识储备
# 配置文件中可以设置多种日志格式,每种格式的定义名不能重复
# 如果遇到了报错,首先需要查看日志来排错
# 查看当前nginx服务详细状态:
[root@web03 conf.d]# systemctl status nginx.service -l
# 监控nginx正确日志
[root@web03 opt]#  tail -f /var/log/nginx/access.log
# 监控nginx的错误日志
[root@web03 opt]#  tail -f /var/log/nginx/access.log
10、nginx访问控制模块
10.1 ngx_http_access_module
nginx默认情况下启动了这个模块

指令(Directives)
Syntax(语法):	allow address | CIDR | unix: | all;
Default:	—
Context(使用环境):	http, server, location, limit_except

# 查看当前客户端有没安装这个模块
[root@web03 nginx-1.20.2]# ./configure --help|grep ngx_http_access_module

# 两个配置项(允许或者拒绝某些IP访问)
deny	: 拒绝
allow	:允许

# 案例1:允许Windows的ip访问,不允许其他IP访问
[root@web03 nginx-1.20.2]# vim /etc/nginx/conf.d/game3.conf
# 加入以下配置两行内容并保存
	"""allow 192.168.15.1;
	deny all;"""

server {
        listen 80;
        server_name www.game.test.com;
        allow 192.168.15.1;
        deny all;
        location / {
        root /opt/Super_Marie;
        index index.html;
        }
}

# 案例2:允许192.168.15.0这个网段访问,不允许其他网段访问
# 加入以下配置两行内容并保存
    """allow 192.168.15.0/24;
    deny all;"""

server {
	listen 80;
	server_name www.game.test.com;
	allow 192.168.15.0/24;
	deny all;
	location / {
	root /opt/Super_Marie;
	index index.html;
	}
}

# 案例3:只允许通过VPN来访问
# 加入以下配置两行内容并保存
  """ allow 172.16.1.81;
   deny all;"""

server {
        listen 80;
        server_name www.game.test.com;
        allow 172.16.1.81;
        deny all;
        location / {
        root /opt/Super_Marie;
        index index.html;
        }
}
10.2 ngx_http_auth_basic_module
认证模块:访问之前需要登录

Syntax:	auth_basic string | off;
Default:
auth_basic off;
Context:	http, server, location, limit_except

# 使用之前确认已经安装该模块
[root@web03 nginx-1.20.2]# ./configure --help|grep ngx_http_access_module
	--without-http_auth_basic_module   disable ngx_http_auth_basic_module   # 默认启用该模块的

1.安装httpd-tools
[root@web03 ~]# yum install httpd-tools -y

2.生成用户名密码文件
[root@web03 ~]# htpasswd -c /etc/nginx/auth qql
    New password: # 输入密码
    Re-type new password:   # 再次输入密码
    Adding password for user qql

3.将文件路径加入Nginx配置
[root@web03 ~]# vim /etc/nginx/conf.d/game3.conf
    """auth_basic "Welcome To Login";
    auth_basic_user_file /etc/nginx/auth;"""

server {
	listen 80;
	server_name www.game.test.com;
	auth_basic "welcome to Login";
	auth_basic_user_file /etc/nginx/auth;
	location / {
	root /opt/Super_Marie;
	index index.html;
	}
}

4.重启Nginx
[root@web03 ~]# nginx -t
nginx: the configuration file /etc/nginx/nginx.conf syntax is ok
nginx: configuration file /etc/nginx/nginx.conf test is successful
[root@web03 ~]# systemctl restart nginx

5.去浏览器访问www.game.test.com输入账号qql,密码1进行测试。
10.3 ngx_http_autoindex_module
该模块用于展示目录索引。
Syntax:	autoindex on | off;
Default:
autoindex off;
Context:	http, server, location

# 使用之前确认已经安装该模块(默认启用该模块的)
[root@web03 nginx-1.20.2]# ./configure --help|grep ngx_http_autoindex_module

[root@web03 conf.d]# vim /etc/nginx/conf.d/game4.conf
# 键入以下内容并保存(需要有权限,测试放在这个路径下所有账号都有权限访问 :/tmp/nginx-1.20.2)

server {
        listen 80;
        server_name 192.168.15.9;

        location / {
        root /tmp/nginx-1.20.2;
        autoindex on;
        autoindex_exact_size on;
        autoindex_localtime on;
        autoindex_format html;
        }
}
11、Nginx状态监控模块
11.1 ngx_http_stub_status_module
该模块用于监控Nginx运行状态。
# 该模块在配置文件中需要一个单独的location

# 使用之前确认已经安装该模块(默认启用该模块的)
[root@web03 nginx-1.20.2]# ./configure --help|grep ngx_http_stub_status_module

[root@web03 conf.d]# cat game4.conf

server {
    listen 80;
    server_name 192.168.15.9;
    location / {
        stub_status;
    }
}

# 浏览器访问192.168.15.9
Active connections: 2
server accepts handled requests
 2 2 12
Reading: 0 Writing: 1 Waiting: 1

# 解释:
Active connections :当前活动客户端连接数,包括Waiting连接数
server :
accepts :接受的客户端连接总数
handled :处理的连接总数
requests : 客户端请求的总数
Reading :nginx 正在读取请求头的当前连接数
Writing :nginx 将响应写回客户端的当前连接数
Waiting :当前等待请求的空闲客户端连接数
12、Nginx访问连接控制模块
12.1 控制Nginx连接数 :ngx_http_limit_conn_module
Syntax:	limit_conn zone number;
Default:	—
Context:	http, server, location

1.安装ab测试命令(ab工具用于做压力测试)
	yum install httpd-tools -y

2.ab 参数
    -n : 总共需要访问多少次
    -c : 每次访问多少个

3.试用ab工具
[root@web03 conf.d]# ab -n 10000 -c 200 http://192.168.15.9/

# 要求
[root@web03 conf.d]# vim game4.conf

# limit_req_zone $remote_addr zone=one:10m rate=1r/s;
limit_conn_zone $remote_addr zone=addr:10m;
server {
    listen 80;
    server_name 192.168.15.9;
    # limit_req zone=one burst=5;
    limit_conn addr 1;
    location / {
        root /opt/Super_Marie;
	index index.html;
    }
}
12.2 控制Nginx访问量 :ngx_http_limit_req_module
Syntax:	limit_req zone=name [burst=number] [nodelay | delay=number];
Default:	—
Context:	http, server, location

1、连接池
    limit_req_zone $remote_addr zone=one:10m rate=1r/s;
    声明连接池        变量     连接词的名称:连接池的大小  速率
2、限制数

# 案例1:要求每秒只能有一个访问。
[root@web03 conf.d]# vim game4.conf

limit_req_zone $remote_addr zone=one:10m rate=1r/s;
server {
    listen 80;
    server_name 192.168.15.9;
    limit_req zone=one burst=5;
    location / {
        root /opt/Super_Marie;
	index index.html;
    }
}

# 调用,超过5次就强硬拒绝掉 :limit_req zone=one burst=5;
13、location
使用Nginx Location可以控制访问网站的路径, 但一个server可以有多个location配置, 多个location的具有不同的优先级区分。
13.1 location匹配符号
| 匹配符 | 匹配规则 | 优先级 |
|---|---|---|
| = | 精确匹配 | 1 |
| ^~ | 以某个字符串开头 | 2 |
| ~ | 区分大小写的正则匹配 | 3 |
| ~* | 不区分大小写的正则匹配 | 3 |
| / | 通用匹配,任何请求都会匹配到 | 4 |
# 优先级测试:测出一个优先级就注释掉一个location,再重启nginx继续测试下一个优先级。

1.编辑配置文件
[root@web03 conf.d]# vim game4.conf

server {
    listen 80;
    server_name _;

    location ~* /python {
        default_type text/html;
        return 200 "Location ~*";
    }

    location ~ /Python {
        default_type text/html;
        return 200 "Location ~";
    }

    location ^~ /python {
        default_type text/html;
        return 200 "Location ^~";
    }

    location = /python {
        default_type text/html;
        return 200 "Location =";
    }
}

2.重启nginx,然后去浏览器访问http://192.168.15.9/python
[root@web03 conf.d]# systemctl restart nginx
13.2 案例:把超级玛丽的图片文件夹共享到NFS
1.创建挂载点并给权限
root@nfs ~]# cd /opt
[root@nfs opt]# mkdir /opt/img
[root@nfs opt]# ll
[root@nfs opt]# vim /etc/exports
  # 新增以下内容后保存退出
  /opt/img  172.16.1.0/20(rw,sync,all_squash,anonuid=666,anongid=666)
[root@nfs opt]# chown -R www.www /opt/img/
[root@nfs opt]# cd

2.重启nfs和rpcbind
[root@nfs ~]# systemctl restart nfs-server rpcbind

3.查看当前挂载点是否有刚刚创建的点
[root@nfs ~]# showmount -e

4.去客户端挂载
[root@web03 opt]# mkdir image
[root@web03 opt]# cd image
[root@web03 image]# mkdir images
[root@web03 opt]# mount -t nfs 172.16.1.31:/opt/img /opt/image

5.查看挂载
[root@web03 opt]# df -h

6.移动图片文件夹的所有文件到挂载的目录
[root@web03 opt]# mv Super_Marie/images/* /opt/image/images/

7.删除原图片文件夹
[root@web03 Super_Marie]# rm -rf images/

8.修改配置文件,键入以下内容并保存
[root@web03 conf.d]# vim game5.conf

server {
    listen 80;
    server_name 192.168.15.9;
    location / {
        root /opt/Super_Marie;
        index index.html;
    }
}

9.重启nginx,然后去浏览器访问192.168.15.9,页面无图片。
[root@web03 conf.d]# systemctl restart nginx

10.修改配置文件,新增一个location来新增图片访问的路径
[root@web03 conf.d]# vim game5.conf

server {
    listen 80;
    server_name 192.168.15.9;
    location / {
        root /opt/Super_Marie;
        index index.html;
    }
    location ~ /image {
        root /opt/image;
    }
}

11.重启nginx,然后去浏览器访问192.168.15.9,页面有图片了。
[root@web03 conf.d]# systemctl restart nginx

12.在其他的客户端也新增挂载点然后挂载到NFS就可以实现共享了。
14、LNMP架构
LNMP是一套技术的组合,L=Linux、N=Nginx、M~=MySQL、P~=Python

首先Nginx服务是不能处理动态请求,那么当用户发起动态请求时, Nginx又是如何进行处理的。
  1.静态请求:请求的内容是静态文件就是静态请求
	1)静态文件:文件上传到服务器,永远不会改变的文件就是静态文件
	2)html就是一个标准的静态文件
  2.动态请求:请求的内容是动态的就是动态请求
	1)不是真实存在服务器上的内容,是通过数据库或者其他服务拼凑成的数据

# 当用户发起http请求,请求会被Nginx处理,如果是静态资源请求Nginx则直接返回,如果是动态请求Nginx则通过uwsgi协议转交给后端的Python程序处理
14.1 uwsgi
因为nginx不支持wsgi协议,无法直接调用py开发的webApp(python开发的网站)。
在nginx + uwsgi + Django的框架里,nginx代理+ webServer,uwsgi是wsgiServer,Django是webApp。
nginx接收用户请求,并判定哪些转发到uWsgi,uWsgi再去调用pyWebApp。
14.2 uwsgi服务部署
1、创建用户:统一用户
[root@web03 opt]# groupadd django -g 888
[root@web03 opt]# useradd django -u 888 -g 888 -r -M -s /bin/sh

2、安装依赖软件
[root@web03 opt]# yum install python3 libxml* python-devel gcc* pcre-devel openssl-devel python3-devel -y

3、安装Django和uwsgi
[root@web03 opt]# pip3 install django
[root@web03 opt]# pip3 install uwsgi

4、创建项目
[root@web03 opt]# cd /opt
[root@web03 opt]# django-admin startproject linux
[root@web03 opt]# cd linux
[root@web03 opt]# django-admin startapp app01
[root@web03 linux]# vim linux/settings.py
  ALLOWED_HOSTS = ['*']  # 允许所有的ip都能访问
  DATABASES = {}

# 指定启动端口
[root@web03 linux]# python3 manage.py runserver 0.0.0.0:8000
# 启动测试:去浏览器访问192.168.15.9:8000

5、编辑项目配置文件:键入以下内容并保存
[root@localhost ~]# vim /opt/linux/myweb_uwsgi.ini

  [uwsgi]
  # 端口号
  socket            = :8000
  # 指定项目的目录
  chdir           = /opt/linux
  # wsgi文件路径
  wsgi-file       = linux/wsgi.py
  # 模块wsgi路径
  module          = linux.wsgi
  # 是否开启master进程
  master          = true
  # 工作进程的最大数目
  processes       = 4
  # 结束后是否清理文件
  vacuum          = true

6、启动uwsgi
[root@web03 linux]# uwsgi -d --ini myweb_uwsgi.ini --uid 666

-d 	  : 以守护进程方式运行
--ini : 指定配置文件路径
--uid : 指定uid

# 这时候再去浏览器访问192.168.15.9:8000已经不能访问了, 因为uwsgi是一种TCP服务,需要转换成http服务才能在浏览器访问。TCP 服务包含http,http不包含tcp。如果需要访问的话就需要nginx来进行转换。

7、编辑Nginx配置文件:键入以下内容并保存
[root@web03 nginx]# cd /etc/nginx/conf.d/
[root@web03 conf.d]# ll
[root@web03 conf.d]# vim /etc/nginx/conf.d/python.conf

server {
    listen 80;
    server_name py.test.com;
    location / {
        include uwsgi_params;
        uwsgi_pass 127.0.0.1:8000;
        uwsgi_read_timeout 2;
        uwsgi_param UWSGI_SCRIPT linux.wsgi;
        uwsgi_param UWSGI_CHDIR /opt/linux;
        index  index.html index.htm;
        client_max_body_size 35m;
    }
}

8、重启Nginx配置
[root@web03 conf.d]# systemctl restart nginx

9、域名解析完成后去浏览器访问 172.16.1.9即可访问成功。
C:\Windows\System32\drivers\etc
  172.16.1.9 py.test.com

# 每个语言都有对应配置的params。
[root@web03 linux]# cd /etc/nginx
[root@web03 nginx]# ll
  uwsgi_params : 给python用的
  scgi_params : 给java用的
  fastcgi_params : 给PHP用的
  V2_params : 给Go用的,目前linux不支持

10、压力测试:
[root@web03 conf.d]# cd /opt/linux
[root@web03 linux]# python3 manage.py runserver 0.0.0.0:8001
# 在浏览器访问192.168.15.9:8001

[root@web03 linux]# cd /etc/nginx/conf.d
[root@web03 conf.d]# vim py.conf

  server {
	listen 80;
    server_name py1.test.com;
    location / {
        proxy_pass 127.0.0.1:8001;
        }
    }

# 域名解析
C:\Windows\System32\drivers\etc
  172.16.1.9 py1.test.com

# 换一个客户端进行域名解析再进行压测
[root@web02 ~]# cd /opt
[root@web02 opt]# vim /etc/hosts
  172.16.1.9 py.test.com py1.test.com

[root@web02 opt]# curl -I -H'Host: py1.test.com' 172.16.1.9
[root@web02 opt]# curl -I -H'Host: py.test.com' 172.16.1.9

# netstat -nutlp # 查看端口使用状态
15、部署BBS项目
1、部署数据库
[root@db01 ~]# yum install mariadb* -y

2、启动数据库
[root@db01 ~]# systemctl start mariadb

3、远程连接MySQL数据:在数据库输入以下命令:

  GRANT ALL PRIVILEGES ON *.* TO 'root'@'%' IDENTIFIED BY '123456' WITH GRANT OPTION;  #创建用户
  FLUSH PRIVILEGES;  #刷新权限
  CREATE DATABASE `bbs` DEFAULT CHARACTER SET utf8 COLLATE utf8_unicode_ci;  #创建数据库

# 然后去pycharm新增连接SQL,name输入db01,Host输入172.16.1.61,User输入root,Password输入123456,点test connection测试通过后点OK即可完成远程连接。

4、部署BBS
4.1、上传代码然后解压,更改路径
[root@db01 ~]# unzip bbs.zip
[root@db01 ~]# mv bbs /opt/

4.2、数据库迁移(数据库迁移前:只留__init__,,其他都删掉)
[root@web03 migrations]# cd /opt/bbs/app01/migrations/
[root@web03 migrations]# pwd
  /opt/bbs/app01/migrations

[root@web03 migrations]# rm -rf 00*
[root@web03 migrations]# rm -rf __pycache__/
[root@web03 migrations]# ll
[root@web03 migrations]# cd /opt/bbs/
[root@web03 bbs]# cd /opt/bbs

# 修改Django版本
[root@web03 bbs]# pip3 uninstall django
[root@web03 bbs]# pip3 install django==1.11

# 安装MySQL数据库插件
[root@web03 bbs]# pip3 install pymysql

# 修改数据连接修改以下内容并保存:
[root@web03 bbs]# vim bbs/settings.py

ALLOWED_HOSTS = ['*']
DATABASES = {
    'default': {
        'ENGINE': 'django.db.backends.mysql',
        'NAME': 'bbs',
        'USER': 'root',
        'PASSWORD': '123456',
        'HOST': '172.16.1.61',
        'PORT': 3306,
        'CHARSET': 'utf8'
    }
}

# 创建数据库迁移文件
[root@web03 bbs]# python3 manage.py makemigration

# 数据库迁移
[root@web03 bbs]# python3 manage.py migrate

4.3、配置UWSGI(wsgi是C语言写的,启动了之后直接绕过python,提高性能。)
[root@localhost ~]# vim /opt/bbs/myweb_uwsgi.ini

[uwsgi]
# 端口号
socket            = :8002
# 指定项目的目录
chdir           = /opt/bbs
# wsgi文件路径
wsgi-file       = bbs/wsgi.py
# 模块wsgi路径
module          = bbs.wsgi
# 是否开启master进程
master          = true
# 工作进程的最大数目
processes       = 4
# 结束后是否清理文件
vacuum          = true

[root@web03 bbs]# uwsgi --ini myweb_uwsgi.ini --uid 666  # 启动uwsgi
[root@web03 bbs]# ps -ef | grep uwsgi  # 查看uwsgi进程
[root@web03 bbs]# kill -9 3260
[root@web03 bbs]# kill -9 13708

4.4、配置Nginx并重启nginx
[root@localhost ~]# vim /etc/nginx/conf.d/bbs.conf

server {
    listen 80;
    server_name bbs.test.com;
    location / {
        include uwsgi_params;
        uwsgi_pass 127.0.0.1:8002;
        uwsgi_read_timeout 2;
        uwsgi_param UWSGI_SCRIPT bbs.wsgi;
        uwsgi_param UWSGI_CHDIR /opt/bbs;
        index  index.html index.htm;
        client_max_body_size 35m;
    }
}

[root@web03 bbs]# systemctl restart nginx

4.5、域名解析后浏览器访问 bbs.test.com
C:\Windows\System32\drivers\etc
  172.16.1.9 bbs.test.com
