Android-组件RadioButton使用技巧
当初第一次接触Android组件的时候,我感觉微信底部的菜单,是用button这样的组件来做的。
可我想错了。却是用RadioButton来做的。那到底怎么做,接下来我就做一下分享!希望看了之后你也觉得很简单,很神奇!

上代码:
<?xml version="1.0" encoding="utf-8"?>
<LinearLayout xmlns:android="http://schemas.android.com/apk/res/android"
    android:layout_width="match_parent"
   android:layout_height="match_parent"
    android:orientation="horizontal"
    >
     <RadioGroup                                          //RadioGroup包裹下面的RadioButton
        android:id="@+id/radioGroup1"
        android:layout_width="match_parent"
        android:layout_height="60dp"
        android:orientation="horizontal"
        android:background="@drawable/group_buton_nomal"   //背景图片 在drawable目录下
        android:gravity="center">

         <RadioButton
             android:id="@+id/radioButton1"
             style="@drawable/color"
             android:layout_width="wrap_content"
             android:layout_height="wrap_content"
             android:layout_weight="1"
             android:button="@null"
             android:checked="true"
             android:textColor="@drawable/color"
             android:drawableTop="@drawable/xiaox"
             android:gravity="center"
             android:text="微信" />

    <RadioButton
        android:id="@+id/radioButton4"
        android:layout_width="wrap_content"
        android:layout_height="wrap_content"
        android:layout_weight="1"
        android:drawableTop="@drawable/tongxuil"
        android:button="@null"
        android:text="通讯录"
        android:textColor="@drawable/color"
        android:gravity="center"
        />

    <RadioButton
        android:id="@+id/radioButton3"
        android:layout_width="wrap_content"
        android:layout_height="wrap_content"
        android:layout_weight="1"
        android:button="@null"
        android:drawableTop="@drawable/faxian"
        android:gravity="center"
        style="@drawable/color"
        android:textColor="@drawable/color"
        android:text="发现" />

    <RadioButton
        android:id="@+id/radioButton2"
        android:layout_width="wrap_content"
        android:layout_height="wrap_content"
        android:layout_weight="1"
        android:button="@null"
        android:textColor="@drawable/color"
        android:drawableTop="@drawable/wo"
        android:text="我"
        android:gravity="center"
        />
    </RadioGroup>
</LinearLayout>
晕吗?那我就从中拿一个RadioButton分析给大家看,那就拿"微信"这个组件:
       <RadioButton
             android:id="@+id/radioButton1"
             android:layout_width="wrap_content"
             android:layout_height="wrap_content"
             android:layout_weight="1"
             android:button="@null"                 //隐藏
             android:checked="true"                 //默认选中状态
             android:textColor="@drawable/color"   //文字颜色color是XML文件,根据判断是否选中而更改当前颜色
             android:drawableTop="@drawable/xiaox"  //图片样式 xiaox是XML文件,根据判断是否选中而更改当前图片
             android:gravity="center"              //文字和图片居中
             android:text="微信" />
如果没android:button="@null" //隐藏 那么效果如下:

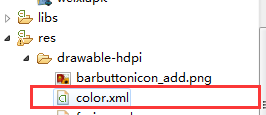
color XML文件代码如下:利用selector属性来判断 android:textColor="@drawable/color" //文字颜色color是XML文件,根据判断是否选中而更改当前颜色

<?xml version="1.0" encoding="utf-8"?>
<selector xmlns:android="http://schemas.android.com/apk/res/android" >
    <item android:state_checked="true"  //当RadioButton为true的时候文字的颜色是#07bb07 否则是 #999999 进行切换
 android:color="#07bb07"></item>
<item android:color="#999999"></item> </selector>
图片样式XML代码如下也是利用selector属性来判断:android:drawableTop="@drawable/xiaox" //图片样式 xiaox是XML文件,根据判断是否选中而更改当前图片
<?xml version="1.0" encoding="utf-8"?>
<selector xmlns:android="http://schemas.android.com/apk/res/android" >
    <item android:state_checked="true"
        android:drawable="@drawable/tabbar_mainframehl" ></item>
    <item android:drawable="@drawable/tabbar_mainframe"></item>

</selector>
把上面代码 复制到你的XML进行相关修改(selector这个属性下的xml)就看到效果了!图片样式请到百度下载!!!
如果还有什么不懂的可以留言,我也会尽我所能。本文欢迎各位大神批评指正!


