Linux操作篇之LNMP--实验(三)
一、状态统计信息
在nginx中,可以配置使其可以查看当前nginx访问统计信息。使用的是安装nginx时,安装过--with-http_stub_status_module这一模块。
找到nginx主配置文件,在server标签下可新建location标签。填写以下代码。(注意后面的分号和括号)
location /nginx_status {
stub_status on; //开启状态信息统计
access_log off; //访问状态统计时,不记入到统计中
}
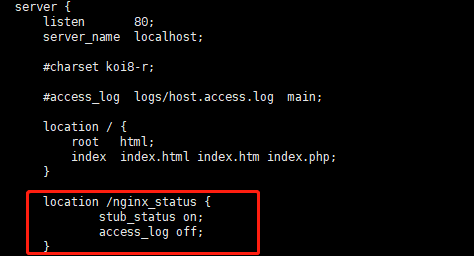

检查没有问题后,可以对其服务进行重启,然后完成后,浏览器输入www.IP/nginx_status就可以查看了。

其中:第一行表示当前的连接数、第二行代表以处理的连接信息、第三行依次代表处理的连接数量;成功的TCP握手次数;已处理的请求。
二、目录保护(与apache目录保护一样)
主配置文件中添加以下代码。
auth_basic "Hell Word!";
auth_basic_user_file /usr/local/nginx/html/htpasswd.nginx
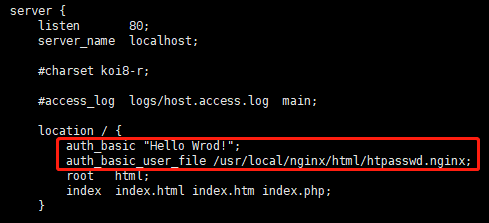
然后使用apache的htpasswd命令生成密码文件(需要安装apache,并不需要开启服务,只需要使用htpasswd命令)
htpasswd -c /usr/local/nginx/html/htpasswd.nginx xiaoming (-c是新建第一个,当第二个开始使用-m,路径与密码文件名称要与配置文件中填写一致)
New password:
Re-type new password
检查没有问题后,重启nginx服务,访问时,需要输入用户名密码

三、访问控制(限制IP登录)
限制其他用户登录统计信息,只有本机可以。
allow IP 代表允许访问的IP地址
deny IP/掩码 代表禁止访问的地址(段)
0.0.0.0/0代表禁止所有IP访问

四、虚拟主机
server {
listen 80;
server_name www.test1.com;
root html/test1;
index test1.php;
location ~ \.php$ {
root html/test1;
fastcgi_pass 127.0.0.1:9000;
fastcgi_index test1.php;
fastcgi_param SCRIPT_FILENAME /scripts$fastcgi_script_name;
include fastcgi.conf;
}
}
server {
listen 80;
server_name www.test2.com;
root html/test2;
index test2.php;
location ~ \.php$ {
root html/test2;
fastcgi_pass 127.0.0.1:9000;
fastcgi_index test2.php;
fastcgi_param SCRIPT_FILENAME /scripts$fastcgi_script_name;
include fastcgi.conf;
}
}

新建测试网页
修改hosts文件,添加域名解析,就可以进行访问了

五、反向代理
填写要代理的服务器地址
location / {
proxy_pass http://192.168.171.133:80;
}
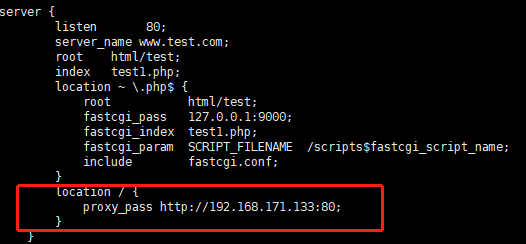
测试结果正确


六、反向代理(负载均衡)
设三台服务器,两个安装apache,作为后端服务器;一台安装nginx,为反向代理服务器。设置域名为www.test.com,测试一apache服务器测试页面test1;测试二apache服务器测试页面test2。(正常情况下是一样的。这里为了可以看清负载均衡,所以设置不一样,方便区分)
建立后端资源池,backends 是资源池名称,下面是后端(apache)服务器的IP和服务端口。(此段代码在server标签之前)
upstream backends {
server 192.168.171.133:80;
server 192.168.171.134:80;
}
添加反向代理,代理的地址就是上面填写的资源池名称;下面是重写请求头部,保证所有网站都可以访问成功。
location / {
proxy_pass http://backends;
proxy_set_header Host $host;
}
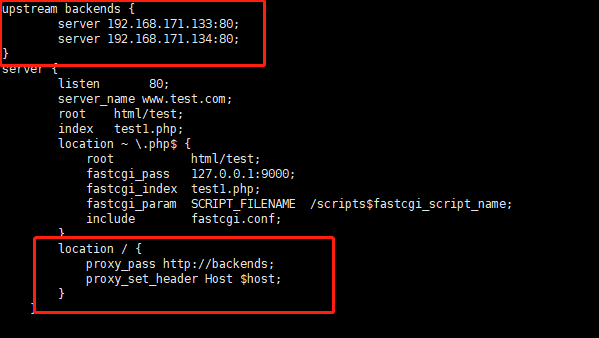
测试结果正确
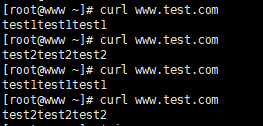
默认情况下是按照时间顺序依次轮流分配到后端服务器。可以自己设置比例。

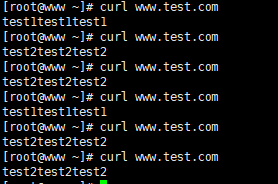
这样访问一次test1,访问两次test2。
七、https
主配置文件
由上往下:后端服务器池
加载ssl.test文件
虚拟主机监听443端口,访问https://www.test.com。
虚拟主机监听80端口,访问http://www.test.com时,重定向到https://www.test.com
Nginx报The plain HTTP request was sent to HTTPS port,是因为每一次用户请求试图通过HTTP访问你的网站,这个请求被重定向到HTTPS。于是Nginx预计使用SSL交互,但原来的请求(通过端口80接收)是普通的HTTP请求,所以需要将ssl.test文件中的ssl on改为off,在443后面填写ssl。
upstream backends {
server 192.168.171.133:80;
server 192.168.171.134:80;
}
include ssl.test;
server {
listen 443 ssl;
server_name www.test.com;
root html;
index test.php;
location ~ \.php$ {
root html;
fastcgi_pass 127.0.0.1:9000;
fastcgi_index test.php;
fastcgi_param SCRIPT_FILENAME /scripts$fastcgi_script_name;
include fastcgi.conf;
}
location / {
proxy_pass http://backends;
proxy_set_header Host $host;
}
}
server {
listen 80;
server_name www.test.com;
root html;
index test.php;
rewrite ^(.*)$ https://www.test.com permanent;
}
ssl.test文件:
ssl off;
ssl_certificate /usr/local/nginx/conf/ssl/test.crt;
ssl_certificate_key /usr/local/nginx/conf/ssl/test.key;
ssl_session_timeout 5m;
ssl_protocols TLSv1 TLSv1.1 TLSv1.2;
ssl_prefer_server_ciphers on;
ssl_ciphers "EECDH+CHACHA20:EECDH+CHACHA20-draft:EECDH+AES128:RSA128+AES128:EECDH+AES256:RSA+AES256:EECDH+3DES:RSA+2DES:!MD5";


