8.Spring MVC域对象共享数据

在 Spring MVC 中,控制器在接收到 DispatcherServlet 分发过来的请求后,会继续调用 Model 层对请求进行处理。Model 层处理完请求后的结果被称为模型数据,会将模型数据返回给 Controller。Controller 在接收到 Model 层返回的模型数据后,下一步就是将模型数据通过域对象共享的方式传递给 View 视图进行渲染,最终返回给客户端展示。
域对象是服务器在内存上创建的一块存储空间,主要用不同动态资源之间的数据传递和数据共享。在 Spring MVC 中,常用的域对象有 request 域对象、session 域对象、application 域对象等。
Spring MVC 提供了多种域对象共享数据的方式,其中最常用的方式如下:
- 使用 Servlet API 向 request 域对象中共享数据
- 使用 ModelAndView 向 request 域对象中共享数据
- 使用 Model 向 request 域对象中共享数据
- 使用 Map 向 request 域对象中共享数据
- 使用 ModelMap 向 request 域对象中共享数据
- 使用 Servlet API 向 session 域中共享数据
- 使用 Servlet API 向 application 域中共享数据
下面我们就一一对这几种域对象共享数据的方式进行介绍。
1. 使用 Servlet API 向 request 域对象中共享数据
我们可以在控制器方法中设置一个 HttpServletRequest 类型的形参。通过它,我们就可以将模型数据共享到 request 域对象中,示例代码如下。
- @RequestMapping("/testServletAPI")
- public String testServletAPI(HttpServletRequest request) {
- request.setAttribute("testScope", "hello,Servet API");
- return "success";
- }
由于这种方式是通过原生 Servlet API 实现的,会导致控制器与 Servlet 容器耦合度过高,因此通常情况下,我们不推荐使用这种方式向 request 域对象中共享数据。
2. 使用 ModelAndView 向 request 域对象中共享数据
我们还可以通过 Spring 提供的 ModelAndView 向 reuqest 域对象中共享数据。ModelAndView 主要由 model(模型)和 view(视图)两部分组成。其中,model 负责数据共享,而 view 则主要用于设置视图,实现页面的跳转。
ModelAndView 为我们提供了多种方法,其中常用的方法如下表。
| 方法 | 说明 |
|---|---|
| ModelAndView addObject(String attributeName, @Nullable Object attributeValue) | 添加模型数据 |
| ModelAndView addObject(Object attributeValue) | |
| ModelAndView addAllObjects(@Nullable Map<String, ?> modelMap) | |
| void setViewName(@Nullable String viewName) | 设置视图 |
| void setView(@Nullable View view) |
在 Controller 类中,ModelAndView 只有在作为控制器方法的返回值,返回给前端控制器(DispatcherServlet)时,前端控制器解析才会去解析它,示例代码如下。
- @RequestMapping("/testModelAndView")
- public ModelAndView testModelAndView() {
- /**
- * ModelAndView有Model和View的功能
- * Model主要用于向请求域共享数据
- * View主要用于设置视图,实现页面跳转
- */
- ModelAndView mav = new ModelAndView();
- //向请求域共享数据
- mav.addObject("testScope", "hello,ModelAndView");
- //设置视图,实现页面跳转
- mav.setViewName("success");
- return mav;
- }
3. 使用 Model 向 request 域对象中共享数据
我们可以在 Controller 控制器方法中设置一个 Model 类型的形参。通过它,我们也可以向 request 域对象中共享数据,示例代码如下。
- @RequestMapping("/testModel")
- public String testModel(Model model) {
- model.addAttribute("testScope", "hello,Model");
- return "success";
- }
4. 使用 Map 向 request 域对象中共享数据
我们可以在 Controller 控制器方法中设置一个 Map 类型的形参。通过它,我们也可以向 request 域对象中共享数据,示例代码如下。
- @RequestMapping("/testMap")
- public String testMap(Map<String, Object> map) {
- map.put("testScope", "hello,Map");
- return "success";
- }
5. 使用 ModelMap 向 request 对象中共享数据
我们可以在 Controller 控制器方法中设置一个 ModelMap 类型的形参。通过它,我们也可以向 request 域对象中共享数据,示例代码如下。
- @RequestMapping("/testModelMap")
- public String testModelMap(ModelMap modelMap) {
- modelMap.addAttribute("testScope", "hello,ModelMap");
- return "success";
- }
6. 使用 Servlet API 向 session 域对象中共享数据
我们可以在控制器方法中设置一个 HttpSession 类型的形参。通过它,我们就可以将数据共享到 session 域对象中,示例代码如下。
- @RequestMapping("/testSession")
- public String testSession(HttpSession session) {
- session.setAttribute("testSessionScope", "hello,session");
- return "success";
- }
7. 使用 Servlet API 向 application 域对象中共享数据
我们可以在控制器方法中设置一个 HttpSession 类型的形参,并通过它获取到 application 域对象,最终我们就可以将数据共享到 application 域对象中,示例代码如下。
- @RequestMapping("/testApplication")
- public String testApplication(HttpSession session) {
- ServletContext application = session.getServletContext();
- application.setAttribute("testApplicationScope", "hello,application");
- return "success";
- }
示例
下面,我们就通过一个简单的案例,来演示下如何实现通过域对象中共享数据,将模型数据返回到 view 视图中。
1. 新建一个名为 springmvc-response-demo 的 Web 项目,并将 Spring MVC 相关的依赖引入到该项目中,web.xml 配置如下。
- <?xml version="1.0" encoding="UTF-8"?>
- <web-app xmlns:xsi="http://www.w3.org/2001/XMLSchema-instance" xmlns="http://xmlns.jcp.org/xml/ns/javaee"
- xsi:schemaLocation="http://xmlns.jcp.org/xml/ns/javaee http://xmlns.jcp.org/xml/ns/javaee/web-app_4_0.xsd"
- id="WebApp_ID" version="4.0">
- <display-name>first-springmvc-demo</display-name>
- <!--请求和响应的字符串过滤器-->
- <filter>
- <filter-name>CharacterEncodingFilter</filter-name>
- <filter-class>org.springframework.web.filter.CharacterEncodingFilter</filter-class>
- <!--设置请求的编码-->
- <init-param>
- <param-name>encoding</param-name>
- <param-value>UTF-8</param-value>
- </init-param>
- <!--设置响应的编码,这里我们可以省略-->
- <init-param>
- <param-name>forceResponseEncoding</param-name>
- <param-value>true</param-value>
- </init-param>
- </filter>
- <filter-mapping>
- <filter-name>CharacterEncodingFilter</filter-name>
- <url-pattern>/*</url-pattern>
- </filter-mapping>
- <!-- 配置SpringMVC的前端控制器,对浏览器发送的请求统一进行处理 -->
- <servlet>
- <servlet-name>dispatcherServlet</servlet-name>
- <servlet-class>org.springframework.web.servlet.DispatcherServlet</servlet-class>
- <!--配置 DispatcherServlet 的一个初始化参数:spring mvc 配置文件按的位置和名称-->
- <init-param>
- <param-name>contextConfigLocation</param-name>
- <param-value>classpath:springMVC.xml</param-value>
- </init-param>
- <load-on-startup>1</load-on-startup>
- </servlet>
- <servlet-mapping>
- <servlet-name>dispatcherServlet</servlet-name>
- <!--设置springMVC的核心控制器所能处理的请求的请求路径/所匹配的请求可以是/login或.html或.js或.css方式的请求路径但是/不能匹配.jsp请求路径的请求-->
- <url-pattern>/</url-pattern>
- </servlet-mapping>
- </web-app>
2. 在 src 下(类路径下)创建一个名为 springMVC.xml 的 Spring MVC 配置文件,配置内容如下。
- <?xml version="1.0" encoding="UTF-8"?>
- <beans xmlns="http://www.springframework.org/schema/beans"
- xmlns:xsi="http://www.w3.org/2001/XMLSchema-instance"
- xmlns:context="http://www.springframework.org/schema/context"
- xmlns:mvc="http://www.springframework.org/schema/mvc"
- xsi:schemaLocation="http://www.springframework.org/schema/beans
- http://www.springframework.org/schema/beans/spring-beans.xsd
- http://www.springframework.org/schema/context
- https://www.springframework.org/schema/context/spring-context.xsd http://www.springframework.org/schema/mvc https://www.springframework.org/schema/mvc/spring-mvc.xsd">
- <!--开启组件扫描-->
- <context:component-scan base-package="net.biancheng.c"></context:component-scan>
- <!-- 配置 Thymeleaf 视图解析器 -->
- <bean id="viewResolver"
- class="org.thymeleaf.spring5.view.ThymeleafViewResolver">
- <property name="order" value="1"/>
- <property name="characterEncoding" value="UTF-8"/>
- <property name="templateEngine">
- <bean class="org.thymeleaf.spring5.SpringTemplateEngine">
- <property name="templateResolver">
- <bean class="org.thymeleaf.spring5.templateresolver.SpringResourceTemplateResolver">
- <!-- 视图前缀 -->
- <property name="prefix" value="/WEB-INF/templates/"/>
- <!-- 视图后缀 -->
- <property name="suffix" value=".html"/>
- <property name="templateMode" value="HTML5"/>
- <property name="characterEncoding" value="UTF-8"/>
- </bean>
- </property>
- </bean>
- </property>
- </bean>
- </beans>
3. 在 net.biancheng.c.entity 包下,创建一个名为 User 的实体类,代码如下。
- package net.biancheng.c.entity;
- public class User {
- private String userId;
- private String userName;
- private String password;
- public String getUserId() {
- return userId;
- }
- public void setUserId(String userId) {
- this.userId = userId;
- }
- public String getUserName() {
- return userName;
- }
- public void setUserName(String userName) {
- this.userName = userName;
- }
- public String getPassword() {
- return password;
- }
- public void setPassword(String password) {
- this.password = password;
- }
- @Override
- public String toString() {
- return "User{" +
- "userId='" + userId + '\'' +
- ", userName='" + userName + '\'' +
- ", password='" + password + '\'' +
- '}';
- }
- }
4. 在 net.biancheng.c.entity 包下,创建一个名为 Product 的实体类,代码如下。
- package net.biancheng.c.entity;
- import java.math.BigDecimal;
- public class Product {
- private Integer productId;
- private String productName;
- private BigDecimal price;
- private Integer storage;
- public Integer getProductId() {
- return productId;
- }
- public void setProductId(Integer productId) {
- this.productId = productId;
- }
- public String getProductName() {
- return productName;
- }
- public void setProductName(String productName) {
- this.productName = productName;
- }
- public BigDecimal getPrice() {
- return price;
- }
- public void setPrice(BigDecimal price) {
- this.price = price;
- }
- public Integer getStorage() {
- return storage;
- }
- public void setStorage(Integer storage) {
- this.storage = storage;
- }
- @Override
- public String toString() {
- return "Product{" +
- "productId=" + productId +
- ", productName='" + productName + '\'' +
- ", price=" + price +
- ", storage=" + storage +
- '}';
- }
- }
5. 在 net.biancheng.c.controller 包下,创建一个名为 LoginController 的 Controller 类,代码如下。
- package net.biancheng.c.controller;
- import net.biancheng.c.entity.User;
- import net.biancheng.c.service.UserService;
- import org.springframework.beans.factory.annotation.Autowired;
- import org.springframework.stereotype.Controller;
- import org.springframework.web.bind.annotation.RequestMapping;
- import javax.servlet.http.HttpServletRequest;
- import javax.servlet.http.HttpSession;
- @Controller
- public class LoginController {
- @Autowired
- private UserService userService;
- @RequestMapping("/user")
- public String sayHello() {
- return "user";
- }
- @RequestMapping("/login")
- public String login(User user, HttpServletRequest request) {
- User user2 = userService.getUserByUserName(user.getUserName());
- if (user2 != null && user2.getPassword().equals(user.getPassword())) {
- HttpSession session = request.getSession();
- session.setAttribute("loginUser", user2);
- return "redirect:/getProductList";
- }
- request.setAttribute("msg", "账号或密码错误!");
- return "user";
- }
- }
6. 在 net.biancheng.c.controller 包下,创建一个名为 ProductController 的 Controller 类,代码如下。
- package net.biancheng.c.controller;
- import net.biancheng.c.entity.Product;
- import net.biancheng.c.service.ProductService;
- import org.springframework.beans.factory.annotation.Autowired;
- import org.springframework.stereotype.Controller;
- import org.springframework.ui.Model;
- import org.springframework.web.bind.annotation.RequestMapping;
- import org.springframework.web.servlet.ModelAndView;
- import java.util.List;
- @Controller
- public class ProductController {
- @Autowired
- private ProductService productService;
- @RequestMapping("/getProductList")
- public ModelAndView getProductList() {
- ModelAndView modelAndView = new ModelAndView();
- modelAndView.setViewName("productList");
- List<Product> productList = productService.getProductList();
- modelAndView.addObject(productList);
- return modelAndView;
- }
- @RequestMapping("/getProduct")
- public String getProduct(Integer productId, Model model) {
- Product productById = productService.getProductById(productId);
- model.addAttribute("product", productById);
- return "product";
- }
- }
7. 在 net.biancheng.c.service 包下,创建一个名为 UserService 的接口,代码如下。
- package net.biancheng.c.service;
- import net.biancheng.c.entity.User;
- public interface UserService {
- User getUserByUserName(String userName);
- }
8. 在 net.biancheng.service.impl 包下,创建 UserService 接口的实现类 UserServiceImpl,代码如下。
- package net.biancheng.c.service.impl;
- import net.biancheng.c.dao.UserDao;
- import net.biancheng.c.entity.User;
- import net.biancheng.c.service.UserService;
- import org.springframework.beans.factory.annotation.Autowired;
- import org.springframework.stereotype.Service;
- @Service("userService")
- public class UserServiceImpl implements UserService {
- @Autowired
- private UserDao userDao;
- @Override
- public User getUserByUserName(String userName) {
- return userDao.getUserByUserName(userName);
- }
- }
9. 在 net.biancheng.c.service 包下,创建一个名为 ProductService 的接口,代码如下。
- package net.biancheng.c.service;
- import net.biancheng.c.entity.Product;
- import java.util.List;
- public interface ProductService {
- List<Product> getProductList();
- Product getProductById(Integer productId);
- }
10. 在 net.biancheng.service.impl 包下,创建 ProductService 接口的实现类 ProductServiceImpl,代码如下。
- package net.biancheng.c.service.impl;
- import net.biancheng.c.dao.ProductDao;
- import net.biancheng.c.entity.Product;
- import net.biancheng.c.service.ProductService;
- import org.springframework.beans.factory.annotation.Autowired;
- import org.springframework.stereotype.Service;
- import java.util.List;
- @Service("productService")
- public class ProductServiceImpl implements ProductService {
- @Autowired
- private ProductDao productDao;
- @Override
- public List<Product> getProductList() {
- return productDao.getProductList();
- }
- @Override
- public Product getProductById(Integer productId) {
- return productDao.getProductById(productId);
- }
- }
11. 在 net.biancheng.c.dao 包下,创建一个名为 UserDao 的类,代码如下。
- package net.biancheng.c.dao;
- import net.biancheng.c.entity.User;
- import org.springframework.stereotype.Repository;
- import java.util.*;
- @Repository
- public class UserDao {
- private static Map<String, User> users = null;
- static {
- users = new HashMap<String, User>();
- User user = new User();
- user.setUserId("1001");
- user.setUserName("C语言中文网默认用户");
- user.setPassword("123456789");
- User user1 = new User();
- user1.setUserId("1002");
- user1.setUserName("南忘");
- user1.setPassword("qwertyuiop");
- User user2 = new User();
- user2.setUserId("1003");
- user2.setUserName("Java用户");
- user2.setPassword("987654321");
- User user3 = new User();
- user3.setUserId("1004");
- user3.setUserName("李小龙");
- user3.setPassword("1qazxsw2");
- users.put(user.getUserName(), user);
- users.put(user1.getUserName(), user1);
- users.put(user2.getUserName(), user2);
- users.put(user3.getUserName(), user3);
- }
- public List getUserList() {
- List userList = new ArrayList();
- Set<String> keys = users.keySet();
- for (String key : keys) {
- User user = users.get(key);
- userList.add(user);
- }
- return userList;
- }
- public User getUserByUserName(String userName) {
- User user = users.get(userName);
- return user;
- }
- public void addUser(User user) {
- users.put(user.getUserId(), user);
- }
- public void update(User user) {
- users.put(user.getUserId(), user);
- }
- public void delete(String userId) {
- users.remove(userId);
- }
- }
12. 在 net.biancheng.c.dao 包下,创建一个名为 ProductDao 的类,代码如下。
- package net.biancheng.c.dao;
- import net.biancheng.c.entity.Product;
- import net.biancheng.c.entity.User;
- import org.springframework.stereotype.Repository;
- import java.math.BigDecimal;
- import java.util.*;
- @Repository
- public class ProductDao {
- private static Map<Integer, Product> products = null;
- static {
- products = new HashMap<Integer, Product>();
- Product product = new Product();
- product.setProductId(1);
- product.setProductName("茅台");
- product.setPrice(new BigDecimal(9999));
- Product product1 = new Product();
- product1.setProductId(2);
- product1.setProductName("五粮液");
- product1.setPrice(new BigDecimal(8888));
- Product product2 = new Product();
- product2.setProductId(3);
- product2.setProductName("信阳毛尖");
- product2.setPrice(new BigDecimal(7777));
- Product product3 = new Product();
- product3.setProductId(4);
- product3.setProductName("深州大蜜桃");
- product3.setPrice(new BigDecimal(6666));
- products.put(product.getProductId(), product);
- products.put(product1.getProductId(), product1);
- products.put(product2.getProductId(), product2);
- products.put(product3.getProductId(), product3);
- }
- public List getProductList() {
- List productList = new ArrayList();
- Set<Integer> keys = products.keySet();
- for (Integer key : keys) {
- Product product = products.get(key);
- productList.add(product);
- }
- return productList;
- }
- public Product getProductById(Integer productId) {
- return products.get(productId);
- }
- }
13. 在 webapp/WEB-INF 下新建一个 templates 目录,并在该目录下创建 user.html,代码如下。
- <!DOCTYPE html>
- <html lang="en" xmlns:th="http://www.thymeleaf.org">
- <head>
- <meta charset="UTF-8">
- <title>C语言中文网</title>
- </head>
- <body>
- <form th:action="@{/login}" method="post">
- <table style="margin: auto">
- <tr>
- <td colspan="2" align="center">
- <p style="color: red;margin: auto" th:text="${msg}" th:if="${not #strings.isEmpty(msg)}"></p>
- </td>
- </tr>
- <tr>
- <td>用户名:</td>
- <td><input type="text" name="userName" required><br></td>
- </tr>
- <tr>
- <td>密码:</td>
- <td><input type="password" name="password" required><br></td>
- </tr>
- <tr>
- <td colspan="2" align="center"><input type="submit"></td>
- </tr>
- </table>
- </form>
- </body>
- </html>
14. 在 webapp/WEB-INF/templates 目录下,新建一个 productList.html,代码如下。
- <!DOCTYPE html>
- <html lang="en" xmlns:th="http://www.thymeleaf.org">
- <head>
- <meta charset="UTF-8">
- <title>Title</title>
- </head>
- <body>
- <h1 th:text="'欢迎您:'+${session.loginUser.getUserName()}"></h1>
- <table th:border="1" th:cellspacing="0" th:cellpadding="10" style="text-align: center;">
- <thead>
- <th>商品id</th>
- <th>商品名</th>
- <th>商品价格</th>
- <th>操作</th>
- </thead>
- <tbody>
- <tr th:each="m:${productList}">
- <td th:text="${m.getProductId()}"></td>
- <td th:text="${m.getProductName()}"></td>
- <td th:text="${m.getPrice()}"></td>
- <td>
- <a th:href="@{/getProduct(productId=${m.getProductId()})}">查看商品详细信息</a>
- </td>
- </tr>
- </tbody>
- </table>
- </body>
- </html>
15. 在 webapp/WEB-INF/templates 目录下,新建一个 product.html,代码如下。
- <!DOCTYPE html>
- <html lang="en" xmlns:th="http://www.thymeleaf.org">
- <head>
- <meta charset="UTF-8">
- <title>Title</title>
- </head>
- <body>
- <table>
- <tr>
- <td> 商品ID:</td>
- <td th:text="${product.getProductId()}"></td>
- </tr>
- <tr>
- <td>商品名:</td>
- <td th:text="${product.getProductName()}"></td>
- </tr>
- <tr>
- <td>商品价格:</td>
- <td th:text="${product.getPrice()}"></td>
- </tr>
- </table>
- <a th:href="@{/getProductList}">返回首页</a>
- </body>
- </html>
16. 将 springmvc-response-demo 部署到 Tomcate 服务器中,启动 Tomcat 服务器。使用浏览器访问“http://localhost:8080/springmvc-response-demo/user”,结果如下。
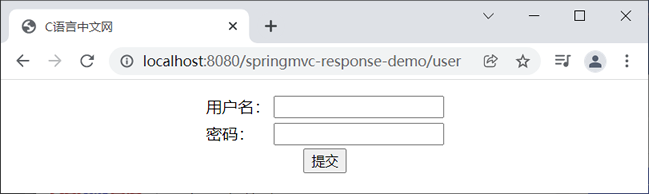
图1:登陆页面
17. 分别输入错误的用户名和密码,结果如下图。
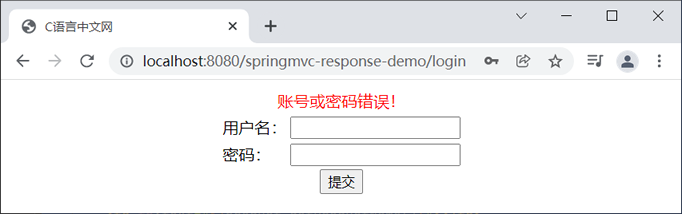
图2:登陆错误
18. 在登录页中,分别输入用户名:C语言中文网默认用户,密码:123456789,如下图。
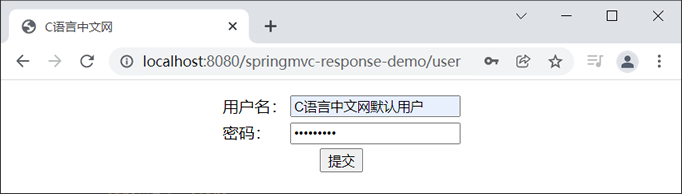
图3:登陆正确
19. 点击“提交”按钮,跳转到商品列表页,如下图。
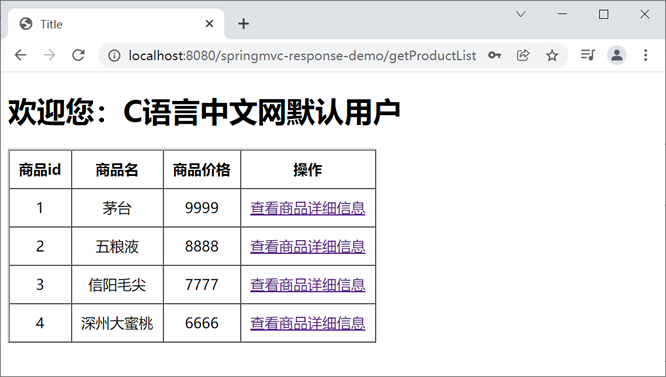
图4:商品列表
20. 点击“查看商品详细信息”,结果如下图。
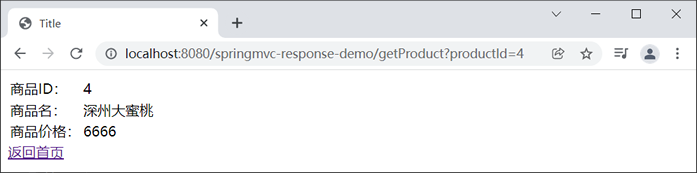
图5:商品详情
