WPF(一)Grid、Border初识
1.主要知识点
1.MVVM架构
MVVM即Model-View-ViewModel,是根据mvc演变而来的,把显示的窗体放到View层,控制窗体的样式。
2.文件作用

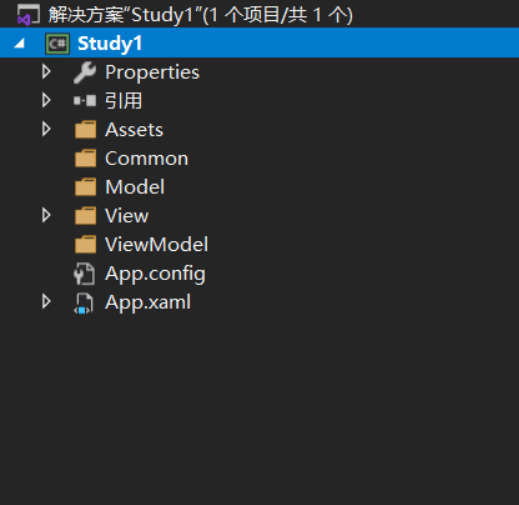
上图是几本文件架构,
Assets 存放一些资源,图片、音频、视频等等。
Common 数据库指令相关,不清楚。
Model 实体层,类似于mvc中的m,跟对象有关。
View 只用来存放窗体。
ViewModel 不知道干嘛的。
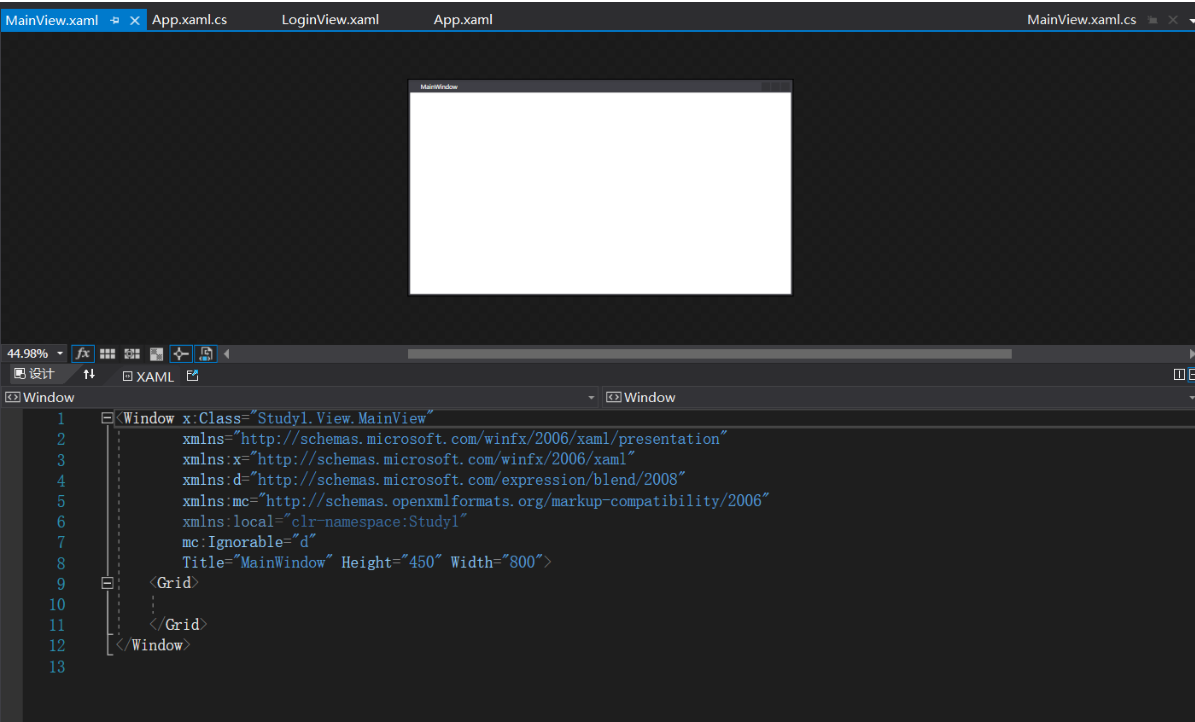
3.xaml文件和cs文件

xaml包含了一些标签的语言,来控制窗体的样式,有点像html,大部分标签都是成对存在。
2.代码讲解
<Window x:Class="Study1.View.LoginView"
        xmlns="http://schemas.microsoft.com/winfx/2006/xaml/presentation"
        xmlns:x="http://schemas.microsoft.com/winfx/2006/xaml"
        xmlns:d="http://schemas.microsoft.com/expression/blend/2008"
        xmlns:mc="http://schemas.openxmlformats.org/markup-compatibility/2006"
        xmlns:local="clr-namespace:Study1.View"
        mc:Ignorable="d"
        Title="系统登录" Height="600" Width="360"
        FontFamily="微软雅黑" FontWeight="ExtraLight"
        ResizeMode="NoResize" WindowStartupLocation="CenterScreen"
        WindowStyle="None" AllowsTransparency="True" Background="{x:Null}"
        >
    <Window.Resources>
        <ControlTemplate TargetType="Button" x:Key="CloseButtonTemplate">
            <!--定义全局的样式,作用于Button,ID是CloseButtonTemplate-->
            <Border Background="Transparent" Name="back" CornerRadius ="0,20,0,0">
                <Path Data="M0 0 12 12M12 0 0 12" Stroke="Wheat" StrokeThickness="1"  VerticalAlignment="Center" HorizontalAlignment="Center" />
                <!--Data内容M表示移动、落笔,0 0是起始点的坐标,12 12是结尾的坐标,形成一条\直线,
                12 0 0 12 形成/这样的直线 Stroke颜色 1是宽度 最后垂直,水平居中-->
            </Border>
            <ControlTemplate.Triggers>
                <!--控制模板,Triggers一般用来实现Hover、Press等效果。-->
                <Trigger Property="IsMouseOver" Value="True">
                    <!--当鼠标放上去,Property是属性,相当于触发条件-->
                    <Setter TargetName="back" Property="Background" Value="#22FFFFFF"></Setter>
                </Trigger>
                <Trigger Property="IsPressed" Value="True">
                    <!--当鼠标被按下-->
                    <Setter TargetName="back" Property="Background" Value="#44FFFFFF"></Setter>
                </Trigger>
            </ControlTemplate.Triggers>
        </ControlTemplate>
    </Window.Resources>
    <Border Margin="5" Background="White"  CornerRadius="20">
        <!--设置窗体的边框,margin,离边框的距离,相当于往里面缩小一点。-->
        <Border.Effect>
            <DropShadowEffect Color="Gray" ShadowDepth="0" BlurRadius="5" Opacity="0.3" Direction="0">
                <!--设置阴影-->
            </DropShadowEffect>
        </Border.Effect>

        <Grid>
            <!--网格-->
            <Grid.RowDefinitions>
                <!--设置行的个数,下级有多少个标签就有多少行-->
                <RowDefinition Height="1.8*"></RowDefinition>
                <!--高度是比例,这里是占(1.8+3)中的1.8份-->
                <RowDefinition Height="3*"></RowDefinition>
                <RowDefinition Height="60"></RowDefinition>
                <!--高度固定60-->
            </Grid.RowDefinitions>
            <Border Background="#FF4489C5"  CornerRadius="20,20,0,0"/>
            <Button VerticalAlignment="Top" HorizontalAlignment="Right" Width="50" Height="30" Template="{StaticResource CloseButtonTemplate}" />
            <!--Button直接使用之前定义的Window.Resources中的模板,可以多次使用 -->

            <StackPanel VerticalAlignment="Bottom" Margin="0 0 0 25">
                <!--设置垂直下方对齐,然后再设置底部的间距为30-->
                <Border Background="White"  VerticalAlignment="Center"  HorizontalAlignment="Center"
                        CornerRadius="50"
                        >
                    <!--把整个图片再框起来,如果是透明的png可以加底色之类的,这里要设置CornerRadius圆角,图片的上一级还是呀设置CornerRadius-->
                    <Border Width="100" Height="100" CornerRadius="50">
                        <!--这个Boder控制图片大小,用ImageBrush来设置图片-->
                        <Border.Background>
                            <ImageBrush ImageSource="/Assets/LoginImg/Logo.png"  />
                        </Border.Background>
                    </Border>
                </Border>
                <TextBlock Text="52HzElegy平台管理" HorizontalAlignment="Center" Foreground="White"
                       FontSize="18" Margin="0 10 0 0 "/>
            </StackPanel>
            <Grid Grid.Row="1" Margin="20 0">
                <!--账号、密码、登录、验证码、错误提示,需要五行-->
                <Grid.RowDefinitions>
                    <RowDefinition/>
                    <RowDefinition/>
                    <RowDefinition/>
                    <RowDefinition/>
                    <RowDefinition/>
                </Grid.RowDefinitions>
                <TextBox/>
                <TextBox Grid.Row="1"/>
                <TextBox Grid.Row="2"/>
                <Button Content="登录" Grid.Row=" 3"/>
                <!--登录按钮-->
                <TextBlock Text="登录失败" Foreground="Red"  Grid.Row="4"/>
            </Grid>

            <Grid Grid.Row="2" Margin="20 0">
                <!--OR和三个第三方登录-->
                <Grid.RowDefinitions>
                    <RowDefinition Height="20"/>
                    <!--高度一点-->
                    <RowDefinition/>
                </Grid.RowDefinitions>
                <Grid>
                    <Grid.ColumnDefinitions>
                        <!--两个线和OR-->
                        <ColumnDefinition/>
                        <ColumnDefinition Width="30"/>
                        <ColumnDefinition/>
                    </Grid.ColumnDefinitions>
                    <Border BorderBrush="Gray" BorderThickness="0,0,0,1"   VerticalAlignment="Center" />
                    <Border BorderBrush="Gray" BorderThickness="0,0,0,1"   VerticalAlignment="Center" Grid.Column="2" />
                    <!--因为有三列, Grid.Column="2"其实是第三个-->
                    <TextBlock Text="OR" HorizontalAlignment="Center" VerticalAlignment="Center" Grid.Column="1" />
                </Grid>
                <UniformGrid Columns="5" Grid.Row="2">
                    <Border Background="Gray"/>
                    <Border />
                    <Border Background="Gray"/>
                    <Border />
                    <Border Background="Gray"/>
                </UniformGrid>
            </Grid>
        </Grid>
    </Border>

</Window>
1.Grid
可以定义整体的结构,垂直,还是水平,可以划分成若干块
1.Grid.RowDefinitions 设置三行
<Grid.RowDefinitions>
    <!--设置行的个数,下级有多少个标签就有多少行-->
    <RowDefinition Height="1.8*"></RowDefinition>
    <!--高度是比例,这里是占(1.8+3)中的1.8份-->
    <RowDefinition Height="3*"></RowDefinition>
    <RowDefinition Height="60"></RowDefinition>
    <!--高度固定60-->
</Grid.RowDefinitions>
2.Grid.ColumnDefinitions设置三列
<Grid.ColumnDefinitions>
    <!--两个线和文字OR-->
    <ColumnDefinition/>
    <ColumnDefinition Width="30"/>
    <ColumnDefinition/>
</Grid.ColumnDefinitions>
3.利用Grid.Row="2"来区分是第三行
<Grid Grid.Row="2" Margin="20 0">
2.Border
可以调节Grid的大小,透明度、颜色等等
1.CornerRadius
<Border Margin="5" Background="White"  CornerRadius="20">
<!--设置圆角-->
2.BorderBrush、BorderThickness(边框颜色和边框粗细)
<Border BorderBrush="Gray" BorderThickness="0,0,0,1" VerticalAlignment="Center" />
3.<Window.Resources>
<Window.Resources>相当于html中的静态文件,
<ControlTemplate TargetType="Button" x:Key="CloseButtonTemplate">中CloseButtonTemplate相当于ID。
可以这样调用,
<Button VerticalAlignment="Top" HorizontalAlignment="Right" Width="50" Height="30" Template="{StaticResource CloseButtonTemplate}" />
4.TextBox
文本框
5.TextBlock
相当于WinForm中的Label。
6.Trigger
触发条件,可以给控件绑定相应的时间,鼠标的点击,覆盖等等。
<Trigger Property="IsMouseOver" Value="True">
    <!--当鼠标放上去,Property是属性,相当于触发条件-->
    <Setter TargetName="back" Property="Background" Value="#22FFFFFF"></Setter>
</Trigger>
3.注意事项
        <Grid.RowDefinitions>
          <RowDefinition/>
          <RowDefinition/>
          <RowDefinition/>
          <RowDefinition/>
          <RowDefinition/>
        </Grid.RowDefinitions>
        <TextBox/>
        <TextBox Grid.Row="1"/>
        <TextBox Grid.Row="2"/>
        <Button Content="登录" Grid.Row=" 3"/>
        <!--登录按钮-->
        <TextBlock Text="登录失败" Foreground="Red"  Grid.Row="4"/>
1.用RowDefinitions声明之后,就要在下面填上相应的控件,并且标记上Grid.Row=""
2.界面的设计和html比较像,要先分析结构,然后再解决小的问题。


