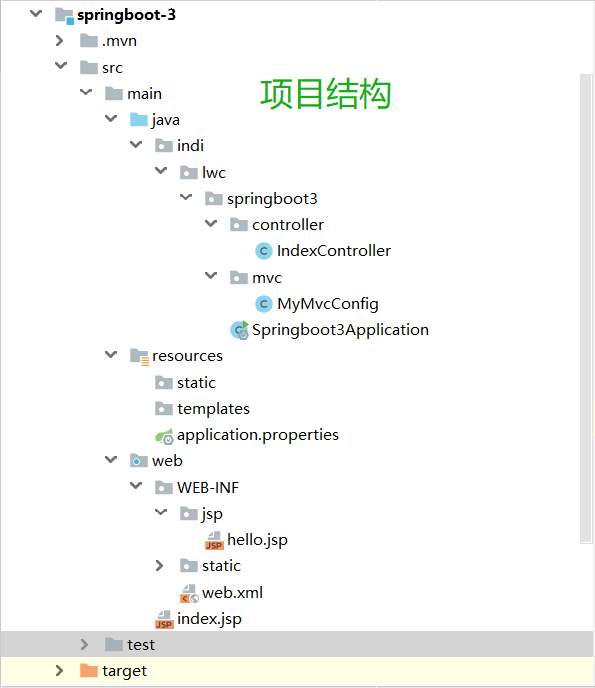
SpringBoot(4) 集成SpringMVC and JSP
1,新建SpringBoot项目

2,导入所需依赖(我这里直接贴pom文件咯)
 1 <?xml version="1.0" encoding="UTF-8"?>
 2 <project xmlns="http://maven.apache.org/POM/4.0.0" xmlns:xsi="http://www.w3.org/2001/XMLSchema-instance"
 3          xsi:schemaLocation="http://maven.apache.org/POM/4.0.0 https://maven.apache.org/xsd/maven-4.0.0.xsd">
 4     <modelVersion>4.0.0</modelVersion>
 5     <parent>
 6         <groupId>org.springframework.boot</groupId>
 7         <artifactId>spring-boot-starter-parent</artifactId>
 8         <version>2.2.5.RELEASE</version>
 9         <relativePath/> <!-- lookup parent from repository -->
10     </parent>
11     <groupId>indi.lwc</groupId>
12     <artifactId>springboot-3</artifactId>
13     <version>0.0.1-SNAPSHOT</version>
14     <name>springboot-3</name>
15     <description>Demo project for Spring Boot</description>
16
17     <properties>
18         <java.version>1.8</java.version>
19     </properties>
20
21     <dependencies>
22
23         <!--web场景支持-->
24         <dependency>
25             <groupId>org.springframework.boot</groupId>
26             <artifactId>spring-boot-starter-web</artifactId>
27         </dependency>
28
29         <!--springboot测试-->
30         <dependency>
31             <groupId>org.springframework.boot</groupId>
32             <artifactId>spring-boot-starter-test</artifactId>
33             <scope>test</scope>
34         </dependency>
35
36         <!-- jsp支持 -->
37         <dependency>
38             <groupId>org.apache.tomcat.embed</groupId>
39             <artifactId>tomcat-embed-jasper</artifactId>
40         </dependency>
41
42         <!-- jstl标签库 -->
43         <dependency>
44             <groupId>javax.servlet</groupId>
45             <artifactId>jstl</artifactId>
46         </dependency>
47
48         <!-- springboot热部署所需依赖包 -->
49         <dependency>
50             <groupId>org.springframework.boot</groupId>
51             <artifactId>spring-boot-devtools</artifactId>
52             <optional>true</optional>
53             <scope>true</scope>
54         </dependency>
55
56     </dependencies>
57
58     <build>
59         <plugins>
60             <plugin>
61                 <groupId>org.springframework.boot</groupId>
62                 <artifactId>spring-boot-maven-plugin</artifactId>
63                 <version>1.4.2.RELEASE</version>
64                 <configuration>
65                     <!--如何没有配置该项,则DevTools不会起作用,即应用不会restart-->
66                     <fork>true</fork>
67                 </configuration>
68             </plugin>
69         </plugins>
70         <!--打包时将jsp文件拷贝到META-INF目录下-->
71         <resources>
72             <resource>
73                 <!--指定处理哪个目录下的资源文件-->
74                 <directory>${basedir}/src/main/web</directory>
75                 <!--注意此次必须要放在此目录下才能被访问到-->
76                 <targetPath>META-INF/resources</targetPath>
77                 <includes>
78                     <!--所有文件,所有文件夹-->
79                     <include>**/**</include>
80                 </includes>
81             </resource>
82
83             <resource>
84
85             </resource>
86             <resource>
87                 <directory>src/main/resources</directory>
88                 <includes>
89                     <include>**/**</include>
90                 </includes>
91             </resource>
92
93         </resources>
94     </build>
95
96 </project>
3,SpringMVC配置
 1 #配置默认端口
 2 server.post=8080
 3 #配置错误页面
 4 server.error.path=/error
 5 # 配置session的过期时间
 6 # m表示分钟 s表示秒
 7 server.servlet.session.timeout=30m
 8 #设置项目的访问路径
 9 server.servlet.context-path=/
10 #设置字符编码
11 spring.http.encoding.charset=UTF-8
12 #上面这些配置不配置其实也行的,它都有默认值得。
13
14 #springboot 视图配置
15 #配置视图访问前缀
16 spring.mvc.view.prefix=/WEB-INF/jsp/
17 #配置视图访问后缀
18 spring.mvc.view.suffix=.jsp
4,web常用注解(学过springMVC都应该知道)
@ Contrller 表示这是一个控制器(类似servlet)
@ RequestMapping 路由,处理请求地址映射
@ GetMapping 使用get方式处理请求地址映射
@ PostMapping 使用post方式处理请求地址映射
@ ResponseBody 异步请求返回JSON格式数据。
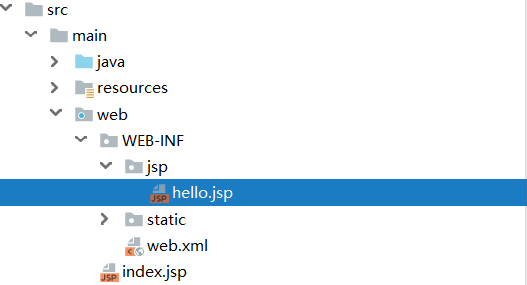
5,创建webApp目录,创建hello.jsp

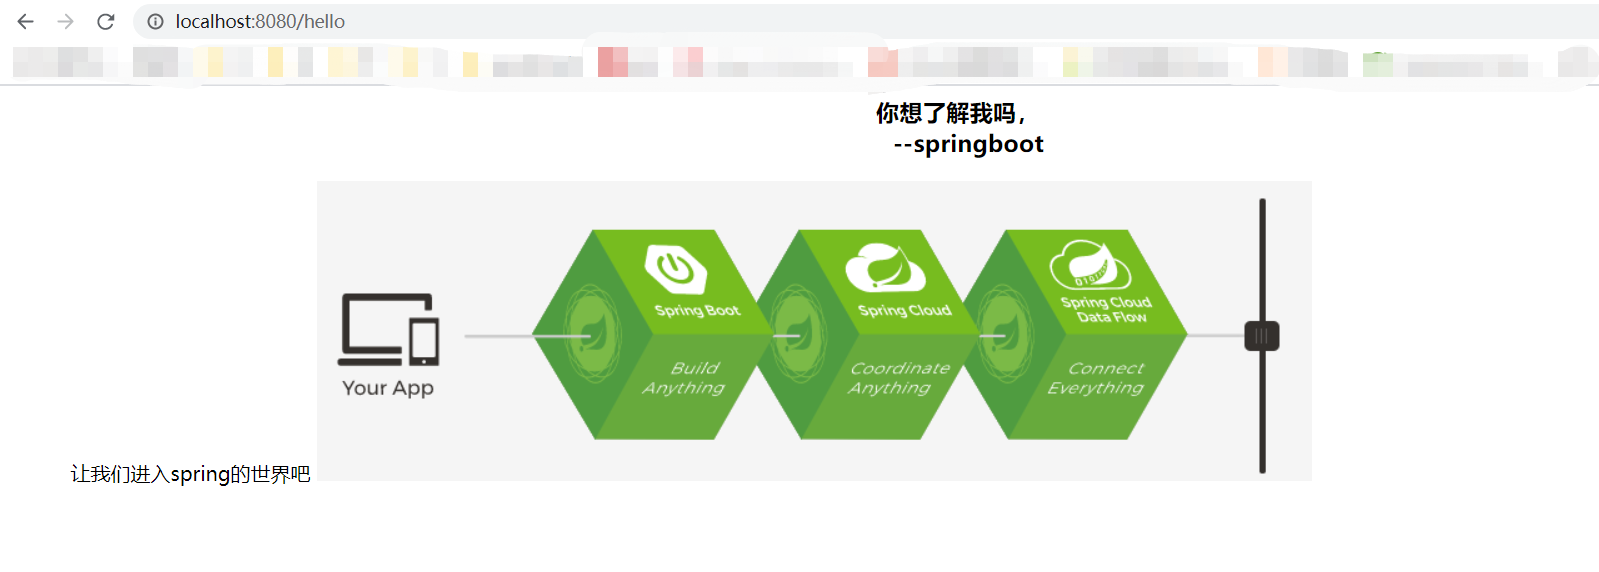
1 <%@ page contentType="text/html;charset=UTF-8" language="java" %> 2 <html> 3 <head> 4 <%--给页面上的url填充地址(相对路径)--%> 5 <base href="/helloworldjsp" /> 6 <title>HelloWorld_JSP</title> 7 <link rel="stylesheet" href="/static/css/hello.css"> 8 </head> 9 <body> 10 <h3 align="center">你想了解我吗, 11 <br/> --springboot</h3> 12 <span class="hello-span">让我们进入spring的世界吧</span> 13 <img src="/static/image/spring_boot.png" > 14 </body> 15 </html>
6,编写Controller类
 1 package indi.lwc.springboot3.controller;
 2
 3 import org.springframework.stereotype.Controller;
 4 import org.springframework.web.bind.annotation.GetMapping;
 5 import org.springframework.web.bind.annotation.RequestMapping;
 6 import org.springframework.web.bind.annotation.ResponseBody;
 7
 8 import java.util.HashMap;
 9 import java.util.Map;
10
11 @Controller
12 public class IndexController {
13
14     /**
15      * 返回json数据
16      * @return
17      */
18     @RequestMapping("/getJson")
19     @ResponseBody
20     private Map<String,String> getJson(){
21         Map<String,String> modelMap = new HashMap<>();
22         modelMap.put("value1","asdfghjkl");
23         modelMap.put("value2","qwertyuiop");
24         return modelMap;
25     }
26
27     /**
28      * 返回jsp页面
29      * @return
30      */
31     @GetMapping("/helloworldjsp")
32     private String helloWorldJsp(){
33         System.out.println("我即将前往神秘的JSP页面");
34         return "hello";
35     }
36
37
38
39
40 }
如果你没在pom文件配置打包方式则返回 jsp 页面会有问题(404),通过查资料发现,1.4版本以下不配打包才能使用。官方推荐我们使用模板引擎技术,不推荐使用 jsp。
7,如果你的静态资源是放在web-inf下面不配置资源管理是访问不了的,我以前写ssm框架就喜欢把静态资源放在wen-inf下面;那时候只需在spring-web.xml文件配置静态映射就可以。那换成SpringBoot呢?它是没有xml文件配置的概念了。
ssm框架处理方式:

SpringBoot处理方式(改成类配置方式):
 1 package indi.lwc.springboot3.mvc;
 2
 3 import org.springframework.context.annotation.Configuration;
 4 import org.springframework.web.servlet.config.annotation.ResourceHandlerRegistration;
 5 import org.springframework.web.servlet.config.annotation.ResourceHandlerRegistry;
 6 import org.springframework.web.servlet.config.annotation.ViewControllerRegistry;
 7 import org.springframework.web.servlet.config.annotation.WebMvcConfigurer;
 8 import sun.dc.pr.PRError;
 9
10 //标明配置类
11 @Configuration
12 public class MyMvcConfig implements WebMvcConfigurer {
13 16
17     /**
18      * 资源处理
19      * @param registry
20      */
21     @Override
22     public void addResourceHandlers(ResourceHandlerRegistry registry){
23         registry.addResourceHandler("/image/**").addResourceLocations("/WEB-INF/"+"/static/"+"/image/");
24         registry.addResourceHandler("/static/**").addResourceLocations("/WEB-INF/"+"/static/");
25     }
26
27
8,启动SpirngBoot启动类得到结果。


