Installing TensorFlow on Ubuntu
1、安装方法有4种,官方推荐是第一种.
virtualenv(官方推荐)
"native" pip
Docker
Anaconda
2、基于virtualenv的安装方法:
1)、Install pip and virtualenv by issuing one of the following commands:
$ sudo apt-get install python-pip python-dev python-virtualenv # for Python 2.7
$ sudo apt-get install python3-pip python3-dev python-virtualenv # for Python 3.n
2)、把virtualenv安装到目录下: 其中targetDirectory 是你要安装的目录名称,假设我们使用目录名称为tensorfolw
$ virtualenv --system-site-packages targetDirectory # for Python 2.7
$ virtualenv --system-site-packages -p python3 targetDirectory # for Python 3.n
3)、进入virtualenv环境下(假设上一步建立的目录名称为tensorfolw)
$ source ~/tensorflow/bin/activate # bash, sh, ksh, or zsh
 $ source ~/tensorflow/bin/activate.csh  # csh or tcsh
执行命令后,出现这个画面:
(tensorflow)$
4)、安装tensorflow:建议先安装只CPU的版本
 (tensorflow)$ pip install --upgrade tensorflow      # for Python 2.7
 (tensorflow)$ pip3 install --upgrade tensorflow     # for Python 3.n
 (tensorflow)$ pip install --upgrade tensorflow-gpu  # for Python 2.7 and GPU
 (tensorflow)$ pip3 install --upgrade tensorflow-gpu # for Python 3.n and GPU
如果这一步命令出现错误,说明pip version lower than 8.1
则执行下面的命令:
(tensorflow)$ pip install --upgrade https://storage.googleapis.com/tensorflow/linux/cpu/tensorflow-1.2.1-cp27-none-linux_x86_64.whl #python2.7 cpu only
5)、安装完成后,执行以下命令退出
(tensorflow)$ deactivate
6)、测试tensorflow是否安装成功
# Python
import tensorflow as tf
hello = tf.constant('Hello, TensorFlow!')
sess = tf.Session()
print(sess.run(hello))
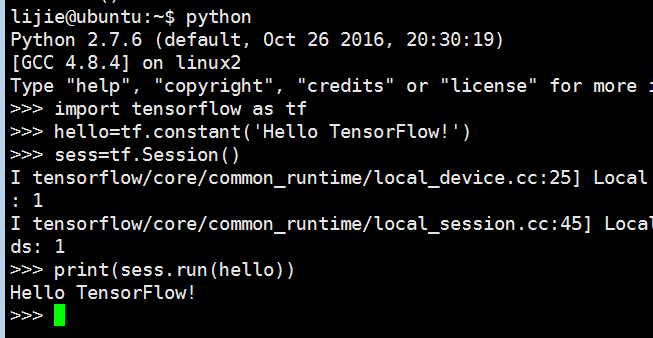
实际操作环境截图:

如果成功print了Hello TensorFlow的字符,说明安装成功


