ROS中发布IMU传感器消息
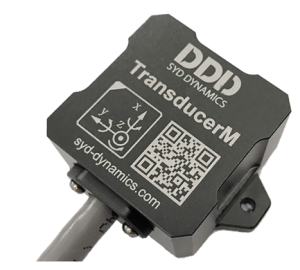
下面使用SYD Dynamics的9轴AHRS(Attitude and heading reference system),来发布sensor_msgs/Imu类型的消息。

将传感器用USB转串口接到Ubuntu系统上,可以用如下命令查看串口信息:
ls -l /dev/tty*
查询出串口名为“/dev/ttyUSB0”。根据官方给的传感器程序源文件和boost::asio库来实现串口发送request指令,并读取传感器返回的四元数信息。之后将其发送到/IMU_data的话题上:
// Step 1:  Include Library Headers:
#include "EasyObjectDictionary.h"
#include "EasyProfile.h"

#include <ros/ros.h>
#include <sensor_msgs/Imu.h>

#include <boost/asio.hpp>         // 包含boost库函数
#include <boost/bind.hpp>
using namespace boost::asio;


int main(int argc, char** argv)
{
    // Step 2: Initialization:
    EasyProfile_C_Interface_Init();

    ros::init(argc, argv, "imu");
    ros::NodeHandle n;

    ros::Publisher IMU_pub = n.advertise<sensor_msgs::Imu>("IMU_data", 20);

    io_service io;
    serial_port sp(io, "/dev/ttyUSB0");         // 定义传输的串口
    sp.set_option(serial_port::baud_rate(115200));                                  // 波特率
    sp.set_option(  serial_port::flow_control( serial_port::flow_control::none ) ); // 流量控制
    sp.set_option(  serial_port::parity( serial_port::parity::none ) );             // 奇偶校验
    sp.set_option( serial_port::stop_bits(  serial_port::stop_bits::one ) );        // 停止位
    sp.set_option(  serial_port::character_size( 8 ) );                             // 数据位

    ros::Rate loop_rate(50);
    while(ros::ok())
    {
        // Step 3 and Step 4 are optional, only if you want to use the request-response communication pattern
        // Step 3: Request quaternion Data from TransdcuerM
        uint16 toId = 309; // Node ID
        char*  txData;
        int    txSize;
        if(EP_SUCC_ == EasyProfile_C_Interface_TX_Request(toId, EP_CMD_Q_S1_E_, &txData, &txSize))
        {
            write(sp, buffer(txData, txSize));    // Step 4:  Send the request via Serial Port.
        }

        char rxData[100];
        boost::system::error_code err;

        sp.read_some(buffer(rxData, 50),err);  // Read from serial port buffer
        if (err)
        {
            ROS_INFO("Serial port read_some Error!");
            return -1;
        }

        Ep_Header header;                       // Then let the EasyProfile do the rest such as data assembling and checksum verification.
        if( EP_SUCC_ == EasyProfile_C_Interface_RX((char*)rxData, 50, &header))
        {
            // Quanternion received
            unsigned int timeStamp = ep_Q_s1_e.timeStamp;
            float q1 = ep_Q_s1_e.q[0];              // Note 1, ep_Q_s1_e is defined in the EasyProfile library as a global variable
            float q2 = ep_Q_s1_e.q[1];              // Note 2, for the units and meaning of each value, refer to EasyObjectDictionary.h
            float q3 = ep_Q_s1_e.q[2];
            float q4 = ep_Q_s1_e.q[3];
            ROS_INFO("Q: %f %f %f %f\n", q1, q2, q3, q4);

            sensor_msgs::Imu imu_data;
            imu_data.header.stamp = ros::Time::now();
            imu_data.header.frame_id = "base_link";
            imu_data.orientation.x = q3;
            imu_data.orientation.y = -q2;
            imu_data.orientation.z = -q1;
            imu_data.orientation.w = q4;

            IMU_pub.publish(imu_data);
        }

        io.run();
        ros::spinOnce();
        loop_rate.sleep();
    }

    return 0;
}
在CMakeLists中添加:
add_compile_options(-std=c99)

aux_source_directory(./src  DIR_SRCS)
add_executable(imu   ${DIR_SRCS} )
target_link_libraries(imu  ${catkin_LIBRARIES})
使用catkin_make编译后,source ./devel/setup.bash,然后运行rosrun imu imu。这时可能会出现无法打开串口的错误,给串口添加权限后再次运行:
sudo chmod 666 /dev/ttyUSB0
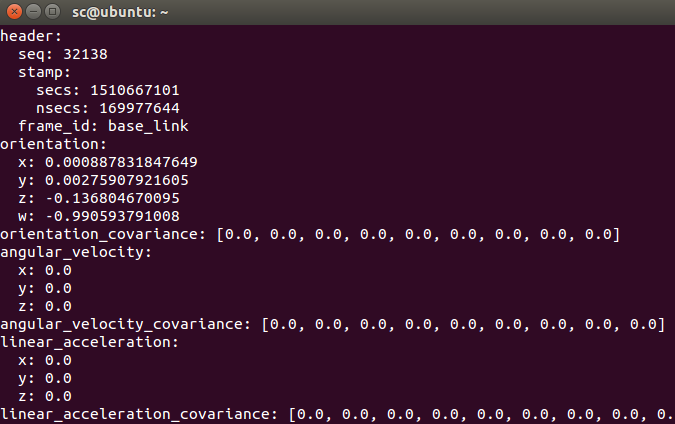
无问题后可以输入下面的指令查看话题,转动IMU可以看到orientation的四个分量一直在变化:
rostopic echo /IMU_data

为了更形象的显示IMU姿态,可以下载rviz_imu_plugin插件并安装。The rviz_imu_plugin package is used to display sensor_msgs/Imu messages in rviz. Once you download and compile the package, it should be visible as a plugin. It displays the orientation of the IMU using a box as well as and coordinate axes. The acceleration can be visualized using a vector.
Make sure you have git installed:
sudo apt-get install git-core
Download the stack from our repository into your catkin workspace
git clone -b indigo https://github.com/ccny-ros-pkg/imu_tools.git
Compile the stack:
cd ~/catkin_ws
catkin_make
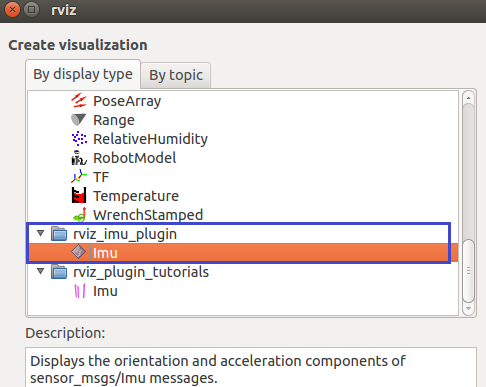
装好后打开rviz,可以看到rviz_imu_plugin与rviz中默认自带的rviz_plugin_tutorials并不一样:

在rviz_imu_plugin下添加imu,修改Fixed Frame为base_link,IMU下面的Topic选为/IMU_data,转动IMU rviz中的虚拟立方体和坐标轴会跟着转动(可以更改box三个方向尺寸的比例):

参考:


【推荐】国内首个AI IDE,深度理解中文开发场景,立即下载体验Trae
【推荐】编程新体验,更懂你的AI,立即体验豆包MarsCode编程助手
【推荐】抖音旗下AI助手豆包,你的智能百科全书,全免费不限次数
【推荐】轻量又高性能的 SSH 工具 IShell:AI 加持,快人一步
· AI与.NET技术实操系列:向量存储与相似性搜索在 .NET 中的实现
· 基于Microsoft.Extensions.AI核心库实现RAG应用
· Linux系列:如何用heaptrack跟踪.NET程序的非托管内存泄露
· 开发者必知的日志记录最佳实践
· SQL Server 2025 AI相关能力初探
· 震惊!C++程序真的从main开始吗?99%的程序员都答错了
· 【硬核科普】Trae如何「偷看」你的代码?零基础破解AI编程运行原理
· 单元测试从入门到精通
· 上周热点回顾(3.3-3.9)
· winform 绘制太阳,地球,月球 运作规律
2016-11-14 粒子群优化算法(Particle Swarm Optimization)