PCL中的OpenNI点云获取框架(OpenNI Grabber Framework in PCL)
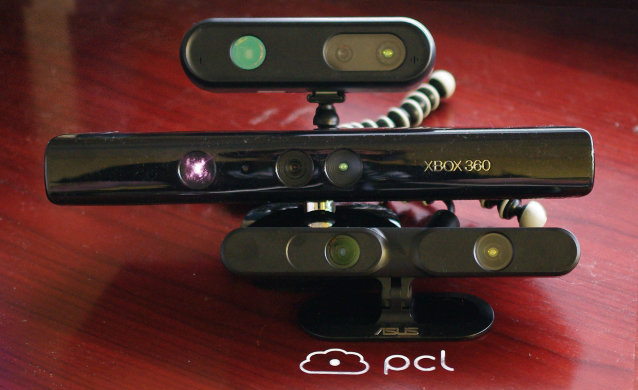
从PCL 1.0开始,PCL(三维点云处理库Point Cloud Library)提供了一个通用采集接口,这样可以方便地连接到不同的设备及其驱动、文件格式和其他数据源。PCL集成的第一个数据获取驱动是OpenNI Grabber,它使得从OpenNI兼容的设备请求数据流变得十分通用和简单。

目前PCL最新的1.8.0版本需要自行编译,而官网上的PCL 1.6.0 All-in-one Installer只支持OpenNI 1。由于我使用的奥比中光3D摄像头只支持OpenNI 2,因此必须使用PCL 1.8.0版本。从源代码开始编译可以参考官网教程Compiling from source,为了图省事我找到一个别人编译好的PCL 1.8.0 All-in-one Installer。
将PCL 1.8.0 All-in-one Installer MSVC2013 Win64下载并安装在默认的C盘路径下“C:\Program Files\PCL 1.8.0”,OpenNI2也装到默认路径下(注意最好安装到默认了路径下,否则可能出现一些问题)。安装好后可以参考官网的教程The OpenNI Grabber Framework in PCL,实现3D点云实时获取。不过官网的教程还停留在OpenNI 1。而在OpenNI 2中OpenNIGrabber()函数的调用方式有所不同,如下所示:
// OpenNI 1:
pcl::Grabber* interface = new pcl::OpenNIGrabber();    //  #include <pcl/io/openni_grabber.h>

// OpenNI 2:
pcl::Grabber* interface = new pcl::io::OpenNIGrabber();  //  #include <pcl/io/openni2_grabber.h>
注意相应的头文件也要改变。通过下面简单的代码,可以实现从3D体感摄像头中读取深度信息,并实时显示3D点云:
#include <pcl/io/openni2_grabber.h>
#include <pcl/visualization/cloud_viewer.h>

class SimpleOpenNIViewer
{
public:
    SimpleOpenNIViewer() : viewer("PCL OpenNI Viewer") {}  // Construct a cloud viewer, with a window name

    // 定义回调函数cloud_cb_,获取到数据时对数据进行处理
    void cloud_cb_(const pcl::PointCloud<pcl::PointXYZ>::ConstPtr &cloud)
    {
        if (!viewer.wasStopped()) // Check if the gui was quit. true if the user signaled the gui to stop
            viewer.showCloud(cloud);
    }

    void run()
    {
        // create a new grabber for OpenNI devices
        pcl::Grabber* interface = new pcl::io::OpenNI2Grabber();

        // make callback function from member function
        boost::function<void(const pcl::PointCloud<pcl::PointXYZ>::ConstPtr&)> f =
            boost::bind(&SimpleOpenNIViewer::cloud_cb_, this, _1);

         // connect callback function for desired signal
        boost::signals2::connection c = interface->registerCallback(f);

        // start receiving point clouds
        interface->start();

        while (!viewer.wasStopped())
        {
            boost::this_thread::sleep(boost::posix_time::seconds(1));
        }

        // Stop the data acquisition
        interface->stop();
    }

    pcl::visualization::CloudViewer viewer;
};


int main()
{
    SimpleOpenNIViewer v;

    v.run();

    return 0;
}
上面代码中SimpleOpenNIViewer的run()函数首先创建了一个新的OpenNI2Grabber接口。接下来用回调函数cloud_cb_地址创建boost::bind对象,给SimpleOpenNIViewer传递一个引用和参数_1作为占位符。The bind then gets casted to a boost::function object which is templated on the callback function type, in this case void (const pcl::PointCloud<pcl::PointXYZ>::ConstPtr&). The resulting function object can the be registered with the OpenNIGrabber and subsequently started.
OpenNIGrabber提供不止一种数据类型,我们可以注册下面几种类型的回调函数:
1. void (const boost::shared_ptr<const pcl::PointCloud<pcl::PointXYZRGB> >&)
2. void (const boost::shared_ptr<const pcl::PointCloud<pcl::PointXYZ> >&)
3. void (const boost::shared_ptr<openni_wrapper::Image>&) 这仅仅提供内置摄像头生成的RGB图像
4. void (const boost::shared_ptr<openni_wrapper::DepthImage>&) 这个提供深度图像,不带任何颜色或者亮度信息。
5. void (const boost::shared_ptr<openni_wrapper::Image>&, const boost::shared_ptr<openni_wrapper::DepthImage>&, float constant) 采集器会发送RGB图像和深度图像
注意:所有需要深度图像和RGB图像流的回调函数类型都会启用一个同步机制,它能保证图像和深度数据的一致。这样引入了一个小的时延,因为同步机制在发送第一张图像之前至少需要等待采集到一组图片。
调用registerCallback将返回一个boost::signals2::connection对象,上面的例子里我们忽略掉了它。然而,如果你想要中断或者取消一个或多个注册数据流,只需要断开与回调函数的连接,而不用停止整个采集器,这样其他还在进行处理的回调函数可以正常工作:
boost::signals2::connection c = interface (registerCallback (f));

// ...

if (c.connected ())
  c.disconnect ();
下面通过CMake创建工程文件:
cmake_minimum_required(VERSION 2.8 FATAL_ERROR)

project(openni_grabber)

find_package(PCL 1.8 REQUIRED)

include_directories(${PCL_INCLUDE_DIRS})
link_directories(${PCL_LIBRARY_DIRS})
add_definitions(${PCL_DEFINITIONS})

add_executable (openni_grabber openni_grabber.cpp)
target_link_libraries (openni_grabber ${PCL_LIBRARIES})
从这里开始我遇到了很多奇怪的问题:
1. 一开始我使用CMake生成VS2010的工程文件,可是在生成工程文件过程中总是出现“common is required but boost was not found”错误:

按照网上提出的修改CMake文件等方式还是不管用,后来有人说是因为版本问题,应该对应的选择生成VS2013工程文件。
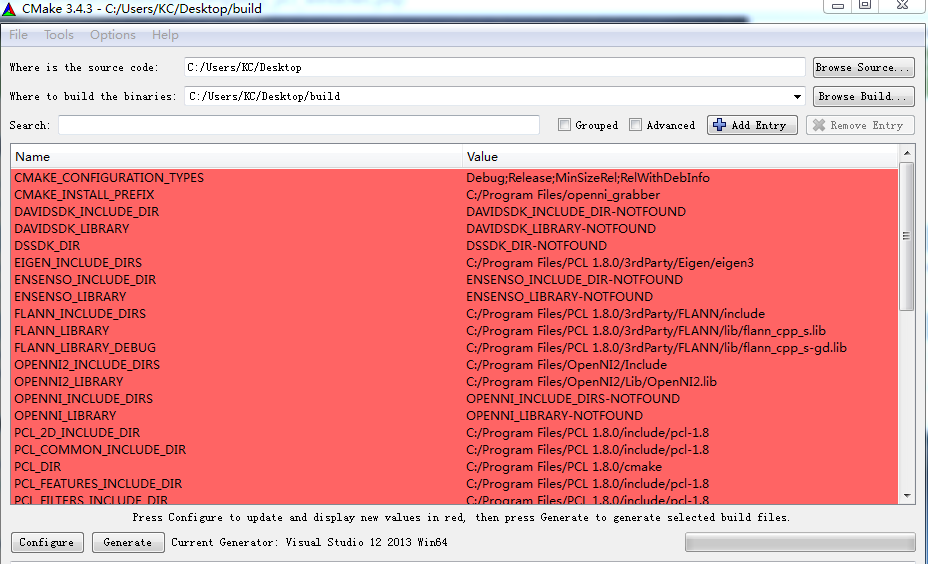
2. 我又装了一个VS2013,这次选择生成VS2013工程文件,生成过程中出现了一些警告信息,如OPENNI_LIBRARY-NOTFOUND等,忽略这些信息;

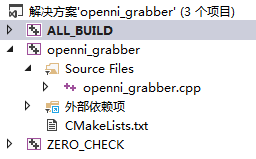
打开成功生成的工程文件,进行编译:

可是在生成解决方案时,出现了这种错误: fatal error C1001: 编译器中发生内部错误。1> (编译器文件“msc1.cpp”,第 1325 行)
网上查找原因,说是VS2013编译器的Bug,需要安装Microsoft Visual Studio 2013 Update 5(适用于Visual Studio 2013的一系列新增功能和Bug修复中的最新更新)。这个更新的安装过程比较漫长...怎么安装这个更新可以参考百度知道:怎样更新VS2013 update 5
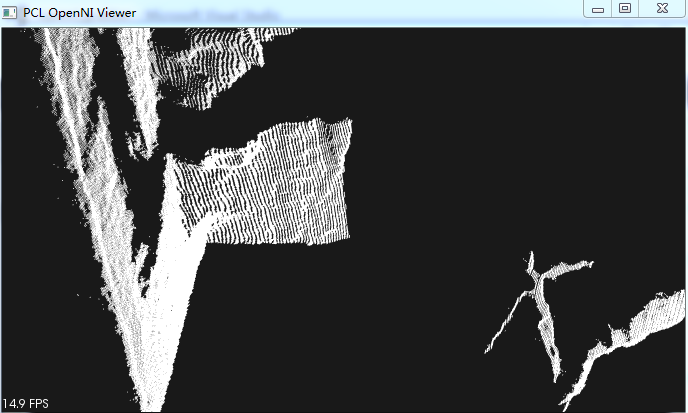
更新装完后再重新生成就可以了,下面是通过获取摄像头探测到的深度信息生成的3D点云:

参考:
The OpenNI Grabber Framework in PCL
Capture Point Cloud with PCL 1.8 and Kinect


【推荐】国内首个AI IDE,深度理解中文开发场景,立即下载体验Trae
【推荐】编程新体验,更懂你的AI,立即体验豆包MarsCode编程助手
【推荐】抖音旗下AI助手豆包,你的智能百科全书,全免费不限次数
【推荐】轻量又高性能的 SSH 工具 IShell:AI 加持,快人一步
· AI与.NET技术实操系列:向量存储与相似性搜索在 .NET 中的实现
· 基于Microsoft.Extensions.AI核心库实现RAG应用
· Linux系列:如何用heaptrack跟踪.NET程序的非托管内存泄露
· 开发者必知的日志记录最佳实践
· SQL Server 2025 AI相关能力初探
· 震惊!C++程序真的从main开始吗?99%的程序员都答错了
· 【硬核科普】Trae如何「偷看」你的代码?零基础破解AI编程运行原理
· 单元测试从入门到精通
· 上周热点回顾(3.3-3.9)
· winform 绘制太阳,地球,月球 运作规律