OpenCV 常用算法学习
使用Qt界面开发结合OpenCV进行学习,学习过程中也逐渐完善了一个图片处理工具
工具中还有很多这里没有介绍的内容,包括图像在Qt中的拖拽放大以及很多细节处理等等,这些无关OpenCV,就不放这里了
源码:GitHub-Qt-imgToolForRaw
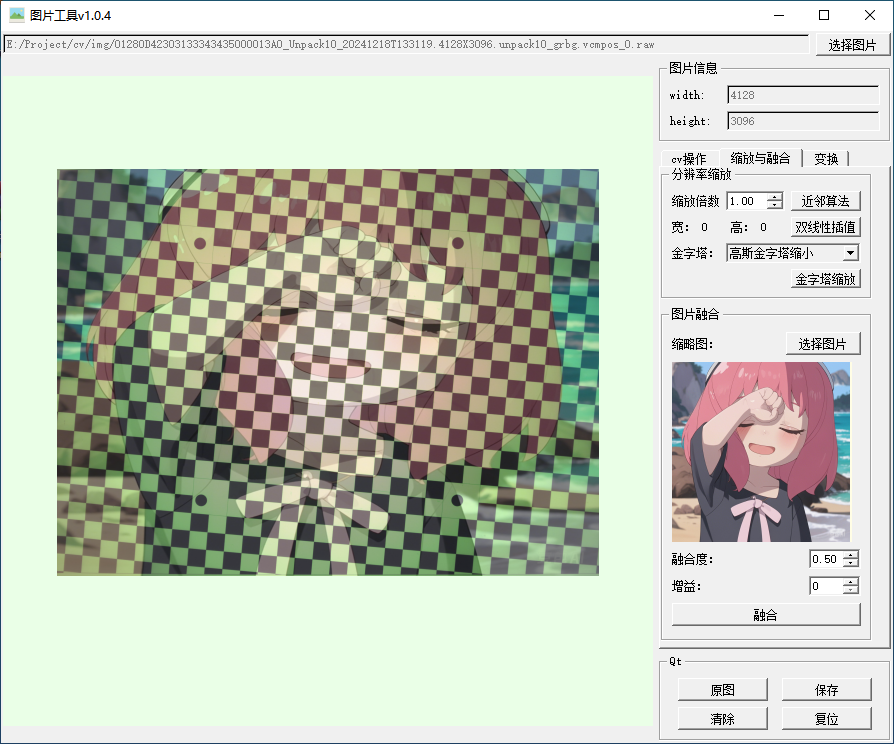
界面:
图像格式转换(颜色空间转换)#
函数原型#
Copy
| void cv::cvtColor( |
| InputArray src, |
| OutputArray dst, |
| int code, |
| int dstCn = 0 |
| ); |
常用的颜色空间转换类型#
| 转换类型 |
代码常量 |
应用场景 |
| BGR ↔ 灰度 |
COLOR_BGR2GRAY |
图像简化处理 |
| BGR ↔ RGB |
COLOR_BGR2GRAY |
Qt显示cv处理的图像 |
| BGR ↔ HSV |
COLOR_BGR2HSV |
颜色追踪、阈值分割 |
| BGR ↔ Lab |
COLOR_BGR2Lab |
色彩一致性检查 |
| BGR ↔ YUV |
COLOR_BGR2YUV_I420 |
视频编码/解码 |
| 灰度 ↔ BGR |
COLOR_GRAY2BGR |
单通道转三通道显示 |
代码应用#
在Qt中QImage显示只支持RGB格式,而OpenCV默认读取的图片是BGR格式,OpenCV处理的图片通常需要通过格式转换成RGB后才能通过Qt显示出来。
- 通过以下函数即实现了将
cv::Mat类型,转为了可以使用Qt显示的QImage。
Copy
| QImage Widget::cvMatToQImage(const cv::Mat &mat){ |
| if (mat.empty()) { |
| qDebug() << "error : mat is empty!"; |
| return QImage(); |
| } |
| |
| |
| if(mat.type() == CV_8UC1){ |
| return QImage( |
| mat.data, |
| mat.cols, |
| mat.rows, |
| mat.step, |
| QImage::Format_Grayscale8 |
| ).copy(); |
| } |
| |
| else if (mat.type() == CV_8UC3) { |
| |
| cv::Mat rgbMat; |
| cv::cvtColor(mat, rgbMat, cv::COLOR_BGR2RGB); |
| |
| return QImage( |
| rgbMat.data, |
| rgbMat.cols, |
| rgbMat.rows, |
| rgbMat.step, |
| QImage::Format_RGB888 |
| ).copy(); |
| } |
| |
| else { |
| qWarning("Unsupported Mat type: must be CV_8UC1 or CV_8UC3"); |
| return QImage(); |
| } |
| } |
- 通过
cv::COLOR_BGRA2GRAY实现将图片转为灰度图功能
Copy
| cv::cvtColor(img_mat_root, img_mat_gray, cv::COLOR_BGRA2GRAY); |
高斯模糊#
数学本质#
采用二维高斯函数生成卷积核:
Copy
| G(x,y) = (1/(2πσ²)) * e^(-(x²+y²)/(2σ²)) |
函数原型#
Copy
| void cv::GaussianBlur( |
| InputArray src, |
| OutputArray dst, |
| Size ksize, |
| double sigmaX, |
| double sigmaY = 0 |
| ); |
- 关键参数:
- 核尺寸(ksize):高斯内核的大小,边越长,模糊范围越大,通常指定宽高都是奇数的
Size对象,如Size(5, 5)表示一个5x5的内核。
- 标准差:
sigmaX和sigmaY分别表示X和Y方向上的标准差,标准差越大,边缘越模糊
使用示例#
Copy
| // 降噪(高斯模糊) |
| cv::GaussianBlur(img_mat_root, img_mat_gaussian, cv::Size(5, 5), 2, 2); |
Canny边缘检测(输入为单通道灰度图像)#
算法步骤#
- 高斯滤波降噪
- 计算梯度幅值和方向
- 非极大值抑制
- 双阈值边缘连接
函数原型#
Copy
| void cv::Canny( |
| InputArray image, |
| OutputArray edges, |
| double threshold1, |
| double threshold2, |
| int apertureSize = 3, |
| bool L2gradient = false |
| ); |
- 关键参数
- threshold1:低阈值,低于此值的边缘将被丢弃
- threshold2:高阈值,高于此值的边缘将被保留为强边缘
- apertureSize:Sobel算子的窗口尺寸(推荐值为3即默认值)
使用示例#
Copy
| cv::Canny(img_mat_gaussian, img_mat_canny, 100, 200); |
- 注意这里使用了
img_mat_gaussian,是已经高斯处理过后的图像,此时在Canny函数内部则会跳过高斯滤波部分。
图像二值化(输入为单通道灰度图像8位或32位浮点)#
函数原型#
Copy
| double cv::threshold( |
| InputArray src, |
| OutputArray dst, |
| double thresh, |
| double maxval, |
| int type |
| ); |
阈值类型(输入为单通道灰度图像8位或32位浮点)#
| 类型标志 |
类型 |
说明 |
| THRESH_BINARY |
二进制阈值 |
像素值低于参数thresh的会被置为0,高于的置为参数中的maxval最大值 |
| THRESH_BINARY_INV |
反二进制阈值 |
与二进制阈值相反 |
| THRESH_TRUNC |
截断阈值 |
像素值高于参数阈值时直接被置为阈值的值,低于或等于则保持不变 |
| THRESH_TOZERO |
零阈值 |
像素值低于参数阈值时被置为0,高于或等于时不变 |
使用示例#
Copy
| void Widget::on_pushButton_threshold_clicked() |
| { |
| threshType = (threshType + 1) % 2; |
| cv::Mat thresh_Mat; |
| int t_type = 0; |
| if(threshType){ |
| |
| t_type = cv::THRESH_BINARY; |
| ui->pushButton_threshold->setText("反二值化"); |
| } |
| else{ |
| |
| t_type = cv::THRESH_BINARY_INV; |
| ui->pushButton_threshold->setText("二值化"); |
| } |
| |
| |
| cv::threshold(img_mat_gray, thresh_Mat, 100, 255, t_type); |
| ui->label->setPixmap(QPixmap::fromImage(cvMatToQImage(thresh_Mat))); |
| } |
亮度对比度调节#
算法原理#
使用线性变换公式
g(x)为输出像素值,f(x)为输入像素值
Copy
-说明
- α>1增强对比度,0<α<1降低对比度
- β>0增加亮度,β<0降低亮度
代码示例#
Copy
| |
| void Widget::changeGain(double contrast, int brightness) |
| { |
| cv::Mat changedGainMat; |
| // 计算公式是 对比度 * 像素值 + 亮度 |
| img_mat_root.convertTo(changedGainMat, -1, contrast, brightness); |
| ui->label->setPixmap(QPixmap::fromImage(cvMatToQImage(changedGainMat))); |
| } |
图像缩放#
插值方法对比#
| 算法类型 |
计算复杂度 |
使用场景 |
| 最近邻插值 |
O(1) |
实时视频处理 |
| 双线性插值 |
O(4) |
通用图像缩放 |
| 图像金字塔 |
多级处理(高内存消耗) |
多尺度特征提取 |
最近邻插值#
函数:cv::resize()
参数:cv::INTER_NEAREST
Copy
| void Widget::on_pushButton_nearest_clicked() |
| { |
| |
| double scale = ui->doubleSpinBox_resize->value(); |
| cv::Mat scaleMat; |
| cv::Size scaleSize(width * scale, height * scale); |
| |
| cv::resize(img_mat_root, scaleMat, scaleSize, 0, 0, cv::INTER_NEAREST); |
| ui->label->setPixmap(QPixmap::fromImage(cvMatToQImage(scaleMat))); |
| ui->label_scale_width->setText(QString::number(scaleSize.width)); |
| ui->label_scale_height->setText(QString::number(scaleSize.height)); |
| } |
双线性插值#
- 由原图像位置在它附近的2*2区域4个临近像素的值通过加权平均计算得出
cv::resize的默认算法
Copy
| void Widget::on_pushButton_linear_clicked() |
| { |
| |
| double scale = ui->doubleSpinBox_resize->value(); |
| cv::Mat scaleMat; |
| cv::Size scaleSize(width * scale, height * scale); |
| |
| cv::resize(img_mat_root, scaleMat, scaleSize, 0, 0, cv::INTER_LINEAR); |
| ui->label->setPixmap(QPixmap::fromImage(cvMatToQImage(scaleMat))); |
| ui->label_scale_width->setText(QString::number(scaleSize.width)); |
| ui->label_scale_height->setText(QString::number(scaleSize.height)); |
| } |
图像金字塔#
- 高斯金字塔(向下采样,图像缩小)
- 执行一次长宽各缩小二分之一
- 函数:
cv::pyrDown(src, dst)
- 拉普拉斯金字塔(向上采样,图像放大)
- 执行一次长宽各放大2倍
- 函数:
cv::pyrUp()
Copy
| void Widget::on_pushButton_pyramid_clicked() |
| { |
| int pyramidType = ui->comboBox_pyramid_type->currentIndex(); |
| double scale = ui->doubleSpinBox_resize->value(); |
| |
| cv::Mat pyMat = img_mat_root.clone(); |
| if(pyramidType == 0){ |
| |
| if(scale != 0.5 && scale != 0.25){ |
| QMessageBox::warning(nullptr, "高斯金字塔缩小", "缩小倍数必须是2的n次方分之1,即0.5,0,25等"); |
| return; |
| } |
| ui->label_scale_width->setText(QString::number(width * scale)); |
| ui->label_scale_height->setText(QString::number(height * scale)); |
| while(scale <= 0.5){ |
| |
| cv::pyrDown(pyMat, pyMat); |
| scale *= 2; |
| } |
| }else { |
| int py_scale = static_cast<int>(scale); |
| |
| if(py_scale % 2 != 0){ |
| QMessageBox::warning(nullptr, "拉普拉斯金字塔放大", "放大倍数必须是2的整数倍"); |
| return; |
| } |
| ui->doubleSpinBox_resize->setValue(py_scale); |
| ui->label_scale_width->setText(QString::number(width * py_scale)); |
| ui->label_scale_height->setText(QString::number(height * py_scale)); |
| while(py_scale > 1){ |
| |
| cv::pyrUp(pyMat, pyMat); |
| py_scale /= 2; |
| } |
| } |
| ui->label->setPixmap(QPixmap::fromImage(cvMatToQImage(pyMat))); |
| } |
图像融合#
算法原理#
Copy
| dst = α·src1 + β·src2 + γ |
函数原型#
Copy
| void cv::addWeighted( |
| InputArray src1, |
| double alpha, |
| InputArray src2, |
| double beta, |
| double gamma, |
| OutputArray dst, |
| int dtype = -1 |
| ) |
| |
- 注意:两张图像融合前,需保证两张图像通道、位深均一致
使用示例#
Copy
| |
| void Widget::on_pushButton_blend_clicked() |
| { |
| double alpha = ui->doubleSpinBox_blend_alpha->value(); |
| double gain = ui->spinBox_blend_gain->value(); |
| cv::Mat blendMat = qImageToCVMat(blendImg); |
| |
| cv::resize(blendMat, blendMat, img_mat_root.size()); |
| |
| if (blendMat.type() != img_mat_root.type()) { |
| |
| if (blendMat.channels() != img_mat_root.channels()) { |
| if (blendMat.channels() == 1) { |
| cv::cvtColor(blendMat, blendMat, cv::COLOR_GRAY2BGR); |
| } else { |
| cv::cvtColor(blendMat, blendMat, cv::COLOR_BGR2GRAY); |
| } |
| } |
| |
| |
| if (blendMat.depth() != img_mat_root.depth()) { |
| if (blendMat.depth() == CV_32F) { |
| blendMat.convertTo(blendMat, CV_8UC3, 255.0); |
| } else if (blendMat.depth() == CV_16U) { |
| blendMat.convertTo(blendMat, CV_8UC3, 1.0/256.0); |
| } |
| } |
| } |
| cv::Mat res_mat; |
| |
| cv::addWeighted(blendMat, alpha, img_mat_root, 1 - alpha, gain, res_mat); |
| ui->label->setPixmap(QPixmap::fromImage(cvMatToQImage(res_mat))); |
| } |
旋转与镜像#
旋转函数原型#
Copy
| void cv::rotate( |
| InputArray src, |
| OutputArray dst, |
| int rotateCode |
| ) |
| |
旋转模式#
| 枚举值 |
旋转角度 |
| ROTATE_90_CLOCKWISE |
顺时针90度 |
| ROTATE_180 |
180度 |
| ROTATE_90_COUNTERCLOCKWISE |
逆时针90度 |
翻转函数模型#
Copy
| void cv::flip( |
| InputArray src, |
| OutputArray dst, |
| int flipCode |
| ) |
| |
翻转模式#
| 参数值 |
翻转方向 |
效果说明 |
| 1 |
水平翻转(X轴对称) |
镜像翻转,左右互换 |
| 0 |
垂直翻转(Y轴对称) |
上下颠倒 |
| -1 |
双向翻转 |
同时水平和垂直翻转 |
代码示例#
Copy
| |
| void Widget::on_pushButton_rotate_clicked() |
| { |
| int flag = ui->comboBox_rotate->currentIndex(); |
| int type = 0; |
| switch(flag){ |
| case 0: |
| type = cv::ROTATE_90_CLOCKWISE; |
| break; |
| case 1: |
| type = cv::ROTATE_90_COUNTERCLOCKWISE; |
| break; |
| case 2: |
| type = cv::ROTATE_180; |
| break; |
| default: |
| break; |
| } |
| |
| cv::rotate(img_mat_root, img_mat_root, type); |
| ui->label->setPixmap(QPixmap::fromImage(cvMatToQImage(img_mat_root))); |
| } |
| |
| |
| void Widget::on_pushButton_flip_clicked() |
| { |
| int flag = ui->comboBox_flip->currentIndex(); |
| int type = 0; |
| switch(flag){ |
| case 0: |
| type = 1; |
| break; |
| case 1: |
| type = 0; |
| break; |
| case 2: |
| type = -1; |
| break; |
| default: |
| break; |
| } |
| cv::flip(img_mat_root, img_mat_root, type); |
| ui->label->setPixmap(QPixmap::fromImage(cvMatToQImage(img_mat_root))); |
| } |
霍夫圆检测#
函数原型#
Copy
| void cv::HoughCircles( |
| InputArray image, |
| OutputArray circles, |
| int method, |
| double dp, |
| double minDist, |
| double param1 = 100, |
| double param2 = 100, |
| int minRadius = 0, |
| int maxRadius = 0 |
| ) |
| |
参数详解#
| 参数 |
典型值范围 |
作用说明 |
| dp |
1.0-2.0 |
值越小检测越精细,但会增加计算量 |
| minDist |
图像宽度的1/10 |
防止相邻圆重复检测 |
| param1 |
50-200 |
Canny边缘检测的高阈值(低阈值为高阈值的一半) |
| param2 |
20-100 |
值越小检测到的假圆越多,值越大检测越严格 |
| minRadius |
0-50 |
过滤过小的圆 |
| maxRadius |
100-图像宽度1/2 |
限制最大检测半径 |
代码示例#
- 这里只处理了对图像上有4个圆的情况(类似下图)

- 这里对圆点次序做了排序,采用中心点叉积方式,详情可去源码中了解
Copy
| void Widget::on_pushButton_circle_clicked() |
| { |
| |
| |
| if(circles.empty()){ |
| |
| img_mat_circle = img_mat_root.clone(); |
| |
| cv::Mat gaussion_gray; |
| cv::GaussianBlur(img_mat_gray, gaussion_gray, cv::Size(5, 5), 2, 2); |
| |
| |
| cv::HoughCircles( |
| gaussion_gray, |
| circles, |
| cv::HOUGH_GRADIENT, |
| 1, |
| gaussion_gray.rows/64, |
| 200, |
| 100, |
| 0, |
| 0); |
| |
| if(circles.empty()){ |
| QMessageBox::warning(nullptr, "不存在圆点", "未找到圆点,请检查图片"); |
| img_mat_circle = cv::Mat(); |
| return; |
| } |
| |
| sortCirclePoint(); |
| |
| setCircleInfo(); |
| std::vector<cv::Point> centers; |
| |
| for (size_t i = 0; i < circles.size(); i++) { |
| qDebug() << circles[i][0] << "," << circles[i][1] << "半径:" << circles[i][2]; |
| cv::Point center(cvRound(circles[i][0]), cvRound(circles[i][1])); |
| centers.push_back(center); |
| int radius = cvRound(circles[i][2]); |
| |
| cv::circle( |
| img_mat_circle, |
| center, |
| radius, |
| cv::Scalar(0, 0, 255), |
| -1 |
| ); |
| |
| cv::circle(img_mat_circle, center, 3, cv::Scalar(0, 255, 0), -1); |
| cv::Point text_pos(center.x + 60, center.y); |
| |
| cv::putText( |
| img_mat_circle, |
| QString::number(i + 1).toStdString(), |
| text_pos, |
| cv::FONT_HERSHEY_SIMPLEX, |
| 1, |
| cv::Scalar(0, 0, 255), |
| 5 |
| ); |
| } |
| double dis13; |
| double dis24; |
| cvLine(centers[0], centers[2], dis13); |
| cvLine(centers[1], centers[3], dis24); |
| ui->lineEdit_circle13_dis->setText(QString::number(dis13)); |
| ui->lineEdit_circle24_dis->setText(QString::number(dis24)); |
| } |
| |
| ui->label->setPixmap(QPixmap::fromImage(cvMatToQImage(img_mat_circle))); |
| } |


【推荐】国内首个AI IDE,深度理解中文开发场景,立即下载体验Trae
【推荐】编程新体验,更懂你的AI,立即体验豆包MarsCode编程助手
【推荐】抖音旗下AI助手豆包,你的智能百科全书,全免费不限次数
【推荐】轻量又高性能的 SSH 工具 IShell:AI 加持,快人一步
· 25岁的心里话
· 闲置电脑爆改个人服务器(超详细) #公网映射 #Vmware虚拟网络编辑器
· 零经验选手,Compose 一天开发一款小游戏!
· 因为Apifox不支持离线,我果断选择了Apipost!
· 通过 API 将Deepseek响应流式内容输出到前端