基于小熊派Hi3861鸿蒙开发的IoT物联网学习【二】
HarmonyOS内核开发—信号量开发案例学习记录
一、LiteOS里面的任务管理介绍:
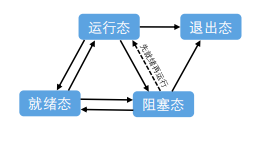
任务状态通常分为以下四种:
就绪(Ready):该任务在就绪列表中,只等待CPU。
运行(Running):该任务正在执行。
阻塞(Blocked):该任务不在就绪列表中。包含任务被挂起、任务被延时、任务正在等待信号量、读写队列或者等待读写事件等。
退出态(Dead):该任务运行结束,等待系统回收资源。

案例 :cmsis_os2的API任务接口
创建任务:osThreadNew(osThreadFunc_t func,void * argument,const osThreadAttr_t * attr)

删除某个任务:osThreadTerminate(osThreadId_t thread_id);
任务挂起:osThreadSuspend(osThreadId_t thread_id)
任务恢复:osThreadResume (osThreadId_t thread_id)
#include <stdio.h>
#include <string.h>
#include <unistd.h>

#include "ohos_init.h"
#include "cmsis_os2.h"

osThreadId_t threadHiID;
osThreadId_t threadLoID;

/*****任务一*****/
void threadHi(void)
{
    // int sum = 0;
    // while (1)
    // {
    //     printf("This is BearPi Harmony Thread1----%d\r\n", sum++);
    //     usleep(1000000);
    // }
    printf("enter threadHi\r\n");
    osDelay(1);   //其作用是让任务阻塞
    printf("threadHi delay done\r\n");
    osThreadSuspend(threadHiID); //任务挂起
    printf("threadHi osThreadResume success\r\n");
    osThreadTerminate(threadHiID); //删除某个任务

}

/*****任务二*****/
void threadLo(void)
{
    // int sum = 0;
    // while (1)
    // {
    //     printf("This is BearPi Harmony Thread2----%d\r\n", sum++);
    //     usleep(500000);
    // }
    for (int i = 0;i<10;i++){
        printf("enter threadLo\r\n");
    }
    printf("threadHi osThreadSuspend success\r\n");
    osThreadResume(threadHiID);    // 任务恢复
    osThreadTerminate(threadLoID); //删除某个任务
}

/*****任务创建*****/
static void Thread_example(void)
{
    osThreadAttr_t attr;


    threadHiID = osThreadNew((osThreadFunc_t)threadHi,NULL,&attr);
    if (threadHiID == NULL)
    {
        printf("Falied to create threadHi!\n");
    }

    attr.name = "threadLo";
    attr.priority = 24 ;
    threadLoID =osThreadNew((osThreadFunc_t)threadLo,NULL,&attr);

    if (threadLoID== NULL)
    {
        printf("Falied to create threadLo!\n");
    }
}

APP_FEATURE_INIT(Thread_example);
// SYS_RUN(Thread_example);
二、信号量开发案例
基本概念:信号量(Semaphore)是一种实现任务间通信的机制,实现任务之间同步或临界资源的互斥访问。常用于协助一组相
互竞争的任务来访问临界资源。
1、在多任务系统中,各任务之间需要同步或互斥实现临界资源的保护,信号量功能可以为用户提供这方面的支持。
2、通常一个信号量的计数值用于对应有效的资源数,表示剩下的可被占用的互斥资源数。其值的含义分两种情况:
1)0,表示没有积累下来的Post信号量操作,且有可能有在此信号量上阻塞的任务。
2)正值,表示有一个或多个Post信号量操作。
4、以同步为目的的信号量和以互斥为目的的信号量在使用有如下不同:
1)用作互斥时,信号量创建后记数是满的,在需要使用临界资源时,先取信号量,使其变空,这样其他任务需要使用
临界资源时就会因为无法取到信号量而阻塞,从而保证了临界资源的安全。
2)用作同步时,信号量在创建后被置为空,任务1取信号量而阻塞,任务2在某种条件发生后,释放信号量,于是任务
1得以进入READY或RUNNING态,从而达到了两个任务间的同步。
#include <stdio.h>
#include <string.h>
#include <unistd.h>

#include "ohos_init.h"
#include "cmsis_os2.h"

osSemaphoreId_t sem1;

void Thread_Semaphore1(void)
{
    osStatus_t status;
    while (1)
    {
        //申请两次sem1信号量,使得Thread_Semaphore2和Thread_Semaphore3能同步执行
        status = osSemaphoreRelease(sem1);
        if (status!=osOK){
            printf("semaphore   fail");
        }else{
            printf("semaphore   success");
        }

        //此处若只申请一次信号量,则Thread_Semaphore2和Thread_Semaphore3会交替运行。
        // osSemaphoreRelease(sem1);

        // printf("Thread_Semaphore i %d \n",i);
        // i=i+1;
        // printf("Thread_Semaphore sem1 %d \n",sem1);
        // printf("Thread_Semaphore1 Release  Semap \n");
        osDelay(100);
    }
}
void Thread_Semaphore2(void)
{
    osStatus_t status;
    while (1)
    {
        //等待sem1信号量
        status = osSemaphoreAcquire(sem1, 50U);
        if (status!=osOK){
            printf("semaphore2   fail");
        }else{
            printf("semaphore2   success");
        }
    }
}

void Thread_Semaphore3(void)
{
    osStatus_t status;
    while (1)
    {
        //等待sem1信号量
        status = osSemaphoreAcquire(sem1, osWaitForever);
        if (status!=osOK){
            printf("semaphore3 fail");
        }else{
            printf("semaphore3   success");
        }
        osDelay(1);
    }
}

void Semaphore_example(void)
{
    osThreadAttr_t attr;

    attr.attr_bits = 0U;
    attr.cb_mem = NULL;
    attr.cb_size = 0U;
    attr.stack_mem = NULL;
    attr.stack_size = 1024 * 4;
    attr.priority = 24;

    attr.name = "Thread_Semaphore1";
    if (osThreadNew((osThreadFunc_t)Thread_Semaphore1, NULL, &attr) == NULL)
    {
        printf("Falied to create Thread_Semaphore1!\n");
    }
    attr.name = "Thread_Semaphore2";
    if (osThreadNew((osThreadFunc_t)Thread_Semaphore2, NULL, &attr) == NULL)
    {
        printf("Falied to create Thread_Semaphore2!\n");
    }
    attr.name = "Thread_Semaphore3";
    if (osThreadNew((osThreadFunc_t)Thread_Semaphore3, NULL, &attr) == NULL)
    {
        printf("Falied to create Thread_Semaphore3!\n");
    }
    sem1 = osSemaphoreNew(4, 0, NULL);
    if (sem1 == NULL)
    {
        printf("Falied to create Semaphore1!\n");
    }
}
APP_FEATURE_INIT(Semaphore_example);
BUILD.gn文件:

static_library("semaphore_example") {
    sources = [
        "Semaphore_example.c"
    ]

    include_dirs = [
        "//utils/native/lite/include",
        "//kernel/liteos_m/components/cmsis/2.0",
    ]
}
BUILD.gn
import("//build/lite/config/component/lite_component.gni")

lite_component("app") {
    features = [
        "A5_kernel_semaphore:semaphore_example"
    ]
}
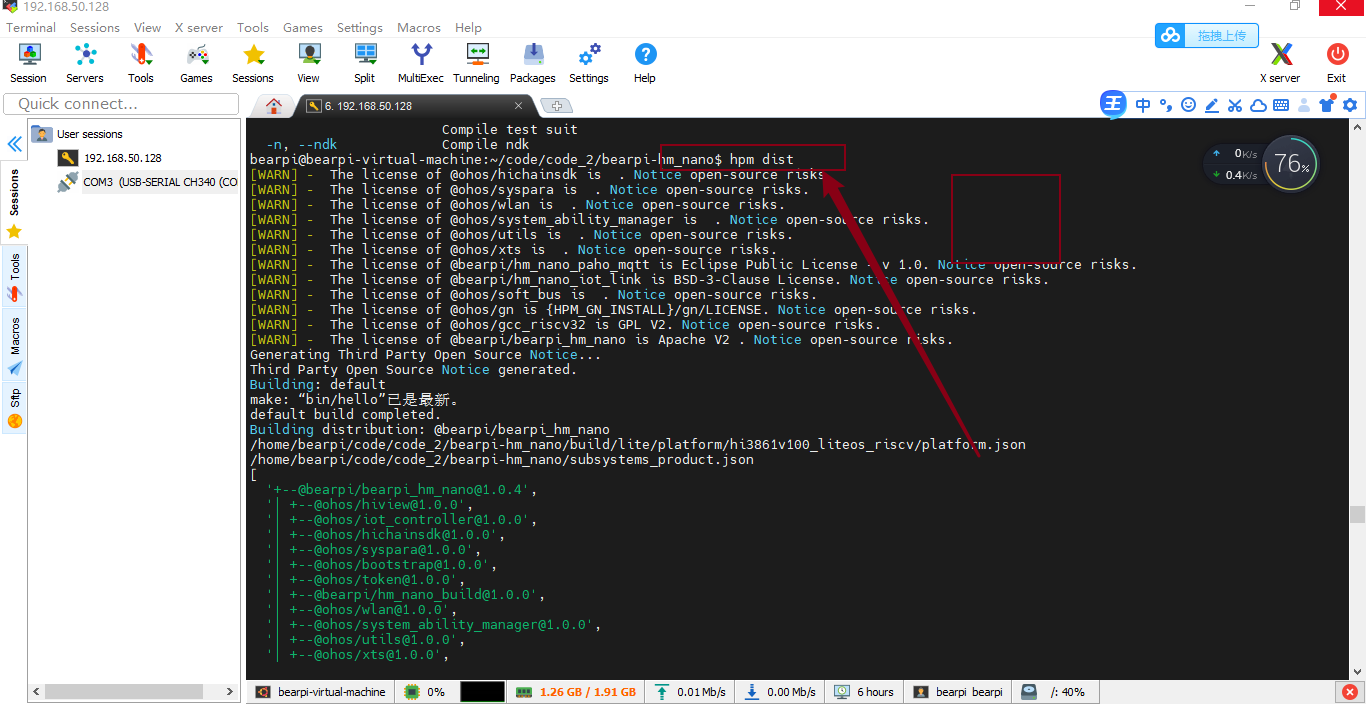
代码写完后用hpm dist命令来编译

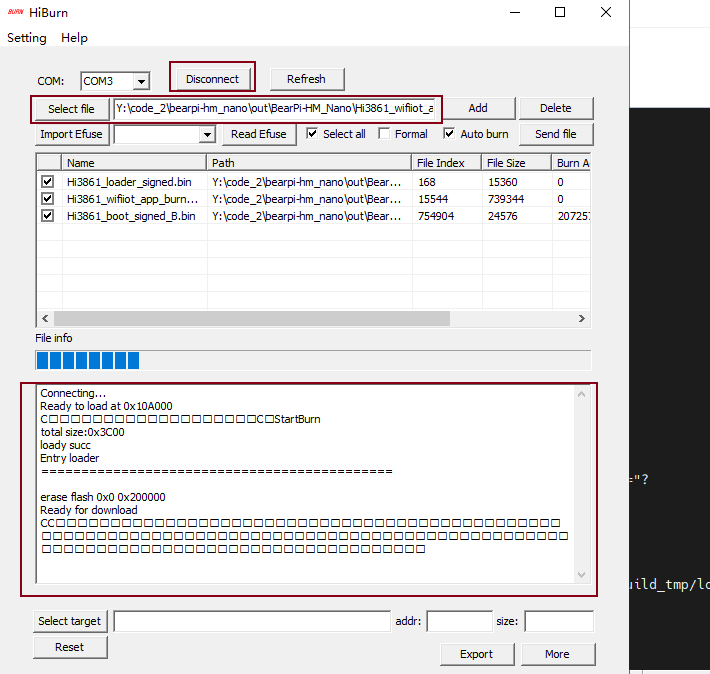
烧录代码到开发板:

后台log

心有猛虎,细嗅蔷薇


