

GIT-Linux(CentOS7)系统部署GitLab服务器
GIT-Linux(CentOS7)系统部署GitLab服务器
root账号登录
一、 安装并配置必要的依赖关系
在CentOS系统上安装所需的依赖:ssh,防火墙,postfix(用于邮件通知) ,wget,以下这些命令也会打开系统防火墙中的HTTP和SSH端口访问。
1.安装ssh ,命令:sudo yum install -y curl policycoreutils-pythonopenssh-server
如报错
错误信息:/var/run/yum.pid已被锁定,PID为1610的另一个程序正在运行。
解决办法: 运行:rm -f /var/run/yum.pid 删除文件后再次运行yum可用。
[root@localhost ~]# sudo yum install -y curl policycoreutils-pythonopenssh-server
已加载插件:fastestmirror, langpacks
Loading mirror speeds from cached hostfile
 * base: mirrors.tuna.tsinghua.edu.cn
 * epel: mirrors.aliyun.com
 * extras: mirrors.huaweicloud.com
 * updates: mirrors.huaweicloud.com
软件包 curl-7.29.0-54.el7.x86_64 已安装并且是最新版本
没有可用软件包 policycoreutils-pythonopenssh-server。
2.将SSH服务设置成开机自启动,安装命令:sudo systemctl enable sshd
3.启动SSH服务,安装命令:sudo systemctl start sshd
4.安装防火墙(如果已经安装了防火墙并且已经在运行状态,则可直接进行第6步)yum install firewalld systemd -y
5.开启防火墙,安装命令:service firewalld start
6.添加http服务到firewalld,pemmanent表示永久生效,若不加--permanent系统下次启动后就会失效。 firewall-cmd --permanent --add-service=http
7.重启防火墙,安装命令:sudo systemctl reload firewalld
8.接下来,安装Postfix以发送通知邮件,安装命令:sudo yum install postfix
9.将postfix服务设置成开机自启动,安装命令:sudo systemctl enable postfix
10.启动postfix,安装命令:sudo systemctl start postfix
注:在安装Postfix期间,可能会出现配置屏幕。选择“Internet Site”并按enter键。使用您的服务器的外部DNS以“mail name”并按enter。如果出现额外的屏幕,继续按enter键接受默认值。
11.wget 用于从外网上下载插件
检查系统中是否已经安装wget,使用命令若出现下图wget相关版本描述则说明系统中已经安装wget 若报系统找不到命令说明wget未安装 wget -V
[root@localhost ~]# wget -V
GNU Wget 1.14 在 linux-gnu 上编译。

+digest +https +ipv6 +iri +large-file +nls +ntlm +opie +ssl/openssl

Wgetrc:
    /etc/wgetrc (系统)
字符集: /usr/share/locale
编译: gcc -DHAVE_CONFIG_H -DSYSTEM_WGETRC="/etc/wgetrc"
    -DLOCALEDIR="/usr/share/locale" -I. -I../lib -I../lib -O2 -g -pipe
    -Wall -Wp,-D_FORTIFY_SOURCE=2 -fexceptions -fstack-protector-strong
    --param=ssp-buffer-size=4 -grecord-gcc-switches -m64 -mtune=generic
链接程序: gcc -O2 -g -pipe -Wall -Wp,-D_FORTIFY_SOURCE=2 -fexceptions
    -fstack-protector-strong --param=ssp-buffer-size=4
    -grecord-gcc-switches -m64 -mtune=generic -lssl -lcrypto
    /usr/lib64/libssl.so /usr/lib64/libcrypto.so /usr/lib64/libz.so
    -ldl -lz -lz -lidn -luuid -lpcre ftp-opie.o openssl.o http-ntlm.o
    ../lib/libgnu.a

Copyright (C) 2011 Free Software Foundation, Inc.
授权 GPLv3+: GNU GPL 第三版或更高版本
<http://www.gnu.org/licenses/gpl.html>。
这是自由软件:您可以自由地更改并重新分发它。
在法律所允许的范围内,没有任何担保。

最初由 Hrvoje Nikšić <hniksic@xemacs.org> 编写。
请将错误报告或建议寄给 <bug-wget@gnu.org>。
若wget未安装则进行安装,安装命令:yum -y install wget
12.安装vim编辑器 安装命令:yum install vim -y
二、添加GitLab镜像源并安装gitlab服务器
1.添加gitlab镜像
wget https://mirrors.tuna.tsinghua.edu.cn/gitlab-ce/yum/el7/gitlab-ce-10.0.0-ce.0.el7.x86_64.rpm
[root@localhost ~]# wget https://mirrors.tuna.tsinghua.edu.cn/gitlab-ce/yum/el7/gitlab-ce-10.0.0-ce.0.el7.x86_64.rpm
--2019-11-04 11:49:39--  https://mirrors.tuna.tsinghua.edu.cn/gitlab-ce/yum/el7/gitlab-ce-10.0.0-ce.0.el7.x86_64.rpm
正在解析主机 mirrors.tuna.tsinghua.edu.cn (mirrors.tuna.tsinghua.edu.cn)... 101.6.8.193, 2402:f000:1:408:8100::1
正在连接 mirrors.tuna.tsinghua.edu.cn (mirrors.tuna.tsinghua.edu.cn)|101.6.8.193|:443... 已连接。
已发出 HTTP 请求,正在等待回应... 200 OK
长度:359519811 (343M) [application/x-redhat-package-manager]
正在保存至: “gitlab-ce-10.0.0-ce.0.el7.x86_64.rpm”

100%[============================================================================================================================================>] 359,519,811 1.55MB/s 用时 3m 16s

2019-11-04 11:52:55 (1.75 MB/s) - 已保存 “gitlab-ce-10.0.0-ce.0.el7.x86_64.rpm” [359519811/359519811])
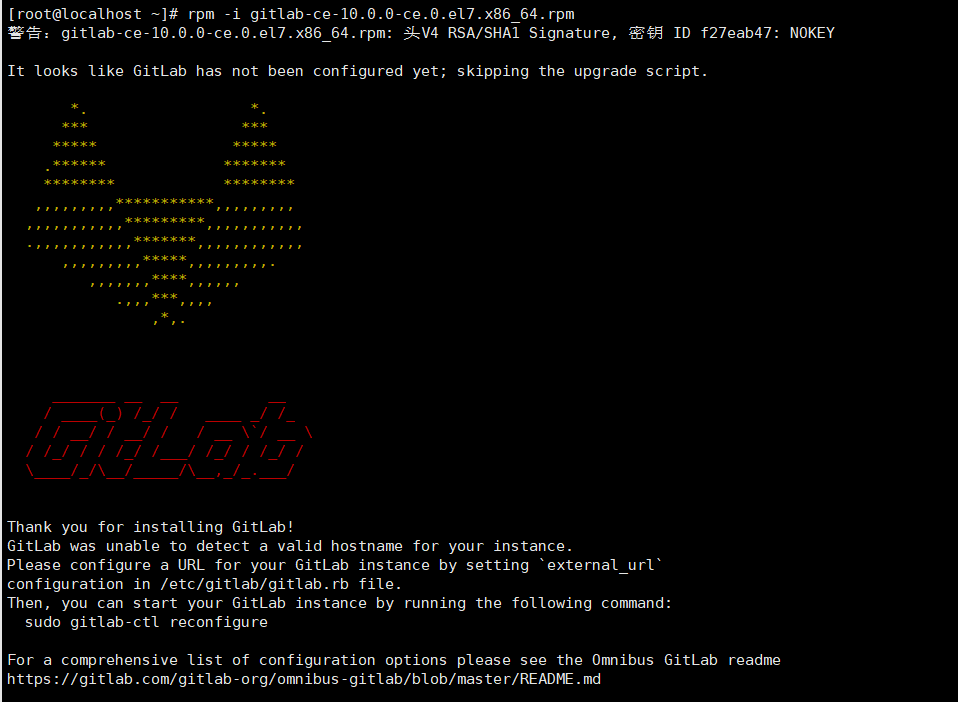
2.安装gitlab 安装命令:rpm -i gitlab-ce-10.0.0-ce.0.el7.x86_64.rpm
安装过程需要些时间,如果出现下图,则说明安装成功。
4.修改gitlab配置文件指定服务器ip和自定义端口:vim /etc/gitlab/gitlab.rb
进入编辑器后按“i”键进入编辑状态,ESC键退出编辑状态
退出并保存,命令输入“:wq”
ps:注意这里设置的端口不能被占用,默认是8080端口,如果8080已经使用,请自定义其它端口,并在防火墙设置开放相对应得端口
注意这里要写成IP地址。

external_url 'http://192.168.122.199:8077'
5.重置并启动GitLab
执行:
gitlab-ctl reconfigure
gitlab-ctl restart
6. 关闭防火墙
防火墙
apt install firewalld
systemctl stop firewalld.service
systemctl disable firewalld.service
firewall-cmd --state
如果显示not running,则关闭成功
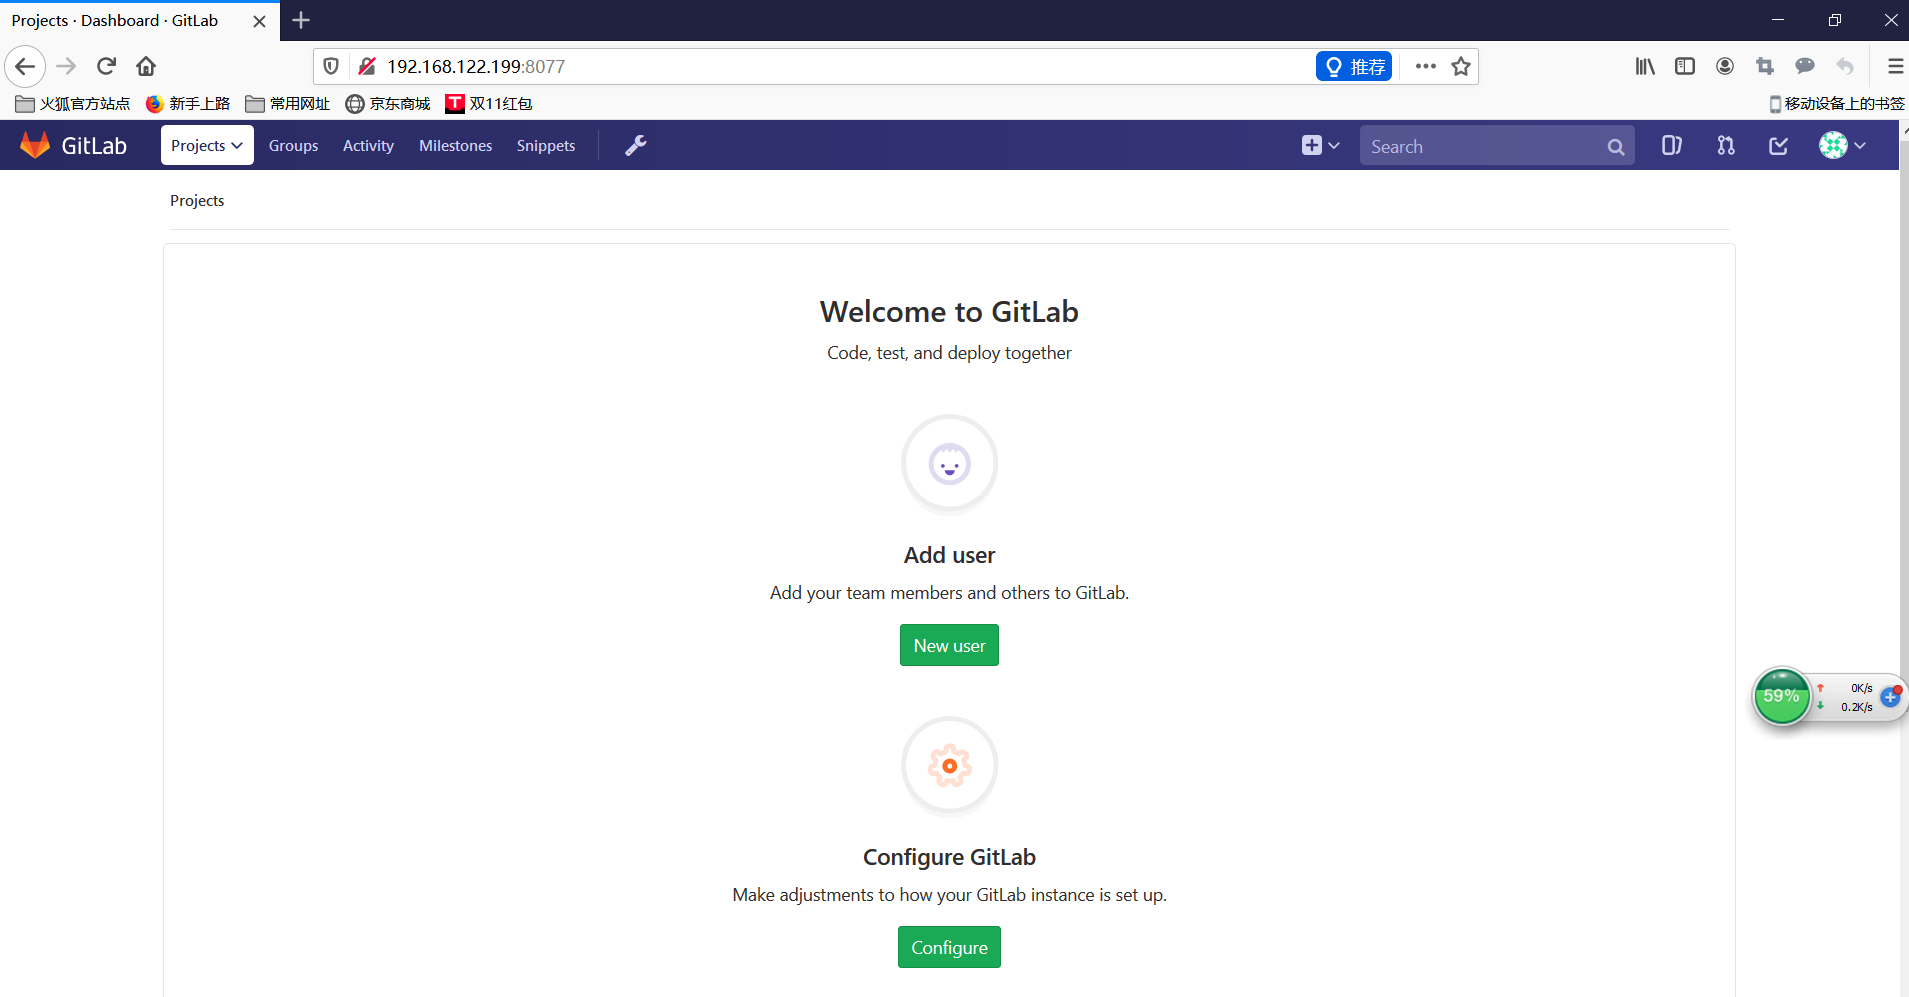
7.访问 GitLab页面
访问地址:http://192.168.122.199:8077/
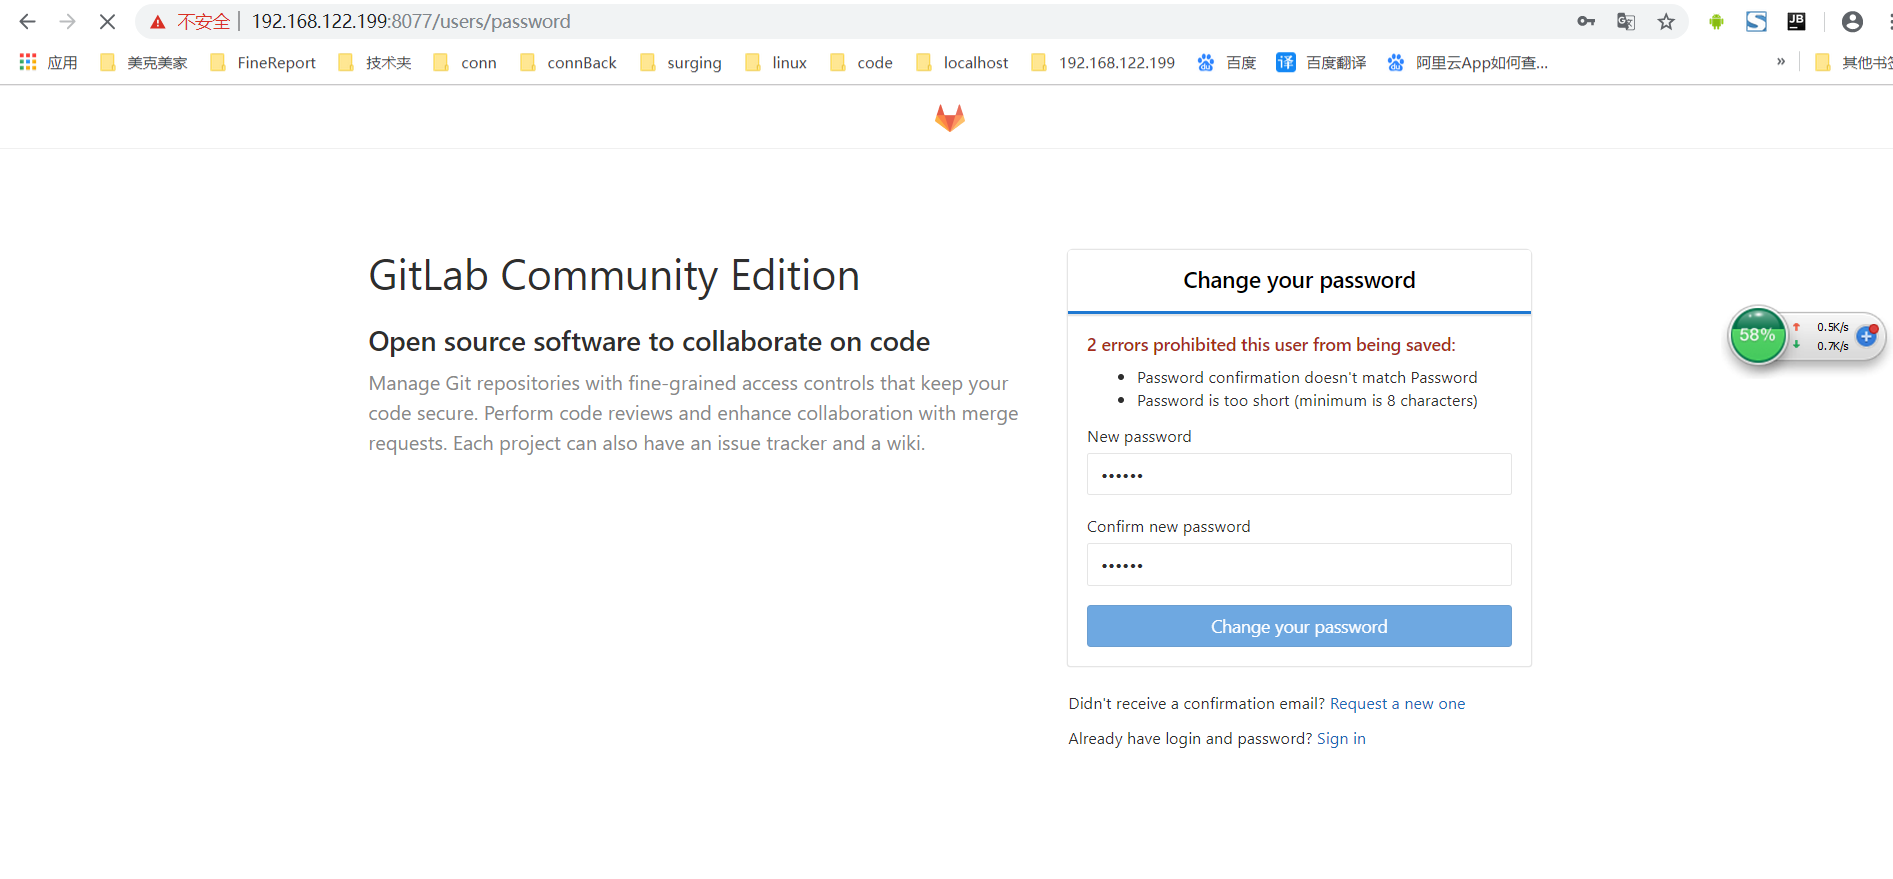
初始账户: root 密码:5iveL!fe
第一次登录修改密码(最少8位,此处修改为 root123456)
设置 SSH Keys
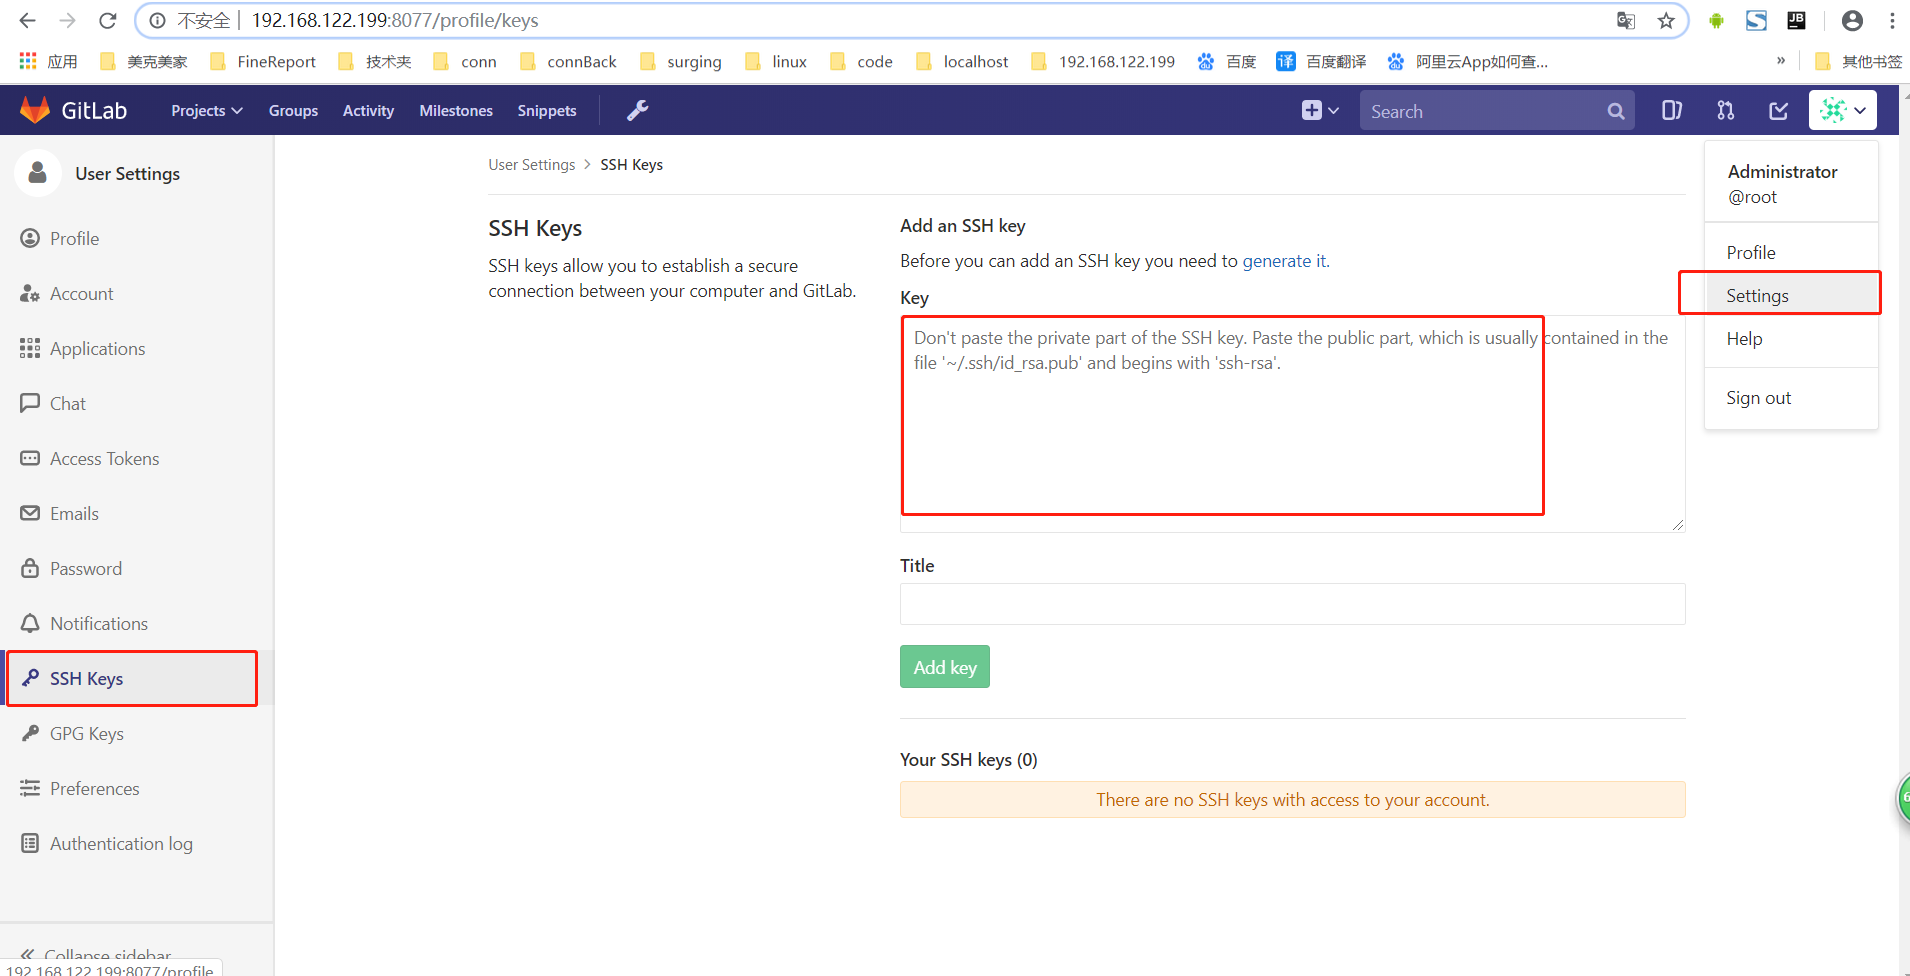
生成SSH的方式 参考 https://git-scm.com/book/zh/v1/服务器上的-Git-生成-SSH-公钥
文件生成目录:C:\Users\用户\.ssh\id_rsa.pub
把内容粘贴到页面配置中即可。
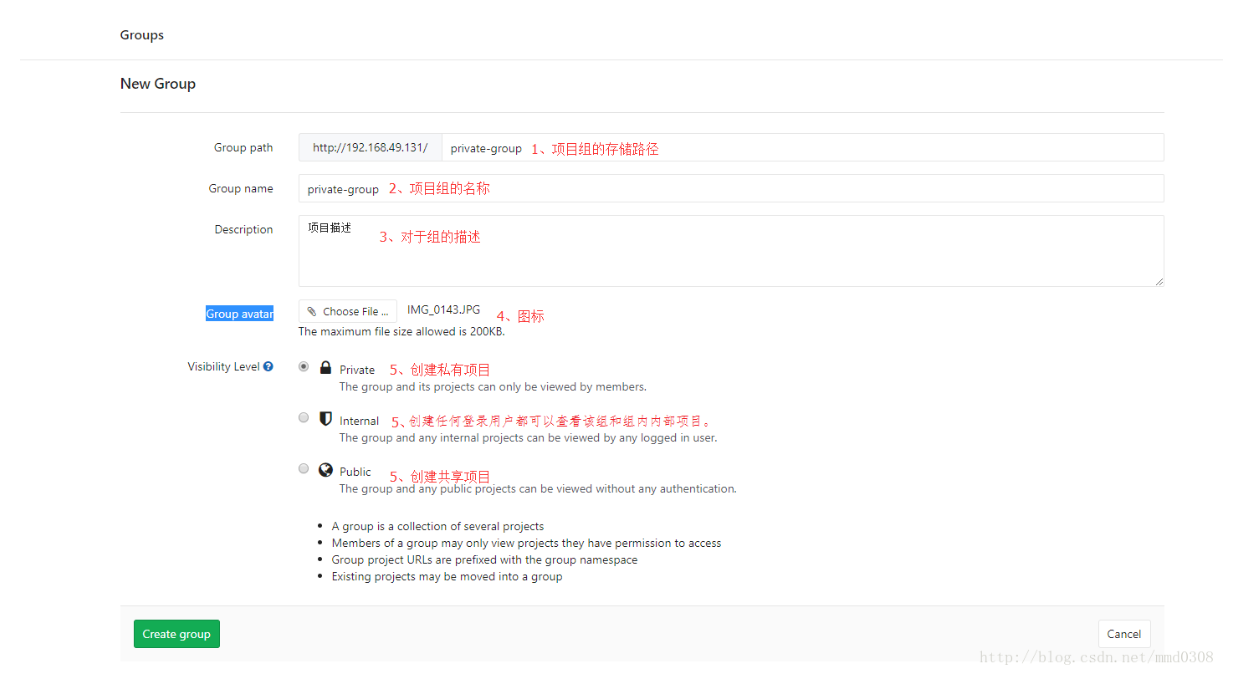
创建 New Group
填写基本信息,点击”Create group“完成创建组。
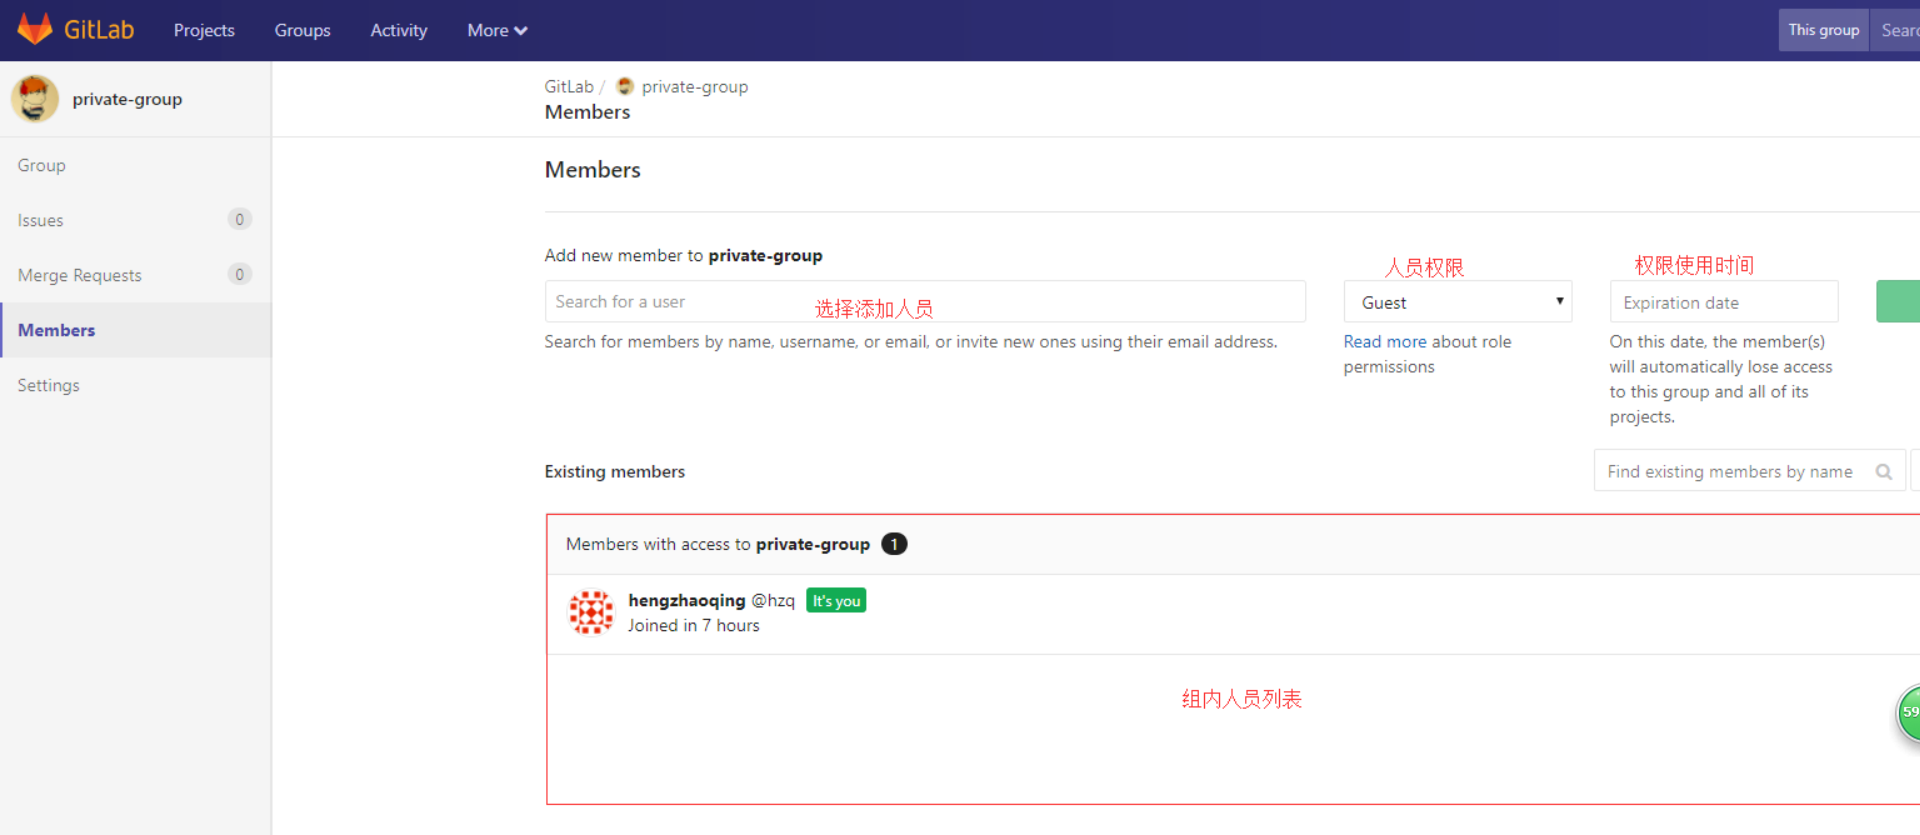
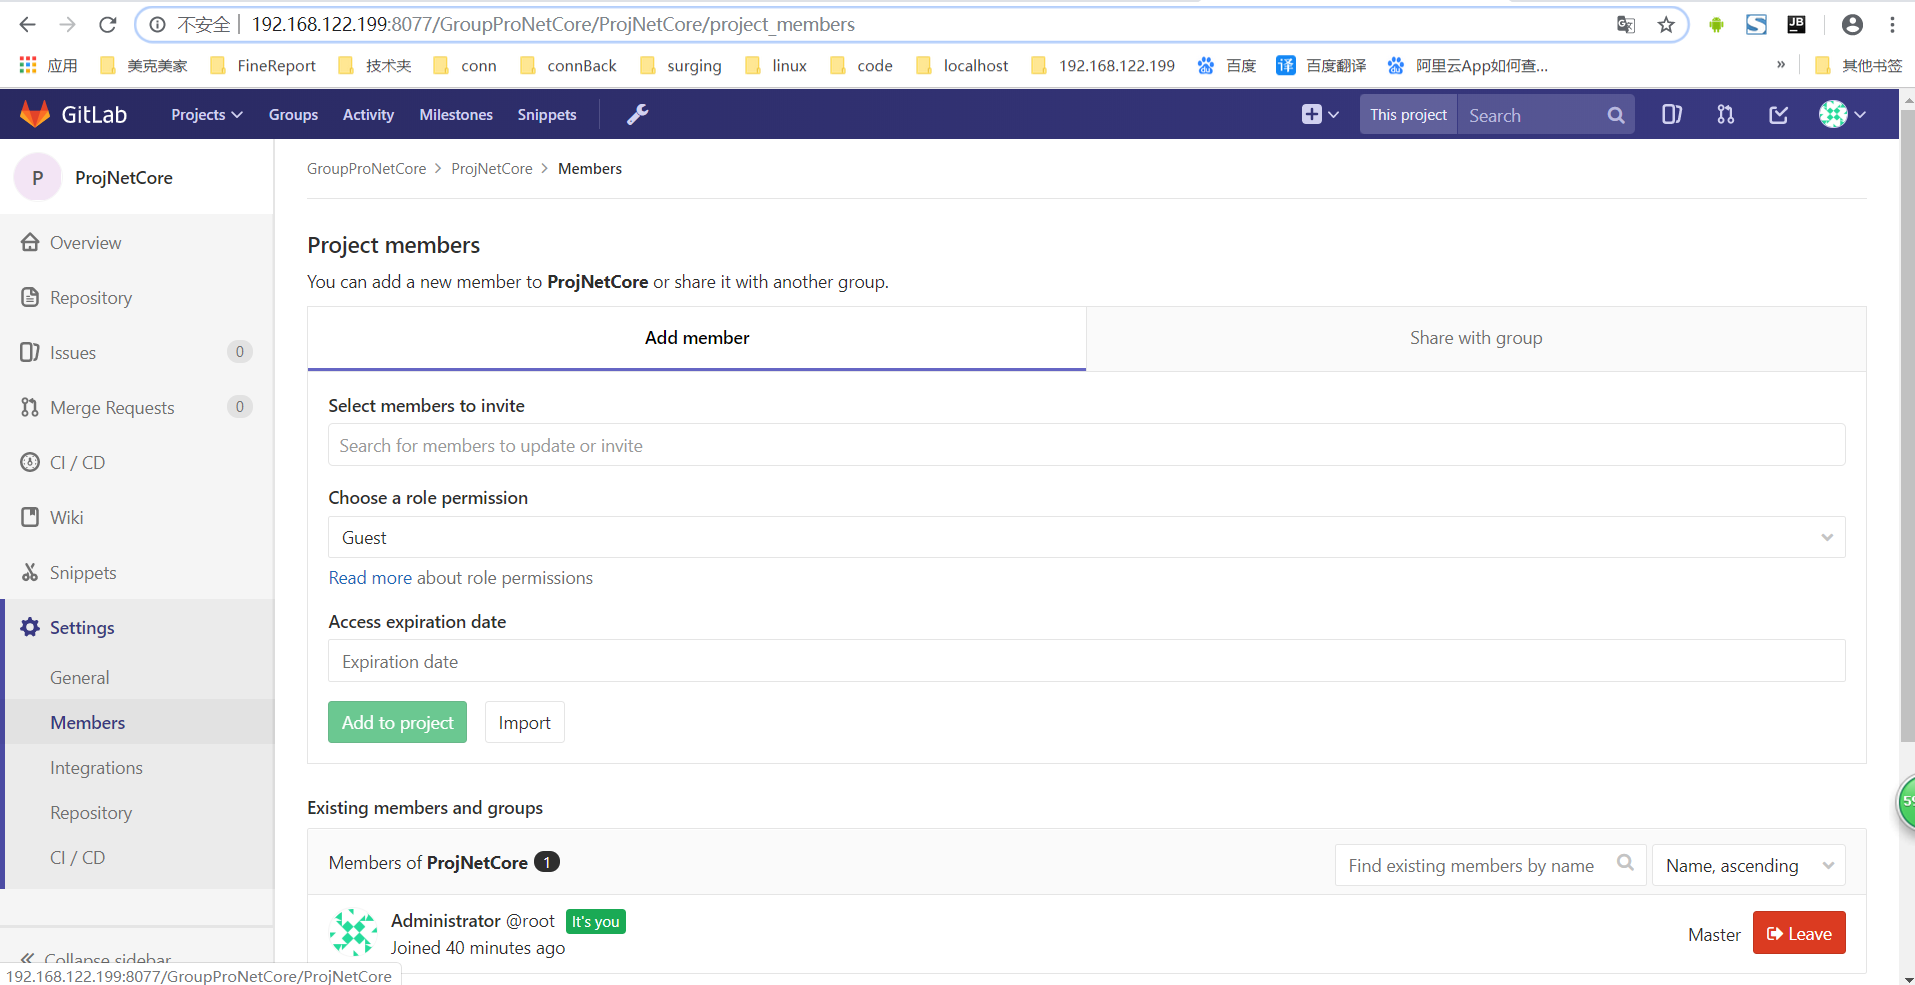
给组添加人员:
1、点击”Members”
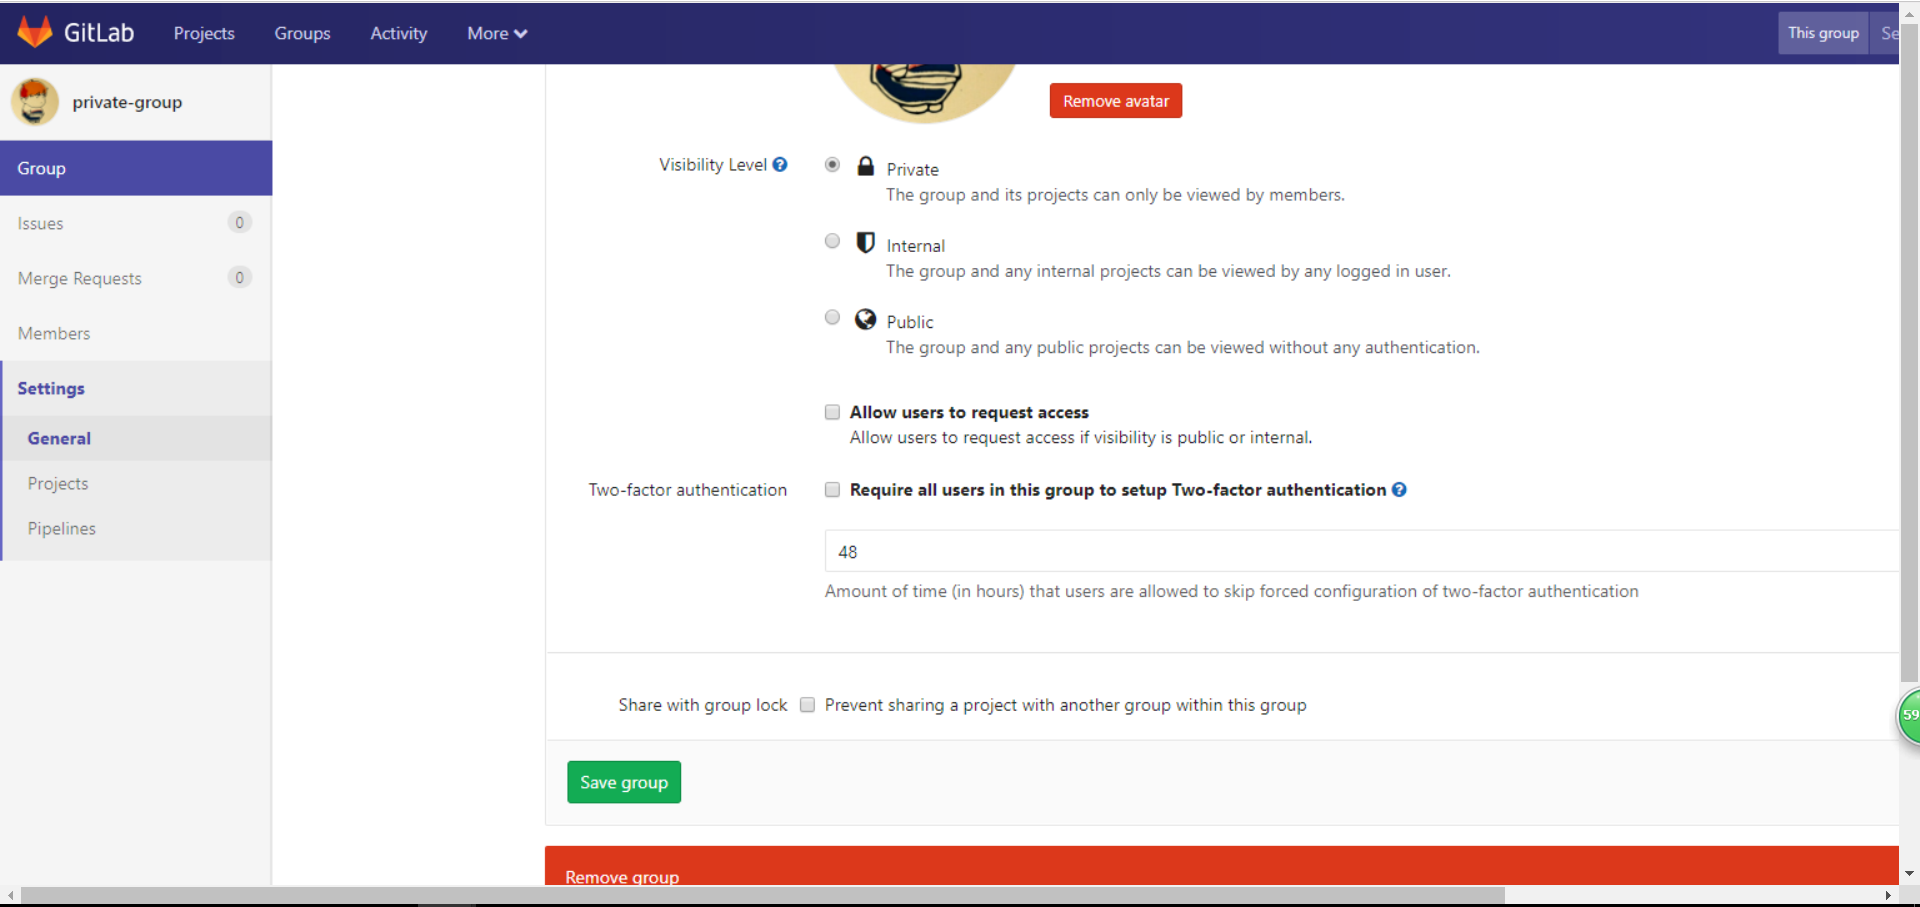
删除组:
1、点击“Settings”
项目管理
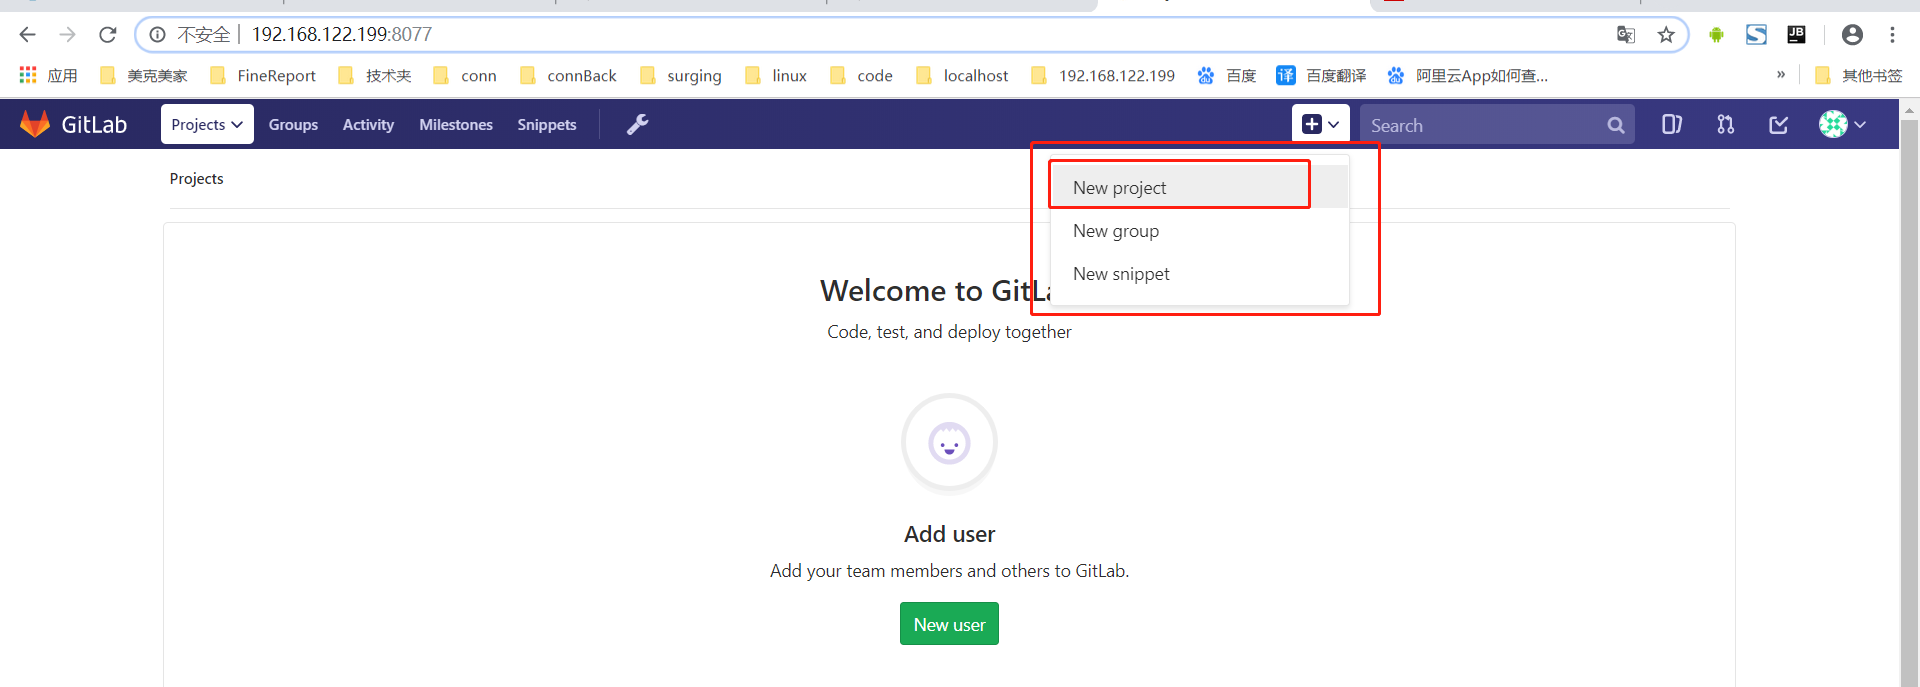
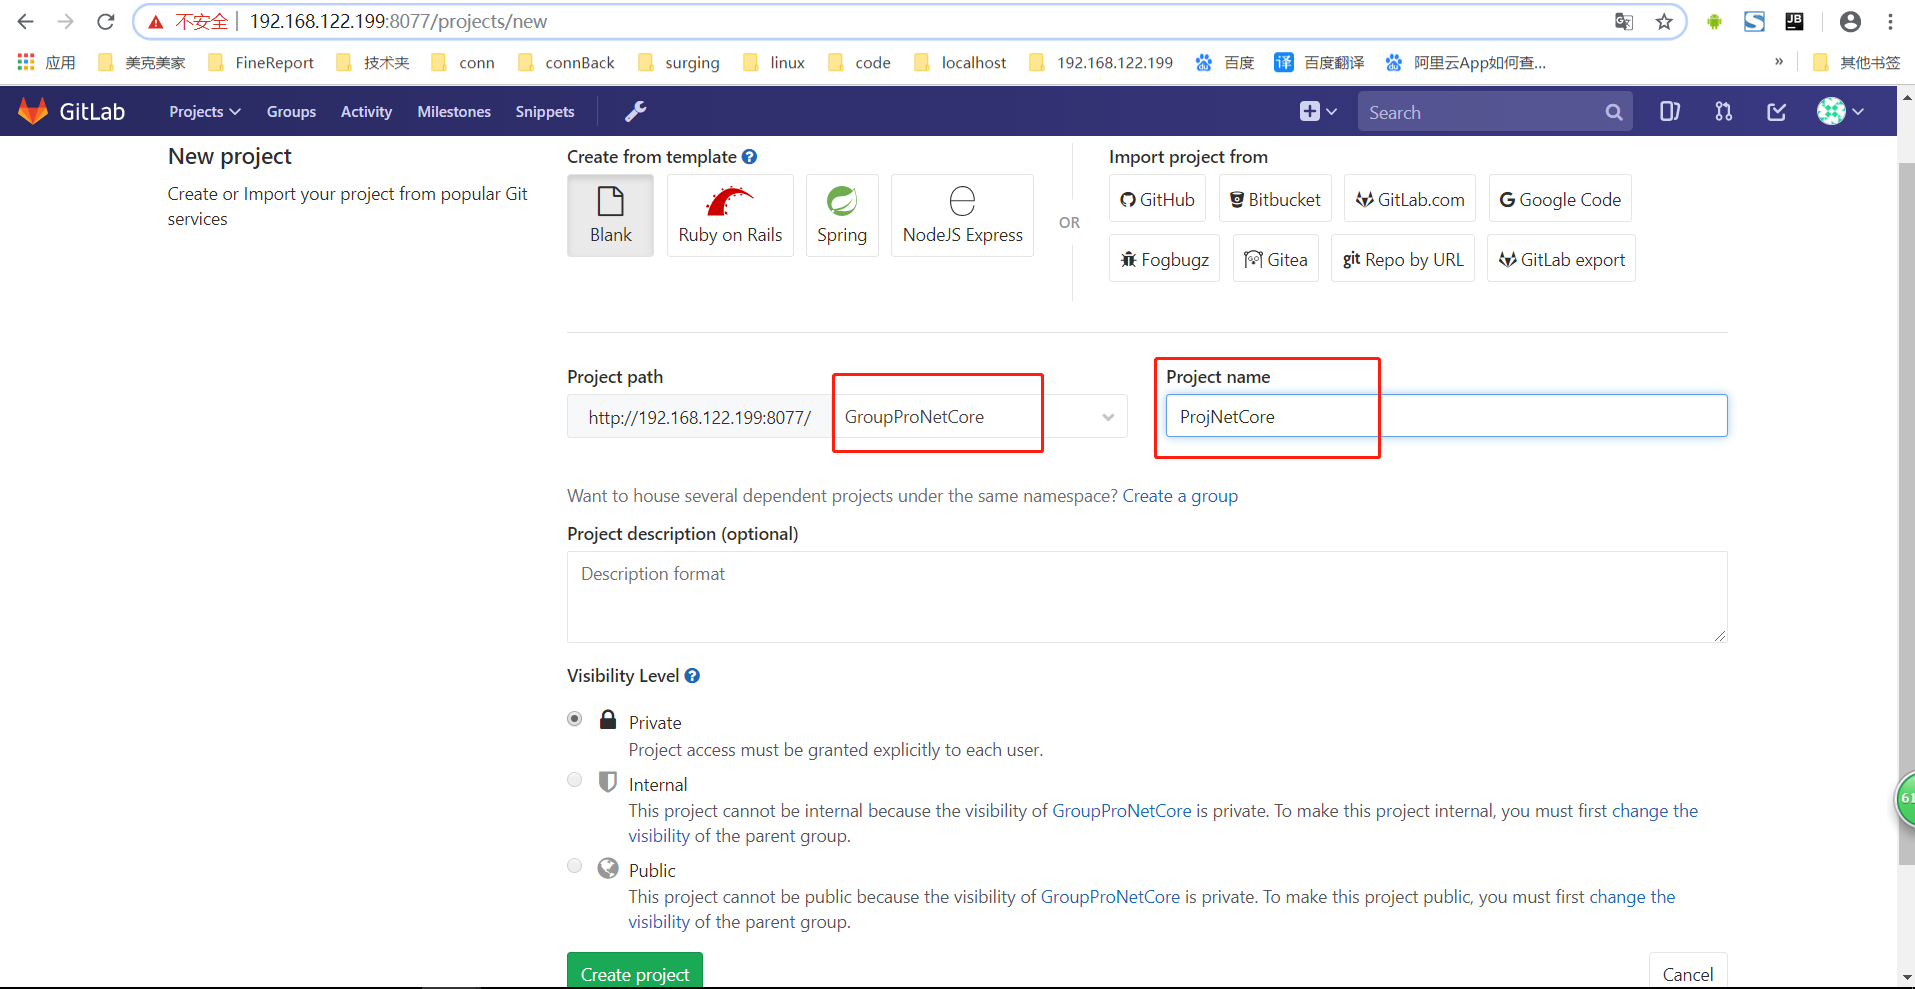
创建项目
1、点击”New project“
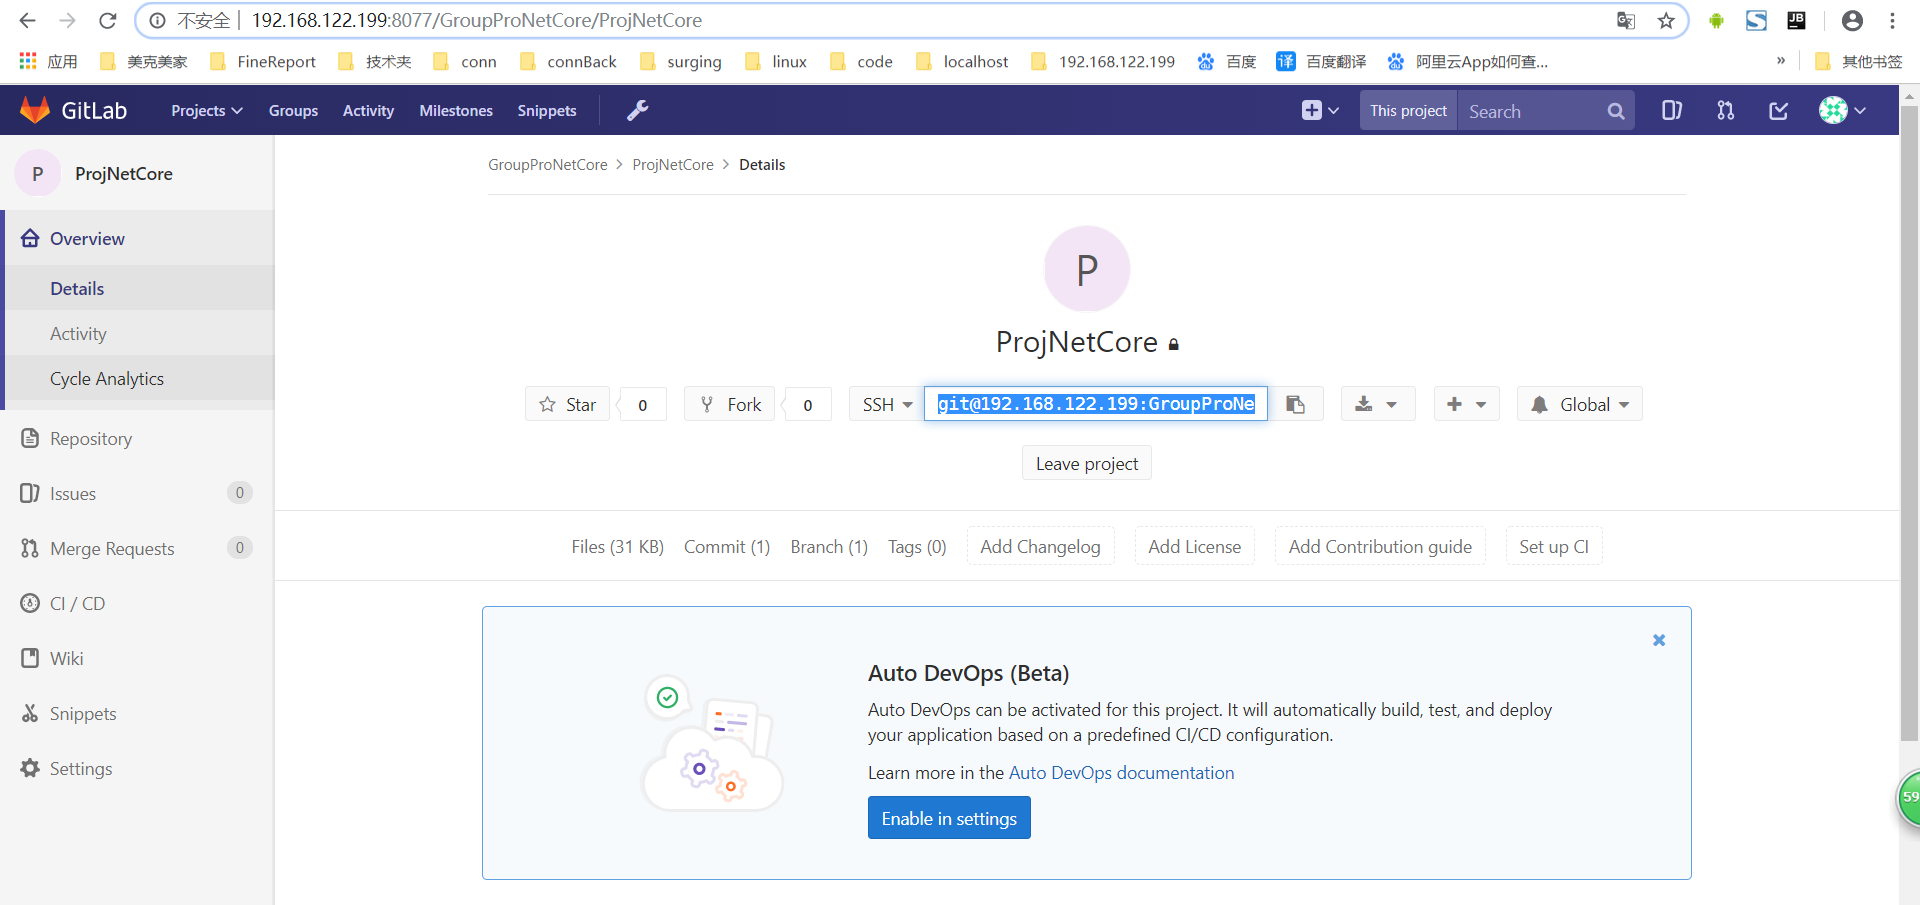
增加开发人员
安装部署完成。。
配置Jenkins自动构建
进入项目,Settings 选择 Integrations
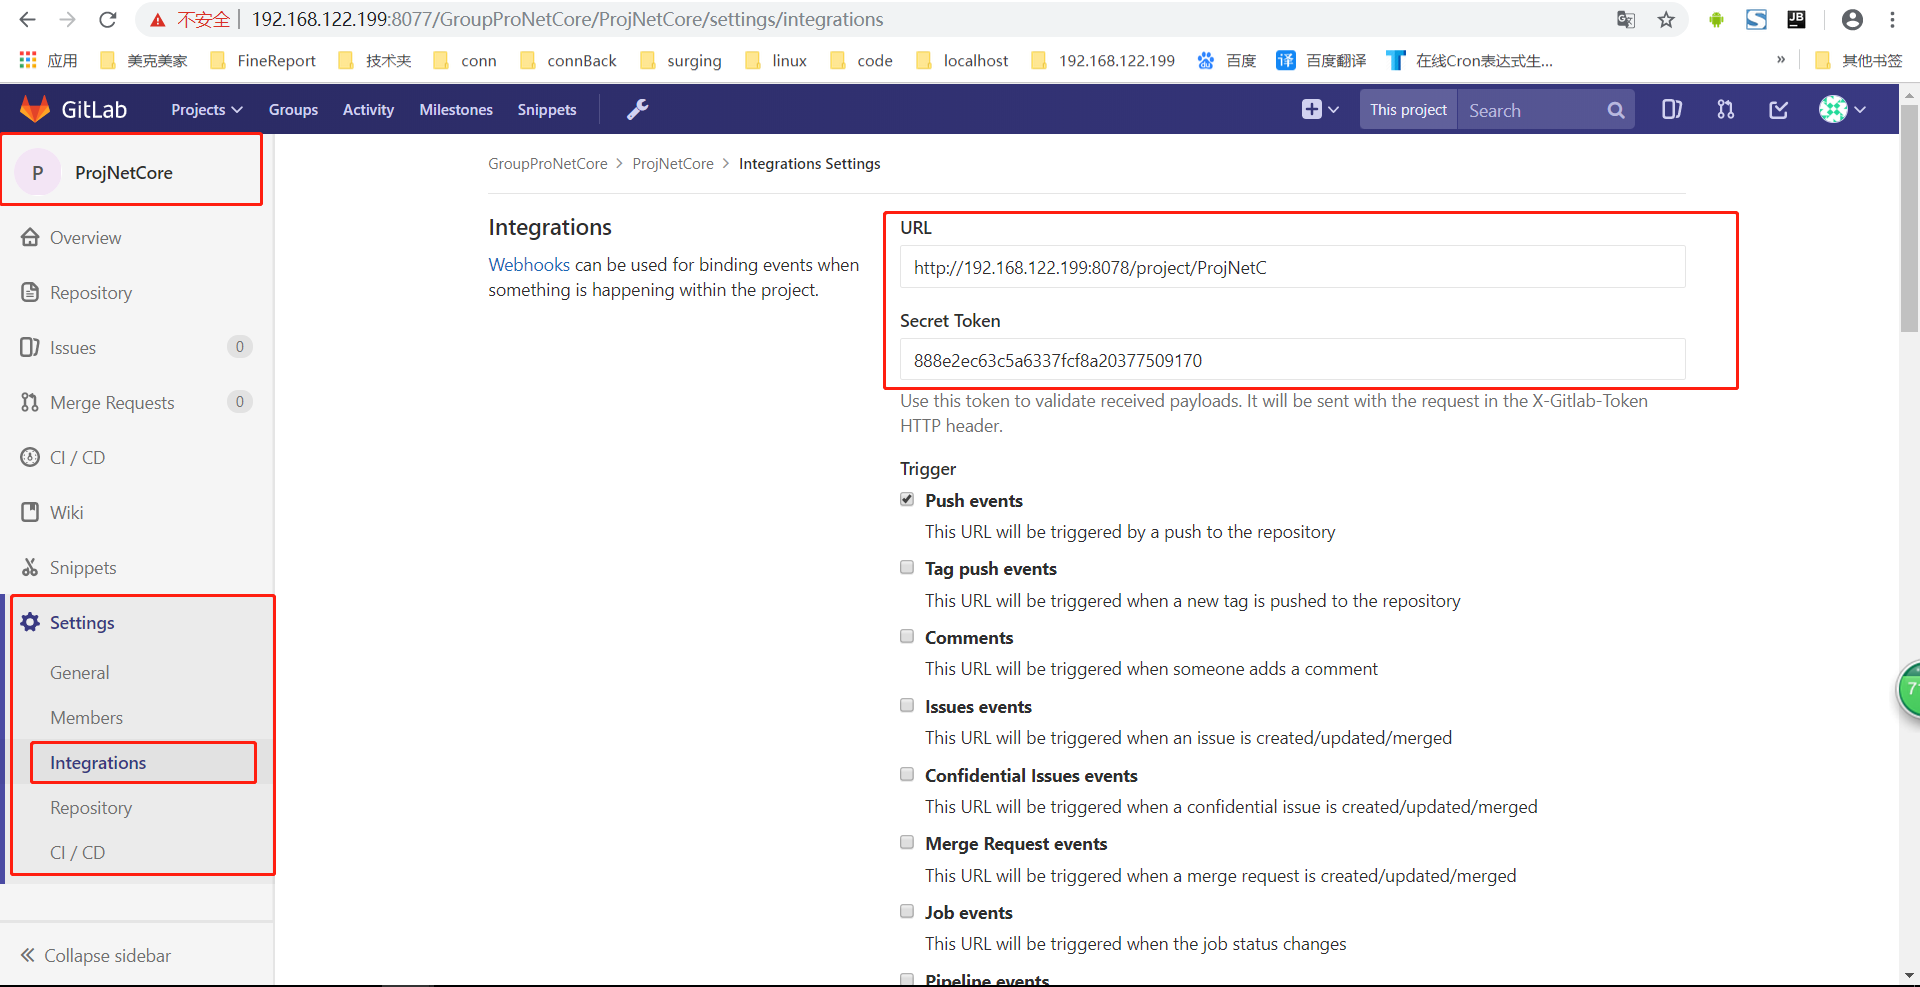
填写以下内容
URL:Jenkins 中配置的 构建触发器 中的地址,参考:https://www.cnblogs.com/1285026182YUAN/p/11814457.html
Secret Token:Jenkins 中配置的 构建触发器 中的地址,参考:https://www.cnblogs.com/1285026182YUAN/p/11814457.html
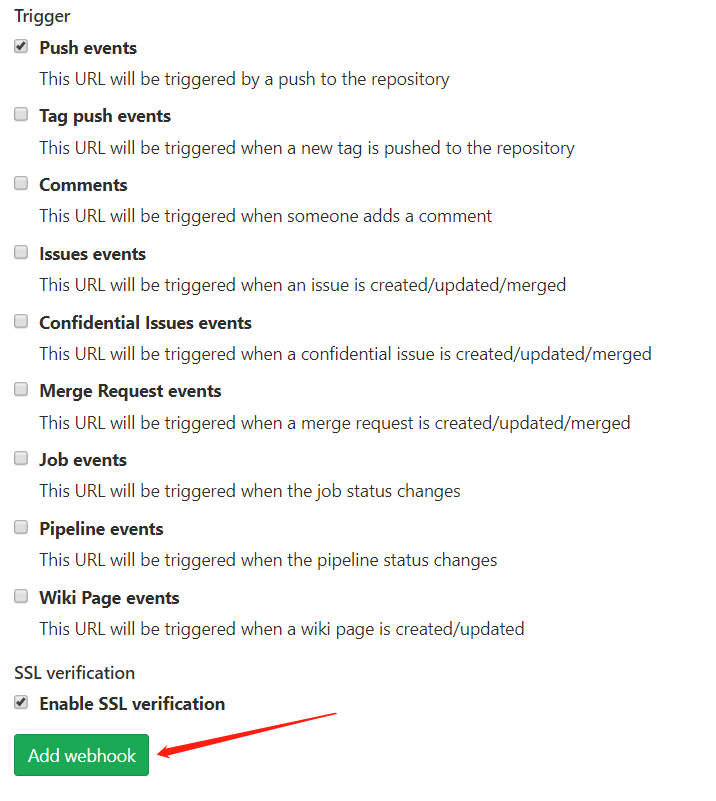
默认选中 Push events 和 Enable SSL verification
点击 Add Webhook

配置完成。
参考:https://blog.csdn.net/duyusean/article/details/80011540
参考:https://blog.csdn.net/mmd0308/article/details/77193352
