Vue_(Router路由)-vue-router路由的基本用法
vue-router官网:传送门
vue-router起步:传送门

vue-router路由:Vue.js官网推出的路由管理器,方便的构建单页应用
单页应用:Single Page Application简称SPA,只有一个web页面的应用,用户与应用交互时,动态更新该页面的内容
简单的来说,根据不同的url与数据,将他们都显示在同一个页面中,就可以称为是单页应用
而控制页面跳转需要用路由
vue-router下载:下载js,或使用npm install vue-router -S
vue-router使用:
定义组件
配置路由
创建路由对象
注入路由
Learn
一、-vue-router路由的基本用法
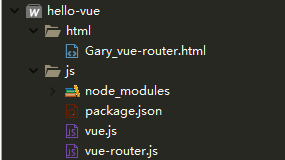
目录结构

【每个demo下方都存有html源码】
一、-vue-router路由的基本用法
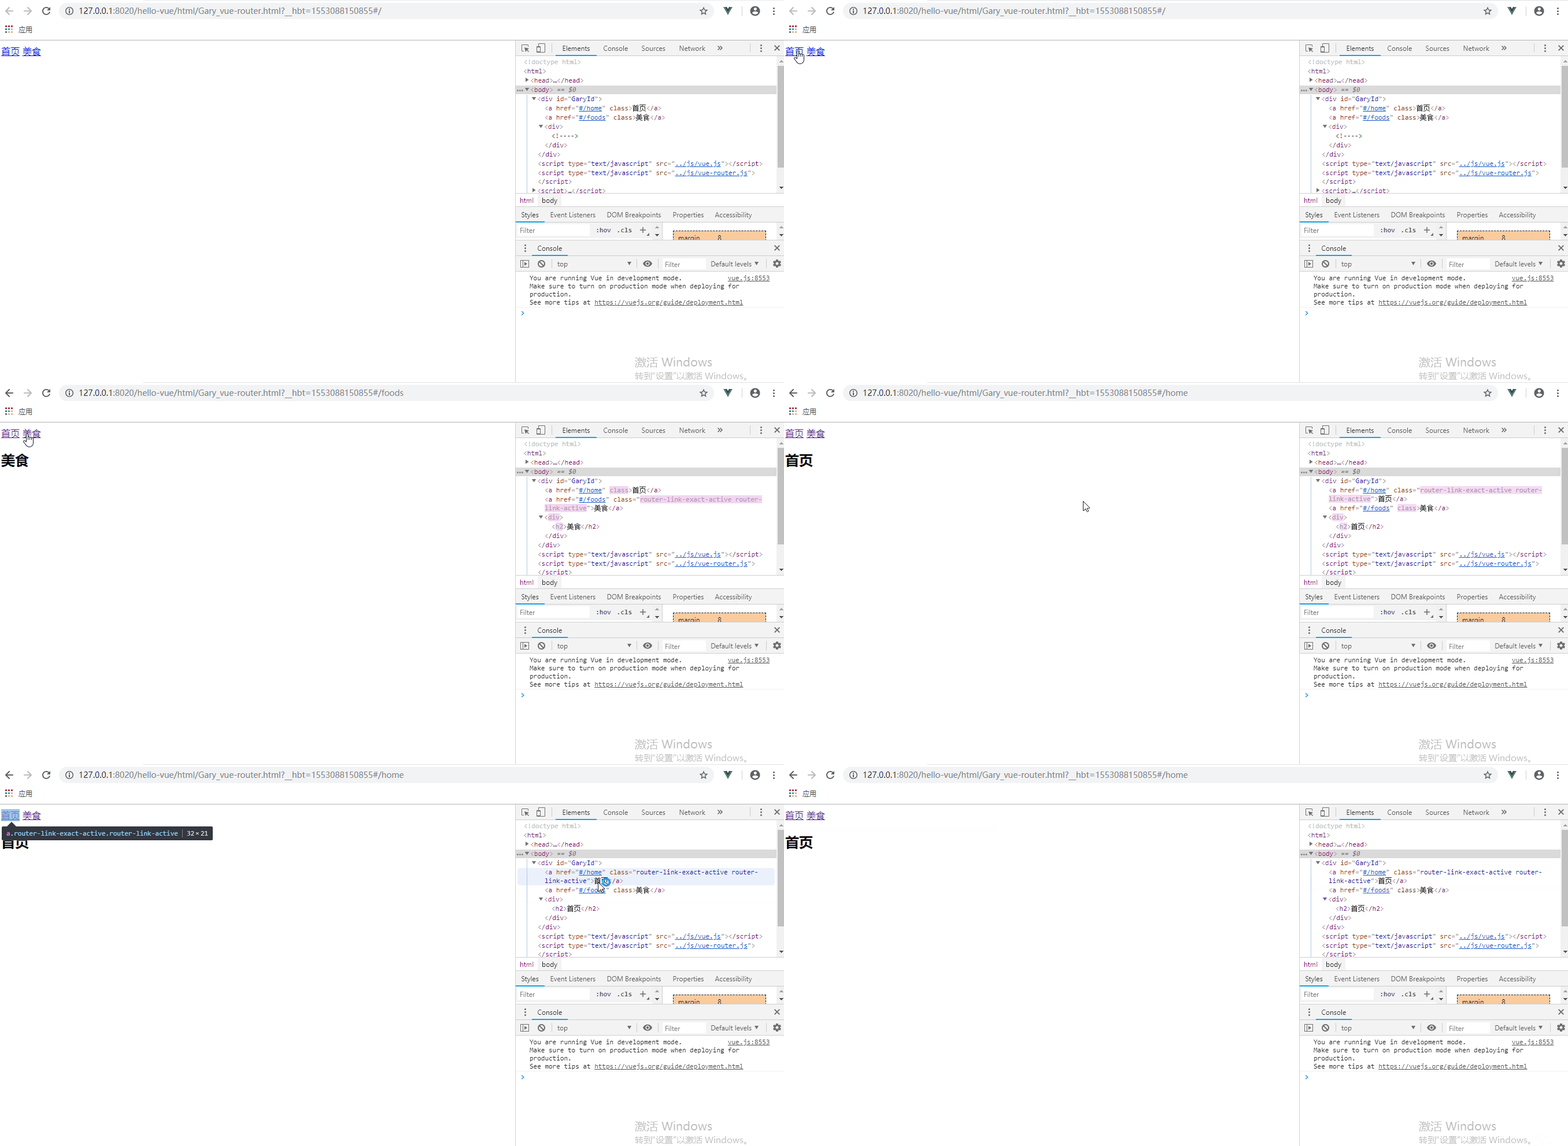
使用 router-link 组件来导航、通过传入 `to` 属性指定链接、<router-link> 默认会被渲染成一个 `<a>` 标签
    <body>
        <div id = "GaryId">
            <!--router-link默认被渲染成一个a标签-->
            <router-link to="/home">首页</router-link>
            <router-link to="/foods">美食</router-link>

            <div>
                <!-- 路由出口 -->
                  <!-- 路由匹配到的组件将渲染在这里 -->
                <router-view></router-view>
            </div>
        </div>
    </body>
分四步使用vue-router
    <script>

        //1 定义组件
        let Home = {
            template : "<h2>首页</h2>"
        }
        let Foods = {
            template : "<h2>美食</h2>"
        }

        //2 配置路由 路由可能有多个
        const myRoutes = [
            {
                path : "/home",
                component : Home
            },
            {
                path : "/foods",
                component : Foods
            }
        ]


        // 3 创建路由对象
        const myRouter = new VueRouter({
            //routes : routes
            routes : myRoutes
        });

        new Vue({
            //4 注入路由 简写
            router : myRouter
        }).$mount("#GaryId")
    </script>


<!DOCTYPE html>
<html>
    <head>
        <meta charset="UTF-8">
        <title>Gary</title>
    </head>
    <body>
        <div id = "GaryId">
            <!--router-link默认被渲染成一个a标签-->
            <router-link to="/home">首页</router-link>
            <router-link to="/foods">美食</router-link>

            <div>
                <!--将数据显示在这里-->
                <router-view></router-view>
            </div>
        </div>
    </body>

    <script type="text/javascript" src="../js/vue.js" ></script>
    <script type="text/javascript" src="../js/vue-router.js" ></script>
    <script>

        //1 定义组件
        let Home = {
            template : "<h2>首页</h2>"
        }
        let Foods = {
            template : "<h2>美食</h2>"
        }

        //2 配置路由 路由可能有多个
        const myRoutes = [
            {
                path : "/home",
                component : Home
            },
            {
                path : "/foods",
                component : Foods
            }
        ]


        // 3 创建路由对象
        const myRouter = new VueRouter({
            //routes : routes
            routes : myRoutes
        });

        new Vue({
            //4 注入路由 简写
            router : myRouter
        }).$mount("#GaryId")
    </script>

</html>
(如需转载学习,请标明出处)


