实验4:开源控制器实践——OpenDaylight
一、基本要求
1. Mininet生成网络拓扑,并连接OpenDaylight控制器

2. 通过Postman工具调用OpenDaylight提供的API下发流表,实现拓扑内主机h1和h3网络中断10s。

二、进阶要求
1. 文档集合
URL: http://127.0.0.1:8181/apidoc/explorer/index.html#!/network-topology(2013-07-12)

2.获取拓扑中的交换机

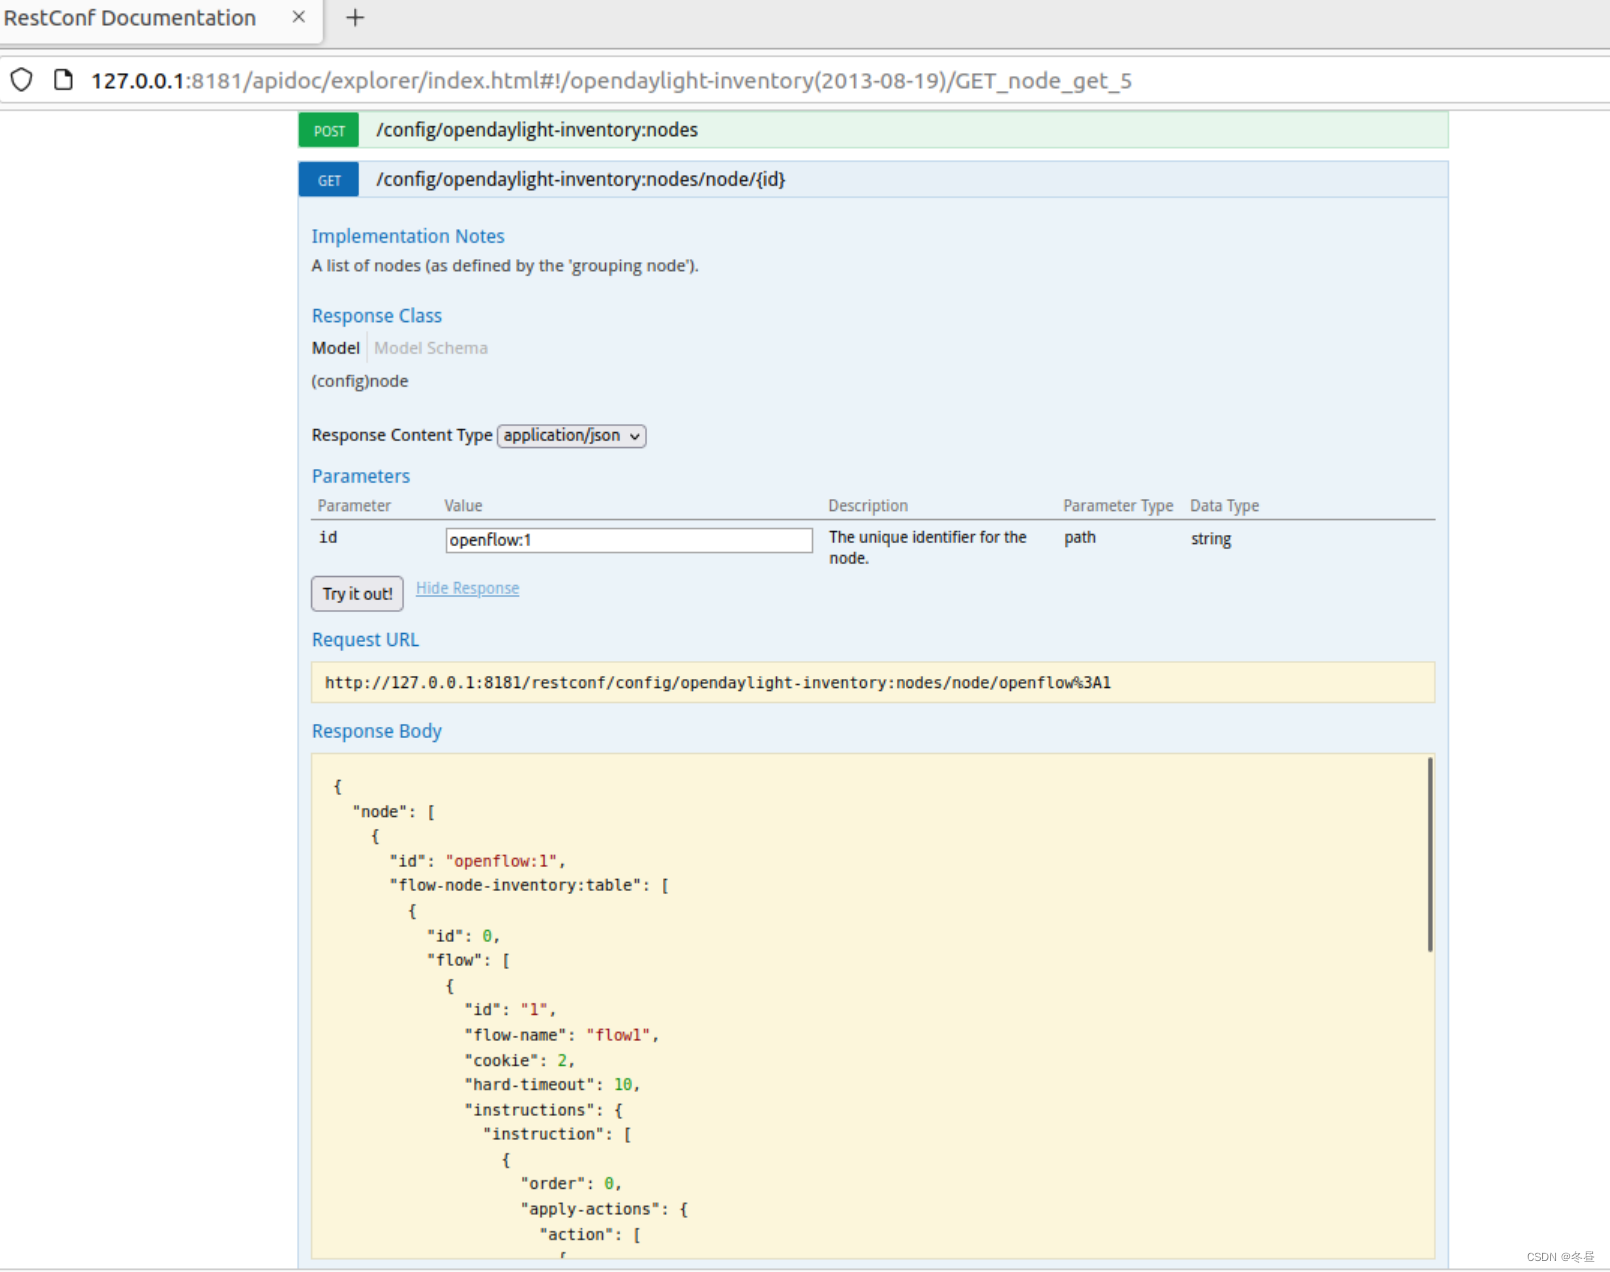
3. 获取拓扑中特定的交换机的信息
URL: http://127.0.0.1:8181/apidoc/explorer/index.html#!/opendaylight-inventory(2013-08-19)/GET_node_get_5

4. 获取拓扑中特定的交换机端口的状态
5. 新增修改或删除流表

6. 获取交换机上流表的统计信息

三、个人总结
-
本次实验难度一般,按照PDF文档流程一步步走下来基本不会出错。
-
实验过程中有遇到过两个小插曲,但很快就解决了。
一是创建完拓扑后,在opendaylight中却仍然显示只有一个交换机。解决方法是创建完后pingall一下就行了,猜测是opendaylight初始只有交换机的信息,需要进行ping后才能接收到其他主机的信息。
二是Postman中写好JSON并发送后,终端中并没有反应。后来仔细阅读PPT,发现要先在authorization登录一下,然后send就能使其停止10s了。
-
本次实验让我初步了解了opendaylight和postman的用法,也更熟悉了mininet等一些工具。但感觉我在sdn方面上还有许多不了解的地方,还需要多多学习加强。

 浙公网安备 33010602011771号