
第四周作业
第四周作业
题目
1、自建yum仓库,分别为网络源和本地源
2、编译安装http2.4,实现可以正常访问,并将编译步骤和结果提交。
3、利用sed 取出ifconfig命令中本机的IPv4地址
4、删除/etc/fstab文件中所有以#开头,后面至少跟一个空白字符的行的行首的#和空白字符
5、处理/etc/fstab路径,使用sed命令取出其目录名和基名
6、列出ubuntu软件管理工具apt的一些用法(自由总结)
解答
1、自建yum仓库,分别为网络源和本地源
1)本地源
#拷贝光盘内的Package 和repodate就可以了
mkdir /yum_repo
cp Packages repodate /yum_repo

#安装httpd,并启动
yum install httpd;systemctl enable httpd --now

#设置防火墙和selinux
firewall-cmd --add-port=80/tcp --permanent
sed  -ri  's/^(SELINUX=).*$/\1disabled/p' /etc/selinux/config
setenforce 0

#配置httpd访问内容
mkdir -p /var/www/html/centos/7/os
ln -s /yum_repo /var/www/html/centos/7/os/x64_86

#最终本地源的地址base
http://192.168.89.10/centos/7/os/x86_64/
2)网络源
#找到可以用的腾讯云base部分
https://mirrors.tuna.tsinghua.edu.cn/centos/7/os/x86_64/

#找到可以用的腾讯云extra部分
https://mirrors.tuna.tsinghua.edu.cn/centos/7/extras/x86_64/

#找到可以用的云端epel部分
https://mirrors.tuna.tsinghua.edu.cn/epel/7/x86_64/
3)备份yum仓库
#备份
cd /etc/yum.repo.d/
mkdir repo.back/
mv CentOS* b repo.back
4)创建repo文件,使用自定义仓库vim /etc/yum.repo.d/base.repo,仓库内容如下
[base]
name=Tuna base
baseurl=http://192.168.89.10/centos/7/os/x86_64/
	https://mirrors.tuna.tsinghua.edu.cn/centos/7/os/x86_64/
enabled=1
gpgcheck=0

[extra]
name=Tuna extra
baseurl=https://mirrors.tuna.tsinghua.edu.cn/centos/7/extras/x86_64/
enabled=1
gpgcheck=0

[epel]
name=Tuna epel
baseurl=https://mirrors.tuna.tsinghua.edu.cn/epel/7/x86_64/
enabled=1
gpgcheck=0
5)更新与查看yum
yum clear all
yum repolist

2、编译安装http2.4,实现可以正常访问,并将编译步骤和结果提交。
注:请按照第一步里,查看防火墙是否方通http,selinux是否为0.
firewall-cmd --list-allgetenforce
#下载数据包,解压缩.
wget https://dlcdn.apache.org/httpd/httpd-2.4.54.tar.gz --no-check-certificate
tar -xvf httpd-2.4.54.tar.gz -C /usr/local/src/

#./confugure可能会发现报错,所以,先安装下列数据包
yum install apr-devel -y
yum install apr-util-devel -y
yum install pcre-devel -y
yum install openssl-devel -y
yum install redhat-rpm-config -y

#使用配置文件生成makefile
cd /usr/local/src/httpd-2.4.54.tar.gz
./configure --prefix=/apps/httpd --sysconfdir=/etc/httpd-2.4.54/ --enable-ssl

#make安装
make
make install

#配置PATH,开启httpd服务
echo 'PATH=/apps/httpd-2.4.54/bin:$PATH' > /etc/profile.d/httpd.sh
. /etc/profile.d/httpd.sh
apachectl start

#访问结果

优化项目
#添加用户和组
groupadd -r -g 88 apache
useradd -o 88 -r -g apache  -s /sbin/nologin -d /apps/httpd-2.4.54/ apache

#修改配置文件,修改用户
sed -ri -e 's/^(User ).*/\1apache/' -e 's/^(Group ).*/\1apache/' /etc/httpd-2.4.54/httpd.conf

#重启
apachectl -k stop
apachectl -k start

#查看运行用户
ps -aux

3、利用sed 取出ifconfig命令中本机的IPv4地址
3.1 查看信息
ifconfig eth0
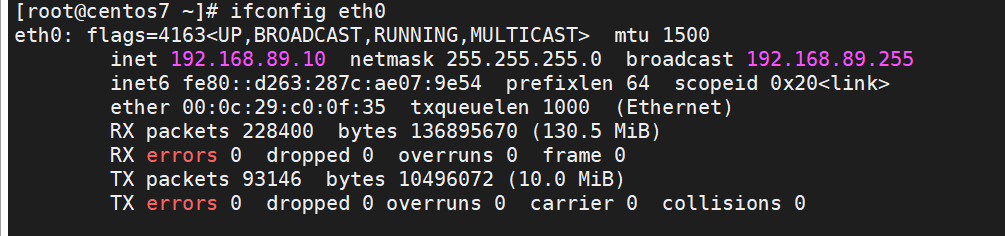
3.2 区ip地址
ifconfig eth0 | sed -nr 's#.*inet (.*) netmask.*$#\1#p'

4、删除/etc/fstab文件中所有以#开头,后面至少跟一个空白字符的行的行首的#和空白字符
sed -ri.back '/^#|^$|^[[:space:]]/d' /etc/fstab
5、处理/etc/fstab路径,使用sed命令取出其目录名和基名
[root@centos7 ~]# echo /etc/fstab | sed -nr 's#(/etc/)(fstab)#\1#p'
/etc/
[root@centos7 ~]# echo /etc/fstab | sed -nr 's#(/etc/)(fstab)#\2#p'
fstab
6、列出ubuntu软件管理工具apt的一些用法(自由总结)
-
仓库信息路径: /etc/apt/sources.list
-
只要把原来的xxx.ubuntu.com 换成国内的就行了
-
更换后刷新
apt update -
apt remove:这个是删除不干净的,配置文件会留下来: -
彻底删除程序,
apt purge -
查看安装包
apt list
-
查看软件的详细信息:
apt show ls -
查看软件的不同的版本:
apt-cache madison

 浙公网安备 33010602011771号