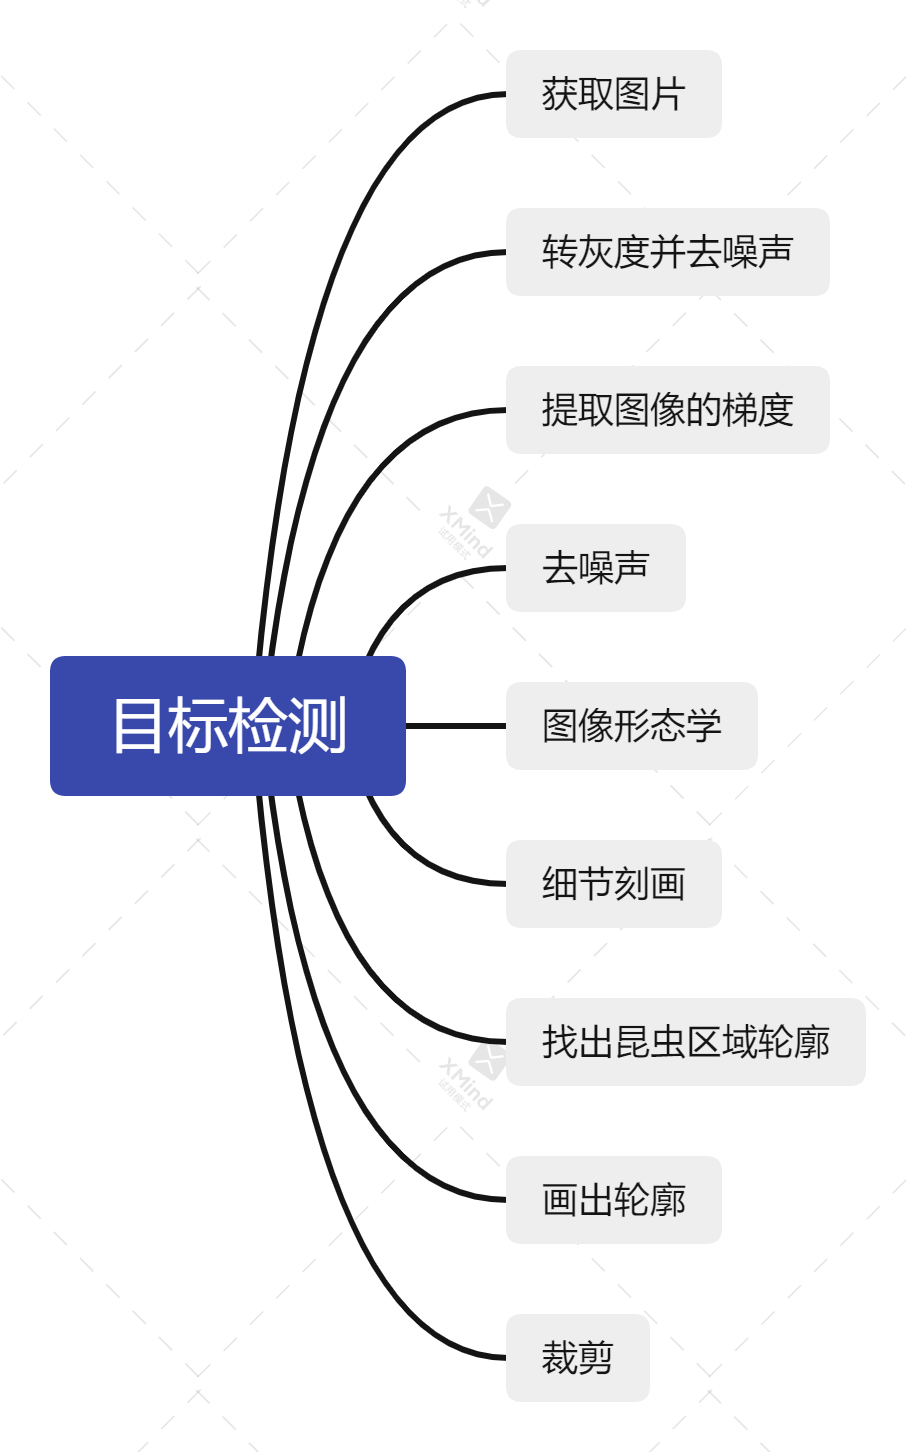
目标提取和检测实例
提取照片中军旗棋子,供文本识别使用
本质:提取矩形四个角落,并进行透视变换;
检测矩形步骤:
图像预处理
边缘检测
提取轮廓
检测凸包
角点检测
实例:
原始图像

"""
#!/usr/bin/env python
# -*- coding:utf-8 -*-
@desc: 用手机拍摄军旗棋子照片,将这两个棋子内容从照片中提取出来,供下一步文本识别使用
坐标返回顺序
[左上,右上,右下,左下]
"""
import cv2
import numpy as np
import math


class Config(object):
    def __init__(self):
        pass
    src = r"D:\workplace\data\opencv\20190905214945506.png"
    resize_rate = 0.5
    min_area = 5000
    min_contours = 8
    threshold_thresh = 50
    epsilon_start = 10
    epsilon_step = 10


def order_points(pts):
    """
    点集排序
    :param pts:
    :return:
    """
    rect = np.zeros((4,2), dtype="float32")
    s = pts.sum(axis=1)
    rect[0] = pts[np.argmin(s)]
    rect[2] = pts[np.argmax(s)]


    diff = np.diff(pts, axis=1)
    rect[1] = pts[np.argmin(diff)]
    rect[3] = pts[np.argmax(diff)]

    return rect


def point_distance(a, b):
    """
    求两点之间的距离
    :param a:
    :param b:
    :return:
    """
    return int(np.sqrt(np.sum(np.square(a-b))))


def bounding_box(idx, c):
    """
    找出外接四边形
    :param idx:
    :param c: 轮廓坐标数组
    :return:
    """
    if len(c) < Config.min_contours:
        return None
    epsilon = Config.epsilon_start
    while True:
        approx_box = cv2.approxPolyDP(c, epsilon, True)
        # 求出拟合得到的多边形
        the_area = math.fabs(cv2.contourArea(approx_box))
        # 输出拟合信息
        print("contour idx: %d, contour_len: %d,"
              " epsilon: %d, approx_len: %d, approve_area: %s"%(idx, len(c), epsilon, len(approx_box),the_area))
        if (len(approx_box) < 4):
            return None
        if the_area > Config.min_area:
            if (len(approx_box) > 4):
                epsilon += Config.epsilon_step
                continue
            else: # approx 的长度为4,表明已经拟合成矩形了
                # 转换成4*2的数组
                approx_box = approx_box.reshape((4,2))
                return approx_box
        else:
            print("failed to find boundingBox, idx = %d area = %f"%(idx, the_area))
            return None

def main():
    img = cv2.imread(Config.src)
    # cv2.imshow("origin", img)

    # 获取原始图像大小
    src_height, src_width, channels = img.shape
    # 对图像进行缩放
    img = cv2.resize(img, (int(src_width*Config.resize_rate), int(src_height * Config.resize_rate)))
    # cv2.imshow("resize_img", img)
    # 转灰度图像
    gray = cv2.cvtColor(img, cv2.COLOR_BGR2GRAY)

    # 中值滤波,消除噪声
    binary = cv2.medianBlur(gray,3)

    # 转换为二值图像
    ret, binary = cv2.threshold(binary, Config.threshold_thresh, 255, cv2.THRESH_BINARY)
    # 显示转换后的二值图像
    cv2.imshow("binary", binary)

    # 进行二次腐蚀操作
    # 腐蚀操作会腐蚀图像中白色像素, 可以将断开的线段连接起来
    binary = cv2.erode(binary, None, iterations=2)
    cv2.imshow("erode", binary)

    # canny 边缘检测
    binary = cv2.Canny(binary, 0, 60, apertureSize=3)
    cv2.imshow("Canny", binary)

    # 提取轮廓
    _, contours, _ = cv2.findContours(binary, cv2.RETR_EXTERNAL, cv2.CHAIN_APPROX_SIMPLE)

    # 输出轮廓数目
    print("the count of contour is %d \n"%(len(contours)))

    # 针对每个轮廓,拟合外接四边形,如果成功,则将改区域切割出来, 做透视变换, 并保存图片文件
    for idx, c in enumerate(contours):
        approx_box = bounding_box(idx, c)
        if approx_box is None:
            continue
        # 获取最小矩形包络
        rect = cv2.minAreaRect(approx_box)
        box = cv2.boxPoints(rect)
        box = np.int0(box)
        box = box.reshape(4,2)
        box = order_points(box)

        print("bounding_box: \n", box)
        # 切割区域的原始位置
        src_rect = order_points(approx_box)
        print("src_rect: \n", src_rect)

        w, h = point_distance(box[0], box[1]), point_distance(box[1], box[2])
        print("w = %d, h = %d"%(w, h))

        # 生成透视变换矩阵
        dst_rect = np.array([
            [0,0],
            [w-1,0],
            [w-1,h-1],
            [0,h-1]
        ], dtype="float32")

        # 透视变换
        M = cv2.getPerspectiveTransform(src_rect, dst_rect)

        # 得到透视后的图像
        warped = cv2.warpPerspective(img, M, (w,h))

        # 将变换后的结果图像写入png文件
        cv2.imwrite(r"D:\workplace\data\opencv\20190905214945507_%d.png"%(idx),
                    warped, [int(cv2.IMWRITE_PNG_COMPRESSION), 9])

    print("END")

    cv2.waitKey(0)
    cv2.destroyAllWindows()


if __name__ == '__main__':
    main()
结果示例:
提取结果:


流程图:


