搭建 k8s 环境
平台规划
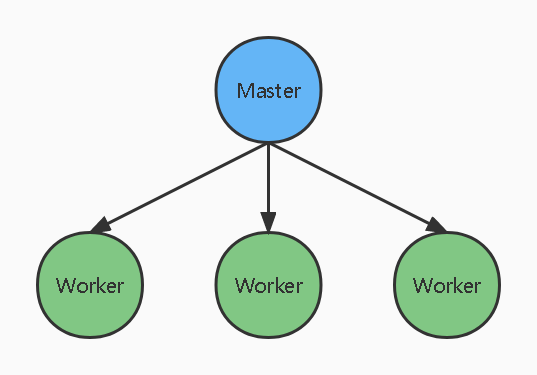
单 Master 集群

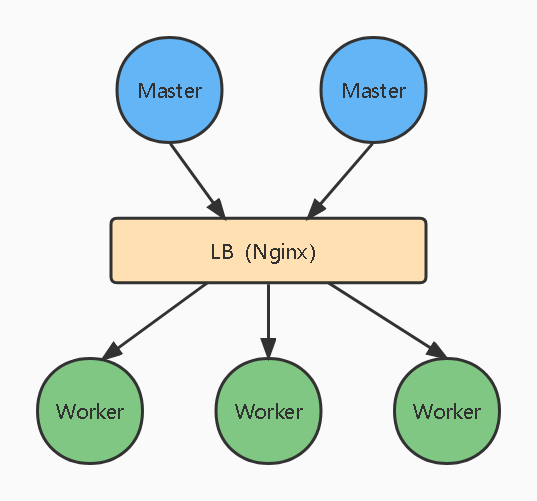
多 Master 集群

硬件要求
| 环境 | 节点 | 硬件要求 |
| 测试环境 | Master | 2核,4G,20G |
| Node | 4核,8G,40G | |
| 生产环境 | Master | 8核,16G,100G |
| Node | 16核,64G,500G |
搭建
搭建准备:
- 安装3台虚拟机或云主机。
- 安装 Ubuntu 操作系统,并执行初始化操作:
- 关闭防火墙
- 关闭selinux
- 关闭swap
$ swapoff -a$ vim /etc/fstab![]()
![]()
- 设置主机名
$ hostnamectl set-hostname k8smaster
-
- 并在Master添加hosts
$ cat >> /etc/hosts << EOF
192.168.241.128 k8smaster
192.168.241.129 k8sworker
EOF
- 并在Master添加hosts
-
- 将桥接的ipv4流量传递到iptables的链,并让设置生效
$ cat > /etc/sysctl.d/k8s.conf << EOF
net.bridge.bridge-nf-call-ip6tables = 1
net.bridge.bridge-nf-call-iptables = 1
EOF
$ sysctl --system
$ modprobe br_netfilter
$ echo "1" > /proc/sys/net/ipv4/ip_forward
- 将桥接的ipv4流量传递到iptables的链,并让设置生效
-
- 时间同步
$ yum install ntpdate -y
$ ntpdate time.windows.com
- 时间同步
- 为所有节点安装 Docker / Containerd
sudo apt-get install docker.io- Kubernetes(1.24版以后)默认CRI(容器运行时接口)为 CRI-Containerd
- Containerd官网安装教程
containerd.io包已经包含了runc, 但是CNI插件需要另外安装。
搭建方式:
- kubeadm
- 二进制方式
Kubeadm
K8s部署工具,快速部署。
- 为所有节点安装
kubeamd / kubectl / kubeletapt-get update && apt-get install -y apt-transport-https curl curl https://mirrors.aliyun.com/kubernetes/apt/doc/apt-key.gpg | apt-key add - cat >> /etc/apt/sources.list.d/kubernetes.list << EOF deb https://mirrors.aliyun.com/kubernetes/apt/ kubernetes-xenial main EOF apt-get update apt-get install -y kubeadm kubelet kubectl - 部署 master 命令
kubeadm init config kubeadm.yaml
出现报错:apiVersion: kubeadm.k8s.io/v1beta3 kind: InitConfiguration localAPIEndpoint: advertiseAddress: 192.168.241.128 bindPort: 6443 nodeRegistration: kubeletExtraArgs: cgroup-driver: "systemd" --- apiVersion: kubeadm.k8s.io/v1beta3 kind: ClusterConfiguration imageRepository: registry.aliyuncs.com/google_containers kubernetesVersion: 1.26.0 clusterName: "k8s-cluster" controllerManager: extraArgs: allocate-node-cidrs: "true" cluster-cidr: "10.244.0.0/16" horizontal-pod-autoscaler-sync-period: "10s" node-monitor-grace-period: "10s" apiServer: extraArgs: runtime-config: "api/all=true"
[kubelet-check] Initial timeout of 40s passed.

Unfortunately, an error has occurred:
        timed out waiting for the condition

This error is likely caused by:
        - The kubelet is not running
        - The kubelet is unhealthy due to a misconfiguration of the node in some way (required cgroups disabled)

If you are on a systemd-powered system, you can try to troubleshoot the error with the following commands:
        - 'systemctl status kubelet'
        - 'journalctl -xeu kubelet'

Additionally, a control plane component may have crashed or exited when started by the container runtime.
To troubleshoot, list all containers using your preferred container runtimes CLI.
Here is one example how you may list all running Kubernetes containers by using crictl:
        - 'crictl --runtime-endpoint unix:///var/run/containerd/containerd.sock ps -a | grep kube | grep -v pause'
        Once you have found the failing container, you can inspect its logs with:
        - 'crictl --runtime-endpoint unix:///var/run/containerd/containerd.sock logs CONTAINERID'
error execution phase wait-control-plane: couldn't initialize a Kubernetes cluster
To see the stack trace of this error execute with --v=5 or higher
查看日志发现,是从
registry.k8s.io拉取pause:3.6失败引起的:$ systemctl status kubelet "RunPodSandbox from runtime service failed" err="rpc error: code = Unknown desc = failed to get sandbox image \"registry.k8s.io/pause:3.6\": failed to pull image \"registry.k8s.io/pause:3.6\": failed to pull and unpack image \"registry.k8s.io/pause:3.6\": failed to resolve reference \"registry.k8s.io/pause:3.6\": failed to do request: Head \"https://asia-east1-docker.pkg.dev/v2/k8s-artifacts-prod/images/pause/manifests/3.6\": dial tcp 142.251.8.82:443: connect: connection refused"
解决方案:修改 containerd 配置文件
没毛病!
![]()
这个时候还不能执行
kubectl命令mkdir -p $HOME/.kube sudo cp -i /etc/kubernetes/admin.conf $HOME/.kube/config sudo chown $(id -u):$(id -g) $HOME/.kube/config查看节点
这是因为没有安装网络插件kubectl get nodes![]()
- 部署 node 命令
kubeadm join - 部署 CNI 网络插件
根据域名查询IP$ cat >> /etc/hosts << EOF 185.199.110.133 raw.githubusercontent.com EOF $ wget https://raw.githubusercontent.com/coreos/flannel/master/Documentation/kube-flannel.yml $ kubectl apply -f kube-flannel.yml
$ kubectl get pods --all-namespaces![]()
再次出错,kube-flannel容器处于CrashLoopBackOff状态![]()
查看日志
$ kubectl logs -f kube-flannel-ds-g57vw -n kube-flannel找到原因,
Error registering network: failed to acquire lease: node "k8sworker" pod cidr not assigned解决办法,在
kubeadm.yaml文件中添加配置(已添加)controllerManager: extraArgs: allocate-node-cidrs: "true" cluster-cidr: "10.244.0.0/16"再来一次!
![]()
- 集群测试:创建一个Pod,看看是否正常
$ kubectl create deployment nginx --image=nginx
deployment.apps/nginx created

$ kubectl get pods

$ kubectl expose deployment nginx --port=80 --type=NodePort
service/nginx exposed
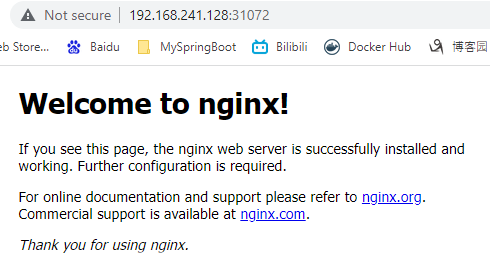
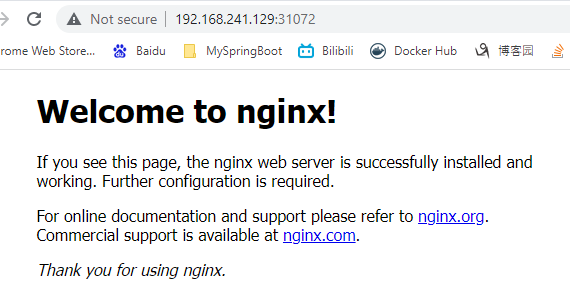
对外暴露端口 31072
![]()
![]()
![]()


 浙公网安备 33010602011771号