Jenkins 问题汇总
1. 未安装 Maven
ERROR: A Maven installation needs to be available for this project to be built.Either your server has no Maven installations defined, or the requested Maven version does not exist.
Finished: FAILURE
原因:Jenkins 默认是没有安装 Maven 的。
解决办法:使用全局工具配置,自动安装 Maven。
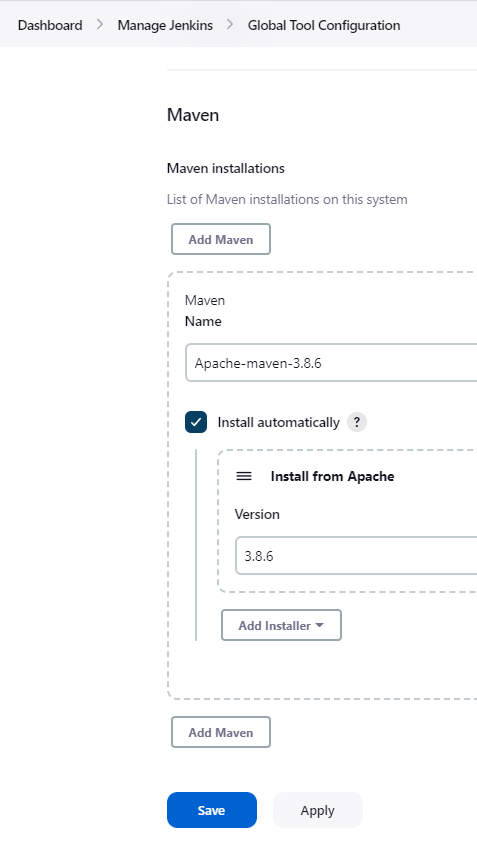
在pipeline{}中添加自动下载工具命令
tools {
    maven 'Apache-maven-3.8.6'
}
2. 用 SSH 凭证方式连接 Git 失败
Failed to connect to repository : Command "git ls-remote -h -- git@github.com:xxx/xxx.git HEAD" returned status code 128:
stdout:
stderr: No ECDSA host key is known for github.com and you have requested strict checking.
Host key verification failed.
fatal: Could not read from remote repository.
Please make sure you have the correct access rights
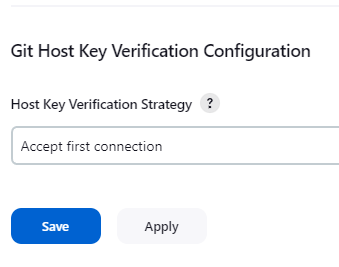
and the repository exists.原因:首次连接可能会出现此错误。
解决办法:Dashboard > Manage Jenkins > Config Global Security 修改验证策略为 Accpt first connection。
3. 部署 jar 包到 nexus 失败
[ERROR] Failed to execute goal org.apache.maven.plugins:maven-deploy-plugin:2.8.2:deploy (default-deploy) on project home-api: Deployment failed: repository element was not specified in the POM inside distributionManagement element or in -DaltDeploymentRepository=id::layout::url parameter -> [Help 1]原因:未在pom文件中配置分发管理。
解决办法:在pom.xml文件中添加distributionManagement节点,使用分发管理将项目打成jar包,直接上传到指定服务器。
snapshotRepository是快照版本,repository是正式版本。
需要注意的是,这里的id应该与setting.xml文件中server节点下的id相同。
<distributionManagement>
    <snapshotRepository>
        <id>nexus-public</id>
        <name>Nexus Snapshot Repository</name>
        <url>http://ori-nexus.com/repository/maven-snapshots/</url>
    </snapshotRepository>
    <repository>
        <id>nexus-public</id>
        <name>Nexus Release Repository</name>
        <url>http://ori-nexus.com/repository/maven-releases/</url>
    </repository>
</distributionManagement>
4. 上传 jar 包再次失败
status: 413 Request Entity Too Large -> [Help 1]原因:使用了nginx作为nexus服务的反向代理,nginx不允许上传过大的文件。
解决办法:可以把client_max_body_size根据需要调大。
server {
  listen 80;
  server_name ori-nexus.com;
  client_max_body_size 30M;

  proxy_set_header Host $host;
  proxy_set_header X-Real-IP $remote_addr;
  proxy_set_header X-Forwarded-For $proxy_add_x_forwarded_for;

  location / {
    proxy_pass http://nexus:8081;
  }
} 重新加载配置文件使之生效:docker exec -it nginx-proxy /usr/sbin/nginx -s reload

 浙公网安备 33010602011771号