k8s部署jenkins:lts
1. 部署
官网地址
插件地址:https://plugins.jenkins.io
github:https://github.com/jenkinsci/kubernetes-plugin
官网安装:https://www.jenkins.io/doc/book/installing/kubernetes
helm方式安装:https://artifacthub.io/packages/helm/jenkinsci/jenkins
kubectl create namespace kube-ops
---
1.2.service-account
cat > service-account.yml <<EOF
---
apiVersion: v1
kind: ServiceAccount
metadata:
  name: jenkins
  namespace: kube-ops
---
kind: Role
apiVersion: rbac.authorization.k8s.io/v1
metadata:
  name: jenkins
  namespace: kube-ops
rules:
- apiGroups: [""]
  resources: ["pods"]
  verbs: ["create","delete","get","list","patch","update","watch"]
- apiGroups: [""]
  resources: ["pods/exec"]
  verbs: ["create","delete","get","list","patch","update","watch"]
- apiGroups: [""]
  resources: ["pods/log"]
  verbs: ["get","list","watch"]
- apiGroups: [""]
  resources: ["events"]
  verbs: ["watch"]
- apiGroups: [""]
  resources: ["secrets"]
  verbs: ["get"]

---
apiVersion: rbac.authorization.k8s.io/v1
kind: RoleBinding
metadata:
  name: jenkins
  namespace: kube-ops
roleRef:
  apiGroup: rbac.authorization.k8s.io
  kind: Role
  name: jenkins
subjects:
- kind: ServiceAccount
  name: jenkins
EOF
kubectl apply -f service-account.ymlcat > jenkins.yml <<"EOF"
# jenkins
---
apiVersion: apps/v1
kind: StatefulSet
metadata:
name: jenkins
namespace: kube-ops
labels:
name: jenkins
namespace: kube-ops
spec:
selector:
matchLabels:
name: jenkins
serviceName: jenkins
replicas: 1
updateStrategy:
type: RollingUpdate
template:
metadata:
name: jenkins
labels:
name: jenkins
spec:
terminationGracePeriodSeconds: 10
serviceAccountName: jenkins
containers:
- name: jenkins
image: jenkins/jenkins:lts
imagePullPolicy: Always
ports:
- containerPort: 8080
- containerPort: 50000
resources:
limits:
cpu: 1
memory: 1Gi
requests:
cpu: 0.5
memory: 500Mi
env:
- name: LIMITS_MEMORY
valueFrom:
resourceFieldRef:
resource: limits.memory
divisor: 1Mi
- name: JAVA_OPTS
# value: -XX:+UnlockExperimentalVMOptions -XX:+UseCGroupMemoryLimitForHeap -XX:MaxRAMFraction=1 -XshowSettings:vm -Dhudson.slaves.NodeProvisioner.initialDelay=0 -Dhudson.slaves.NodeProvisioner.MARGIN=50 -Dhudson.slaves.NodeProvisioner.MARGIN0=0.85
value: -Xmx$(LIMITS_MEMORY)m -XshowSettings:vm -Dhudson.slaves.NodeProvisioner.initialDelay=0 -Dhudson.slaves.NodeProvisioner.MARGIN=50 -Dhudson.slaves.NodeProvisioner.MARGIN0=0.85 -Dhudson.security.csrf.GlobalCrumbIssuerConfiguration.DISABLE_CSRF_PROTECTION=true
volumeMounts:
- name: jenkins-home
mountPath: /var/jenkins_home
livenessProbe:
httpGet:
path: /login
port: 8080
initialDelaySeconds: 60
timeoutSeconds: 5
failureThreshold: 12 # ~2 minutes
readinessProbe:
httpGet:
path: /login
port: 8080
initialDelaySeconds: 60
timeoutSeconds: 5
failureThreshold: 12 # ~2 minutes
securityContext:
fsGroup: 1000
volumeClaimTemplates:
- metadata:
name: jenkins-home
# annotations:
# volume.beta.kubernetes.io/storage-class: anything
spec:
accessModes: [ "ReadWriteOnce" ]
resources:
requests:
storage: 10Gi
---
apiVersion: v1
kind: Service
metadata:
name: jenkins
namespace: kube-ops
spec:
# type: LoadBalancer
selector:
name: jenkins
# ensure the client ip is propagated to avoid the invalid crumb issue when using LoadBalancer (k8s >=1.7)
#externalTrafficPolicy: Local
ports:
-
name: http
port: 80
targetPort: 8080
protocol: TCP
-
name: agent
port: 50000
protocol: TCP
EOF
kubectl apply -f jenkins.yml

1.4.ingress
cat > jenkins-ingress.yaml <<EOF
---
apiVersion: networking.k8s.io/v1
kind: Ingress
metadata:
  name: jenkins
  namespace: kube-ops
  annotations:
    nginx.ingress.kubernetes.io/service-weight: ""
spec:
  ingressClassName: nginx
  rules:
    - host: jenkins.example.com
      http:
        paths:
        - backend:
            service:
              name: jenkins
              port:
                number: 80
          path: /
          pathType: Prefix
EOF
kubectl apply -f jenkins-ingress.yaml

# 不要忘记本地Windows进行域名解析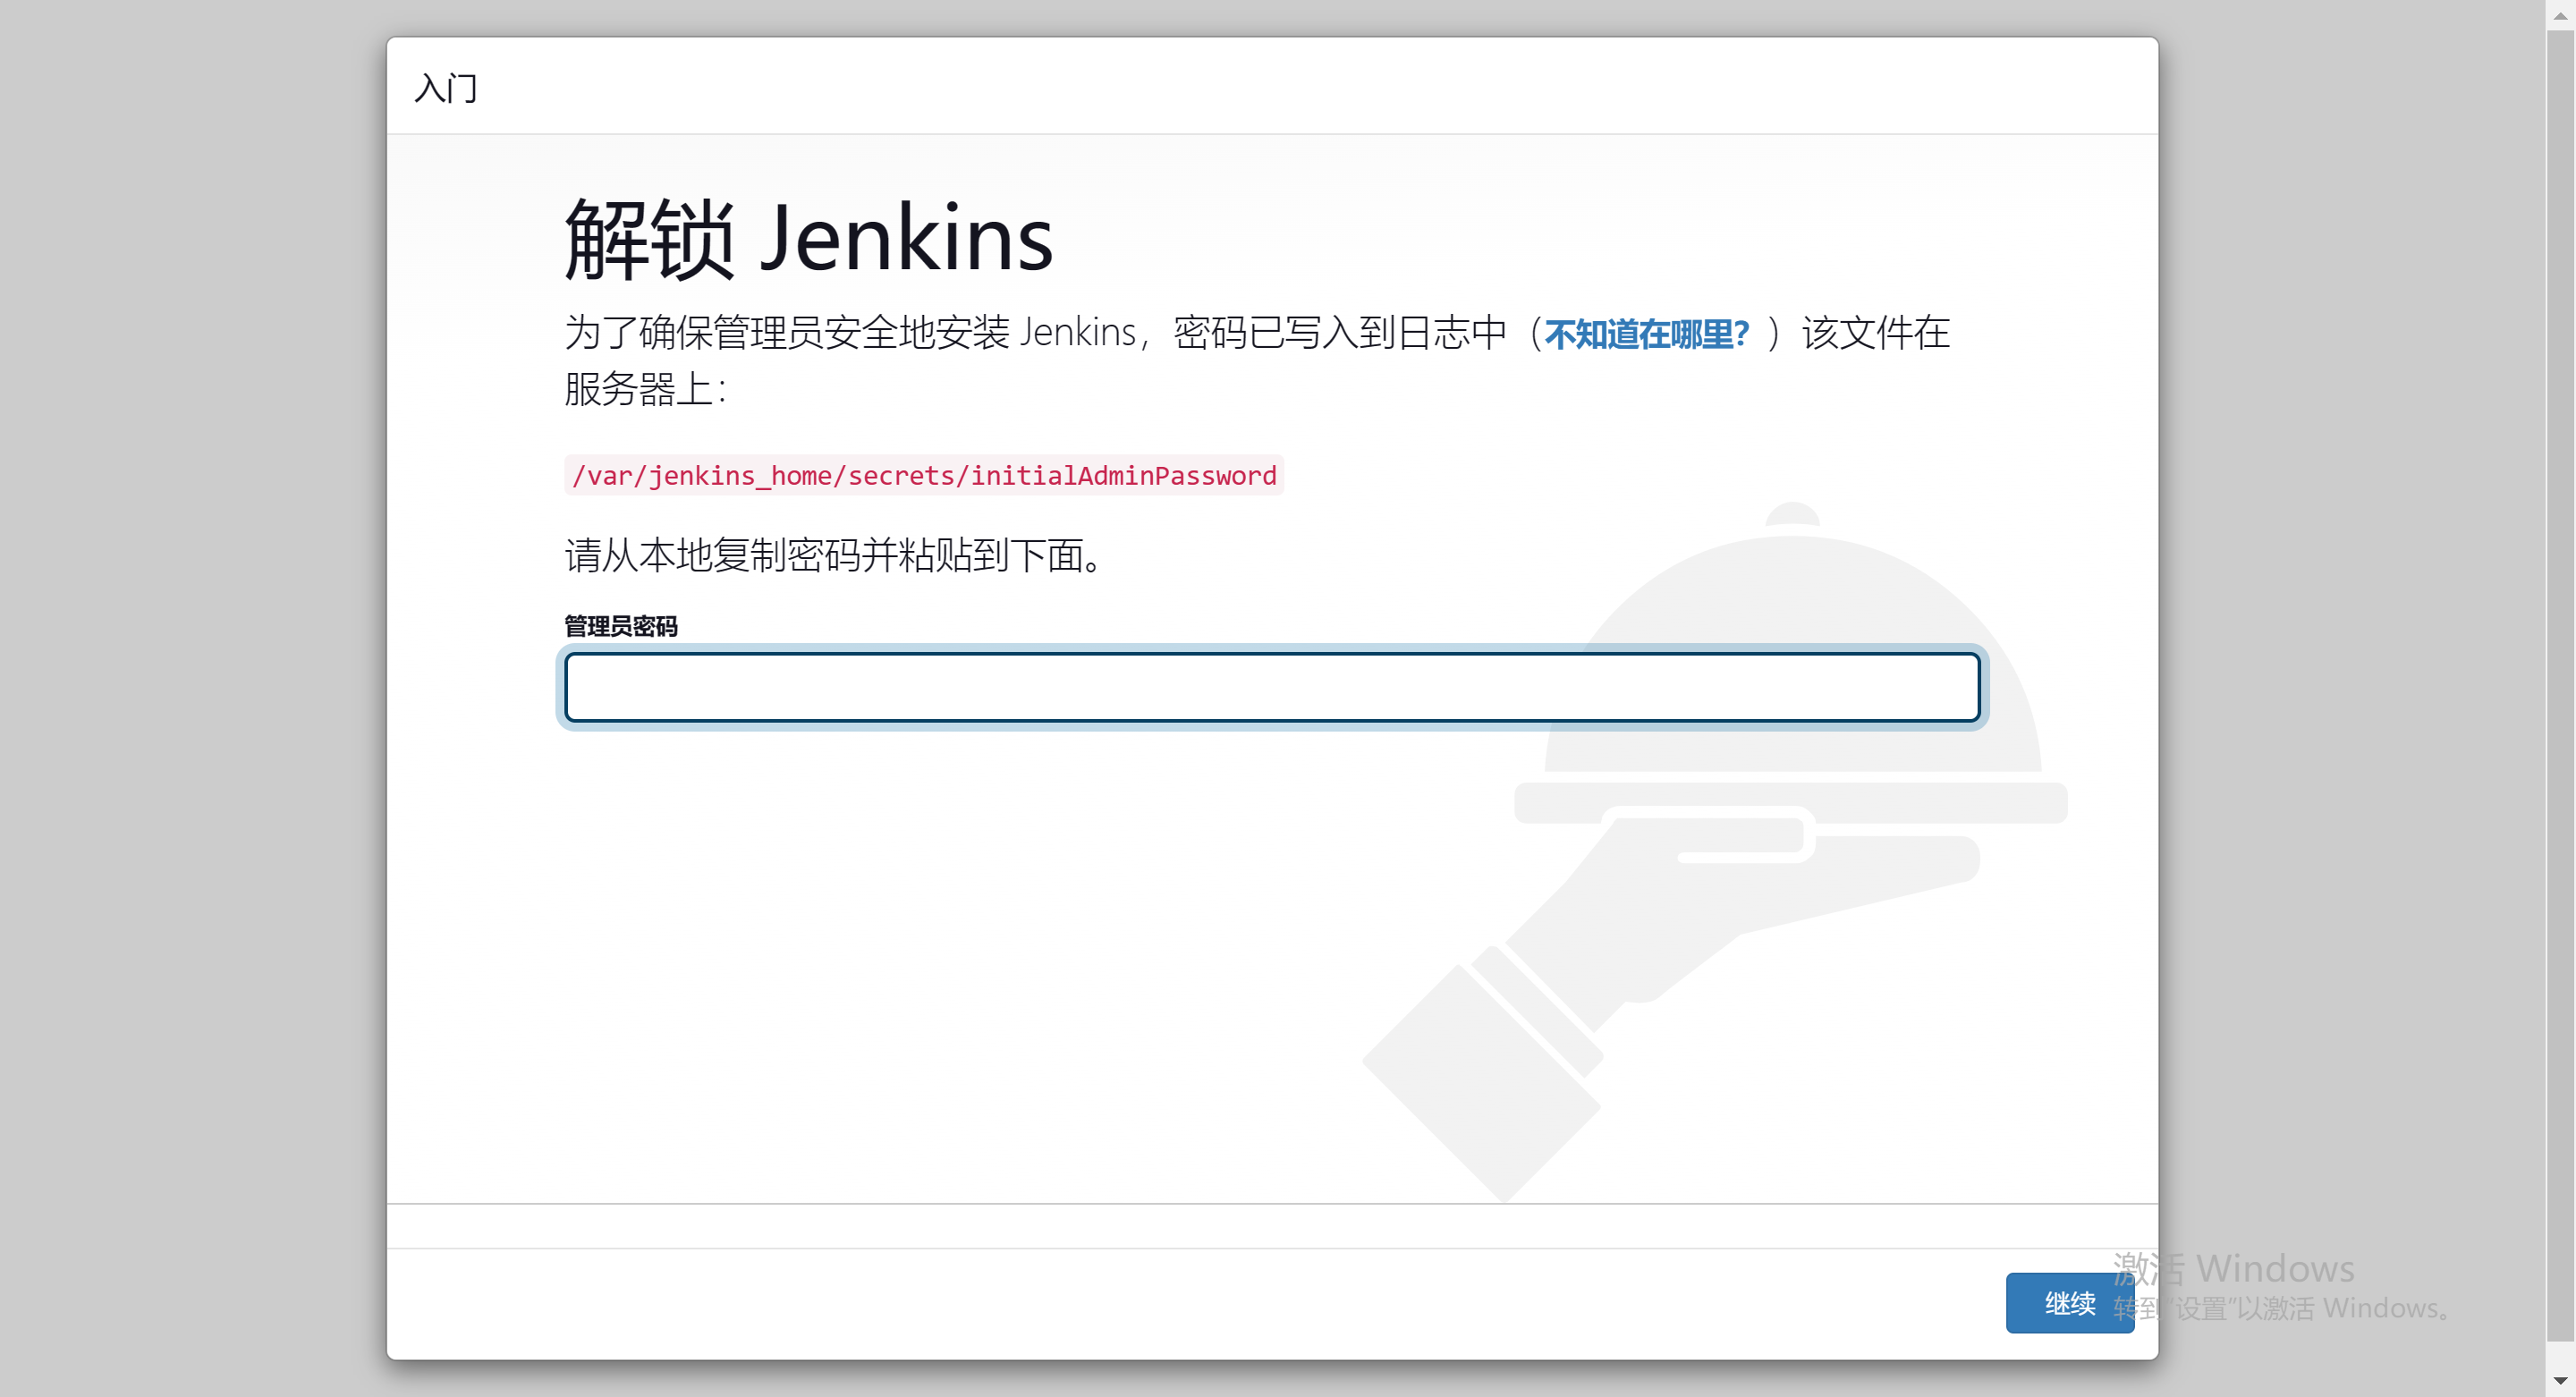
查看密码:
kubectl logs -n kube-ops jenkins-7d7994fff5-92jvd
2022-12-31 03:43:19.145+0000 [id=31]    INFO    jenkins.install.SetupWizard#init:

*************************************************************
*************************************************************
*************************************************************

Jenkins initial setup is required. An admin user has been created and a password generated.
Please use the following password to proceed to installation:

580f0d4a0c8047a1b054b17c57dd907b

This may also be found at: /var/jenkins_home/secrets/initialAdminPassword

*************************************************************
*************************************************************
*************************************************************

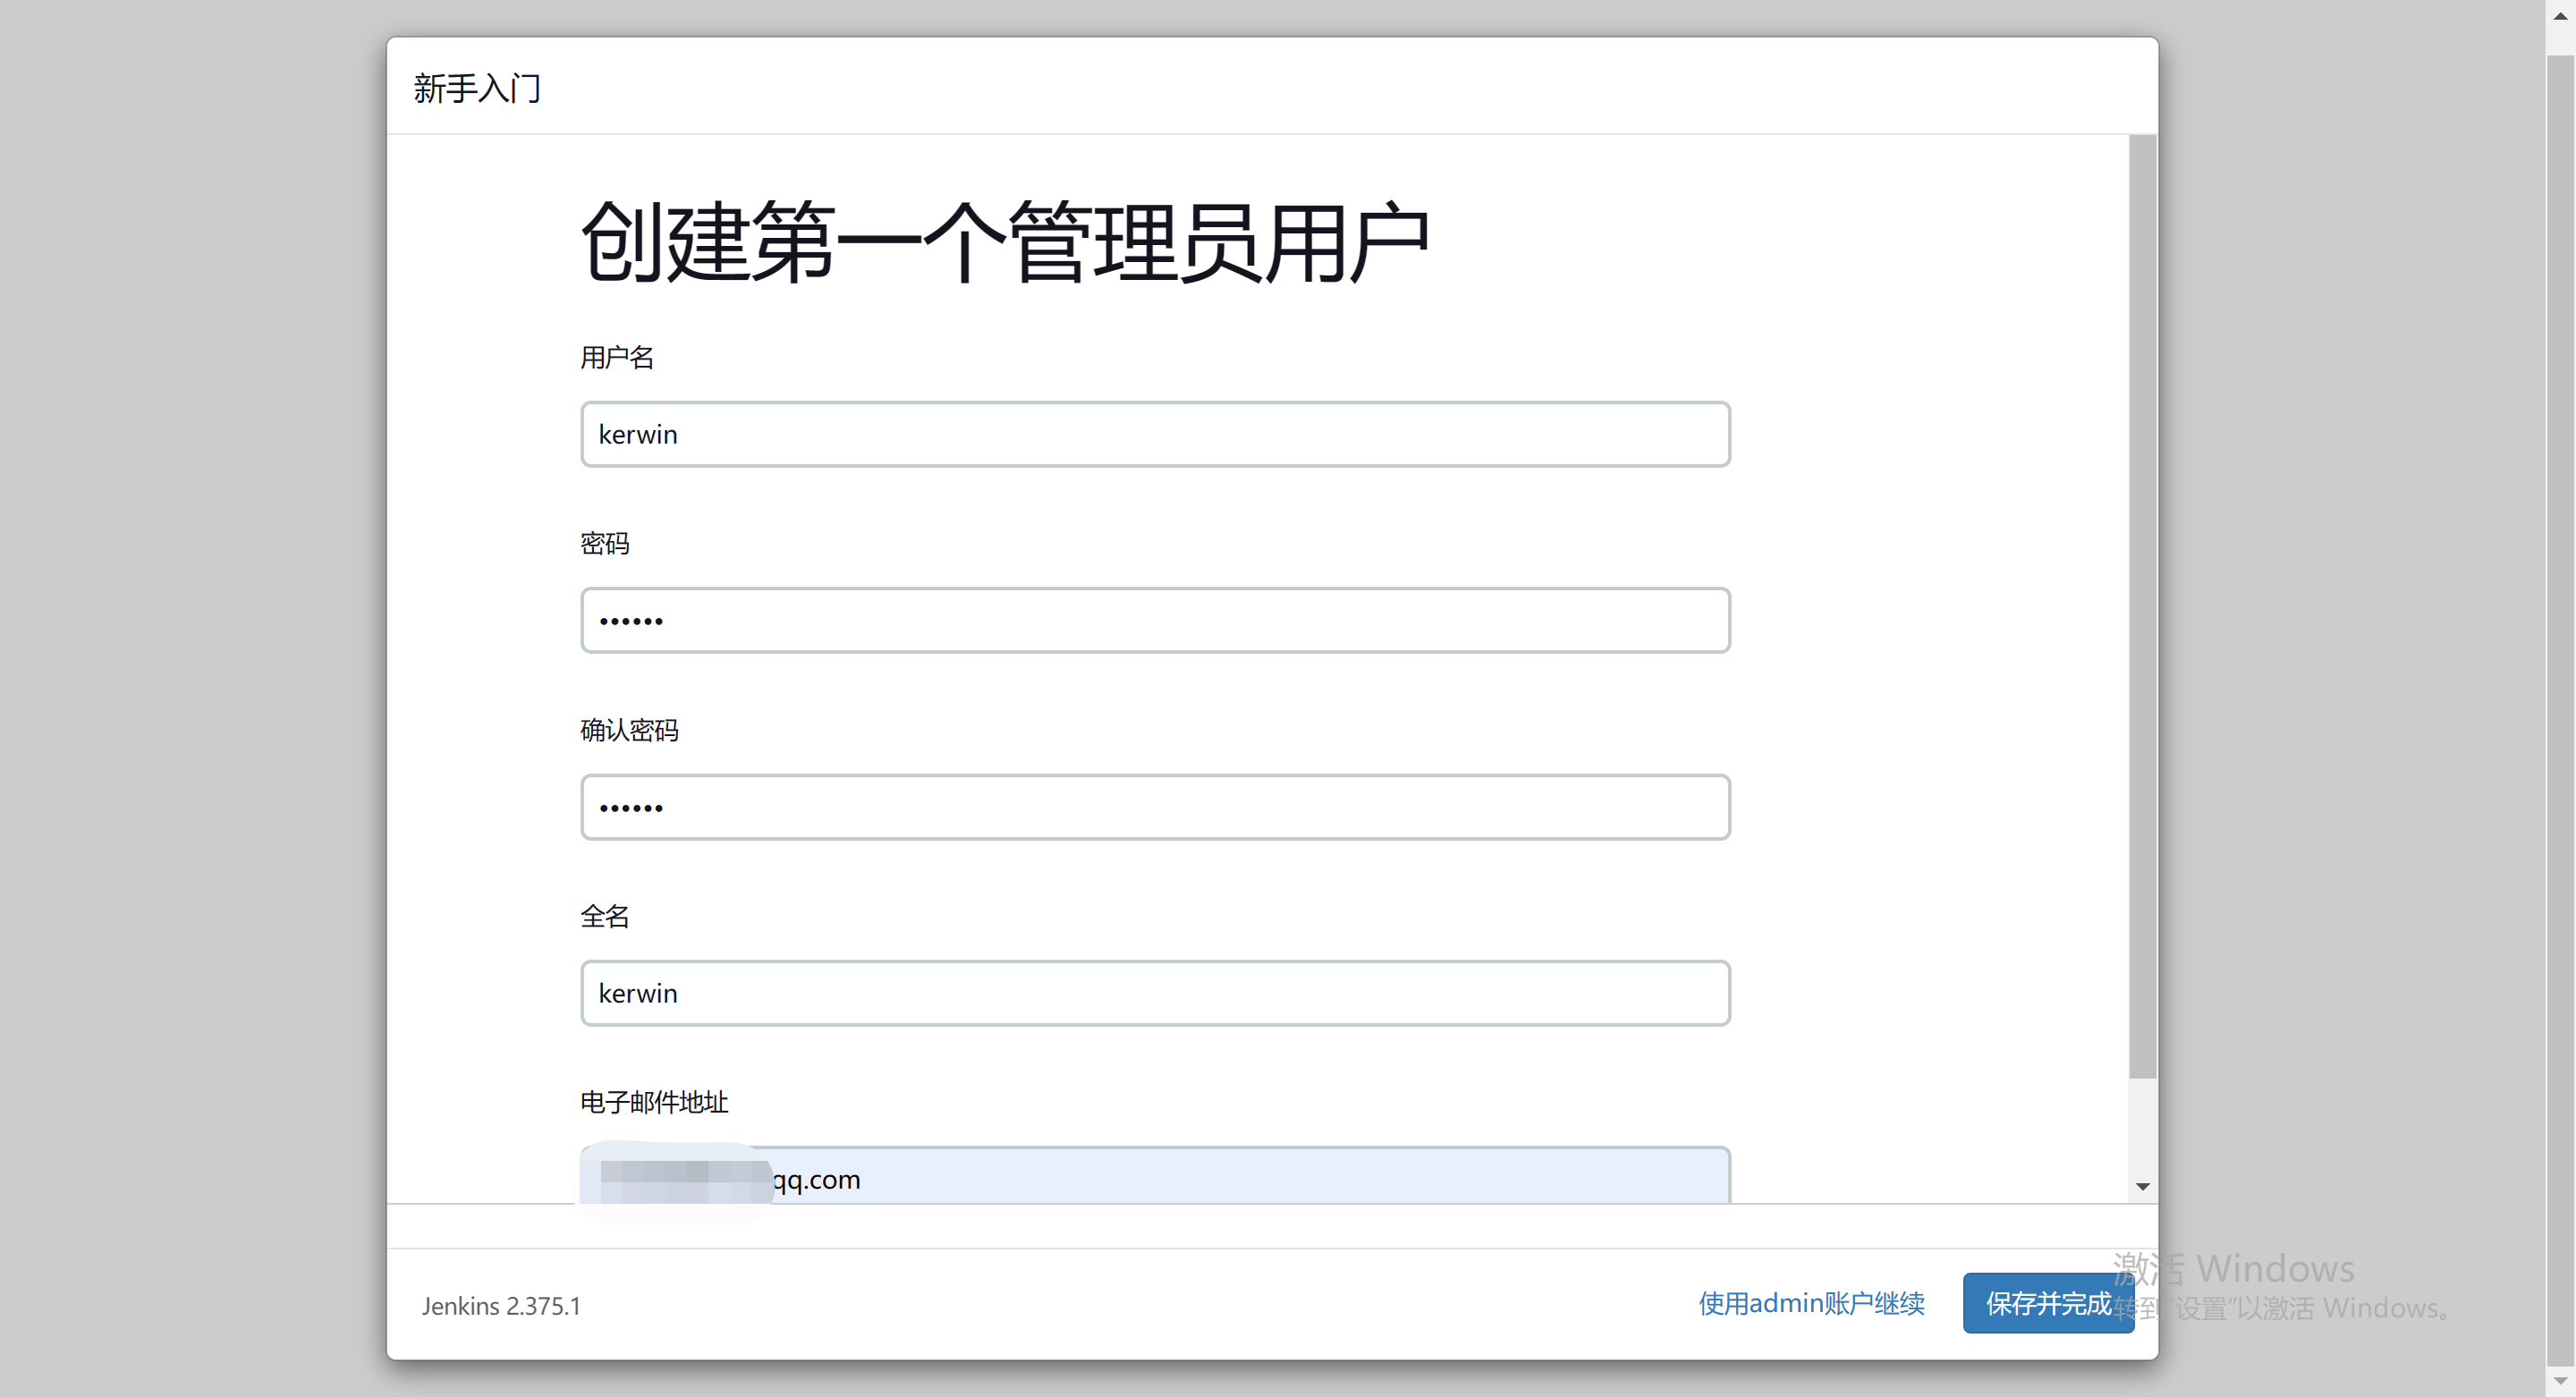
创建新用户:
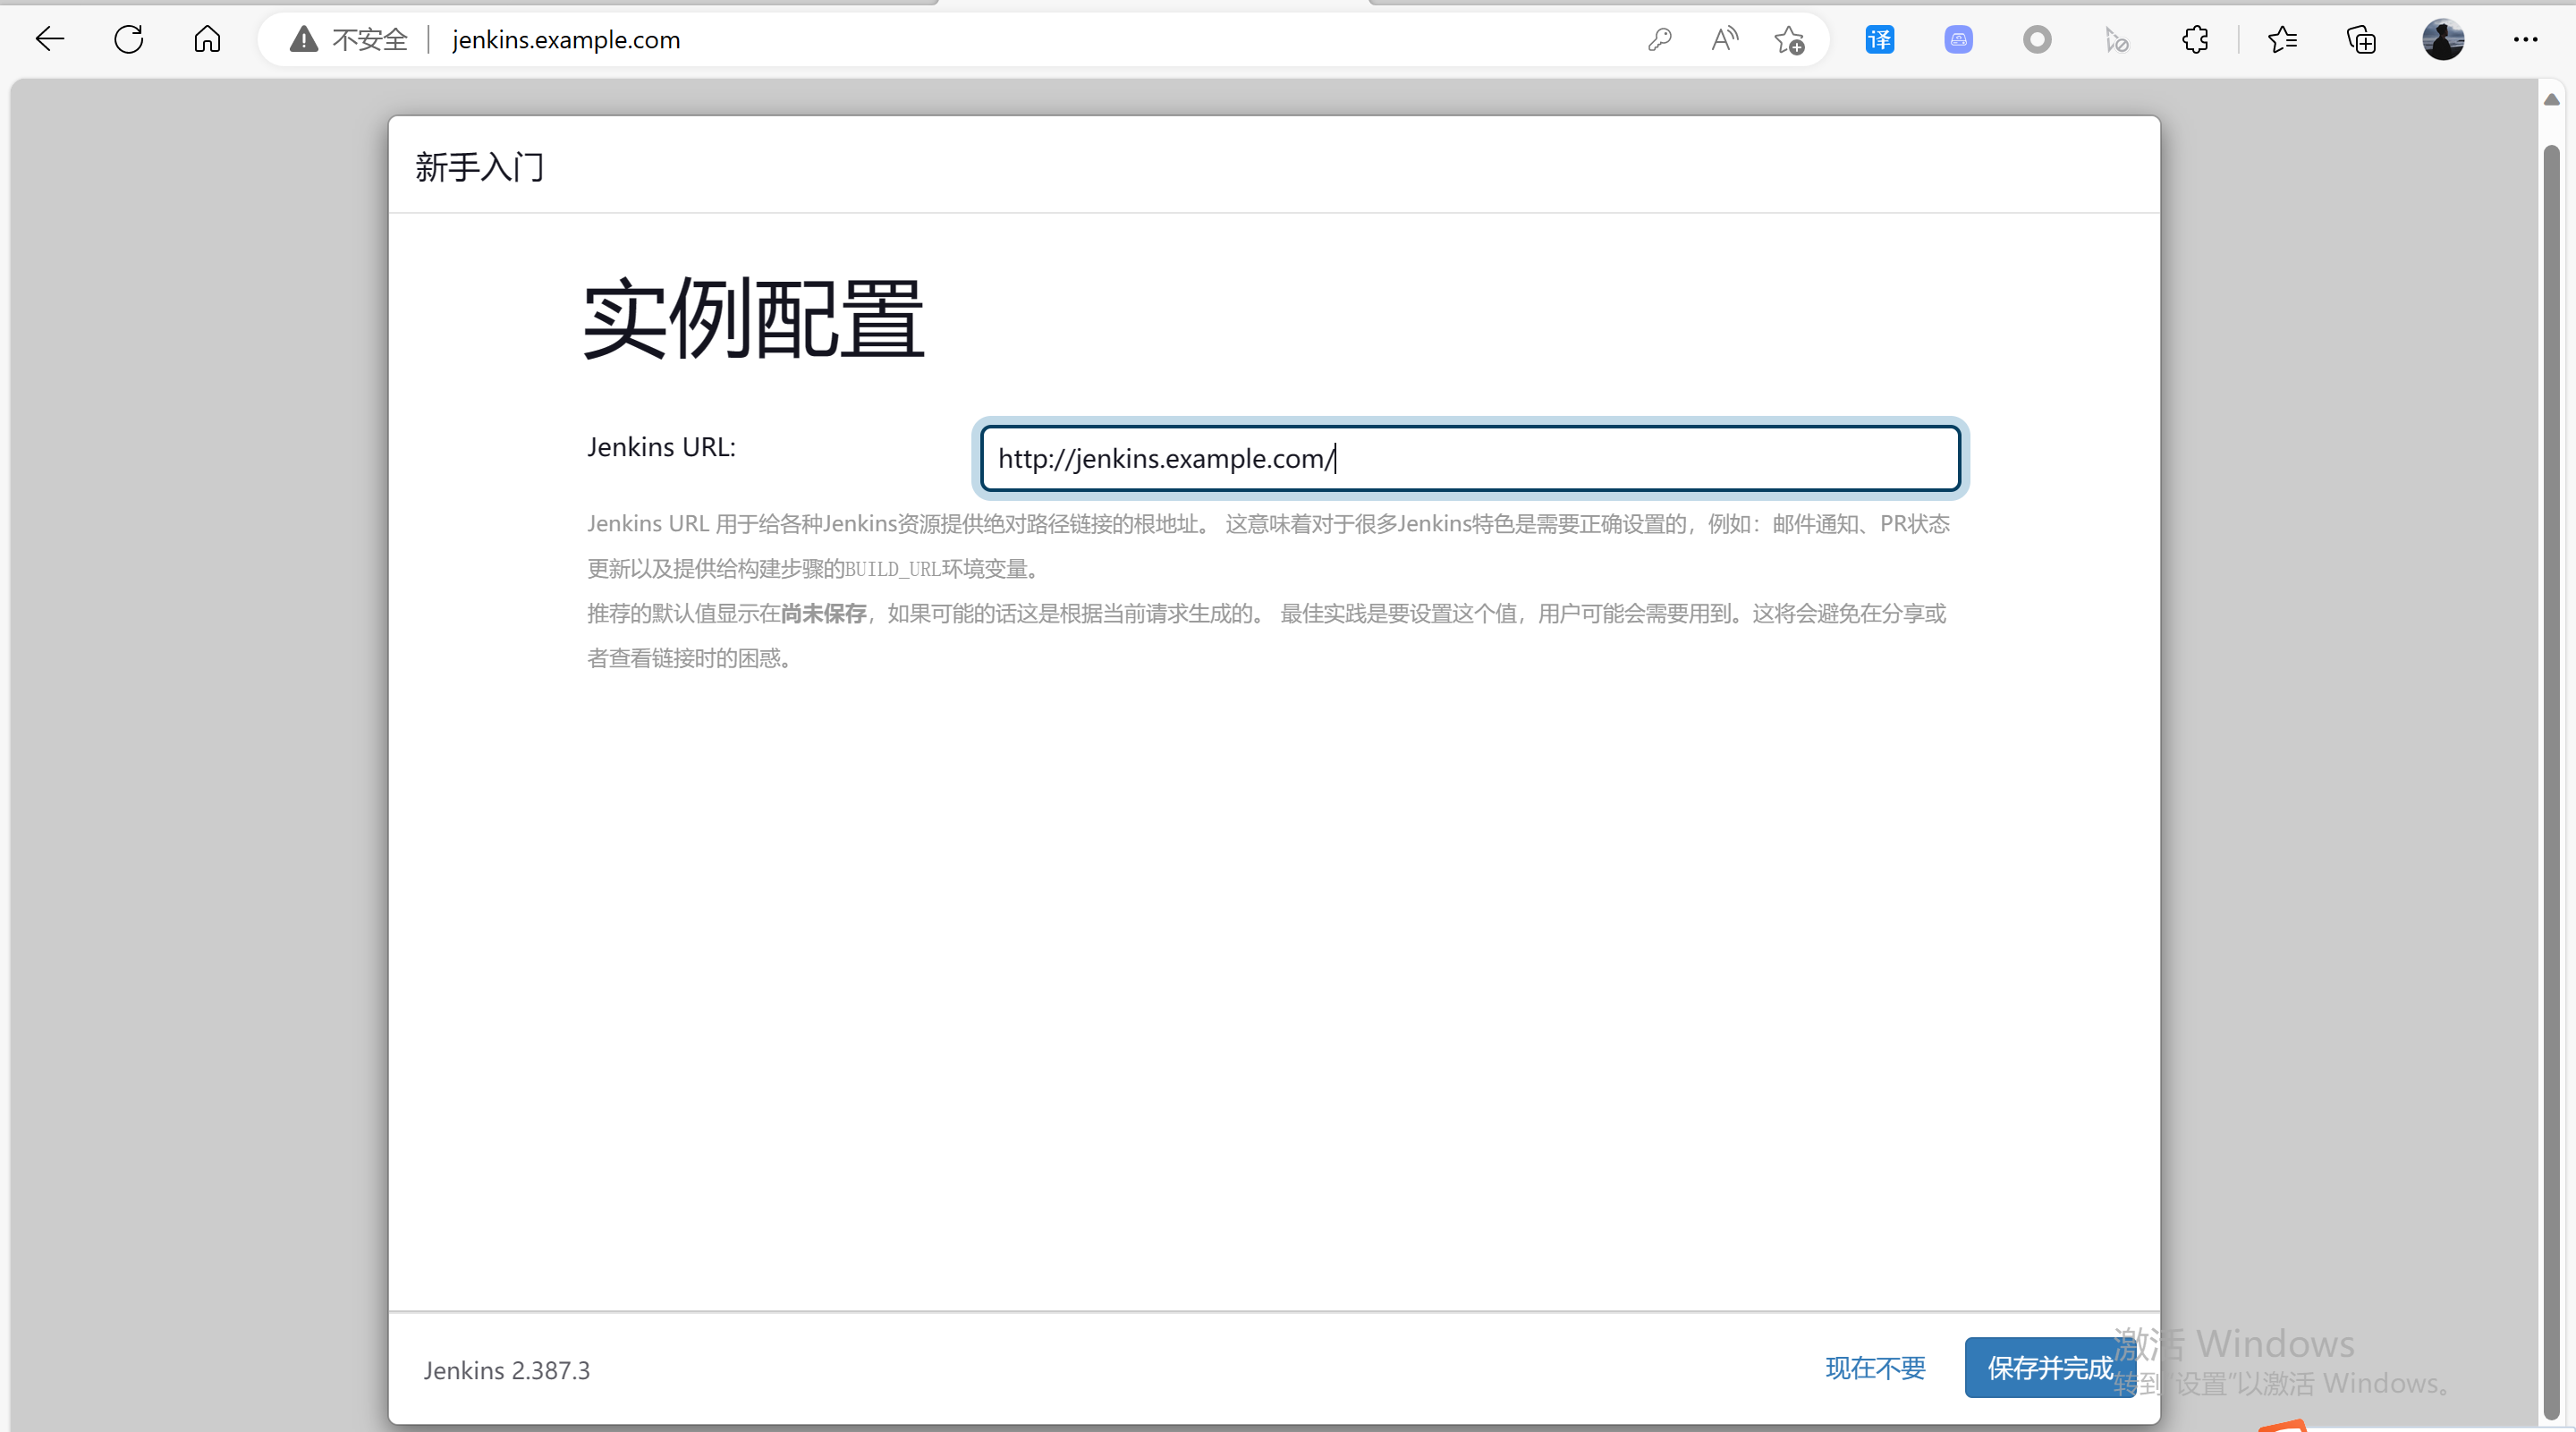
Jenkins页面:
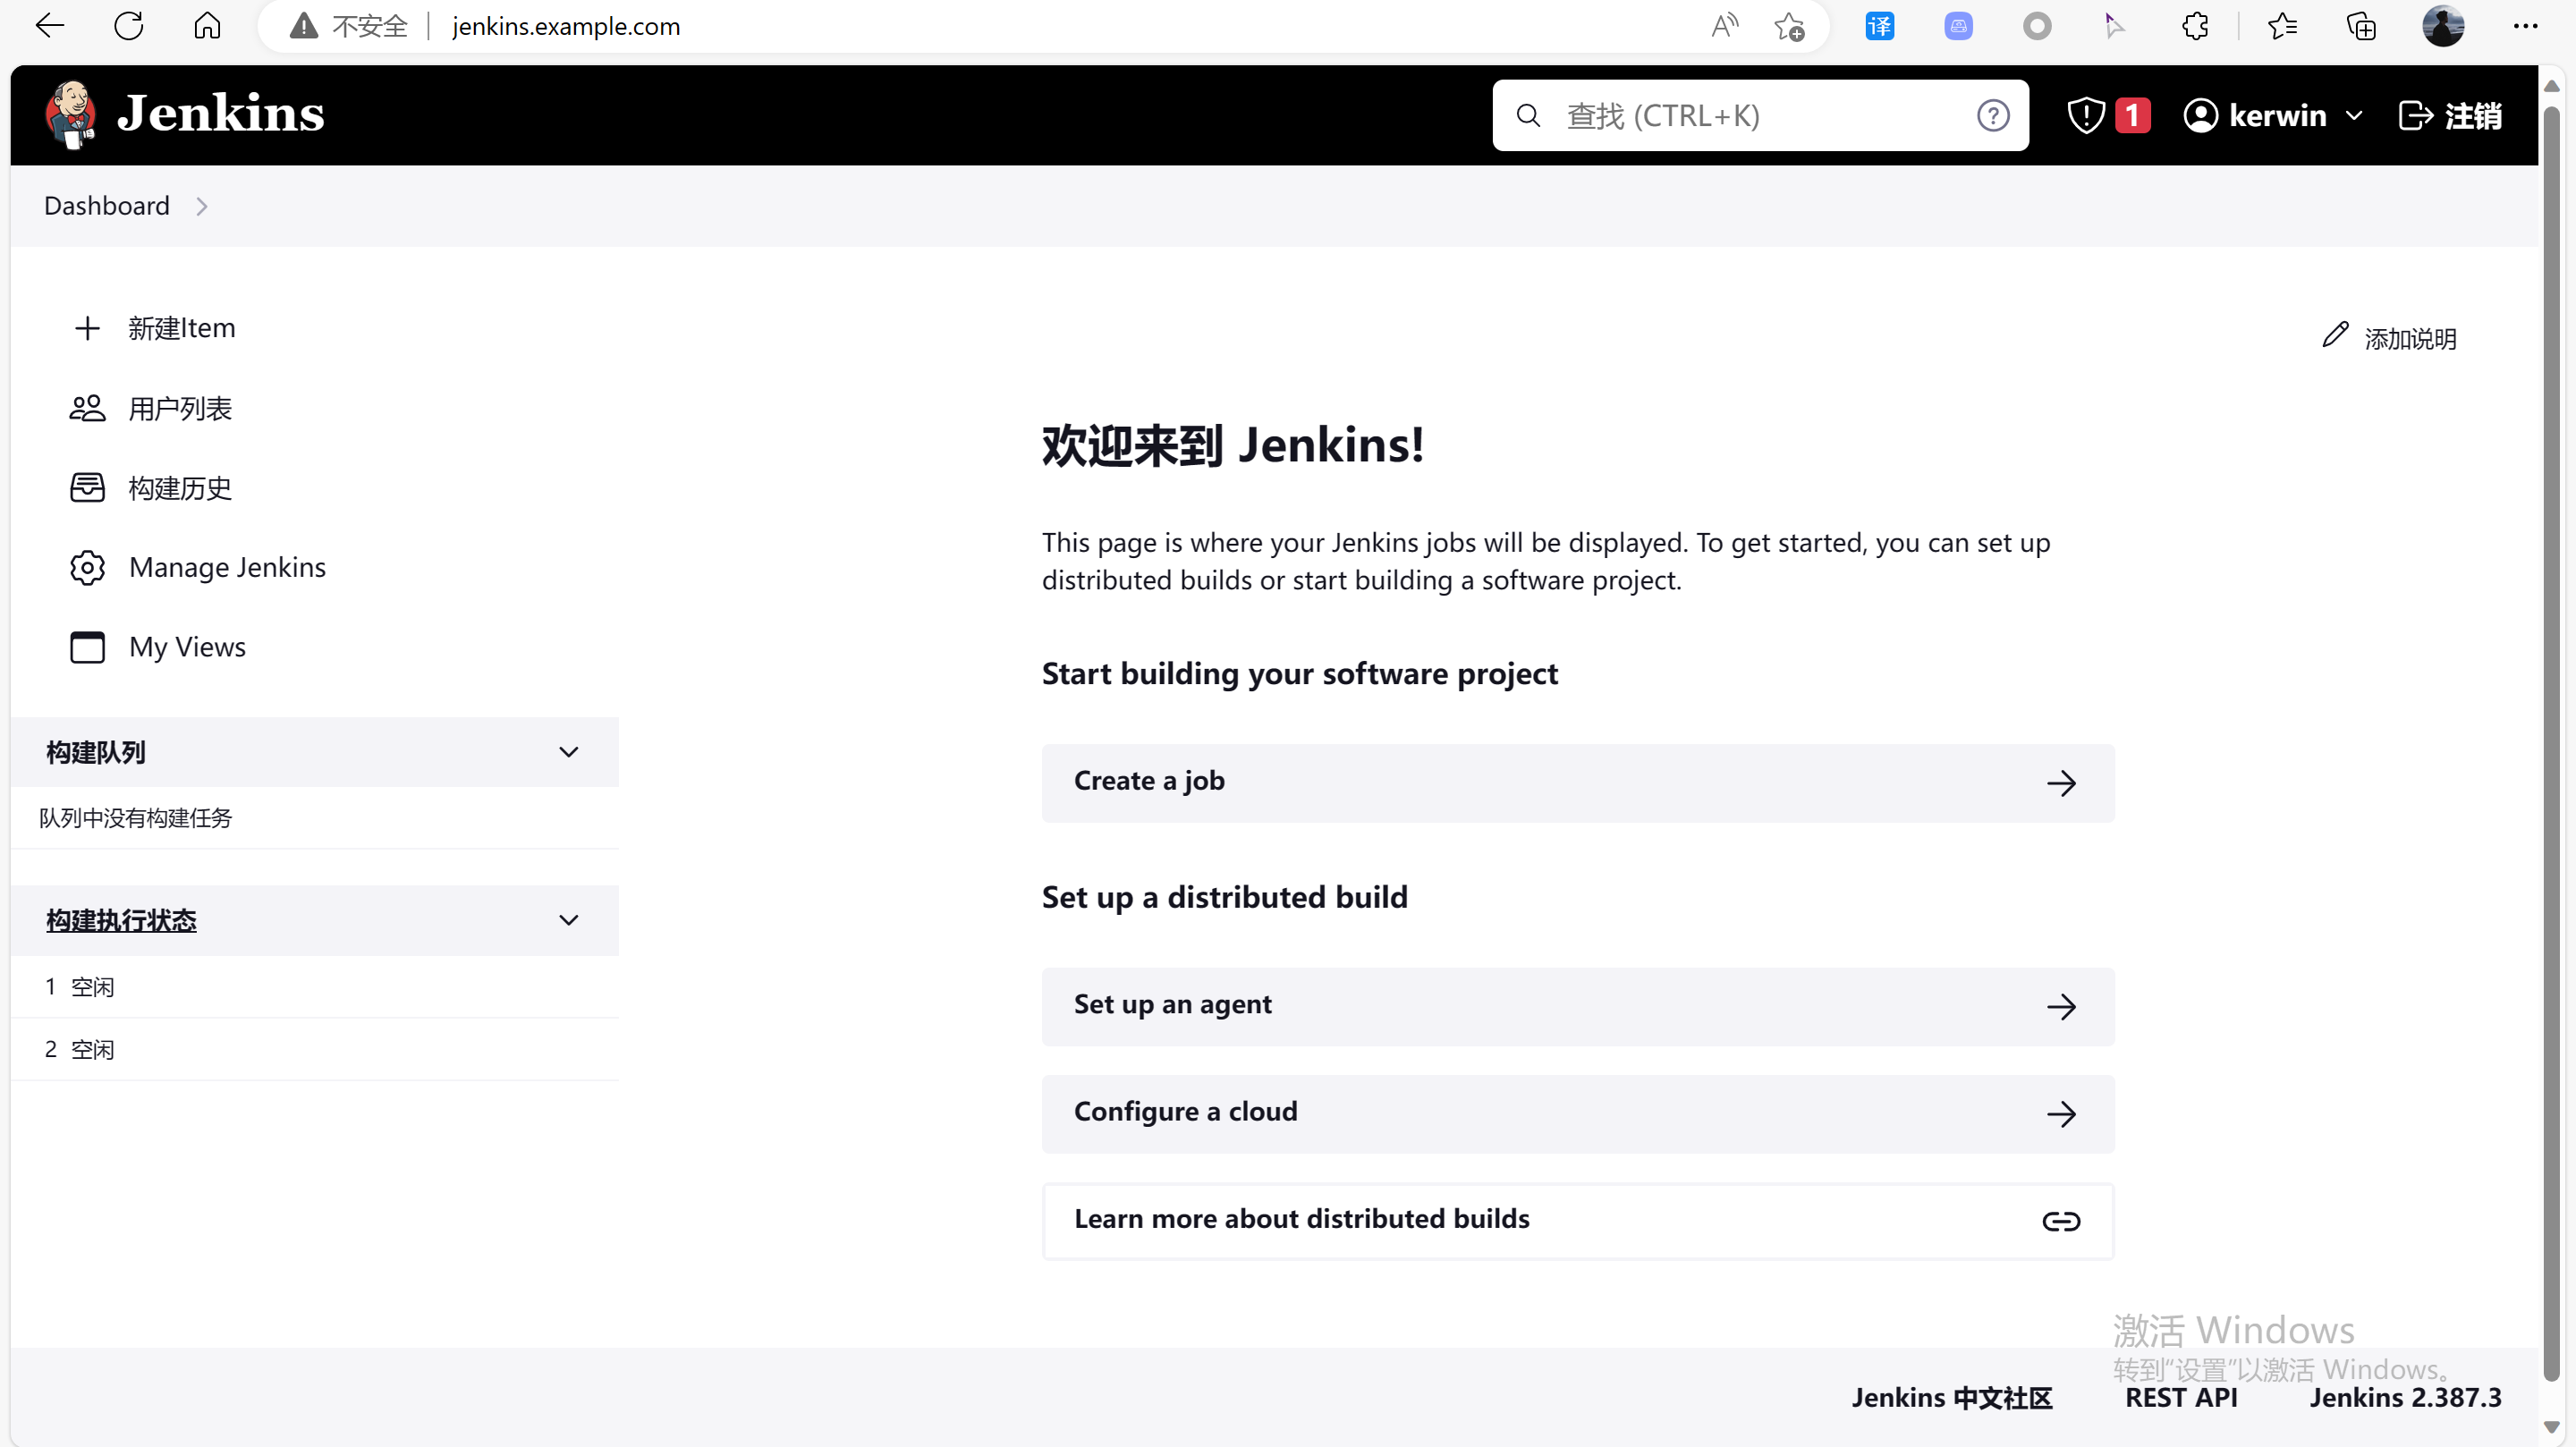
地址:
Dashboard --> Manage Jenkins --> 插件管理 --> advanced settings --> 升级站点
# 默认地址
https://updates.jenkins.io/update-center.json
# 阿里源
https://mirrors.aliyun.com/jenkins/updates/update-center.json
# 清华源
https://mirrors.tuna.tsinghua.edu.cn/jenkins/updates/update-center.json然后重启jenkins。https://jenkins.example.com/restart
4.Blue Ocean
插件介绍:https://www.jenkins.io/zh/doc/book/blueocean
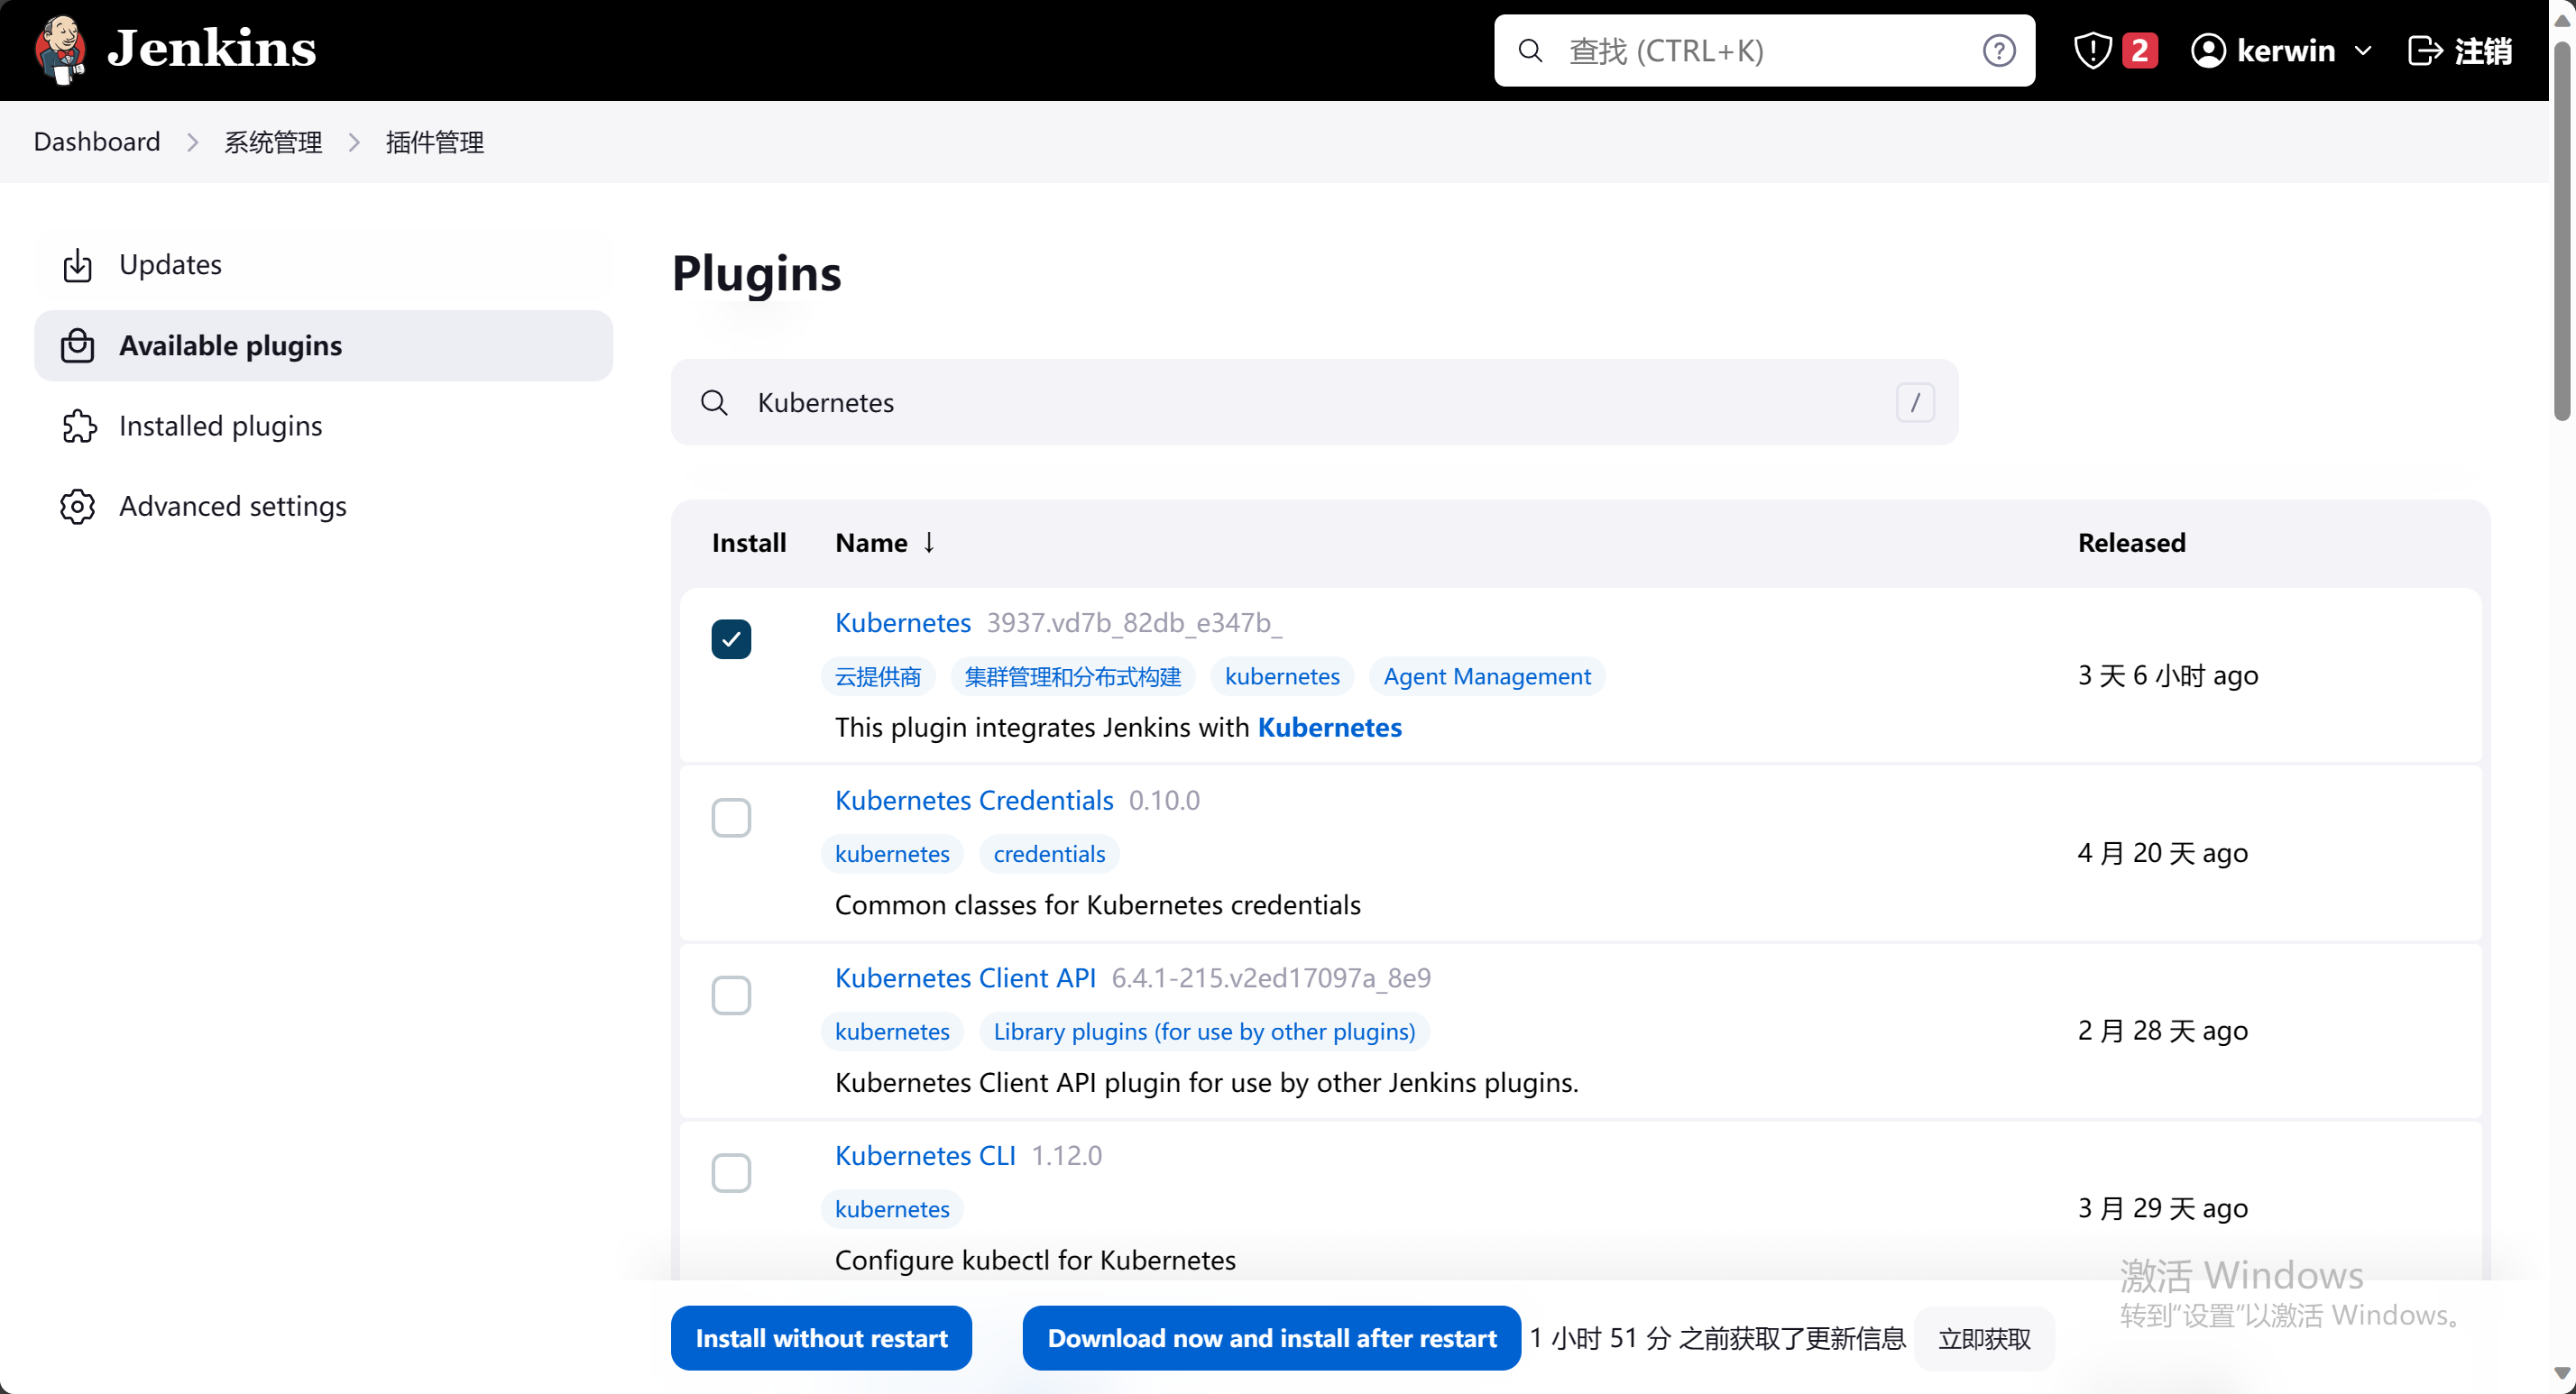
4.1.插件安装
插件安装参考:https://www.jenkins.io/zh/doc/book/blueocean/getting-started
pipeline语法介绍:https://www.jenkins.io/zh/doc/book/pipeline/#declarative-pipeline-fundamentals
系统设置--> 插件管理--> available plugins --> Blue Ocean
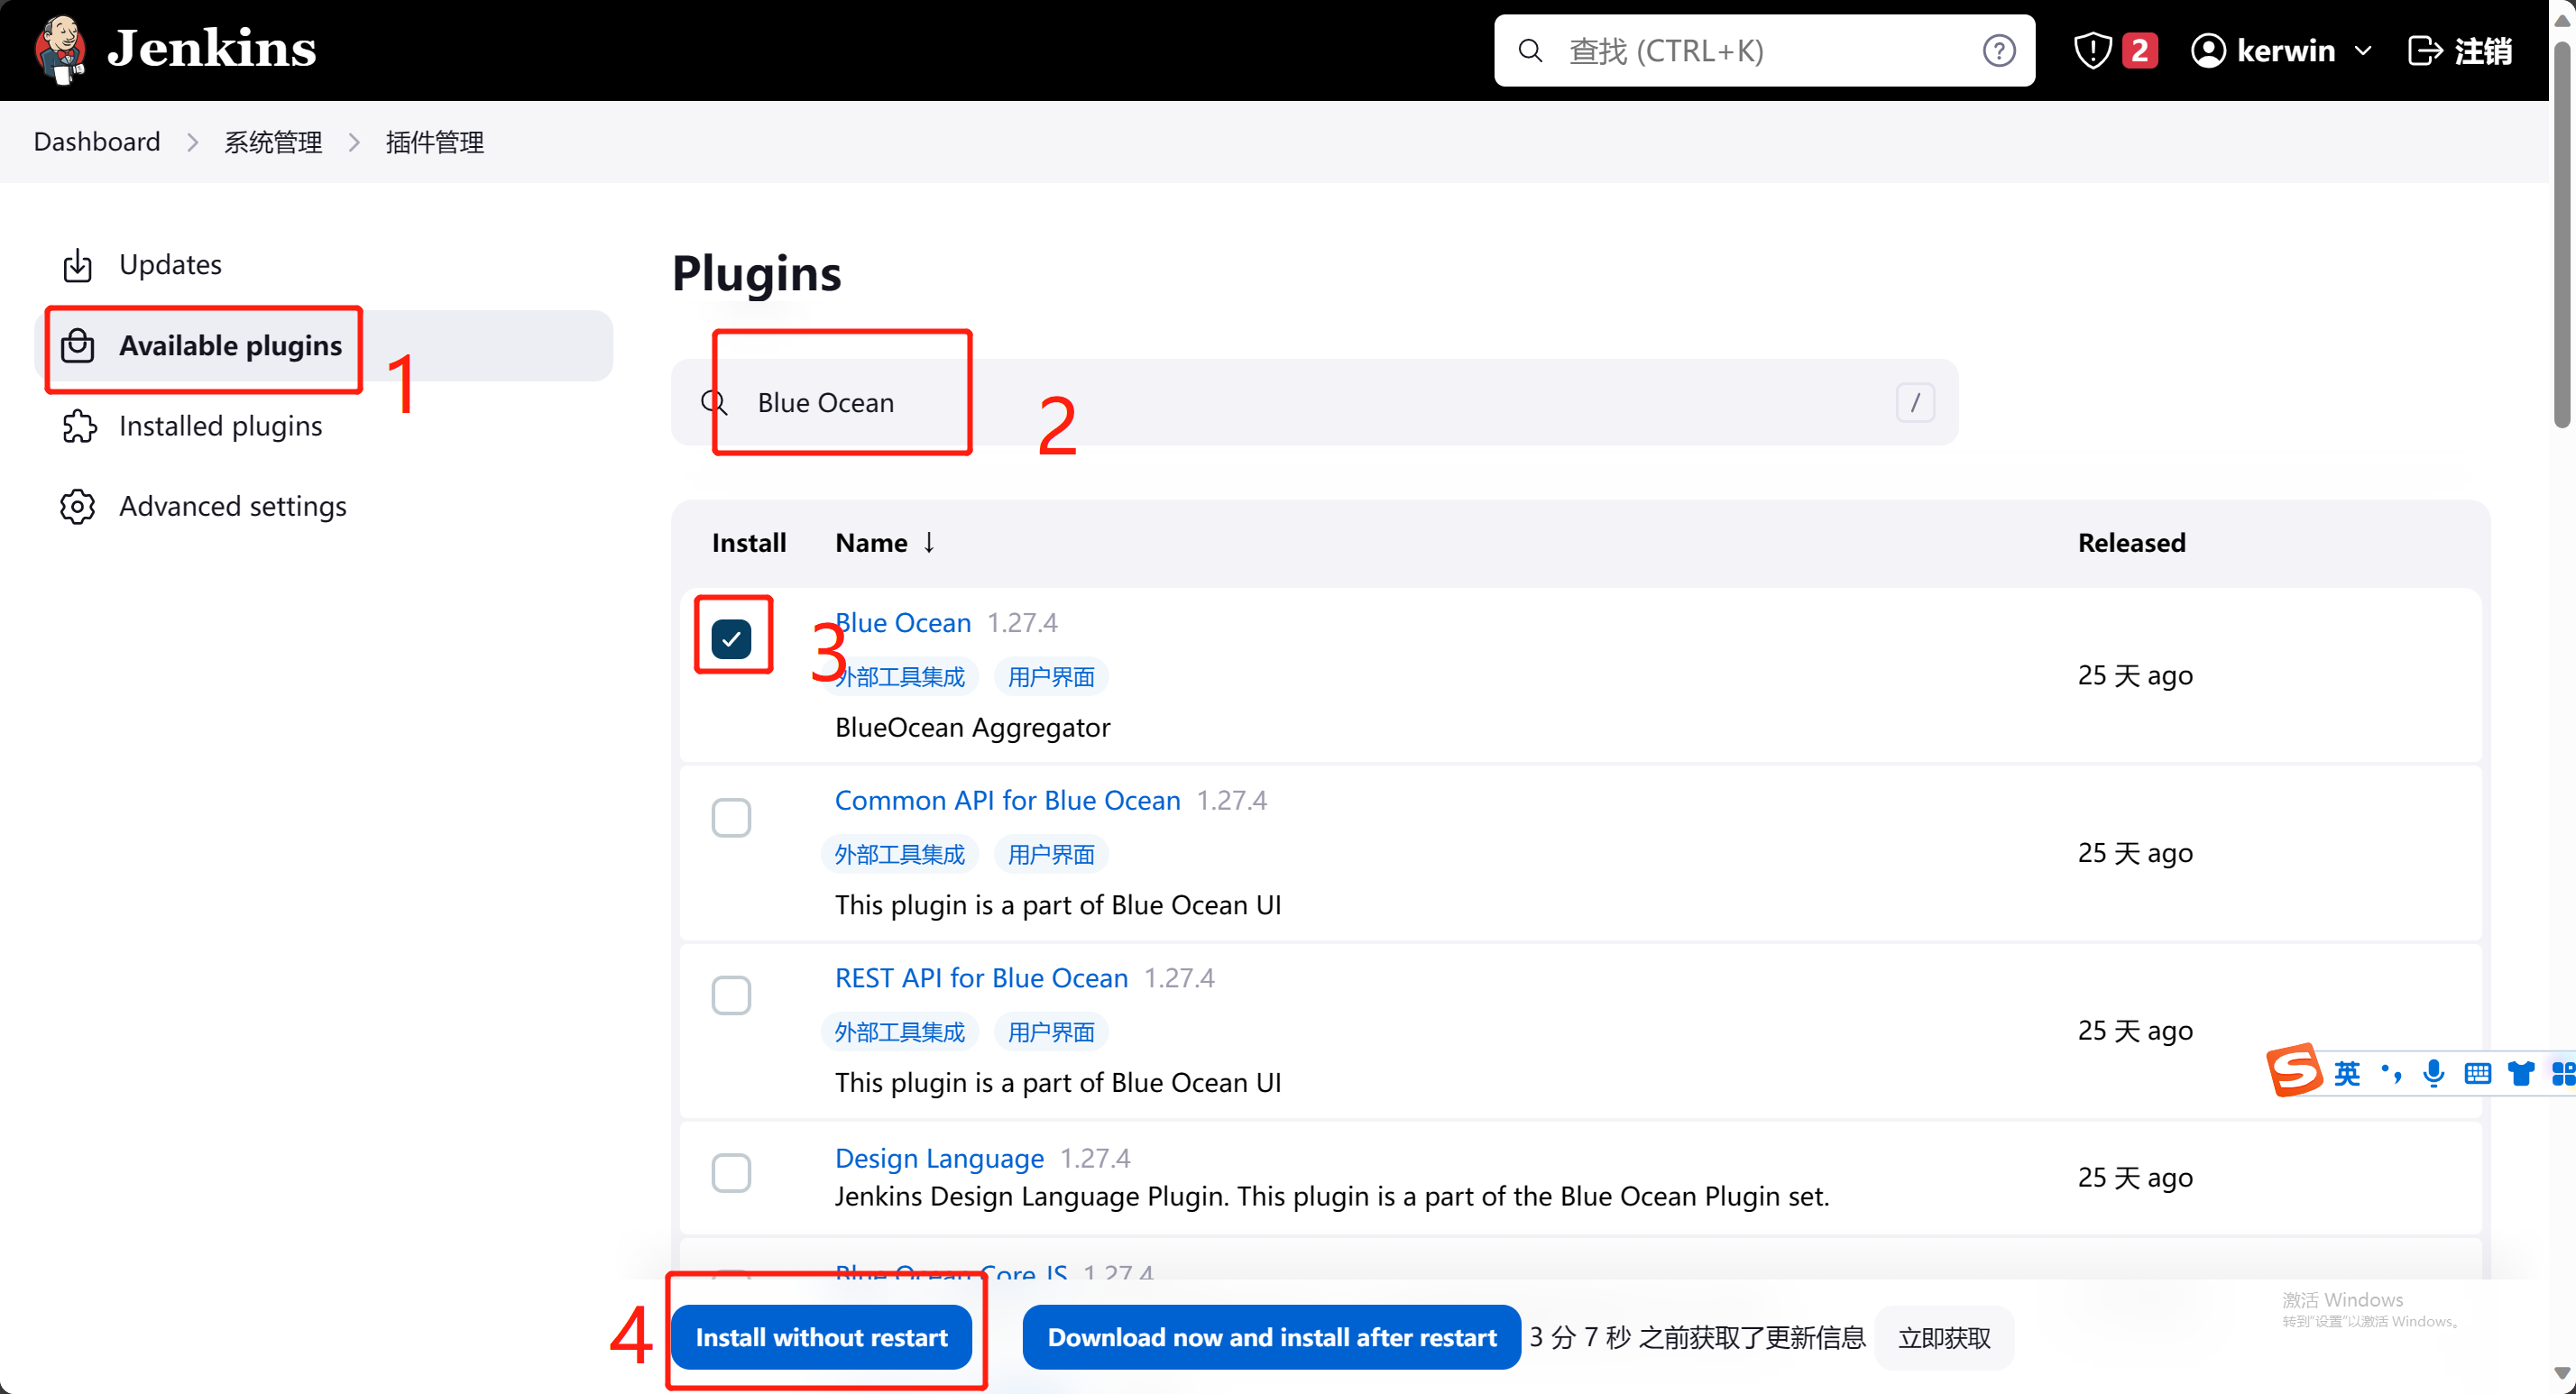
等待插件安装,依赖插件有点多。
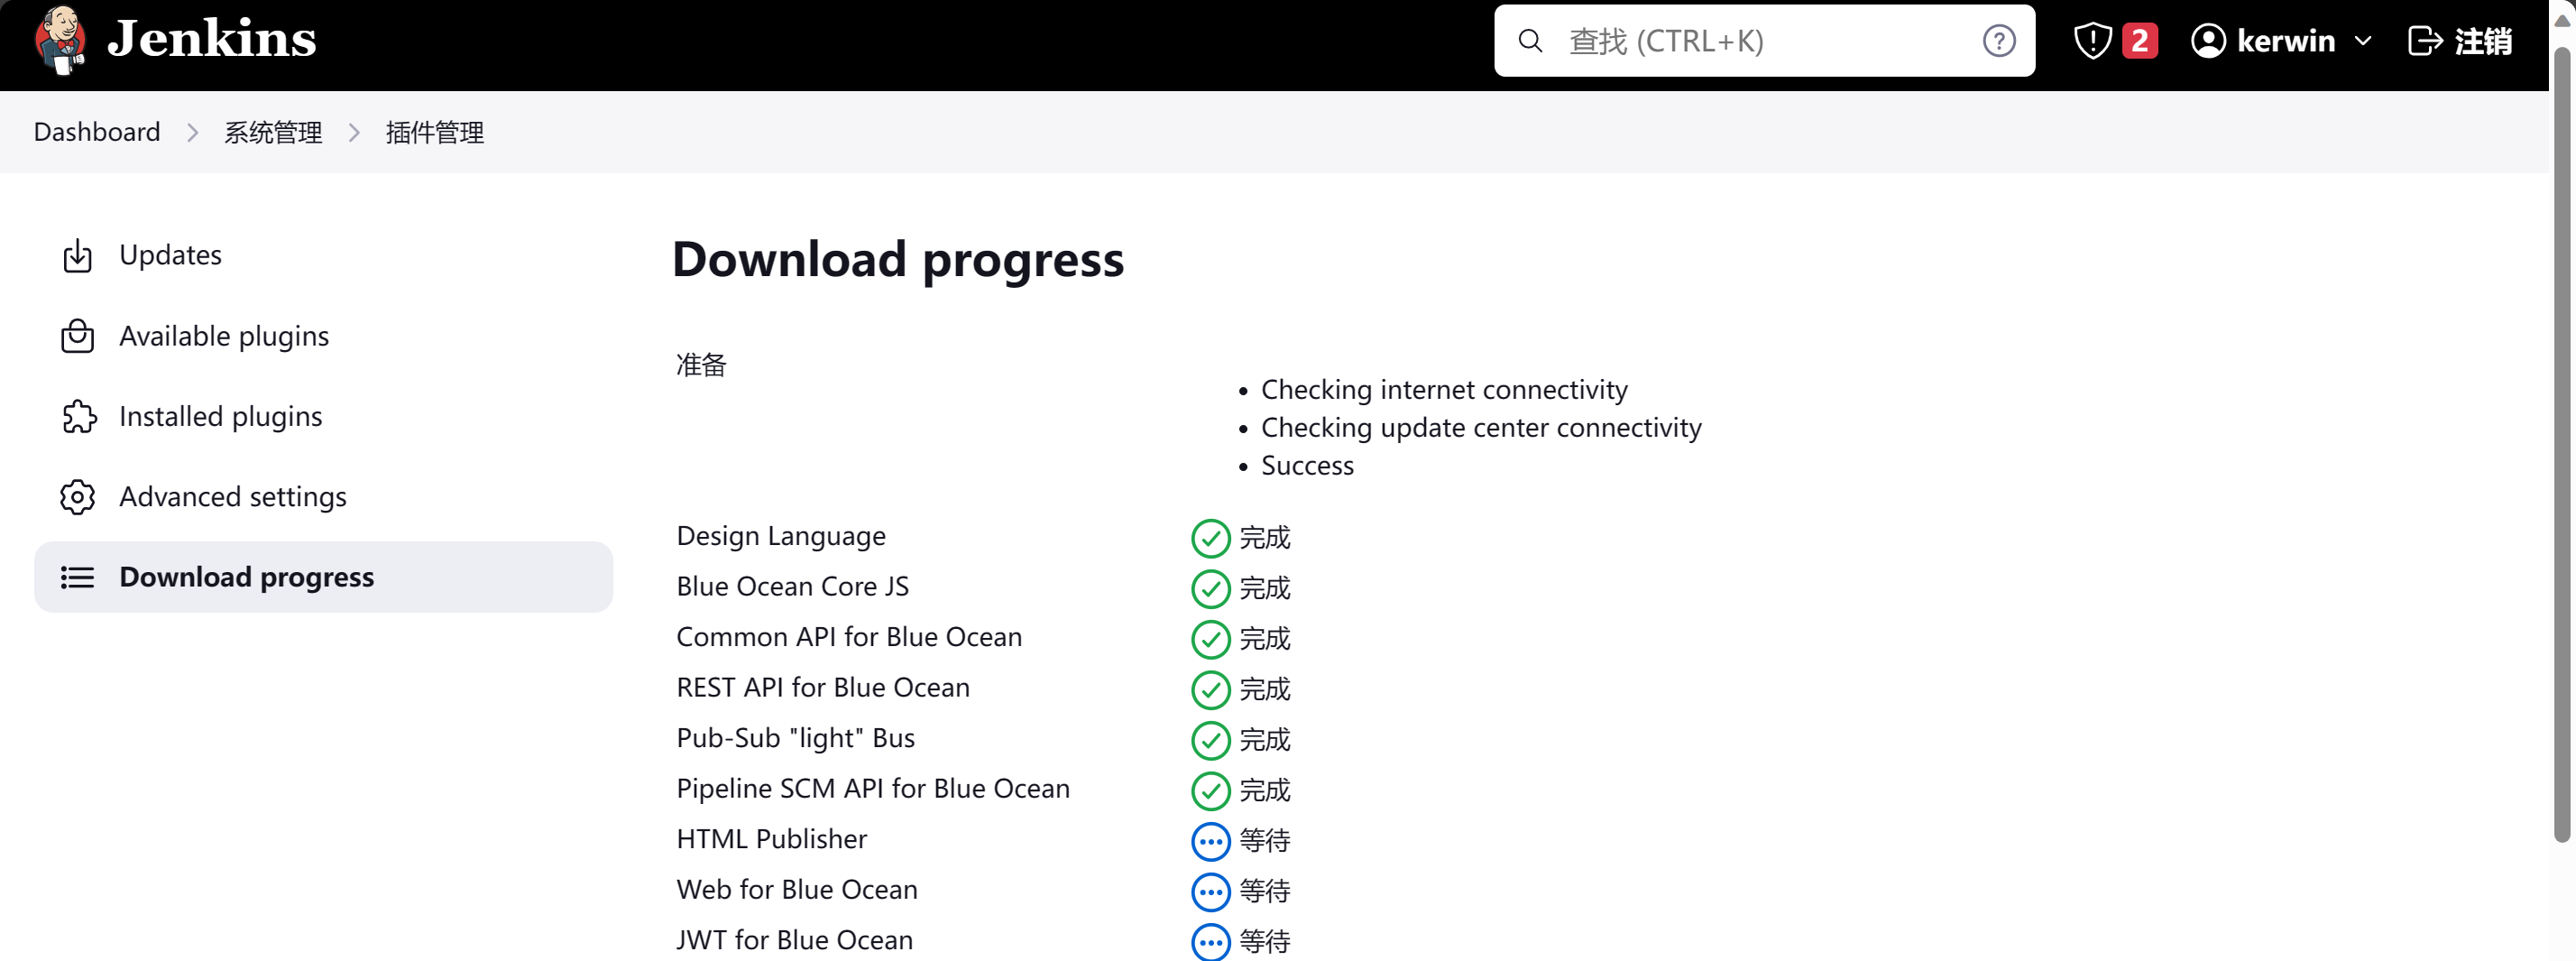
然后重启jenkins,看pod日志,先让jenkins缓一会,等到pod running了然后去登录。
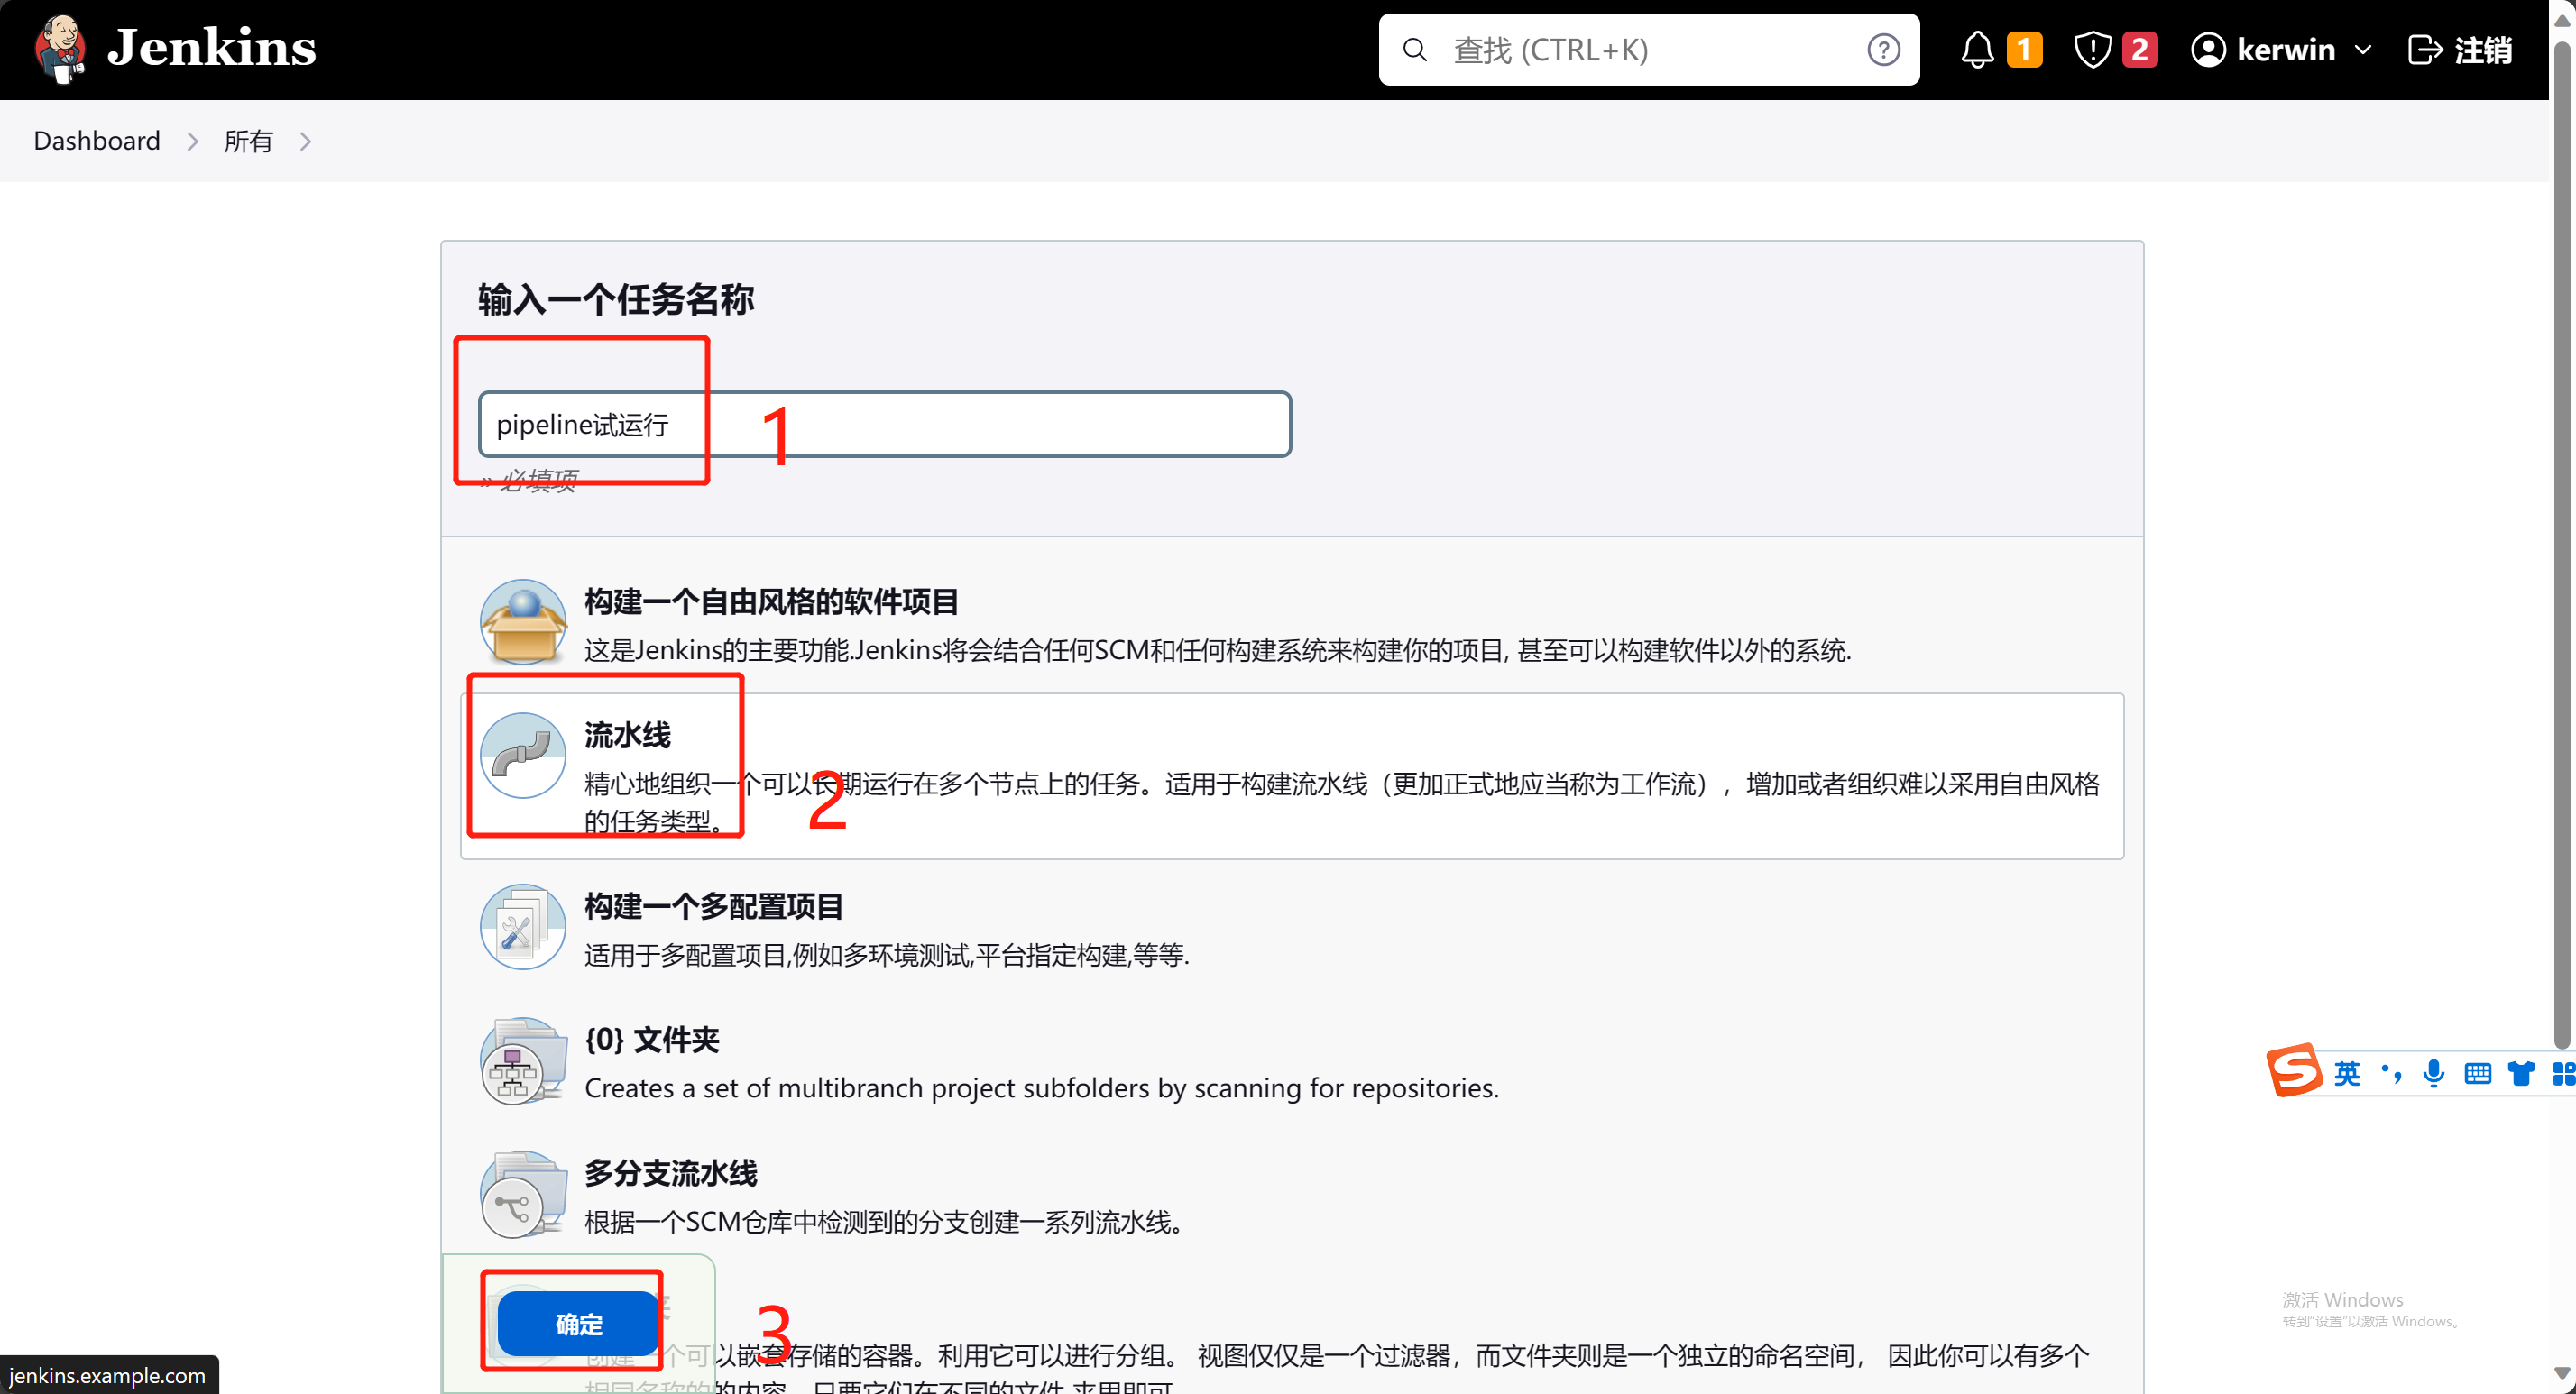
4.2.pipeline试运行
创建一个新任务
pipeline {
    agent any
    stages {
        stage('Hello') {
            steps {
                echo 'Hello World'
            }
        }
    }
}

安装完成之后前往系统管理--> 节点管理--> configureClouds
-
kubernetes地址采用了kube的服务器发现:https://kubernetes.default.svc.cluster.local
-
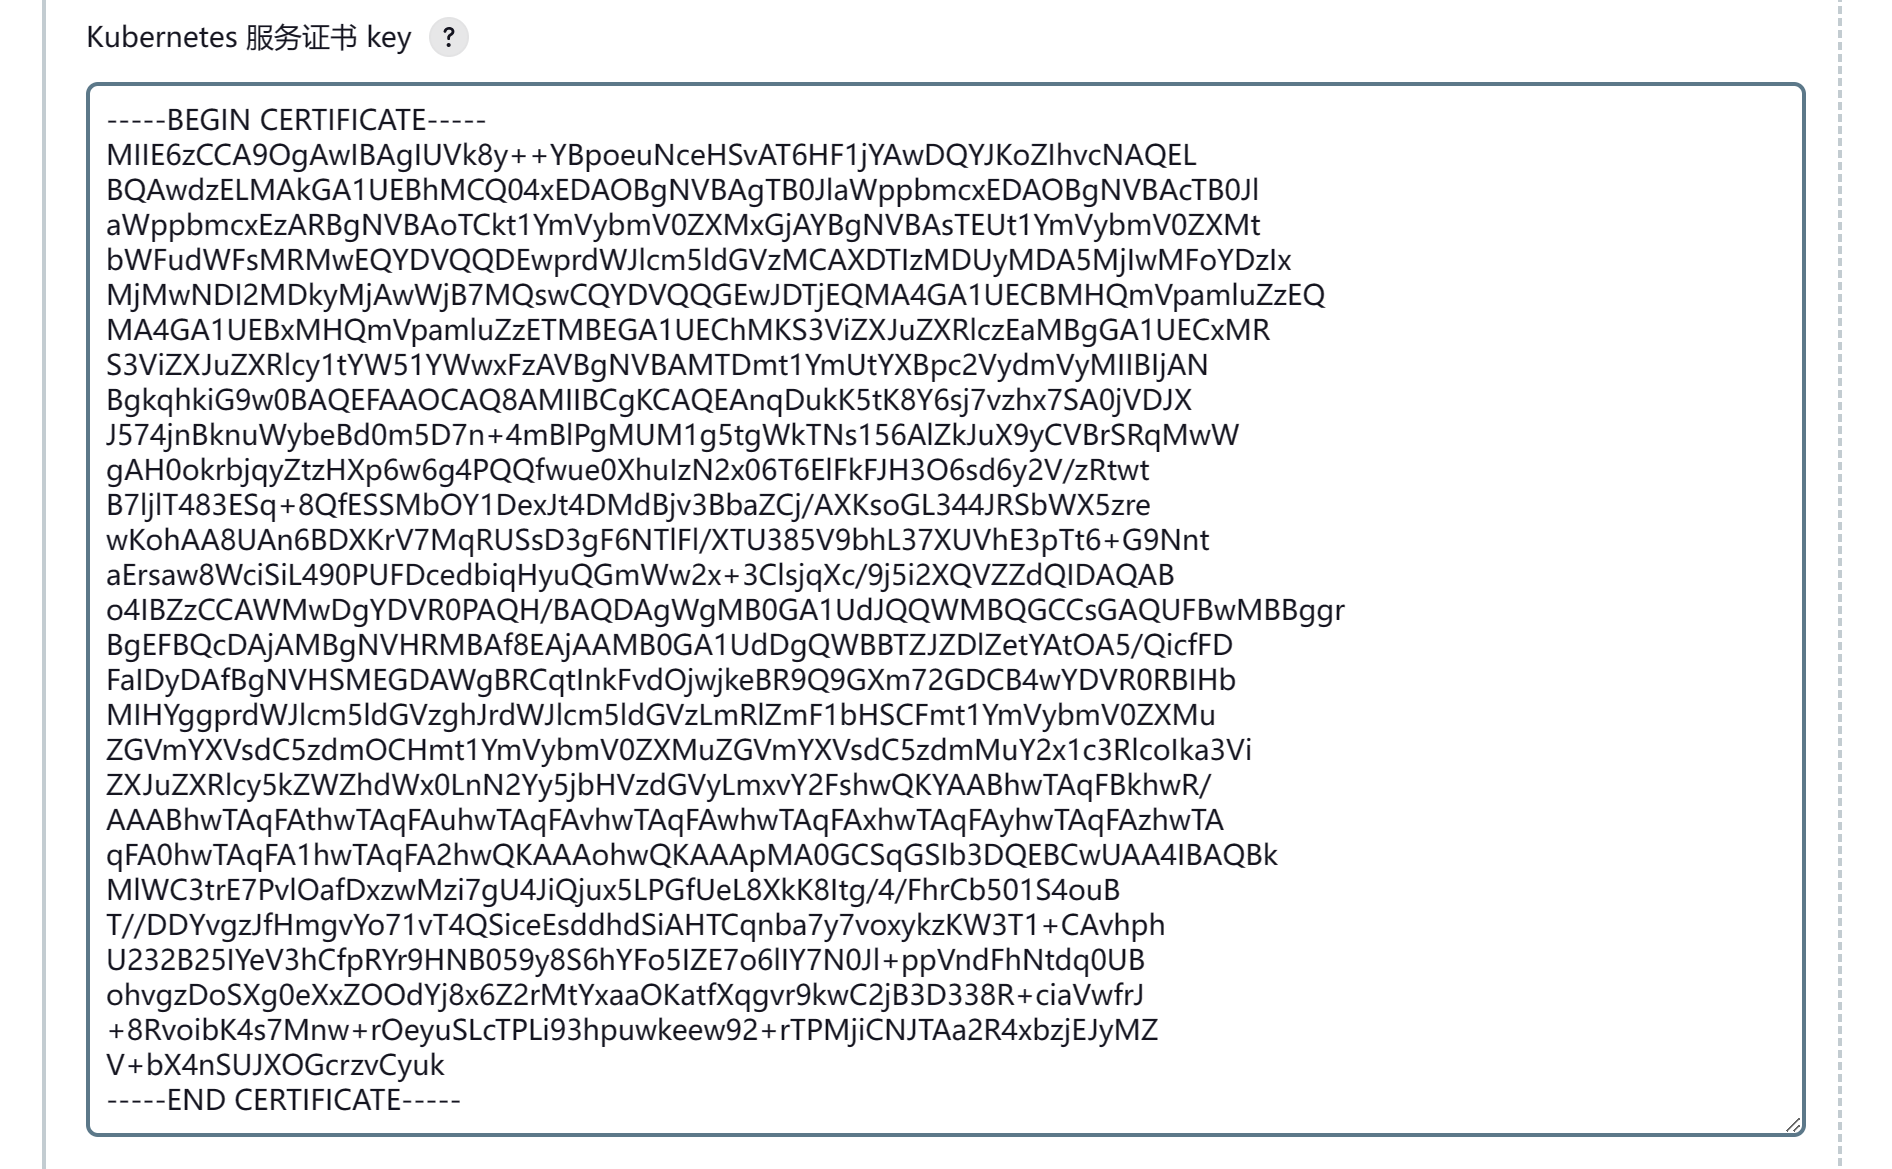
Kubernetes 服务证书 key:apiserver.pem文件内容
-
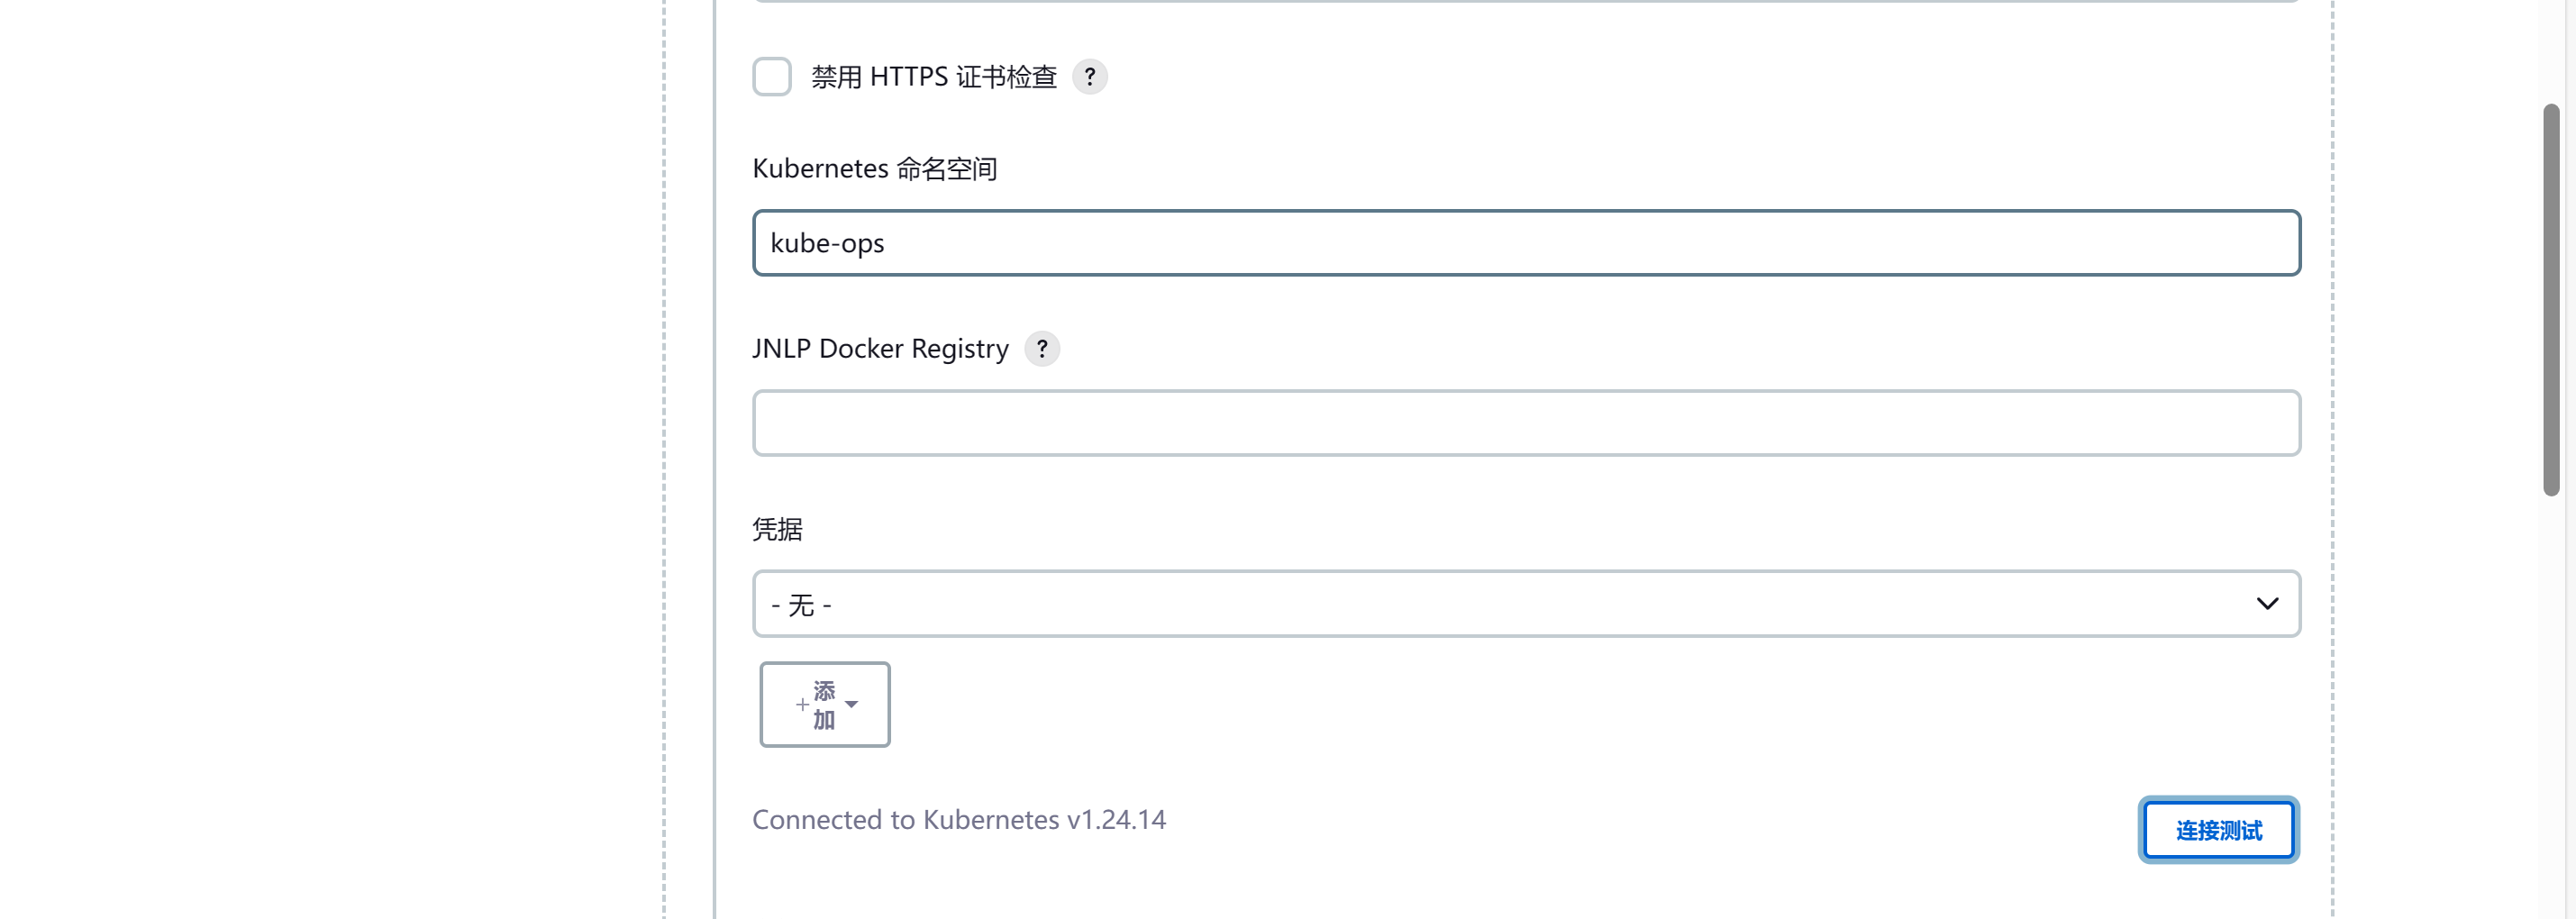
namespace填
kube-ops(Jenkins所在的命名空间),然后点击Test Connection,如果出现 Connection test successful 的提示信息证明 Jenkins 已经可以和 Kubernetes 系统正常通信 -
凭据:/root/.kube/config 然后去连接测试
-
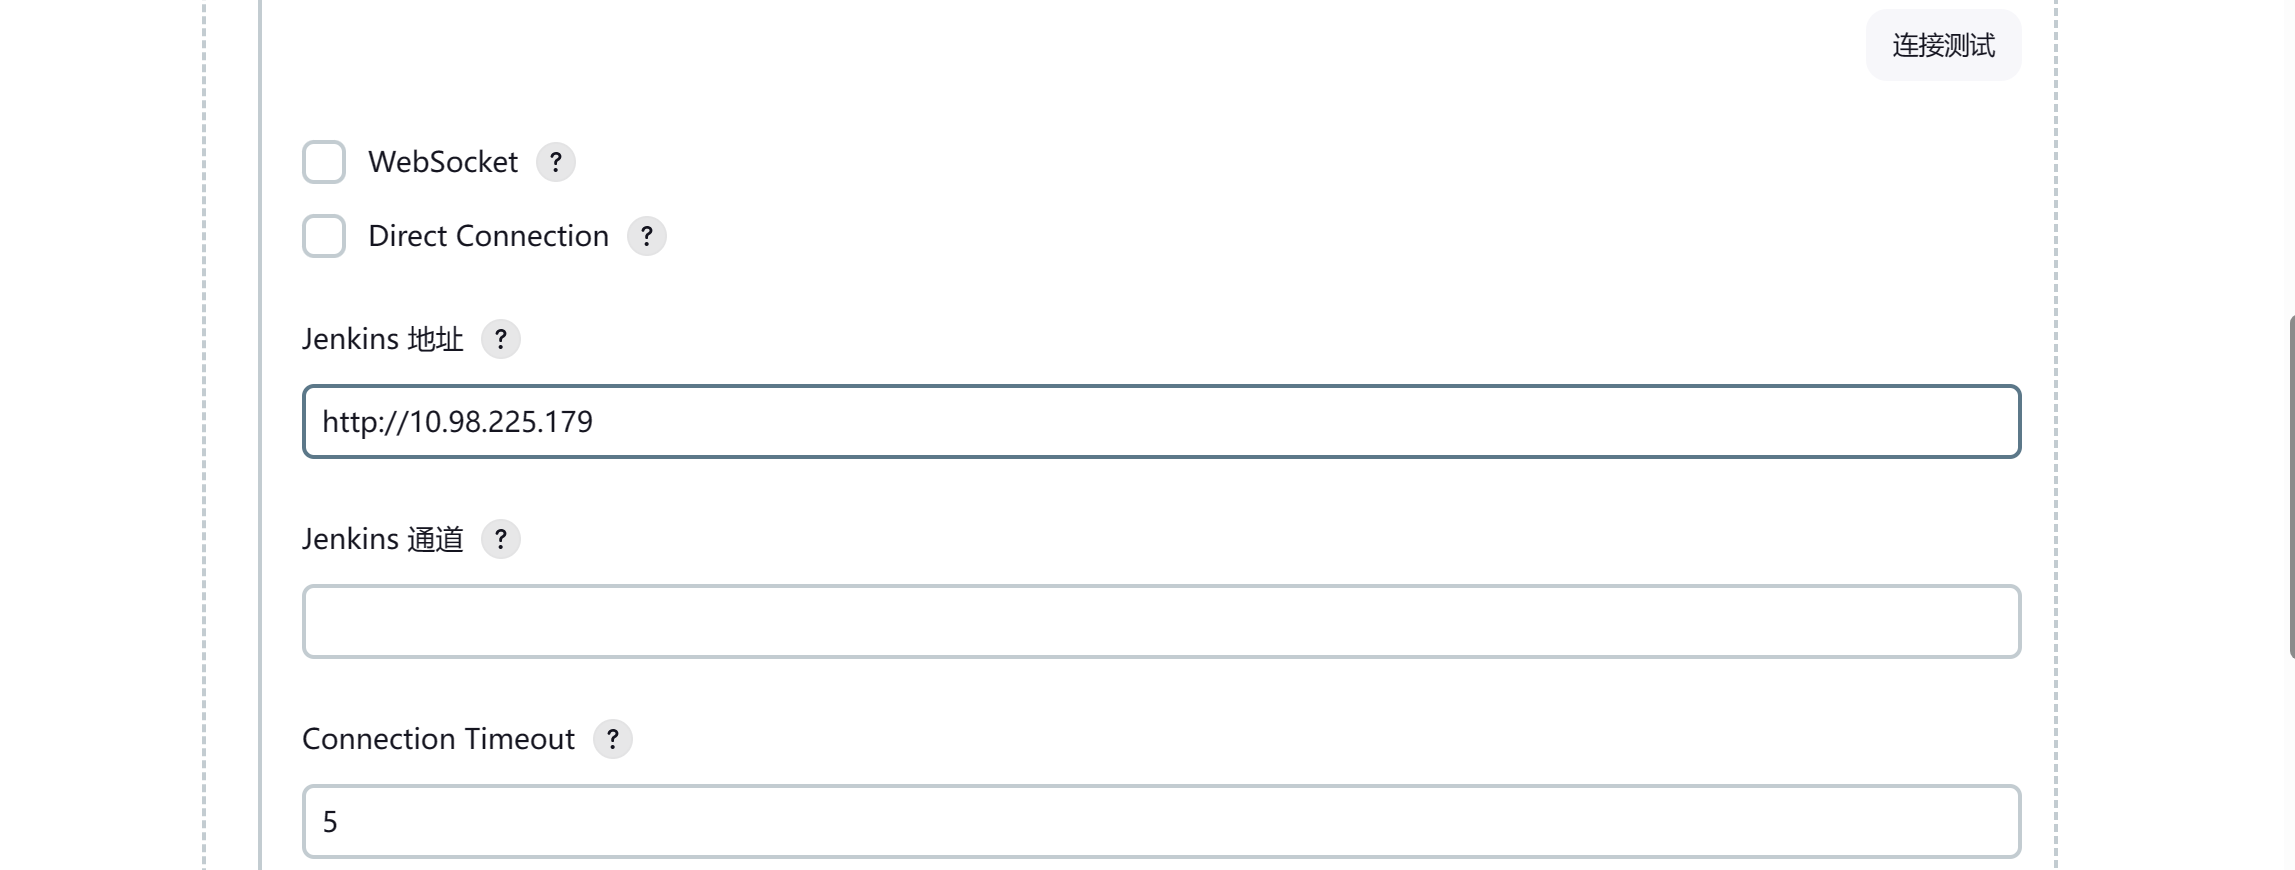
Jenkins 地址:http://10.98.225.179 (Jenkins的svc地址,80端口指向了8080,所以没有写端口。)
-
Pod Label:jenkins:slave

apiserver.pem
podTemplate(containers: [
    containerTemplate(name: 'golang', image: 'golang:1.16.5', command: 'sleep', args: '99d')
  ]) {
    node(POD_LABEL) {
        stage('Get a Golang project') {
            git url: 'https://github.com/hashicorp/terraform.git', branch: 'main'
            container('golang') {
                stage('Build a Go project') {
                    sh '''
                    mkdir -p /go/src/github.com/hashicorp
                    ln -s `pwd` /go/src/github.com/hashicorp/terraform
                    cd /go/src/github.com/hashicorp/terraform && make
                    '''
                }
            }
        }
    }
}
执行结果有报错,至少可以证明是能去启动pod去构建的。
JNLP(Java Network Launch Protocol)在 Jenkins 中可以使用 Kubernetes 插件来启动 pod,这对于需要在容器中运行构建的构建任务非常有用。
使用 JNLP 和 Kubernetes 插件,Jenkins 可以轻松地将构建任务转换为 Kubernetes pod 中运行的容器,这些容器可以访问配置的环境和工具来执行构建。在 JNLP pod 中运行构建任务具有以下优点:
-
可以在 pod 中精确地设置所需的执行环境和配置,以确保构建任务的可靠性和一致性。
-
可以通过 Kubernetes 资源限制和进程隔离机制来控制容器的资源占用和性能,以保证构建任务在可控的范围内。
-
支持水平伸缩,即可以在需要更多代理的同时增加更多的 pod。
因此,使用 JNLP 来启动 Kubernetes pod 可以为 Jenkins 构建流程带来更大的灵活性、可伸缩性和可控性。
公众号:https://mp.weixin.qq.com/s/ndy3qKEuokX-Oi8e-rSwPw

 浙公网安备 33010602011771号