Swagger与OAuth 手动搭建WebApi 操作笔记
1、创建一个空的Web应用程序
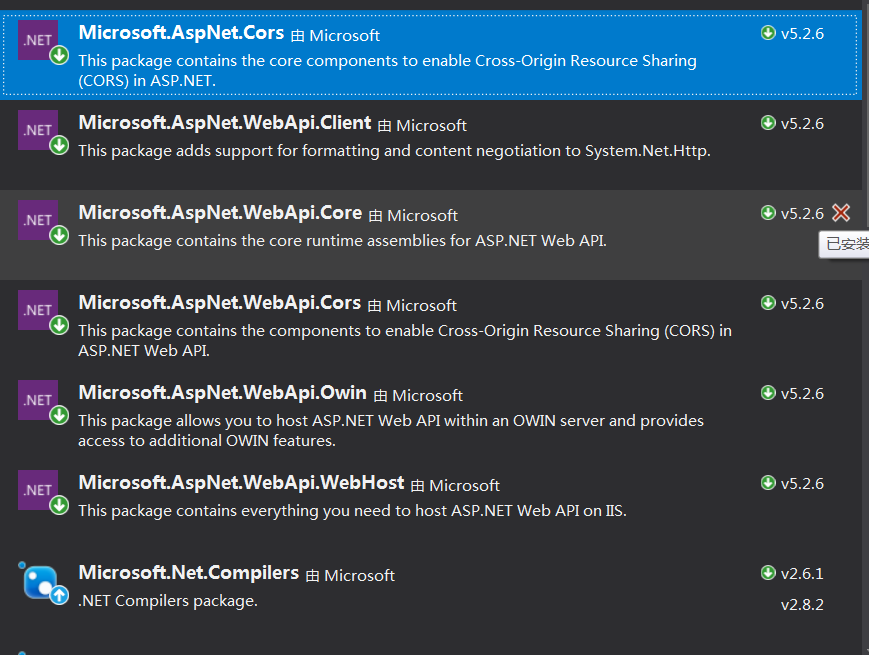
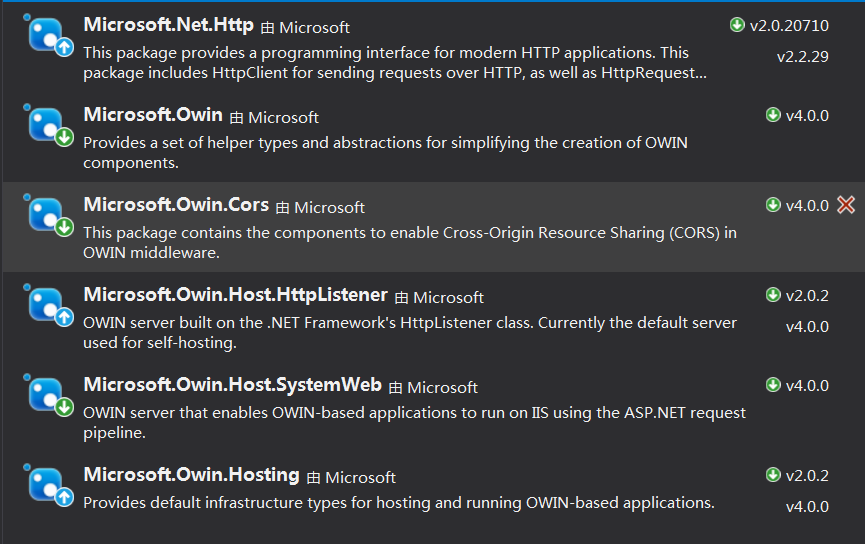
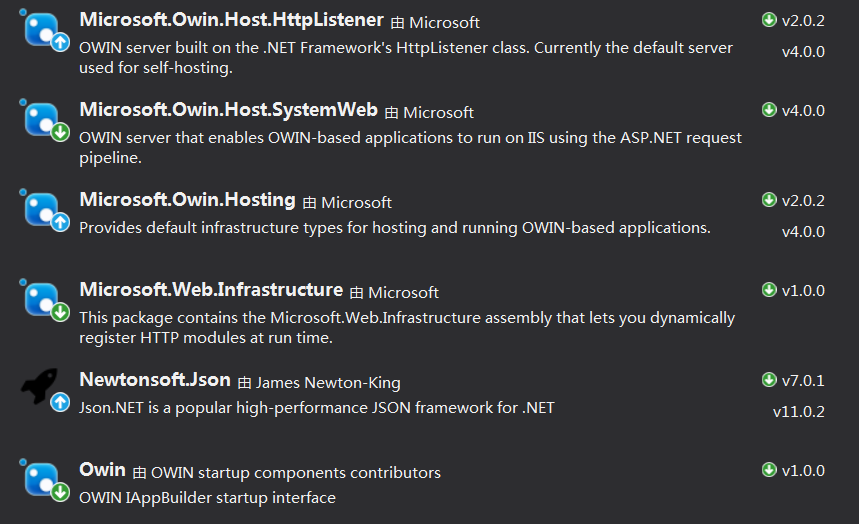
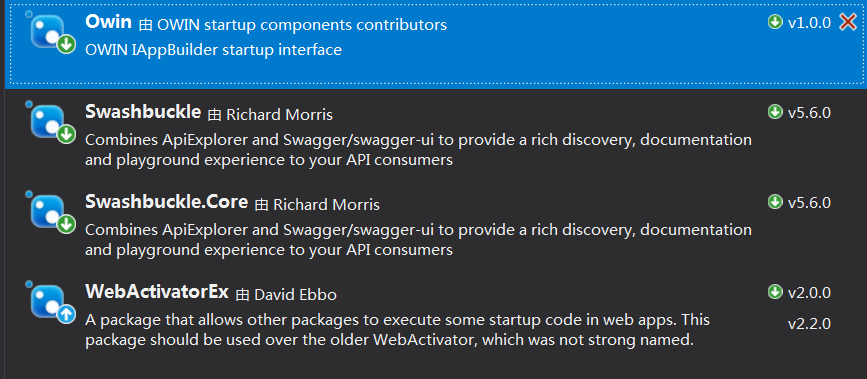
2、通过nuget 安装以下插件清单,有部分会在安装其他插件时候自动安装:
3、安装完Swagger 会生成一个目录App_Start,在这个目录中增加文件ApiConfig.cs 配置路由相关信息
  public static void Register(HttpConfiguration config)
        {
            var appsettings = ConfigurationManager.AppSettings;

            //跨域配置
            var corsAttr = new EnableCorsAttribute("*", "*", "*");
            config.EnableCors(corsAttr);
            config.MapHttpAttributeRoutes();
            config.Routes.MapHttpRoute(
               name: "Default",
               routeTemplate: "api/{controller}/{id}",
               defaults: new { id = RouteParameter.Optional }
           );
        }
添加文件 CustomApiExplorer.cs 重写ApiExplorer中的ShouldExploreController方法,对路由进行重定向
        /// <summary>
        /// 构造方法
        /// </summary>
        /// <param name="configuration"></param>
        public CustomApiExplorer(HttpConfiguration configuration) : base(configuration)
        {
        }
        //public override bool ShouldExploreAction(string actionVariableValue, HttpActionDescriptor actionDescriptor, IHttpRoute route)
        //{
        //    return base.ShouldExploreAction(actionVariableValue, actionDescriptor, route);
        //}
        public override bool ShouldExploreController(string controllerVariableValue, HttpControllerDescriptor controllerDescriptor, IHttpRoute route)
        {
            return base.ShouldExploreController(controllerVariableValue, controllerDescriptor, route);
        }
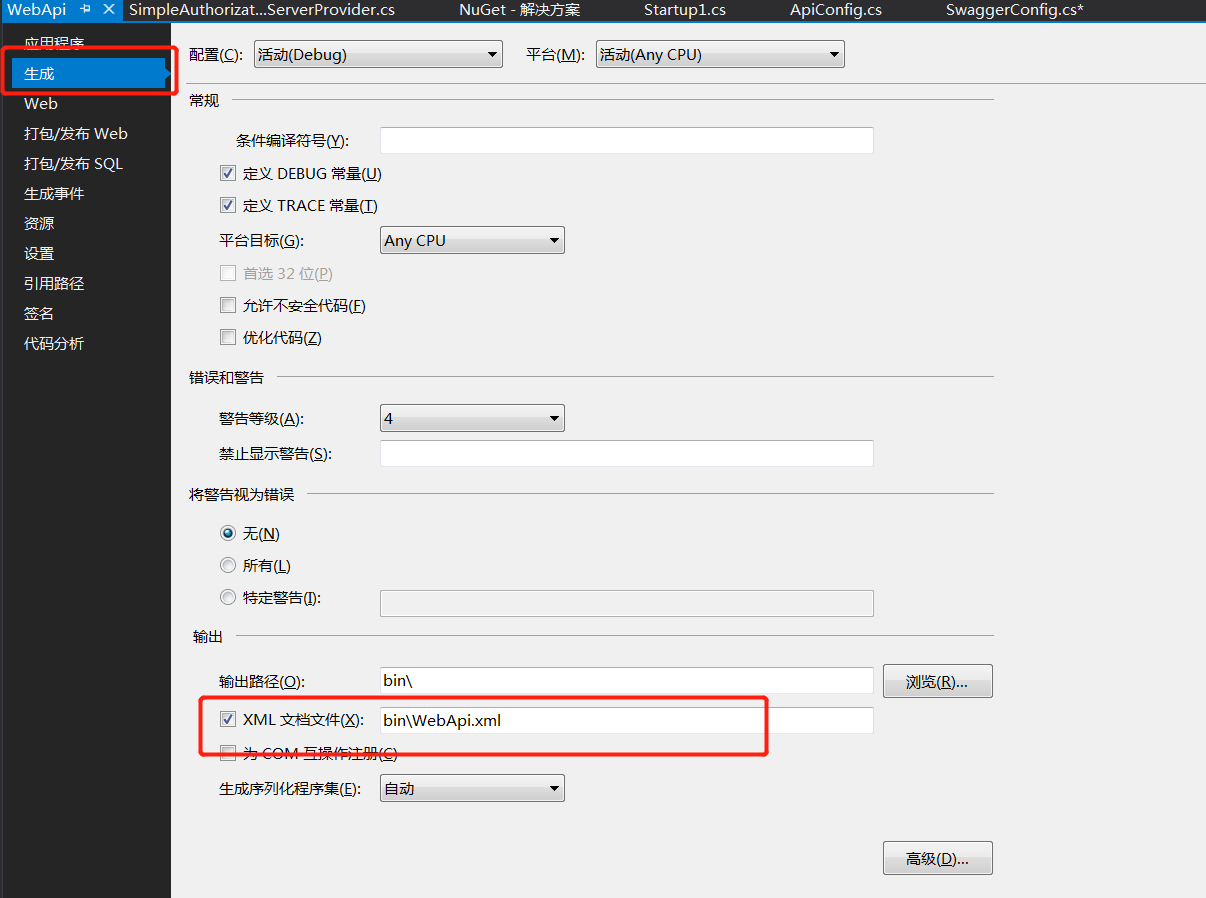
修改 SwaggerConfig中代码; WebApi.xml 中记录Swagger接口的描述信息
 public static void Register()
        {
            var thisAssembly = typeof(SwaggerConfig).Assembly;

            GlobalConfiguration.Configuration
                .EnableSwagger(c =>
                    {
                        c.SingleApiVersion("v1", "WebApi");

                        c.IncludeXmlComments(GetXmlCommentsPath());

                    })
                .EnableSwaggerUi(c =>
                    {
                    });
        }
        private static string GetXmlCommentsPath()
        {
            return System.String.Format(@"{0}\bin\WebApi.xml", System.AppDomain.CurrentDomain.BaseDirectory);
        }
修改工程配置信息
使用 OWIN 方式实现 创建 Startup 文件:
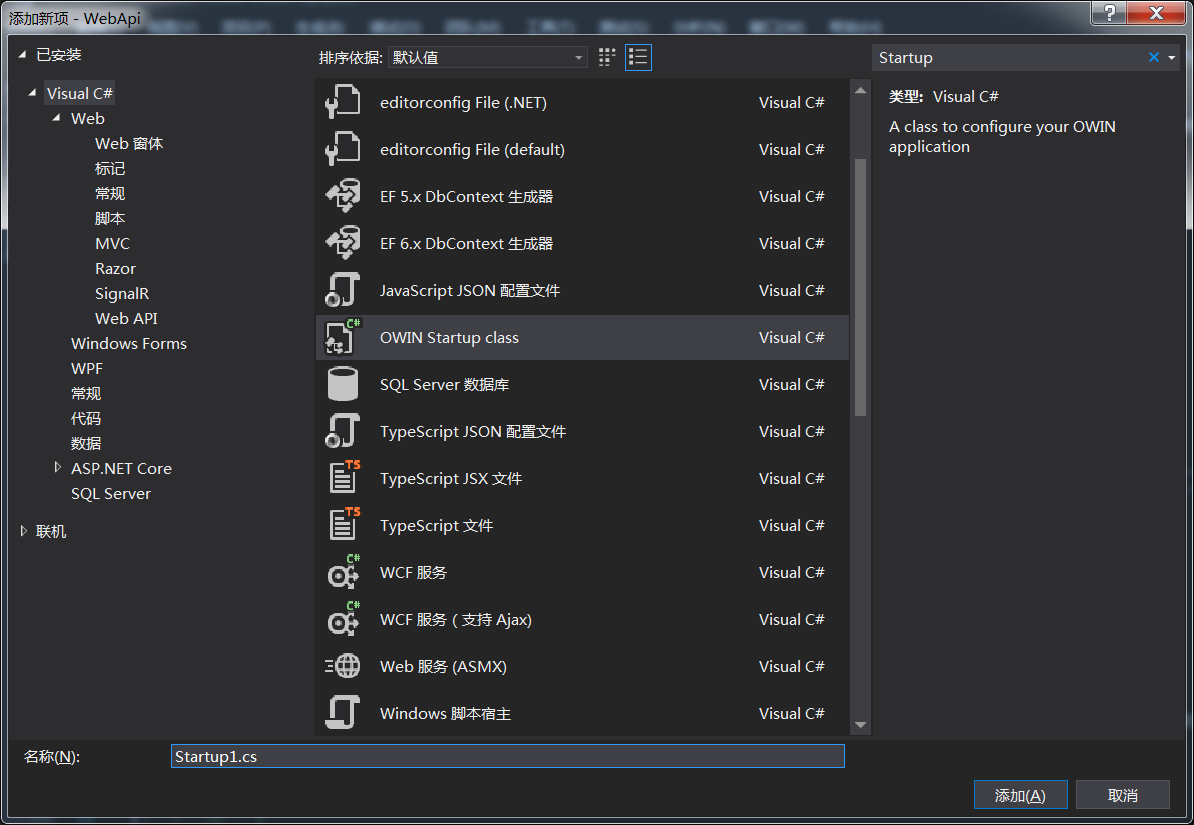
创建完成后修改代码:
 public void Configuration(IAppBuilder app)
        {


            HttpConfiguration config = new HttpConfiguration();
            ApiConfig.Register(config);
            app.UseCors(CorsOptions.AllowAll);
            app.UseWebApi(config);


            //初始化
            GlobalConfiguration.Configure(ApiConfig.Register);
            //重订路由
            GlobalConfiguration.Configuration.Services.Replace(typeof(IApiExplorer), new CustomApiExplorer(GlobalConfiguration.Configuration));
        }
使用Global.asax实现;添加全局文件Global.asax,在Application_Start方法中对路由进行重订
        protected void Application_Start(object sender, EventArgs e)
        {
            //初始化
            GlobalConfiguration.Configure(ApiConfig.Register);
            //重订路由
            GlobalConfiguration.Configuration.Services.Replace(typeof(IApiExplorer), new CustomApiExplorer(GlobalConfiguration.Configuration));
        }
到这里配置相关已经处理完成,创建Controller文件夹配置接口,在文件夹中创建文件DemoController.cs
 [RoutePrefix("api/DemoTest")]
    public class DemoController : ApiController
    {
        [HttpGet]
        [Route("Hello")]
        public string GetList()
        {
            return "Hello";
        }
    }
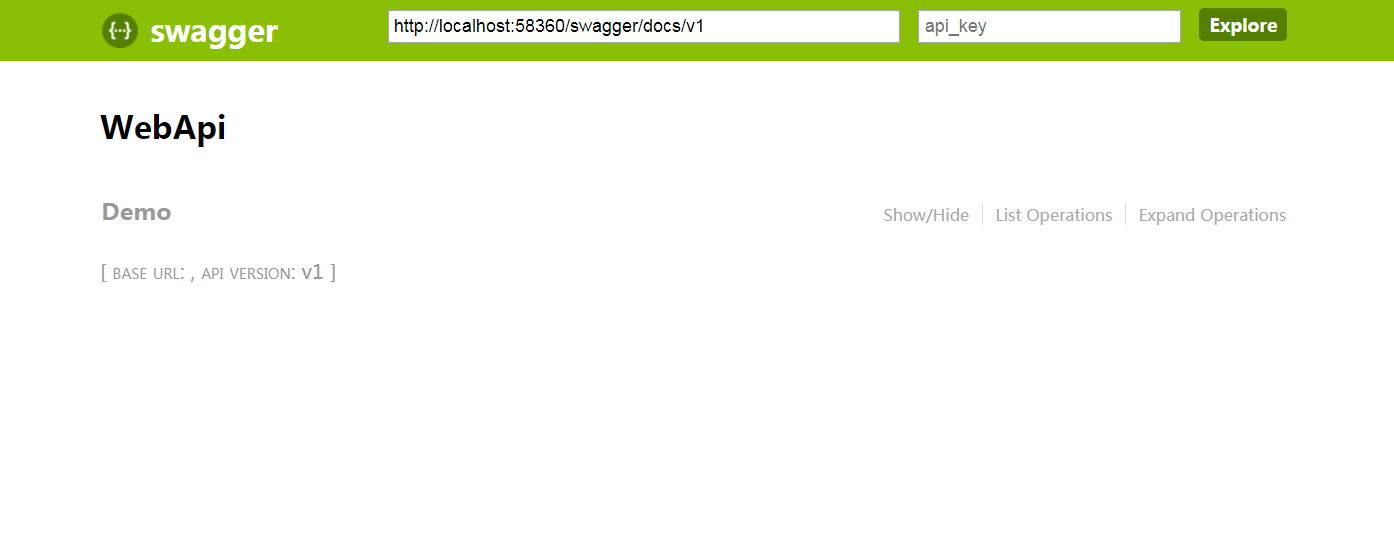
到这里Swagger配置以及全部完成,直接运行,在浏览器中输入http://localhost:58360/swagger 即可查看结果
开始配置验证功能,这里我使用的是OAuth ;
首先在Nuget中安装 Microsoft.Owin.Security.OAuth
安装完成后创建 SimpleAuthorizationServerProvider 文件,在这个文件中重写Oauth方法, 在此文件中做用户验证等操作
 public class SimpleAuthorizationServerProvider : OAuthAuthorizationServerProvider
    {


        public override Task ValidateClientAuthentication(OAuthValidateClientAuthenticationContext context)
        {
            context.Validated();
            return Task.FromResult<object>(null);
        }

        public override async Task GrantResourceOwnerCredentials(OAuthGrantResourceOwnerCredentialsContext context)
        {
            context.OwinContext.Response.Headers.Add("Access-Control-Allow-Origin", new[] { "*" });
            var isLogin = false;// UsersBase.Login(context.UserName, context.Password);
            if (!isLogin)
            {
                context.SetError("Error", "账号密码验证失败");
                return;
            }
            var identity = new ClaimsIdentity(context.Options.AuthenticationType);
            identity.AddClaim(new Claim("sub", context.UserName));
            identity.AddClaim(new Claim("role", "user"));
            context.Validated(identity);

        }
    }
创建 SimpleRefreshTokenProvider 文件 重写OauthToken生成规则
    public class SimpleRefreshTokenProvider : AuthenticationTokenProvider
    {
        private static ConcurrentDictionary<string, string> _refreshTokens = new ConcurrentDictionary<string, string>();

        /// <summary>
        /// 生成 refresh_token
        /// </summary>
        public override void Create(AuthenticationTokenCreateContext context)
        {
            context.Ticket.Properties.IssuedUtc = DateTime.UtcNow;
            context.Ticket.Properties.ExpiresUtc = DateTime.UtcNow.AddDays(60);

            context.SetToken(Guid.NewGuid().ToString("n"));
            _refreshTokens[context.Token] = context.SerializeTicket();
        }

        /// <summary>
        /// 由 refresh_token 解析成 access_token
        /// </summary>
        public override void Receive(AuthenticationTokenReceiveContext context)
        {
            string value;
            if (_refreshTokens.TryRemove(context.Token, out value))
            {
                context.DeserializeTicket(value);
            }
        }
    }
修改 Startup1文件中代码
  public void Configuration(IAppBuilder app)
        {

            ConfigAuth(app);
            HttpConfiguration config = new HttpConfiguration();
            ApiConfig.Register(config);
            app.UseCors(CorsOptions.AllowAll);
            app.UseWebApi(config);


            //初始化
            GlobalConfiguration.Configure(ApiConfig.Register);
            //重订路由
            GlobalConfiguration.Configuration.Services.Replace(typeof(IApiExplorer), new CustomApiExplorer(GlobalConfiguration.Configuration));
        }
        public void ConfigAuth(IAppBuilder app)
        {
            OAuthAuthorizationServerOptions option = new OAuthAuthorizationServerOptions()
            {
                AllowInsecureHttp = true,
                TokenEndpointPath = new PathString("/token"), //获取 access_token 授权服务请求地址
                AccessTokenExpireTimeSpan = TimeSpan.FromDays(1), //access_token 过期时间
                Provider = new SimpleAuthorizationServerProvider(), //access_token 相关授权服务
                RefreshTokenProvider = new SimpleRefreshTokenProvider() //refresh_token 授权服务
            };
            app.UseOAuthAuthorizationServer(option);
            app.UseOAuthBearerAuthentication(new OAuthBearerAuthenticationOptions());
        }
接口启用验证;[Authorize] 代表此模块需要身份验证, [AllowAnonymous] 代表此方法不需要验证
    [RoutePrefix("api/DemoTest")]
    [Authorize]
    public class DemoController : ApiController
    {
        [HttpGet]
        [Route("Hello")]
        [AllowAnonymous]
        public string GetList()
        {
            return "Hello";
        }
        [HttpPost]
        [Route("Hello2")]
        public string GetToken(string userName,string userPwd)
        {
            //new SimpleRefreshTokenProvider().Create(new AuthenticationTokenCreateContext(Owin.IAppBuilder) context);
            return "Hello";
        }
    }
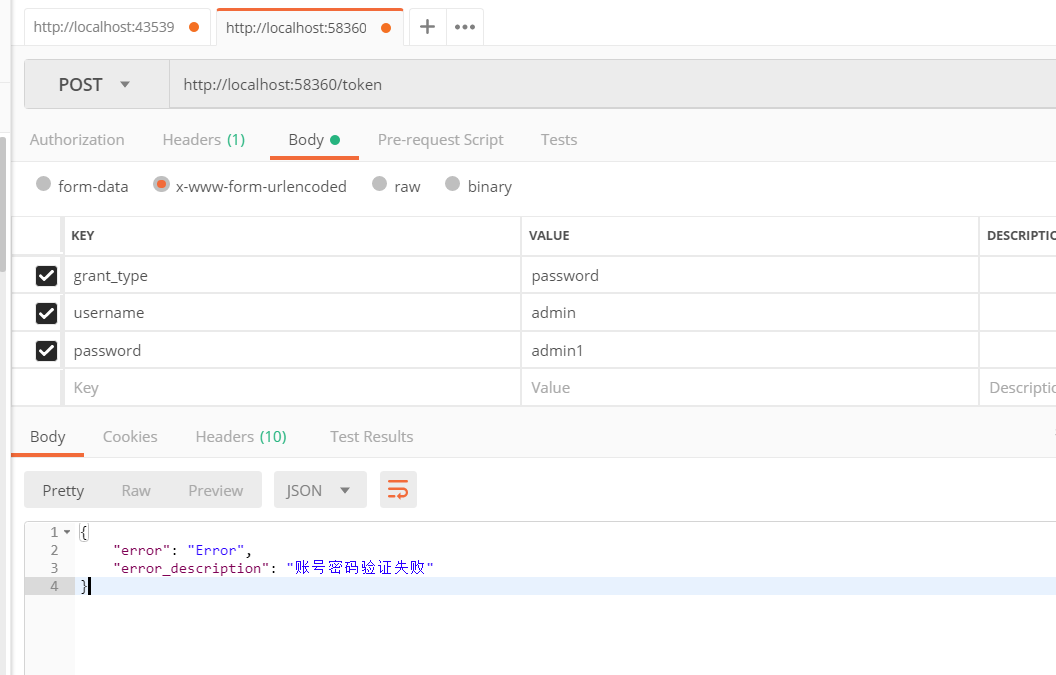
Oauth已经配置完成,现在直接运行项目,由于是Post请求我这边使用Postman进行验证接口

 浙公网安备 33010602011771号