60分钟内从零起步驾驭Hive实战学习笔记(Ubuntu里安装mysql)
本博文的主要内容是:
1. Hive本质解析
2. Hive安装实战
3. 使用Hive操作搜索引擎数据实战
SparkSQL前身是Shark,Shark强烈依赖于Hive。Spark原来没有做SQL多维度数据查询工具,后来开发了Shark,Shark依赖于Hive的解释引擎,部分在Spark中运行,还有一部分在Hadoop中运行。所以讲SparkSQL必须讲Hive。
1. Hive本质解析
1. Hive是分布式数据仓库,同时又是查询引擎,所以SparkSQL取代的只是Hive的查询引擎,在企业实际生产环境下,Hive+SparkSQL是目前最为经典的数据分析组合。
2. Hive本身就是一个简单单机版本的软件,主要负责:
a) 把HQL翻译成Mapper(s)-Reducer-Mapper(s)的代码,并且可能产生很多MapReduce的Job。
b) 把生成的MapReduce代码及相关资源打包成jar并发布到Hadoop集群中运行(这一切都是自动的)
3.Hive本身的架构如下所示:
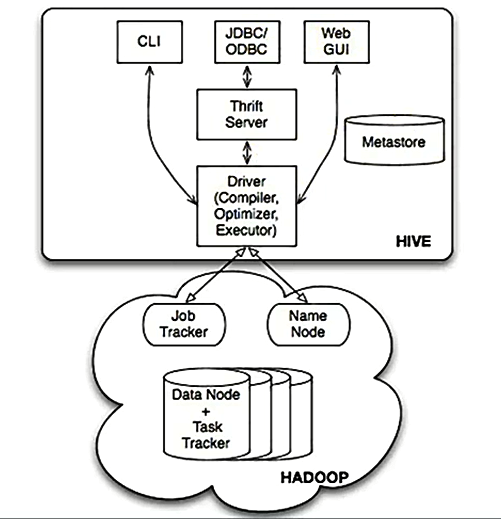
可以通过CLI(命令终端)、JDBC/ODBC、Web GUI访问Hive。
JavaEE或.net程序可以通过Hive处理,再把处理的结果展示给用户。
也可以直接通过Web页面操作Hive。
※ Hive本身只是一个单机版本的的软件,怎么访问HDFS的呢?
=> 在Hive用Table的方式插入数据、检索数据等,这就需要知道数据放在HDFS的什么地方以及什么地方属于什么数据,Metastore就是保存这些元数据信息的。Hive通过访问元数据信息再去访问HDFS上的数据。
可以看出HDFS不是一个真实的文件系统,是虚拟的,是逻辑上的,HDFS只是一套软件而已,它是管理不同机器上的数据的,所以需要NameNode去管理元数据。DataNode去管理数据。
Hive通过Metastore和NameNode打交道。
2、Hive安装和配置实战
由于,我这里,Spark的版本是1.5.2。
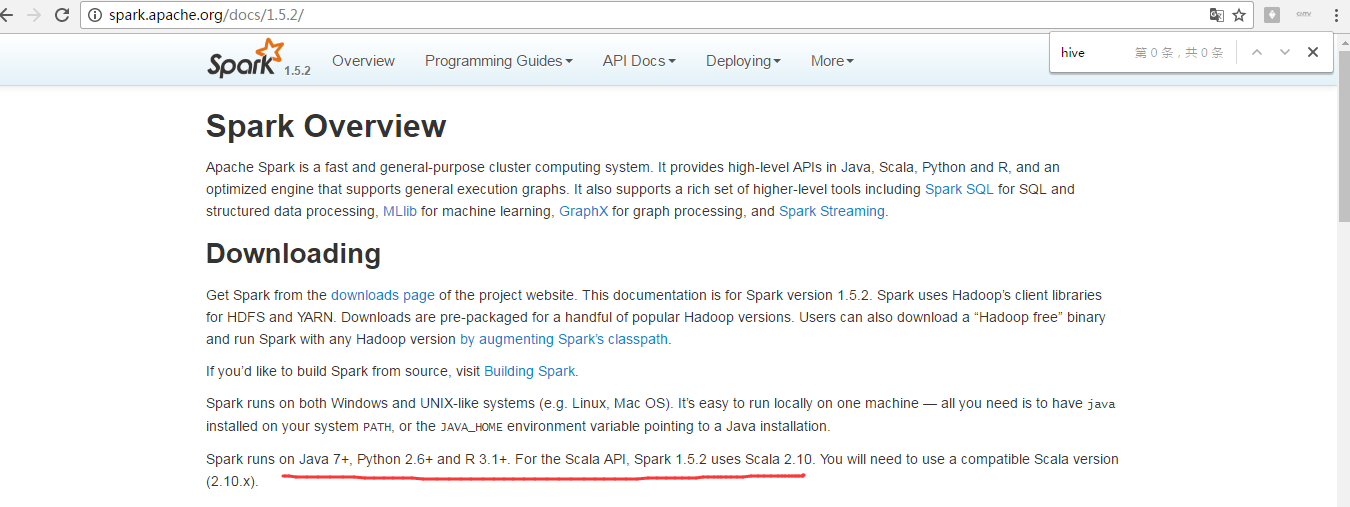
Spark1.5.2中SparkSQL可以指定具体的Hive的版本。
1. 从apache官网下载hive-1.2.1
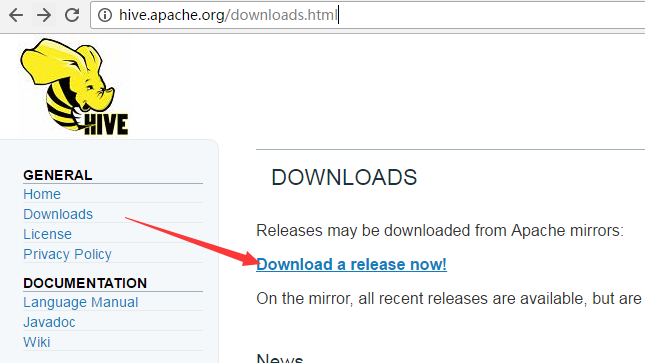
https://mirrors.tuna.tsinghua.edu.cn/apache/hive/
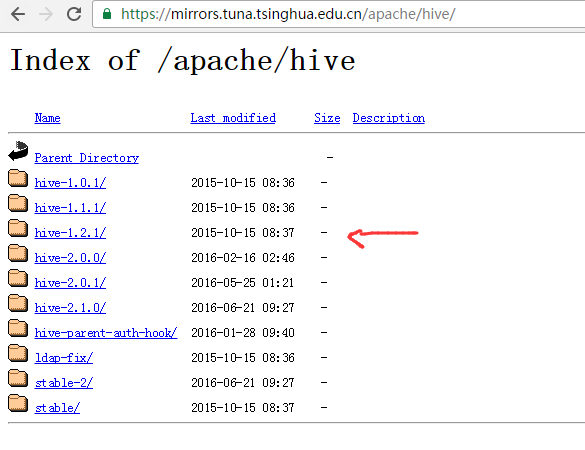

2、apache-hive-1.2.1-bin.tar.gz的上传

3、现在,新建/usr/loca/下的hive目录

root@SparkSingleNode:/usr/local# pwd
/usr/local
root@SparkSingleNode:/usr/local# ls
bin etc games hadoop include jdk lib man sbin scala share spark src
root@SparkSingleNode:/usr/local# mkdir -p /usr/local/hive
root@SparkSingleNode:/usr/local# cd hive
root@SparkSingleNode:/usr/local/hive# ls
root@SparkSingleNode:/usr/local/hive#
4、将下载的hive文件移到刚刚创建的/usr/local/hive下

root@SparkSingleNode:/usr/local/hive# ls
root@SparkSingleNode:/usr/local/hive# sudo cp /home/spark/Downloads/Spark_Cluster_Software/apache-hive-1.2.1-bin.tar.gz /usr/local/hive/
root@SparkSingleNode:/usr/local/hive# ls
apache-hive-1.2.1-bin.tar.gz
root@SparkSingleNode:/usr/local/hive#
最好用cp,不要轻易要mv
5、解压hive文件

root@SparkSingleNode:/usr/local/hive# ls
apache-hive-1.2.1-bin.tar.gz
root@SparkSingleNode:/usr/local/hive# tar -zxvf apache-hive-1.2.1-bin.tar.gz
6、删除解压包,留下解压完成的文件目录,并修改权限(这是最重要的!!!),其中,还重命名

root@SparkSingleNode:/usr/local/hive# ls
apache-hive-1.2.1-bin apache-hive-1.2.1-bin.tar.gz
root@SparkSingleNode:/usr/local/hive# rm -rf apache-hive-1.2.1-bin.tar.gz
root@SparkSingleNode:/usr/local/hive# ls
apache-hive-1.2.1-bin
root@SparkSingleNode:/usr/local/hive# ll
total 12
drwxr-xr-x 3 root root 4096 10月 9 17:39 ./
drwxr-xr-x 15 root root 4096 10月 9 17:35 ../
drwxr-xr-x 8 root root 4096 10月 9 17:38 apache-hive-1.2.1-bin/
root@SparkSingleNode:/usr/local/hive# mv apache-hive-1.2.1-bin/ apache-hive-1.2.1
root@SparkSingleNode:/usr/local/hive# ll
total 12
drwxr-xr-x 3 root root 4096 10月 9 17:40 ./
drwxr-xr-x 15 root root 4096 10月 9 17:35 ../
drwxr-xr-x 8 root root 4096 10月 9 17:38 apache-hive-1.2.1/
root@SparkSingleNode:/usr/local/hive# chown -R spark:spark apache-hive-1.2.1/
root@SparkSingleNode:/usr/local/hive# ll
total 12
drwxr-xr-x 3 root root 4096 10月 9 17:40 ./
drwxr-xr-x 15 root root 4096 10月 9 17:35 ../
drwxr-xr-x 8 spark spark 4096 10月 9 17:38 apache-hive-1.2.1/
root@SparkSingleNode:/usr/local/hive#
7、修改环境变量
vim ~./bash_profile 或 vim /etc/profile
配置在这个文件~/.bash_profile,或者也可以,配置在那个全局的文件里,也可以哟。/etc/profile。
这里,我vim /etc/profile
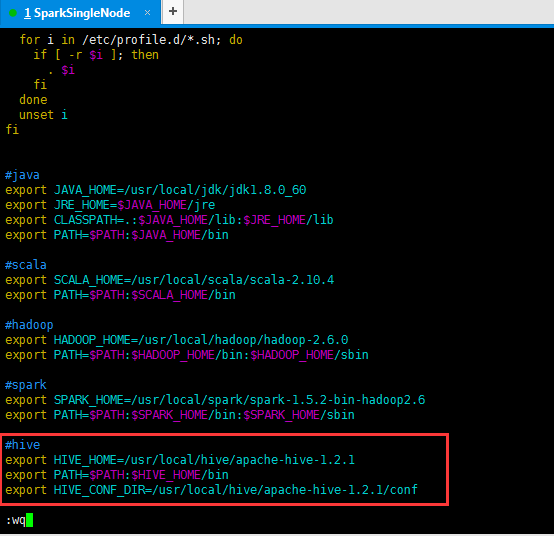
#hive
export HIVE_HOME=/usr/local/hive/apache-hive-1.2.1
export PATH=$PATH:$HIVE_HOME/bin
export HIVE_CONF_DIR=/usr/local/hive/apache-hive-1.2.1/conf

root@SparkSingleNode:/usr/local/hive# vim /etc/profile
root@SparkSingleNode:/usr/local/hive# source /etc/profile
8、配置hive
8.1 配置hive-env.sh文件
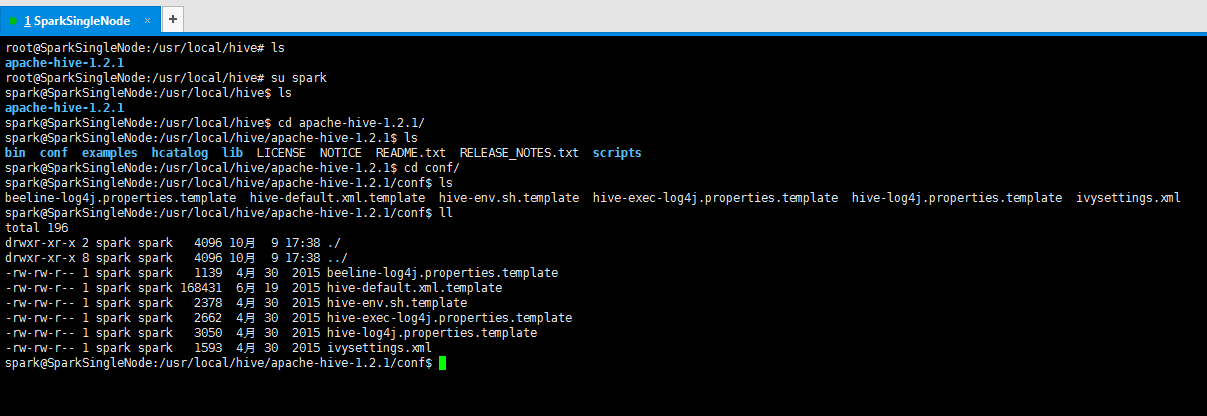
cp hive-env.sh.template hive-env.sh

spark@SparkSingleNode:/usr/local/hive/apache-hive-1.2.1/conf$ ls
beeline-log4j.properties.template hive-default.xml.template hive-env.sh.template hive-exec-log4j.properties.template hive-log4j.properties.template ivysettings.xml
spark@SparkSingleNode:/usr/local/hive/apache-hive-1.2.1/conf$ cp hive-env.sh.template hive-env.sh
spark@SparkSingleNode:/usr/local/hive/apache-hive-1.2.1/conf$ ls
beeline-log4j.properties.template hive-default.xml.template hive-env.sh hive-env.sh.template hive-exec-log4j.properties.template hive-log4j.properties.template ivysettings.xml
spark@SparkSingleNode:/usr/local/hive/apache-hive-1.2.1/conf$ rm hive-env.sh.template
spark@SparkSingleNode:/usr/local/hive/apache-hive-1.2.1/conf$ ls
beeline-log4j.properties.template hive-default.xml.template hive-env.sh hive-exec-log4j.properties.template hive-log4j.properties.template ivysettings.xml
spark@SparkSingleNode:/usr/local/hive/apache-hive-1.2.1/conf$ vim hive-env.sh

export HIVE_HOME=/usr/local/hive/apache-hive-1.2.1
export PATH=$PATH:$HIVE_HOME/bin
export HIVE_CONF_DIR=/usr/local/hive/apache-hive-1.2.1/conf
8.2 配置hive-env.sh文件

spark@SparkSingleNode:/usr/local/hive/apache-hive-1.2.1/conf$ ls
beeline-log4j.properties.template hive-default.xml.template hive-env.sh hive-exec-log4j.properties.template hive-log4j.properties.template ivysettings.xml
spark@SparkSingleNode:/usr/local/hive/apache-hive-1.2.1/conf$ cp hive-default.xml.template hive-site.xml
spark@SparkSingleNode:/usr/local/hive/apache-hive-1.2.1/conf$ ls
beeline-log4j.properties.template hive-default.xml.template hive-env.sh hive-exec-log4j.properties.template hive-log4j.properties.template hive-site.xml ivysettings.xml
spark@SparkSingleNode:/usr/local/hive/apache-hive-1.2.1/conf$ rm hive-default.xml.template
spark@SparkSingleNode:/usr/local/hive/apache-hive-1.2.1/conf$ ls
beeline-log4j.properties.template hive-env.sh hive-exec-log4j.properties.template hive-log4j.properties.template hive-site.xml ivysettings.xml
spark@SparkSingleNode:/usr/local/hive/apache-hive-1.2.1/conf$ vim hive-site.xml
Hive默认情况下放元数据的数据库是Derby,遗憾的是Derby是单用户,所以在生产环境下一般会采用支持多用户的数据库来进行MetaStore,且进行Master-Slaves主从读写分离和备份(一般Master节点负责写数据,Slaves节点负责读数据)。最常用的是MySQL。
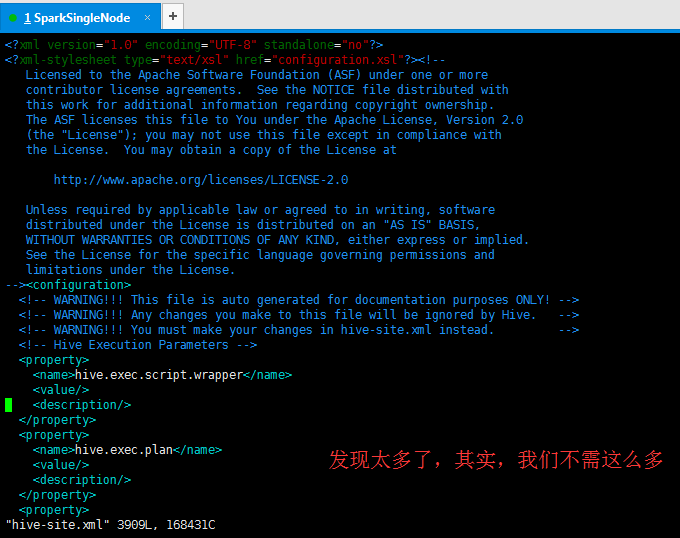
于是,删除它,在本地上写好,上传即可。
或者,
学个技巧,如何快速的搜索。 先按Esc,再按Shift,再 . 键 + / 键
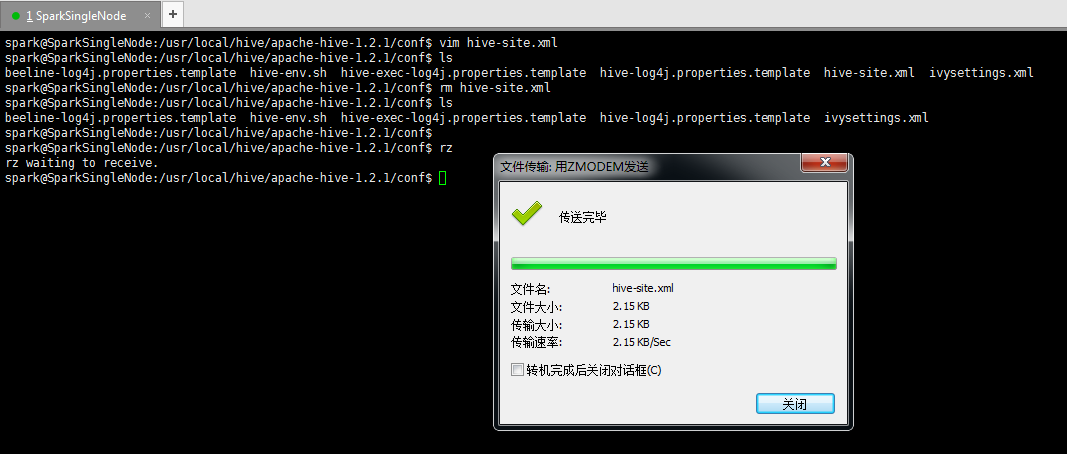
spark@SparkSingleNode:/usr/local/hive/apache-hive-1.2.1/conf$ vim hive-site.xml
spark@SparkSingleNode:/usr/local/hive/apache-hive-1.2.1/conf$ ls
beeline-log4j.properties.template hive-env.sh hive-exec-log4j.properties.template hive-log4j.properties.template hive-site.xml ivysettings.xml
spark@SparkSingleNode:/usr/local/hive/apache-hive-1.2.1/conf$ rm hive-site.xml
spark@SparkSingleNode:/usr/local/hive/apache-hive-1.2.1/conf$ ls
beeline-log4j.properties.template hive-env.sh hive-exec-log4j.properties.template hive-log4j.properties.template ivysettings.xml
spark@SparkSingleNode:/usr/local/hive/apache-hive-1.2.1/conf$
spark@SparkSingleNode:/usr/local/hive/apache-hive-1.2.1/conf$ rz
rz waiting to receive.
spark@SparkSingleNode:/usr/local/hive/apache-hive-1.2.1/conf$ ls
beeline-log4j.properties.template hive-env.sh hive-exec-log4j.properties.template hive-log4j.properties.template hive-site.xml ivysettings.xml
spark@SparkSingleNode:/usr/local/hive/apache-hive-1.2.1/conf$ vim hive-site.xml
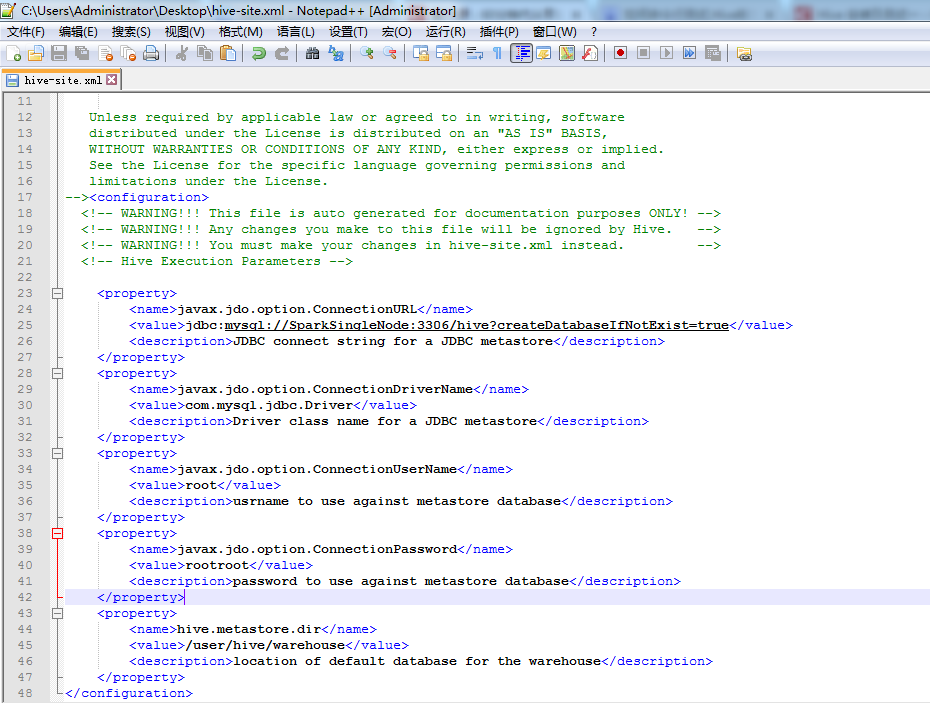
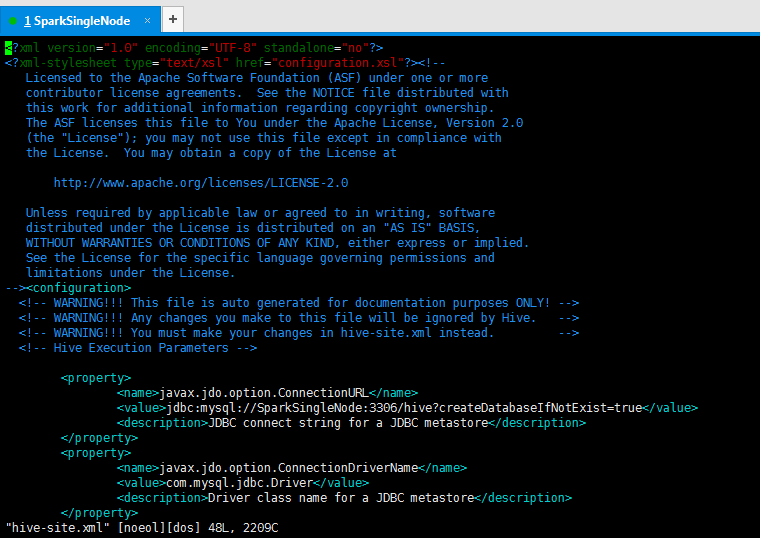
<property>
<name>javax.jdo.option.ConnectionURL</name>
<value>jdbc:mysql://SparkSingleNode:3306/hive?createDatabaseIfNotExist=true</value>
</property>
<property>
<name>javax.jdo.option.ConnectionDriverName</name>
<value>com.mysql.jdbc.Driver</value>
</property>
<property>
<name>javax.jdo.option.ConnectionUserName</name>
<value>root</value>
</property>
<property>
<name>javax.jdo.option.ConnectionPassword</name>
<value>rootroot</value>
</property>
<property>
<name>hive.metastore.dir</name>
<value>/user/hive/warehouse</value>
<description>location of default database for the warehouse</description>
</property>
当然,你也可以,专门,用一个hive用户专门,见
1 复习ha相关 + weekend110的hive的元数据库mysql方式安装配置
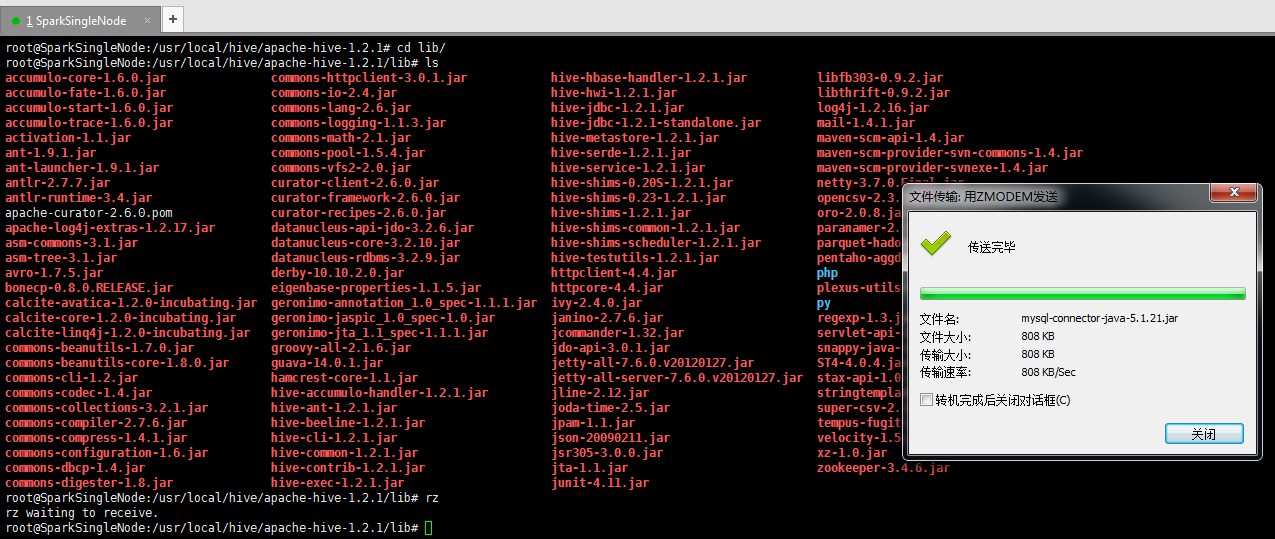
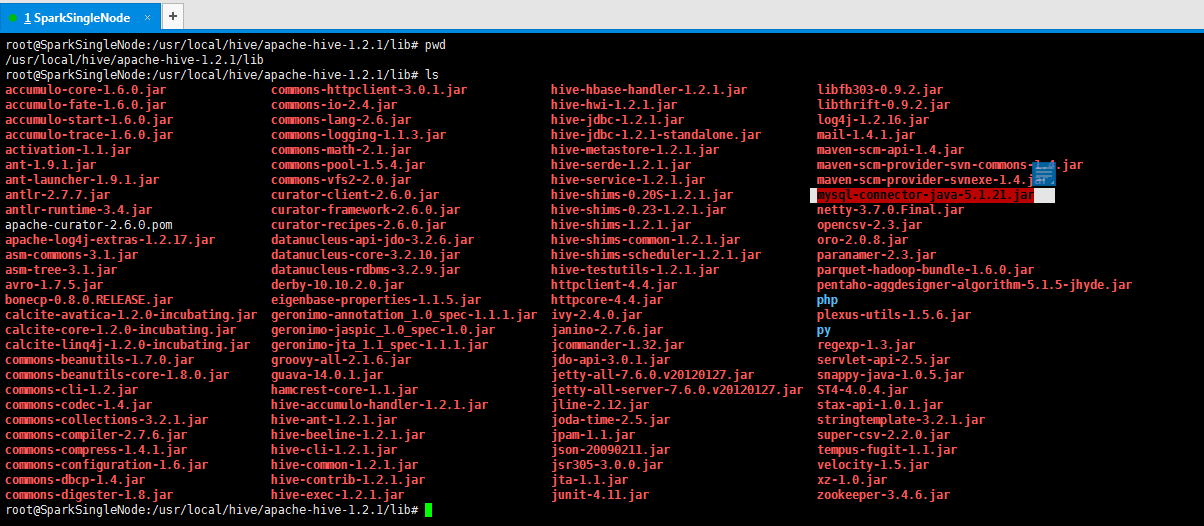
root@SparkSingleNode:/usr/local/hive/apache-hive-1.2.1/lib# pwd
/usr/local/hive/apache-hive-1.2.1/lib
root@SparkSingleNode:/usr/local/hive/apache-hive-1.2.1/lib# ls
accumulo-core-1.6.0.jar commons-httpclient-3.0.1.jar hive-hbase-handler-1.2.1.jar libfb303-0.9.2.jar
accumulo-fate-1.6.0.jar commons-io-2.4.jar hive-hwi-1.2.1.jar libthrift-0.9.2.jar
accumulo-start-1.6.0.jar commons-lang-2.6.jar hive-jdbc-1.2.1.jar log4j-1.2.16.jar
accumulo-trace-1.6.0.jar commons-logging-1.1.3.jar hive-jdbc-1.2.1-standalone.jar mail-1.4.1.jar
activation-1.1.jar commons-math-2.1.jar hive-metastore-1.2.1.jar maven-scm-api-1.4.jar
ant-1.9.1.jar commons-pool-1.5.4.jar hive-serde-1.2.1.jar maven-scm-provider-svn-commons-1.4.jar
ant-launcher-1.9.1.jar commons-vfs2-2.0.jar hive-service-1.2.1.jar maven-scm-provider-svnexe-1.4.jar
antlr-2.7.7.jar curator-client-2.6.0.jar hive-shims-0.20S-1.2.1.jar mysql-connector-java-5.1.21.jar
antlr-runtime-3.4.jar curator-framework-2.6.0.jar hive-shims-0.23-1.2.1.jar netty-3.7.0.Final.jar
apache-curator-2.6.0.pom curator-recipes-2.6.0.jar hive-shims-1.2.1.jar opencsv-2.3.jar
apache-log4j-extras-1.2.17.jar datanucleus-api-jdo-3.2.6.jar hive-shims-common-1.2.1.jar oro-2.0.8.jar
asm-commons-3.1.jar datanucleus-core-3.2.10.jar hive-shims-scheduler-1.2.1.jar paranamer-2.3.jar
asm-tree-3.1.jar datanucleus-rdbms-3.2.9.jar hive-testutils-1.2.1.jar parquet-hadoop-bundle-1.6.0.jar
avro-1.7.5.jar derby-10.10.2.0.jar httpclient-4.4.jar pentaho-aggdesigner-algorithm-5.1.5-jhyde.jar
bonecp-0.8.0.RELEASE.jar eigenbase-properties-1.1.5.jar httpcore-4.4.jar php
calcite-avatica-1.2.0-incubating.jar geronimo-annotation_1.0_spec-1.1.1.jar ivy-2.4.0.jar plexus-utils-1.5.6.jar
calcite-core-1.2.0-incubating.jar geronimo-jaspic_1.0_spec-1.0.jar janino-2.7.6.jar py
calcite-linq4j-1.2.0-incubating.jar geronimo-jta_1.1_spec-1.1.1.jar jcommander-1.32.jar regexp-1.3.jar
commons-beanutils-1.7.0.jar groovy-all-2.1.6.jar jdo-api-3.0.1.jar servlet-api-2.5.jar
commons-beanutils-core-1.8.0.jar guava-14.0.1.jar jetty-all-7.6.0.v20120127.jar snappy-java-1.0.5.jar
commons-cli-1.2.jar hamcrest-core-1.1.jar jetty-all-server-7.6.0.v20120127.jar ST4-4.0.4.jar
commons-codec-1.4.jar hive-accumulo-handler-1.2.1.jar jline-2.12.jar stax-api-1.0.1.jar
commons-collections-3.2.1.jar hive-ant-1.2.1.jar joda-time-2.5.jar stringtemplate-3.2.1.jar
commons-compiler-2.7.6.jar hive-beeline-1.2.1.jar jpam-1.1.jar super-csv-2.2.0.jar
commons-compress-1.4.1.jar hive-cli-1.2.1.jar json-20090211.jar tempus-fugit-1.1.jar
commons-configuration-1.6.jar hive-common-1.2.1.jar jsr305-3.0.0.jar velocity-1.5.jar
commons-dbcp-1.4.jar hive-contrib-1.2.1.jar jta-1.1.jar xz-1.0.jar
commons-digester-1.8.jar hive-exec-1.2.1.jar junit-4.11.jar zookeeper-3.4.6.jar
root@SparkSingleNode:/usr/local/hive/apache-hive-1.2.1/lib#

root@SparkSingleNode:/usr/local/hive/apache-hive-1.2.1# /usr/local/hadoop/hadoop-2.6.0/bin/hadoop fs -ls hdfs://SparkSingleNode:9000/user
Found 1 items
drwxr-xr-x - spark supergroup 0 2016-09-27 17:40 hdfs://SparkSingleNode:9000/user/spark
root@SparkSingleNode:/usr/local/hive/apache-hive-1.2.1# /usr/local/hadoop/hadoop-2.6.0/bin/hadoop fs -mkdir -p /user/hive/warehouse
root@SparkSingleNode:/usr/local/hive/apache-hive-1.2.1# /usr/local/hadoop/hadoop-2.6.0/bin/hadoop fs -ls /user
Found 2 items
drwxr-xr-x - root supergroup 0 2016-10-10 07:45 /user/hive
drwxr-xr-x - spark supergroup 0 2016-09-27 17:40 /user/spark
root@SparkSingleNode:/usr/local/hive/apache-hive-1.2.1# /usr/local/hadoop/hadoop-2.6.0/bin/hadoop fs -ls /user/hive
Found 1 items
drwxr-xr-x - root supergroup 0 2016-10-10 07:45 /user/hive/warehouse
root@SparkSingleNode:/usr/local/hive/apache-hive-1.2.1# /usr/local/hadoop/hadoop-2.6.0/bin/hadoop fs -chmod g+w /user/hive/warehouse
root@SparkSingleNode:/usr/local/hive/apache-hive-1.2.1# /usr/local/hadoop/hadoop-2.6.0/bin/hadoop fs -ls /user/hive
Found 1 items
drwxrwxr-x - root supergroup 0 2016-10-10 07:45 /user/hive/warehouse
root@SparkSingleNode:/usr/local/hive/apache-hive-1.2.1#
参考博主:http://mars914.iteye.com/blog/1410035
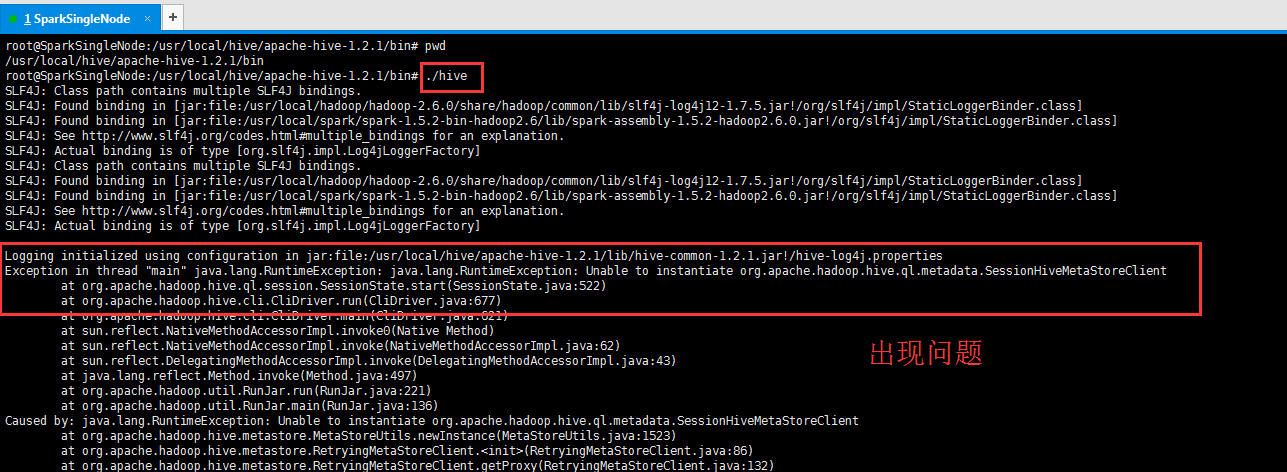
遇到问题:
Exception in thread "main" java.lang.RuntimeException: java.lang.RuntimeException: Unable to instantiate org.apache.hadoop.hive.ql.metadata.SessionHiveMetaStoreClient
解决办法:
参考博客:http://blog.csdn.net/freedomboy319/article/details/44828337
hive常见问题解决干货大全
原因:因为没有正常启动Hive 的 Metastore Server服务进程。
解决方法:启动Hive 的 Metastore Server服务进程,执行如下命令:
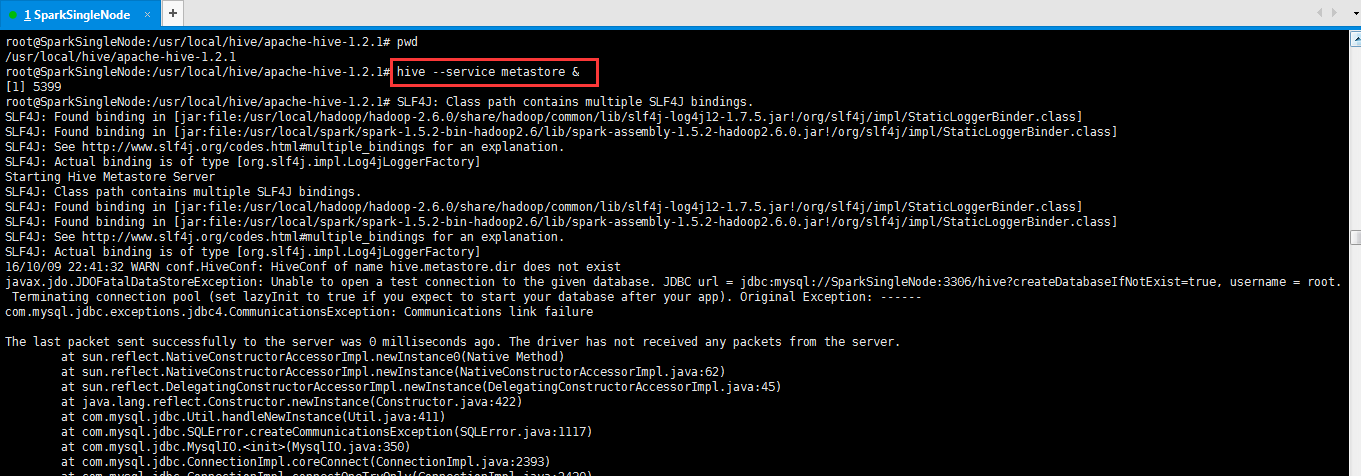
出现,另一个问题。
root@SparkSingleNode:/usr/local/hive/apache-hive-1.2.1# pwd
/usr/local/hive/apache-hive-1.2.1
root@SparkSingleNode:/usr/local/hive/apache-hive-1.2.1# hive --service metastore &
[1] 5399
root@SparkSingleNode:/usr/local/hive/apache-hive-1.2.1# SLF4J: Class path contains multiple SLF4J bindings.
SLF4J: Found binding in [jar:file:/usr/local/hadoop/hadoop-2.6.0/share/hadoop/common/lib/slf4j-log4j12-1.7.5.jar!/org/slf4j/impl/StaticLoggerBinder.class]
SLF4J: Found binding in [jar:file:/usr/local/spark/spark-1.5.2-bin-hadoop2.6/lib/spark-assembly-1.5.2-hadoop2.6.0.jar!/org/slf4j/impl/StaticLoggerBinder.class]
SLF4J: See http://www.slf4j.org/codes.html#multiple_bindings for an explanation.
SLF4J: Actual binding is of type [org.slf4j.impl.Log4jLoggerFactory]
Starting Hive Metastore Server
SLF4J: Class path contains multiple SLF4J bindings.
SLF4J: Found binding in [jar:file:/usr/local/hadoop/hadoop-2.6.0/share/hadoop/common/lib/slf4j-log4j12-1.7.5.jar!/org/slf4j/impl/StaticLoggerBinder.class]
SLF4J: Found binding in [jar:file:/usr/local/spark/spark-1.5.2-bin-hadoop2.6/lib/spark-assembly-1.5.2-hadoop2.6.0.jar!/org/slf4j/impl/StaticLoggerBinder.class]
SLF4J: See http://www.slf4j.org/codes.html#multiple_bindings for an explanation.
SLF4J: Actual binding is of type [org.slf4j.impl.Log4jLoggerFactory]
16/10/09 22:41:32 WARN conf.HiveConf: HiveConf of name hive.metastore.dir does not exist
javax.jdo.JDOFatalDataStoreException: Unable to open a test connection to the given database. JDBC url = jdbc:mysql://SparkSingleNode:3306/hive?createDatabaseIfNotExist=true, username = root. Terminating connection pool (set lazyInit to true if you expect to start your database after your app). Original Exception: ------
com.mysql.jdbc.exceptions.jdbc4.CommunicationsException: Communications link failure
The last packet sent successfully to the server was 0 milliseconds ago. The driver has not received any packets from the server.
at sun.reflect.NativeConstructorAccessorImpl.newInstance0(Native Method)
at sun.reflect.NativeConstructorAccessorImpl.newInstance(NativeConstructorAccessorImpl.java:62)
at sun.reflect.DelegatingConstructorAccessorImpl.newInstance(DelegatingConstructorAccessorImpl.java:45)
at java.lang.reflect.Constructor.newInstance(Constructor.java:422)
at com.mysql.jdbc.Util.handleNewInstance(Util.java:411)
at com.mysql.jdbc.SQLError.createCommunicationsException(SQLError.java:1117)
at com.mysql.jdbc.MysqlIO.<init>(MysqlIO.java:350)
at com.mysql.jdbc.ConnectionImpl.coreConnect(ConnectionImpl.java:2393)
at com.mysql.jdbc.ConnectionImpl.connectOneTryOnly(ConnectionImpl.java:2430)
at com.mysql.jdbc.ConnectionImpl.createNewIO(ConnectionImpl.java:2215)
at com.mysql.jdbc.ConnectionImpl.<init>(ConnectionImpl.java:813)
at com.mysql.jdbc.JDBC4Connection.<init>(JDBC4Connection.java:47)
参考:
http://blog.csdn.net/xiaoshunzi111/article/details/48827775
方案一:权限问题
可能由于root的权限不够,可以进行如下操作
1) 以root进入mysql
root@SparkSingleNode:/usr/local/hive/apache-hive-1.2.1# mysql -uroot -prootroot

root@SparkSingleNode:/usr/local/hive/apache-hive-1.2.1# mysql -uroot -prootroot
Welcome to the MySQL monitor. Commands end with ; or \g.
Your MySQL connection id is 45
Server version: 5.5.52-0ubuntu0.14.04.1 (Ubuntu)
Copyright (c) 2000, 2016, Oracle and/or its affiliates. All rights reserved.
Oracle is a registered trademark of Oracle Corporation and/or its
affiliates. Other names may be trademarks of their respective
owners.
Type 'help;' or '\h' for help. Type '\c' to clear the current input statement.
mysql>
2) 赋予root权限:
mysql> GRANT ALL PRIVILEGES ON *.* TO 'root'@'SparkSingleNode' WITH GRANT OPTION;
//本地操作的权限
mysql> GRANT ALL PRIVILEGES ON *.* TO ' root '@'%' WITH GRANT OPTION;
//远程操作的权限
3) 刷新:
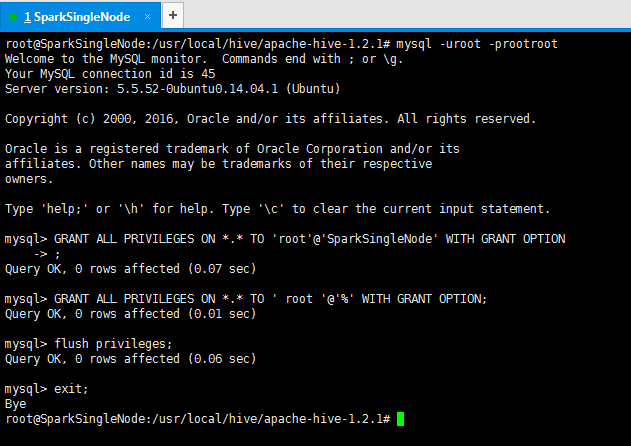
root@SparkSingleNode:/usr/local/hive/apache-hive-1.2.1# mysql -uroot -prootroot
Welcome to the MySQL monitor. Commands end with ; or \g.
Your MySQL connection id is 45
Server version: 5.5.52-0ubuntu0.14.04.1 (Ubuntu)
Copyright (c) 2000, 2016, Oracle and/or its affiliates. All rights reserved.
Oracle is a registered trademark of Oracle Corporation and/or its
affiliates. Other names may be trademarks of their respective
owners.
Type 'help;' or '\h' for help. Type '\c' to clear the current input statement.
mysql> GRANT ALL PRIVILEGES ON *.* TO 'root'@'SparkSingleNode' WITH GRANT OPTION
-> ;
Query OK, 0 rows affected (0.07 sec)
mysql> GRANT ALL PRIVILEGES ON *.* TO ' root '@'%' WITH GRANT OPTION;
Query OK, 0 rows affected (0.01 sec)
mysql> flush privileges;
Query OK, 0 rows affected (0.06 sec)
mysql> exit;
Bye
root@SparkSingleNode:/usr/local/hive/apache-hive-1.2.1#
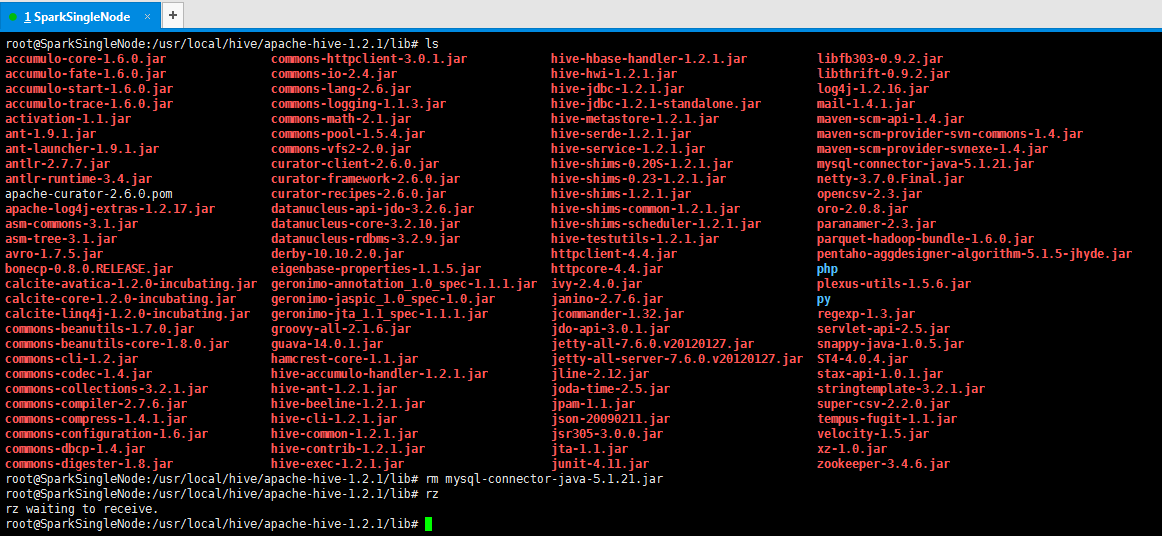
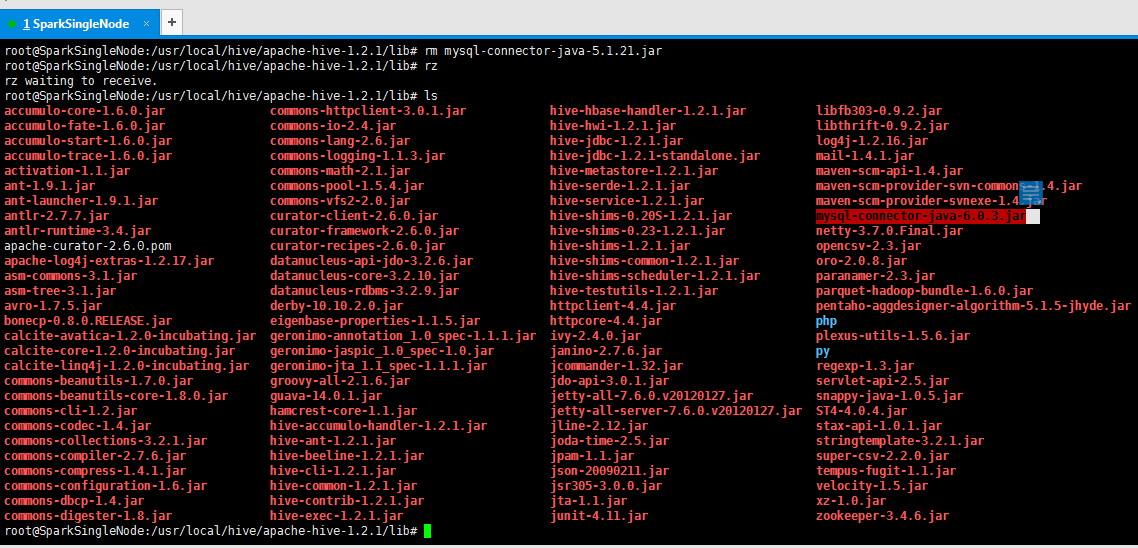
方案二:mysql驱动问题
mysql-connector-java-5.1.21-bin.jar换成较高版本的驱动如mysql-connector-java-6.0.3-bin.jar
下载路径http://ftp.ntu.edu.tw/MySQL/Downloads/Connector-J/
Hive中的DataBase和表其实就是HDFS上的目录和简单的文本文件。简单的文本文件中有几列数据,每列数据的类型无法直接从文本文件中得知。但当数据放入Hive中,Hive就把元数据放入Mysql中了,这样就可以基于数据的表进行查询了。
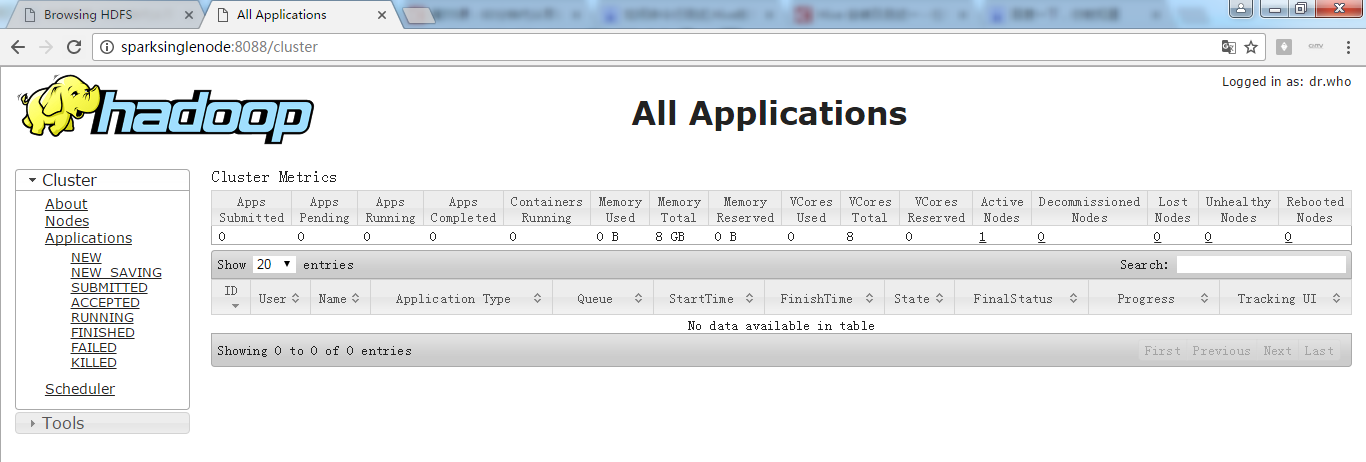
开启hadoop集群
spark@SparkSingleNode:/usr/local/hadoop/hadoop-2.6.0$ sbin/start-dfs.sh
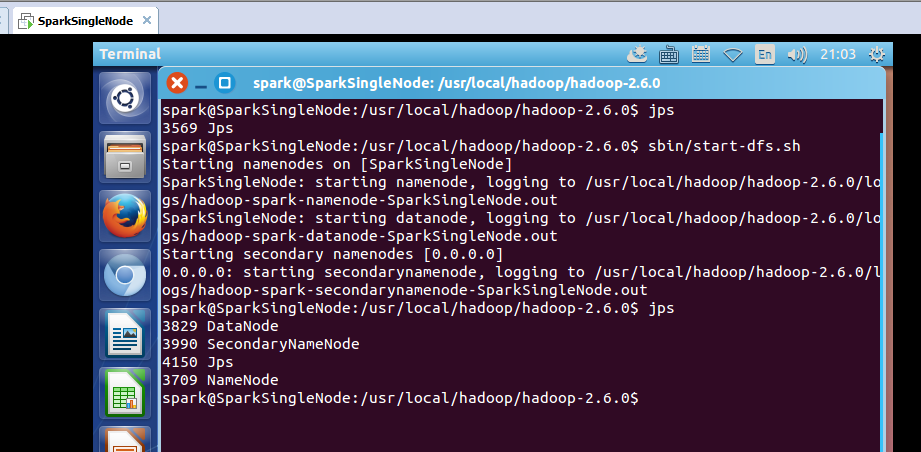
spark@SparkSingleNode:/usr/local/hadoop/hadoop-2.6.0$ jps
3569 Jps
spark@SparkSingleNode:/usr/local/hadoop/hadoop-2.6.0$ sbin/start-dfs.sh
Starting namenodes on [SparkSingleNode]
SparkSingleNode: starting namenode, logging to /usr/local/hadoop/hadoop-2.6.0/logs/hadoop-spark-namenode-SparkSingleNode.out
SparkSingleNode: starting datanode, logging to /usr/local/hadoop/hadoop-2.6.0/logs/hadoop-spark-datanode-SparkSingleNode.out
Starting secondary namenodes [0.0.0.0]
0.0.0.0: starting secondarynamenode, logging to /usr/local/hadoop/hadoop-2.6.0/logs/hadoop-spark-secondarynamenode-SparkSingleNode.out
spark@SparkSingleNode:/usr/local/hadoop/hadoop-2.6.0$ jps
3829 DataNode
3990 SecondaryNameNode
4150 Jps
3709 NameNode
spark@SparkSingleNode:/usr/local/hadoop/hadoop-2.6.0$
开启spark集群
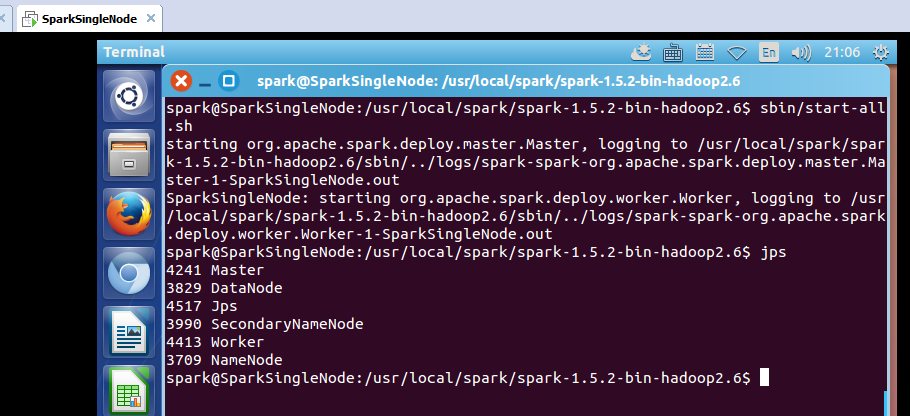
spark@SparkSingleNode:/usr/local/spark/spark-1.5.2-bin-hadoop2.6$ sbin/start-all.sh
starting org.apache.spark.deploy.master.Master, logging to /usr/local/spark/spark-1.5.2-bin-hadoop2.6/sbin/../logs/spark-spark-org.apache.spark.deploy.master.Master-1-SparkSingleNode.out
SparkSingleNode: starting org.apache.spark.deploy.worker.Worker, logging to /usr/local/spark/spark-1.5.2-bin-hadoop2.6/sbin/../logs/spark-spark-org.apache.spark.deploy.worker.Worker-1-SparkSingleNode.out
spark@SparkSingleNode:/usr/local/spark/spark-1.5.2-bin-hadoop2.6$ jps
4241 Master
3829 DataNode
4517 Jps
3990 SecondaryNameNode
4413 Worker
3709 NameNode
spark@SparkSingleNode:/usr/local/spark/spark-1.5.2-bin-hadoop2.6$

'
9. MYSQL的安装和配置 (路径,没要求)
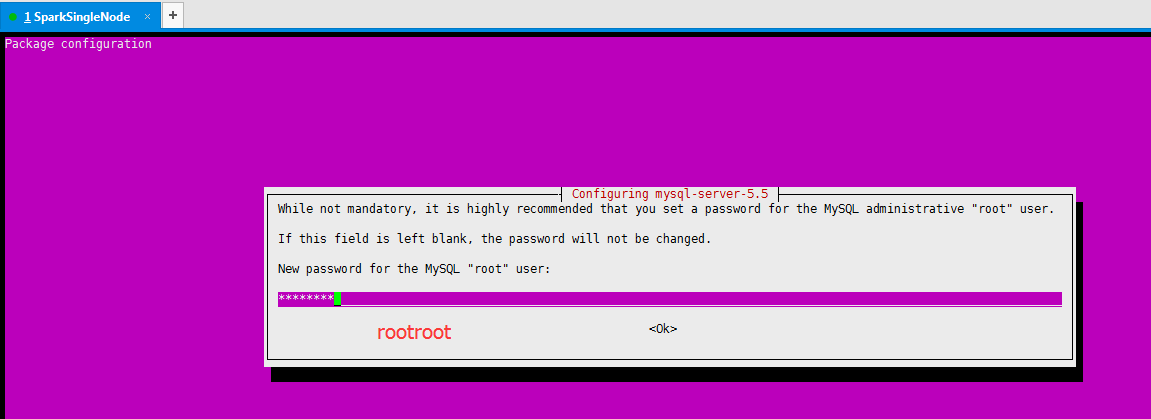
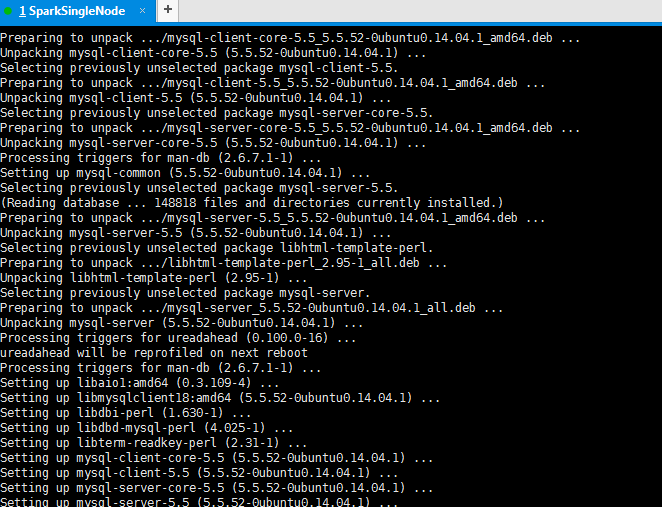
root用户下执行yum -y install mysql-server(CentOS版本)或apt-get install mysql-server(Ubuntu版本) 即可自动安装
9.1 在线安装mysql数据库
root@SparkSingleNode:/usr/local/hive/apache-hive-1.2.1# pwd
/usr/local/hive/apache-hive-1.2.1
root@SparkSingleNode:/usr/local/hive/apache-hive-1.2.1# yum -y install mysql-server
The program 'yum' is currently not installed. You can install it by typing:
apt-get install yum
root@SparkSingleNode:/usr/local/hive/apache-hive-1.2.1# apt-get install mysql-server
Reading package lists... Done
Building dependency tree
Reading state information... Done
The following extra packages will be installed:
libaio1 libdbd-mysql-perl libdbi-perl libhtml-template-perl libmysqlclient18 libterm-readkey-perl mysql-client-5.5 mysql-client-core-5.5 mysql-common mysql-server-5.5
mysql-server-core-5.5
Suggested packages:
libmldbm-perl libnet-daemon-perl libplrpc-perl libsql-statement-perl libipc-sharedcache-perl tinyca mailx
The following NEW packages will be installed:
libaio1 libdbd-mysql-perl libdbi-perl libhtml-template-perl libmysqlclient18 libterm-readkey-perl mysql-client-5.5 mysql-client-core-5.5 mysql-common mysql-server mysql-server-5.5
mysql-server-core-5.5
0 upgraded, 12 newly installed, 0 to remove and 742 not upgraded.
Need to get 8,998 kB of archives.
After this operation, 97.1 MB of additional disk space will be used.
Do you want to continue? [Y/n] y

9.2 查看mysql数据库版本
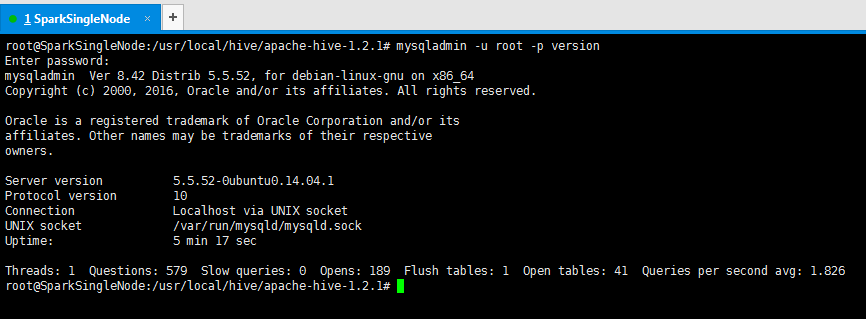
root@SparkSingleNode:/usr/local/hive/apache-hive-1.2.1# mysqladmin -u root -p version
Enter password: (rootroot)
mysqladmin Ver 8.42 Distrib 5.5.52, for debian-linux-gnu on x86_64
Copyright (c) 2000, 2016, Oracle and/or its affiliates. All rights reserved.
Oracle is a registered trademark of Oracle Corporation and/or its
affiliates. Other names may be trademarks of their respective
owners.
Server version 5.5.52-0ubuntu0.14.04.1
Protocol version 10
Connection Localhost via UNIX socket
UNIX socket /var/run/mysqld/mysqld.sock
Uptime: 5 min 17 sec
Threads: 1 Questions: 579 Slow queries: 0 Opens: 189 Flush tables: 1 Open tables: 41 Queries per second avg: 1.826
root@SparkSingleNode:/usr/local/hive/apache-hive-1.2.1#
9.2 查看mysql服务状态,若是关闭,则启动mysql服务。

root@SparkSingleNode:/usr/local/hive/apache-hive-1.2.1# service mysql status
mysql start/running, process 9868
root@SparkSingleNode:/usr/local/hive/apache-hive-1.2.1# sudo /etc/init.d/mysql start
* Starting MySQL database server mysqld [ OK ]
root@SparkSingleNode:/usr/local/hive/apache-hive-1.2.1# sudo /etc/init.d/mysql stop
* Stopping MySQL database server mysqld [ OK ]
root@SparkSingleNode:/usr/local/hive/apache-hive-1.2.1# sudo /etc/init.d/mysql restart
* Stopping MySQL database server mysqld [ OK ]
* Starting MySQL database server mysqld [ OK ]
* Checking for tables which need an upgrade, are corrupt or were
not closed cleanly.
root@SparkSingleNode:/usr/local/hive/apache-hive-1.2.1# service mysql status
mysql start/running, process 10330
root@SparkSingleNode:/usr/local/hive/apache-hive-1.2.1#

9.3 设置MySQL的root用户设置密码,这一步,就不需要做了,在CentOS版本里,需要做。在Ubuntu版本,在安装时,就已经设置了。
9.4 以root用户,登录mysql看看。
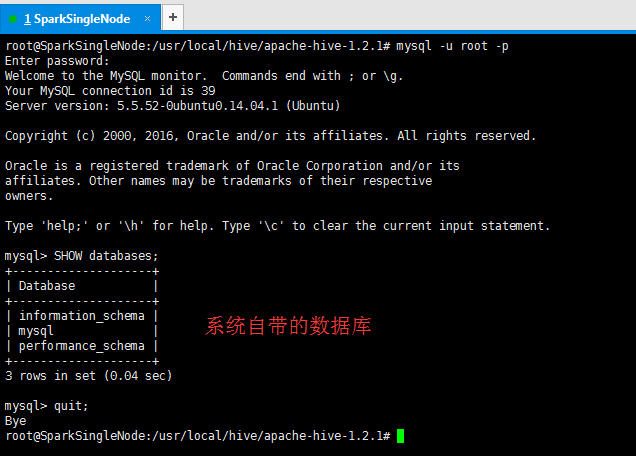
root@SparkSingleNode:/usr/local/hive/apache-hive-1.2.1# mysql -u root -p
Enter password: (rootroot)
Welcome to the MySQL monitor. Commands end with ; or \g.
Your MySQL connection id is 39
Server version: 5.5.52-0ubuntu0.14.04.1 (Ubuntu)
Copyright (c) 2000, 2016, Oracle and/or its affiliates. All rights reserved.
Oracle is a registered trademark of Oracle Corporation and/or its
affiliates. Other names may be trademarks of their respective
owners.
Type 'help;' or '\h' for help. Type '\c' to clear the current input statement.
mysql> SHOW databases;
+--------------------+
| Database |
+--------------------+
| information_schema |
| mysql |
| performance_schema |
+--------------------+
3 rows in set (0.04 sec)
mysql> quit;
Bye
root@SparkSingleNode:/usr/local/hive/apache-hive-1.2.1#
或者

root@SparkSingleNode:/usr/local/hive/apache-hive-1.2.1# mysql -uroot -prootroot
Welcome to the MySQL monitor. Commands end with ; or \g.
Your MySQL connection id is 44
Server version: 5.5.52-0ubuntu0.14.04.1 (Ubuntu)
Copyright (c) 2000, 2016, Oracle and/or its affiliates. All rights reserved.
Oracle is a registered trademark of Oracle Corporation and/or its
affiliates. Other names may be trademarks of their respective
owners.
Type 'help;' or '\h' for help. Type '\c' to clear the current input statement.
mysql> SHOW DATABASES;
+--------------------+
| Database |
+--------------------+
| information_schema |
| mysql |
| performance_schema |
+--------------------+
3 rows in set (0.00 sec)
mysql> quit;
Bye
root@SparkSingleNode:/usr/local/hive/apache-hive-1.2.1#
更多,可以,参考
1 复习ha相关 + weekend110的hive的元数据库mysql方式安装配置
由此,说明mysql数据库,安装成功!
5. Hive的表有两种基本类型:一种是内部表(这种表数据属于Hive本身,即如果原来的数据在HDFS的其他地方,此时数据会通过HDFS移动到Hive所在目录,如果删除Hive中的该表的话数据和元数据均会被删除),一种是外部表(这种表数据不属于Hive数据仓库,元数据中会表达具体数据在哪里,使用时和内部表的使用一样,只是如果通过Hive去删除的话,删除的只是元数据,并没有删除数据本身)
三. 使用Hive分析搜索数据
启动HDFS/Yarn。注意如果要使用Hive进行查询就需要启动Yarn。
启动Hive。
通过show databases;可以查看数据库。默认database只有default。
creeate database hive;
use hive;
create table person(name String,age int);
insert into person values(‘richard’,’34’);
select * from person;即可查询。
感谢下面的博主:
http://blog.csdn.net/slq1023/article/details/50988267
http://blog.csdn.net/gujinjinseu/article/details/38307685
http://blog.csdn.net/zhu_tianwei/article/details/48972833
http://blog.csdn.net/jim110/article/details/44907745
作者:大数据和人工智能躺过的坑
出处:http://www.cnblogs.com/zlslch/
本文版权归作者和博客园共有,欢迎转载,但未经作者同意必须保留此段声明,且在文章页面明显位置给出原文链接,否则保留追究法律责任的权利。
如果您认为这篇文章还不错或者有所收获,您可以通过右边的“打赏”功能 打赏我一杯咖啡【物质支持】,也可以点击右下角的【好文要顶】按钮【精神支持】,因为这两种支持都是我继续写作,分享的最大动力!


