
App Inventor2项目部署到本地
介绍App Inventor
App Inventor 原是Google实验室(Google Lab)的一个子计划,该项目是一个完全在线开发的Android编程环境,抛弃复杂的程式代码而使用积木式的堆叠法来完成的Android程式。App Inventor
2012年1月1日移交给麻省理工学院行动学习中心,并已于3月4日公布使用。【前面都是我从网上找的介绍,详细情况可以自行上网了解】
本文主要是介绍我部署到本地的详细经过。参考的书籍:《App Invenrot2 定制与二次开发》强增编著。
----------------------------------------------------------------------------------------------------------------------------------
1. 本地环境的准备
首先需要准备本地环境,官方的文档是这么给出的:
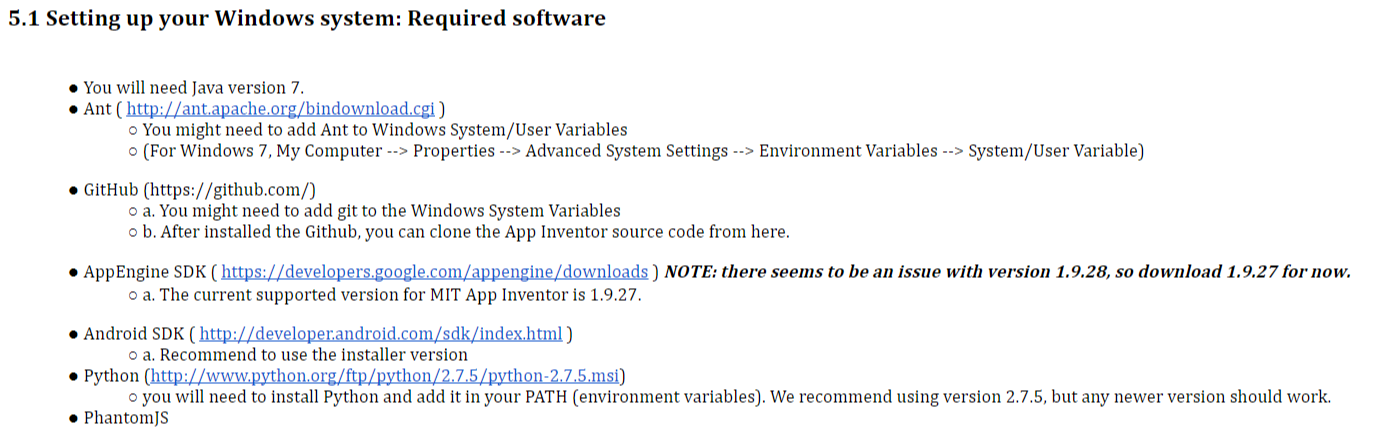
我的JDK用的是:java version "1.7.0_79",因为文档中推荐使用JDK6或者7。ant的版本使用的是: version 1.9.4。JDK和ANT都需要配置环境变量。
| JAVA_HOME | 本地JDK的安装路径 |
| Path | %JAVA_HOME%\bin;%JAVA_HOME%\jre\bin; |
| CLASSPATH | .;%JAVA_HOME%\lib;%JAVA_HOME%\lib\tools.jar |
| ANT_HOME | ant的安装路径 |
| PATH | ;%ANT_HOME%\bin |
值得一提的是安装完git后,也需要添加环境变量(我第一次就是因为没有配置环境变量,反复出错……)。
最后,需要下载AppEngine SDK ( https://developers.google.com/appengine/downloads ) ,官网上推荐使用1.9.27及其以下版本:
a. The current supported version for MIT App Inventor is 1.9.27.
http://central.maven.org/maven2/com/google/appengine/appengine-java-sdk/1.9.27/
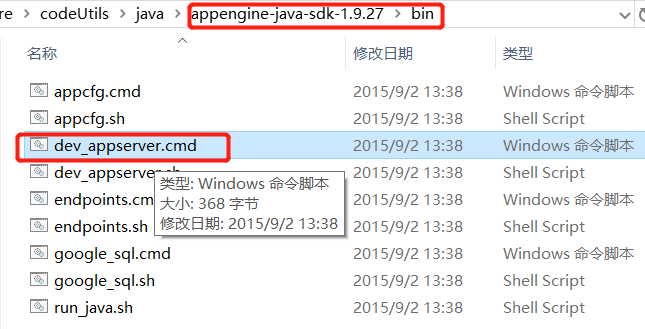
同样,下载完后,最好配置环境变量:在Path下面添加:****实际本地的路径***\appengine-java-sdk-1.9.27\bin目录的路径。
2. 获取源码
前面的步骤,你已经在计算机本地安装了git,然后找个合适的位置,新建文件夹存放代码,在文件夹中鼠标右键,选择Git Bash Here,使用 git init初始化当前目录。
然后,输入命令:git clone https://github.com/mit-cml/appinventor-sources.git ,获取源代码。需要等待一段时间……官网文档(This will create a folder named “appinventor-sources” where the sources (and a copy of the repository) will reside. )就是说在当前文件下会生成一个“appinventor-sources” 的文件夹。文档中还有这么一段话,我不清楚是什么意思,只是照着做了(We’ll refer to this folder (即“appinventor-sources” 的文件夹)throughout the rest of these instructions as the appinventor parent folder. The appinventor parent folder also contains a file called sample-.gitignore. This file should be copied to another file simply named .gitignore which will keep generated files from being added to the git index .)
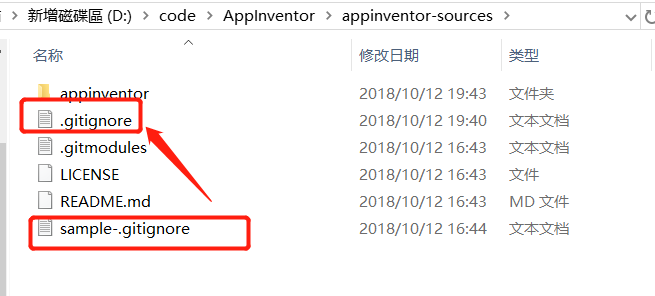
就是将sample-.gitignore文件复制了一份,重命名为.gitignore。(在winodws系统下,这样可能有点困难,所以我借助git命令窗口来完成的,touch .gitignore,然后将内容拷贝进去。)紧接着,
Checking out Blockly as a dependency is also needed, and can be done by issuing the following command (from the appinventor-sources folder),官网的意思是进入appinventor-sources
文件夹执行命令:git submodule update --init,这和我参考书上的不一样,还是按照官方文档来。上面的步骤完成后,源代码就获取到了,为了谨慎期间,在编译之前,我还是备份了一下。
3. 编译项目
进入项目的根目录:***\appinventor-sources\appinventor
如果不是第一次编译的话可以使用ant clean命令,会清理掉一些垃圾文件,但是要谨慎使用!!因为一些项目也会清理掉。(附上文档:Cleaning isn’t necessary every time you build, but it’s a good idea to clean each time before you build in case some junk has crept into the various build directories. Note again that if you clean, all your projects will go away, so make sure you have copies of the projects before cleaning. )
在编译项目之前使用命令ant MakeAuthKey,来生成key。仅需执行一次。
然后使用命令ant来编译项目。
Building should take several minutes and end with the message BUILD SUCCESSFUL. 看到BUILD SUCCESSFUL,就说明编译成功了。
4. 启动服务,访问网站
NOTE: As of 4/18/2016 you must use a version of the App Engine SDK that is at 1.9.27 or lower. The dev_appserver in newer versions will not work. You will also want to have the latest version and use that for deployment to App Engine itself.这个前面也提到了,就用1.9.27的版本就好了,我就是用这个运行成功的。
在appinventor文件夹下面,使用命令:<your appengine SDK folder>/appengine-java-sdk-1.9.11/bin/dev_appserver.cmd --port=8888 --address=0.0.0.0 appengine/build/war/(前面配置环境变量的话,只需要运行加粗的部分的命令即可。)
首次编译这个项目要花费一点时间,耐心等待。出现下面的情况,说明成功:

然后,进入/appinventor/buildserver目录下,运行命令:
ant RunLocalBuildServer
成功后,如图:

在浏览器访问localhost:8888,可以看到登录页面,点击:
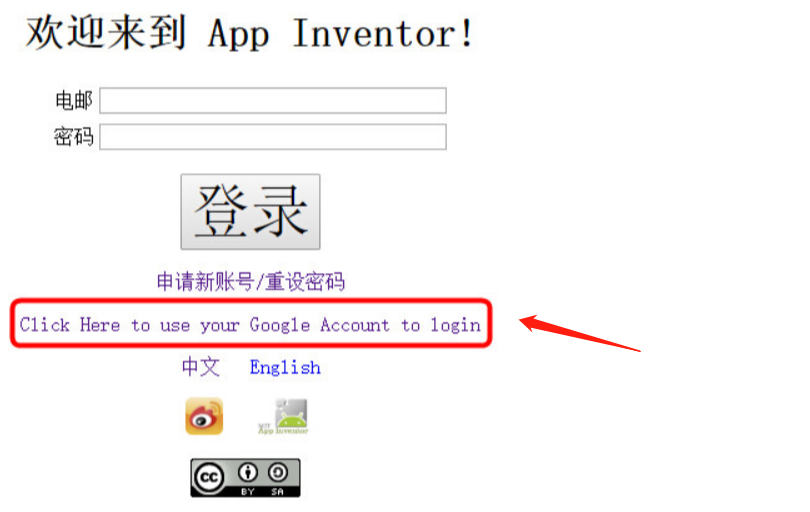
接着点击Login,接着单击“I accept the terms of service”按钮就可以进入开发环境。

待续……
