

写随笔主要是当做日记,方便以后查看,遇到该问题时获取解决方法。
在eclipse中创建一个JavaWeb项目,配置web.xml,集成spring框架,调用后台返回指定jsp显示信息。
一、eclipse中创建一个JavaWeb项目
创建javaWeb项目百度经验就有,我创建的工程名为Demo,需要注意的是选择开发的jdk版本。
二、配置web.xml
1、在项目根目录创建一个web文件夹,web下创建一个WEB-INF文件夹(如果不创建直接用WebContent也行),在WEB-INF中创建一个web.xml配置文件。
<?xml version="1.0" encoding="UTF-8"?>
<web-app xmlns:xsi="http://www.w3.org/2001/XMLSchema-instance"
        xmlns="http://java.sun.com/xml/ns/javaee"
        xmlns:web="http://java.sun.com/xml/ns/javaee/web-app_2_5.xsd"
        xsi:schemaLocation="http://java.sun.com/xml/ns/javaee
         http://java.sun.com/xml/ns/javaee/web-app_2_5.xsd"
        id="WebApp_ID" version="2.5">

        <description>yangmin</description>

    <!-- 指定欢迎页面 -->
    <welcome-file-list>
        <welcome-file>/demo/page/Login.jsp</welcome-file>
    </welcome-file-list>

</web-app>
在web目录下创建一个demo/page/目录,page下创建一个Login.jsp登录页面,启动tomcat,后输入http://127.0.0.1:8080/web/demo/page/Login.jsp就能够访问该页面,一个JavaWeb项目搭建完毕。
javaWeb web.xml的作用和基本配置:https://www.cnblogs.com/EasonJim/p/6221952.html。
三、集成spring框架
1、下载Spring框架包。官网的下载地址(http://repo.spring.io/release/org/springframework/spring ),版本自己选择,我下载的的是4.3.5版本。
2、将Spring架包导入工程。在创建的工程\web\WEB-INF下创建一个lib文件夹,将下载的Spring框架包解压的libs文件夹下的*.RELEASE.jar文件复制ib文件夹中。
3、创建后台Controller。在Java Resources文件夹下创建一个com.demo.base.controller包,然后创建一个TestController类,如下:
package com.demo.base.controller;

import org.springframework.stereotype.Controller;
import org.springframework.web.bind.annotation.RequestMapping;
import org.springframework.web.bind.annotation.RequestMethod;
import org.springframework.web.servlet.ModelAndView;

/**
 * 测试控制类
 *
 *
 * @author yangmin
 * @since 1.0
 * @version 2017-11-20 yangmin
 */
@Controller
@RequestMapping("/TestInterface/")
public class TestController {

    /**
     * 测试方法
     *
     * @return ModelAndView
     */
    @RequestMapping(value = "/test", method = RequestMethod.GET)
    public ModelAndView testMVC() {
        System.out.println("调用。");
        ModelAndView modelAndView = new ModelAndView("/tscp/page/test.jsp");
        modelAndView.addObject("info", "yangker);
        return modelAndView;
    }
}
当浏览器访问*/TestInterface/test时会显示/demo/page/test.jsp页面,并传值给页面。
4、test.jsp。在web目录下创建/demo/page/test.jsp:
<%@ page language="java" contentType="text/html; charset=ISO-8859-1"
  import="java.util.*"  pageEncoding="ISO-8859-1"%>
<!DOCTYPE html PUBLIC "-//W3C//DTD HTML 4.01 Transitional//EN" "http://www.w3.org/TR/html4/loose.dtd">
<html>
<head>
<meta http-equiv="Content-Type" content="text/html; charset=ISO-8859-1">
<title>Insert title here</title>
</head>
<body>
  Hello ${info} !!!!!
</body>
</html>
  info是后台传递的数据。
5、web.xml集成Spring配置。创建一个监听器和一个路径:
<!-- Spring配置文件 --> <context-param> <param-name>contextConfigLocation</param-name> <param-value>/WEB-INF/config/spring/applicationcontext.xml</param-value> </context-param><!-- 监听器 加载spring配置文件 -->
<listener> <listener-class>org.springframework.web.context.ContextLoaderListener</listener-class> </listener>
通过context-param去加载spring配置文件,applicationcontext.xml文件需要创建,代码如下:
<?xml version="1.0" encoding="UTF-8"?>
<beans xmlns="http://www.springframework.org/schema/beans"
    xmlns:xsi="http://www.w3.org/2001/XMLSchema-instance"
    xmlns:aop="http://www.springframework.org/schema/aop"
    xmlns:context="http://www.springframework.org/schema/context"
    xmlns:jpa="http://www.springframework.org/schema/data/jpa"
    xmlns:mvc="http://www.springframework.org/schema/mvc"
    xmlns:tx="http://www.springframework.org/schema/tx"
    xmlns:p="http://www.springframework.org/schema/p"
    xmlns:util="http://www.springframework.org/schema/util"
    xsi:schemaLocation="http://www.springframework.org/schema/beans
    http://www.springframework.org/schema/beans/spring-beans-4.0.xsd
    http://www.springframework.org/schema/aop http://www.springframework.org/schema/aop/spring-aop-4.0.xsd
    http://www.springframework.org/schema/context http://www.springframework.org/schema/context/spring-context-4.0.xsd
    http://www.springframework.org/schema/mvc http://www.springframework.org/schema/mvc/spring-mvc-4.0.xsd
    http://www.springframework.org/schema/tx http://www.springframework.org/schema/tx/spring-tx-4.0.xsd
    http://www.springframework.org/schema/util http://www.springframework.org/schema/util/spring-util-4.0.xsd">

    <!-- spring集成,注释掉 -->
    <context:component-scan base-package="com.demo" />


</beans>
项目启动时会去扫描com.tscp目录下的javaBean。
接下来web.xml中配置启动框架:
    <!-- 启动框架 -->
   <servlet>
        <servlet-name>springmvc</servlet-name>
        <servlet-class>org.springframework.web.servlet.DispatcherServlet</servlet-class>
        <init-param>
            <param-name>contextConfigLocation</param-name>
            <param-value>/WEB-INF/config/spring/servlet-config.xml</param-value>
        </init-param>
        <load-on-startup>1</load-on-startup>
    </servlet>

    <servlet-mapping>
        <servlet-name>springmvc</servlet-name>
        <url-pattern>*.do</url-pattern>
    </servlet-mapping>
servlet-config.xml配置:
<?xml version="1.0" encoding="UTF-8"?>
<beans xmlns="http://www.springframework.org/schema/beans"
    xmlns:xsi="http://www.w3.org/2001/XMLSchema-instance" xmlns:mvc="http://www.springframework.org/schema/mvc"
    xmlns:p="http://www.springframework.org/schema/p" xmlns:context="http://www.springframework.org/schema/context"
    xmlns:aop="http://www.springframework.org/schema/aop" xmlns:tx="http://www.springframework.org/schema/tx"
    xsi:schemaLocation="http://www.springframework.org/schema/beans
            http://www.springframework.org/schema/beans/spring-beans-4.0.xsd
            http://www.springframework.org/schema/context
            http://www.springframework.org/schema/context/spring-context-4.0.xsd
            http://www.springframework.org/schema/aop
            http://www.springframework.org/schema/aop/spring-aop-4.0.xsd
            http://www.springframework.org/schema/tx
            http://www.springframework.org/schema/tx/spring-tx-4.0.xsd
            http://www.springframework.org/schema/mvc
            http://www.springframework.org/schema/mvc/spring-mvc-4.0.xsd
            http://www.springframework.org/schema/context
            http://www.springframework.org/schema/context/spring-context-4.0.xsd">

    <context:component-scan base-package="com.demo" use-default-filters="false">
         <context:include-filter type="annotation" expression="org.springframework.stereotype.Controller" />
    </context:component-scan>

</beans>
集成已经做好,接下来改下工程编译的Class文件的输出位置,在工程根目录下有个.classpath文件,将里面的<classpathentry kind="output" path="build/classes"/>改成<classpathentry kind="output" path="web/WEB-INF/classes"/>,编译后直接在web/WEB-INF/classes目录下。
重新编译工程,启动tomcat,浏览器输入http://127.0.0.1:8080/web/TestInterface/test.do就看到如下信息:
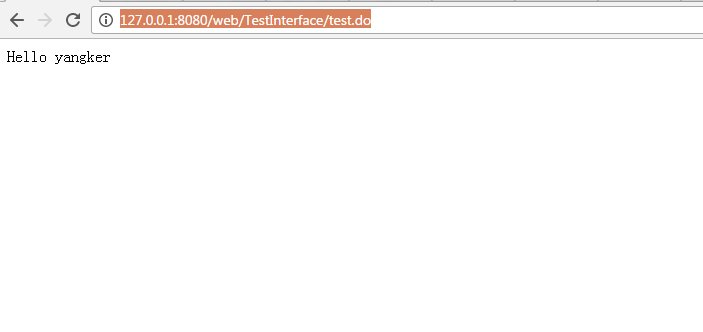
至此创建在eclipse中创建一个JavaWeb项目,配置web.xml,集成spring框架,调用后台返回指定jsp显示信息就已完成。
ps:好东西值得记录。
