Spring Boot 2.0 整合Thymeleaf 模板引擎
本节将和大家一起实战Spring Boot 2.0 和thymeleaf 模板引擎
1. 创建项目
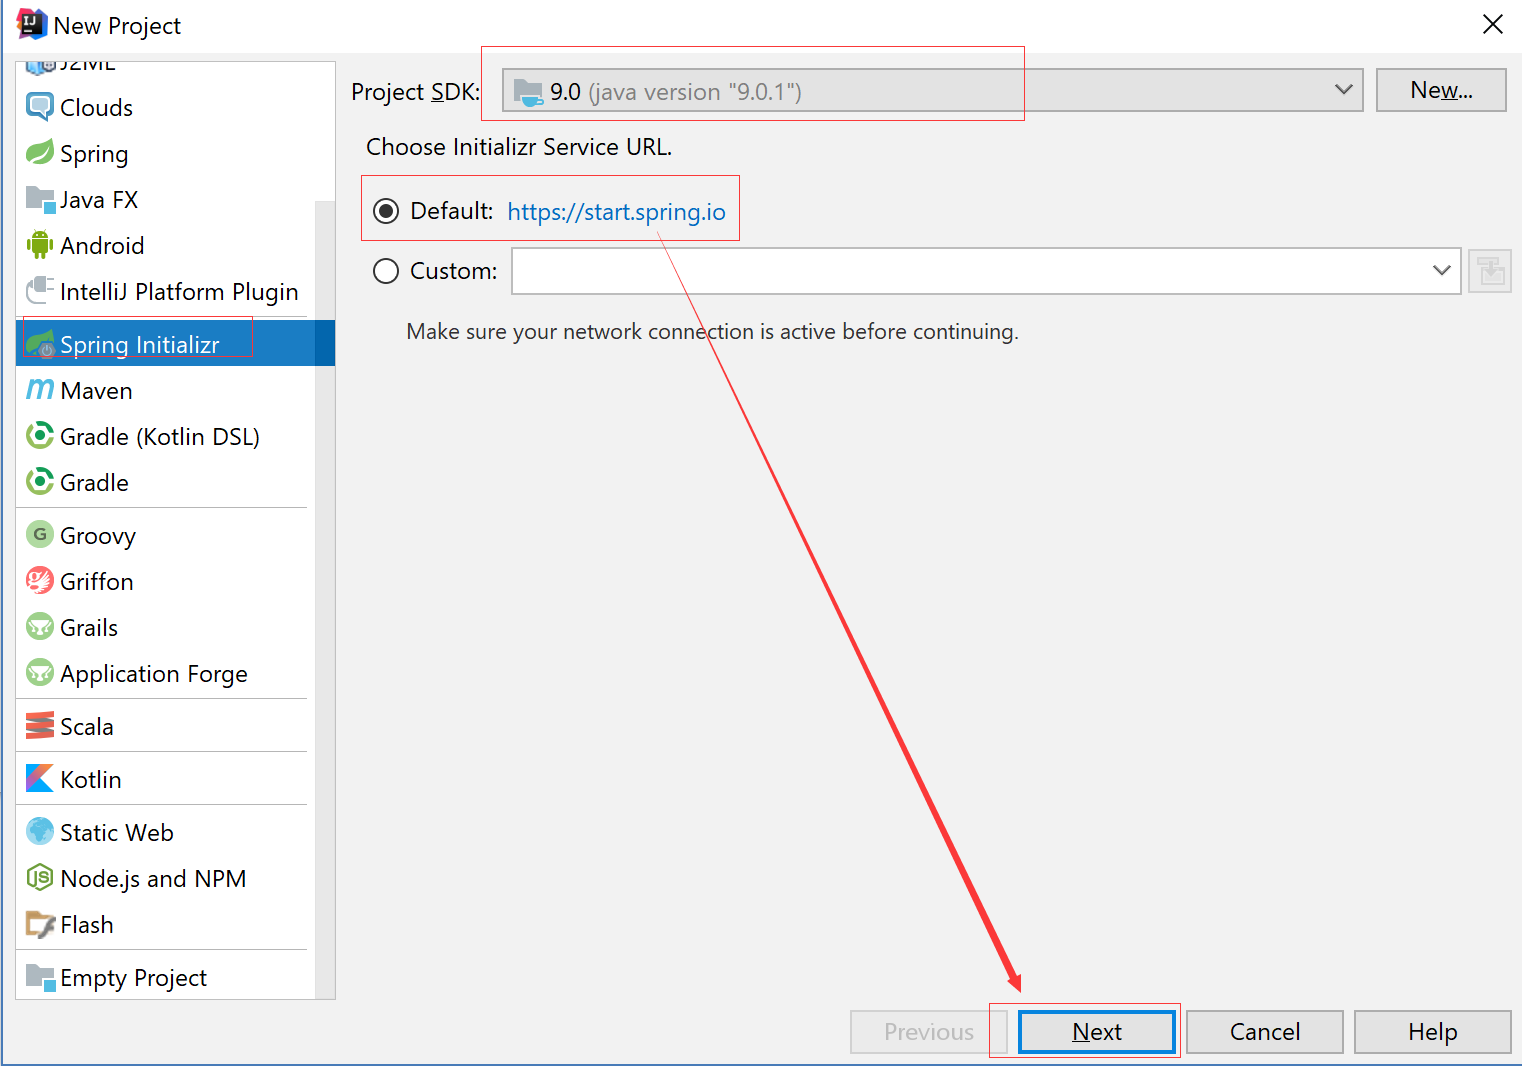
2. 使用Spring Initlizr 快速创建Spring Boot 应用程序
3. 填写项目配置信息

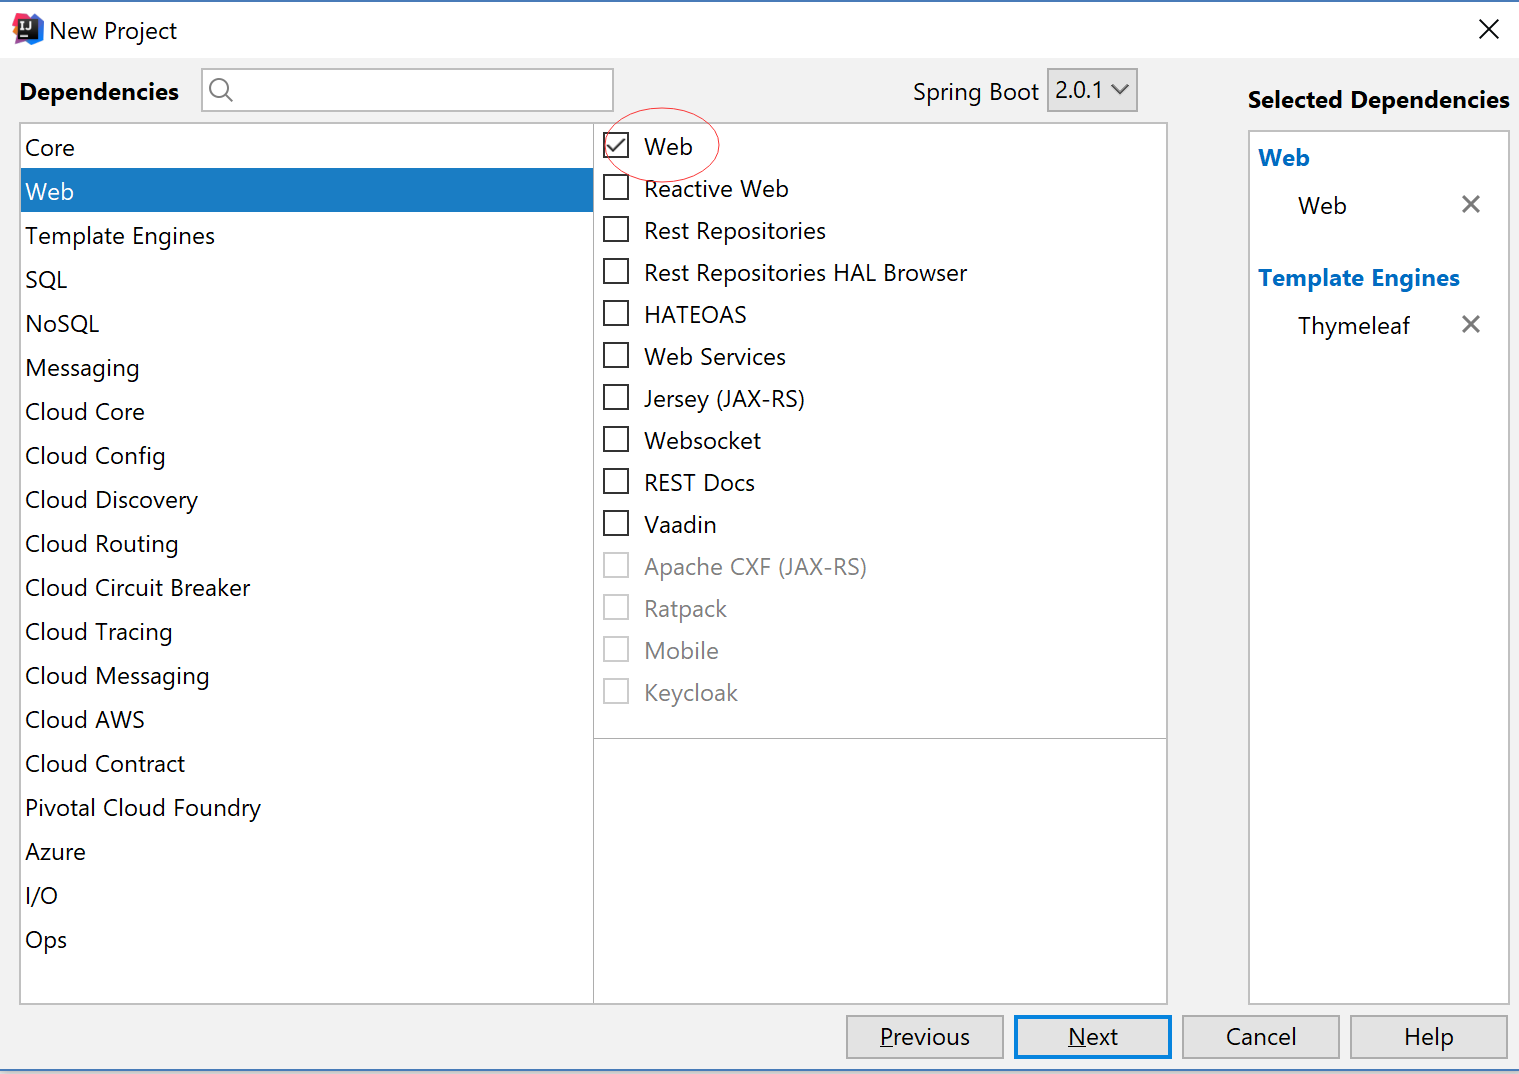
4. 添加Web 模块
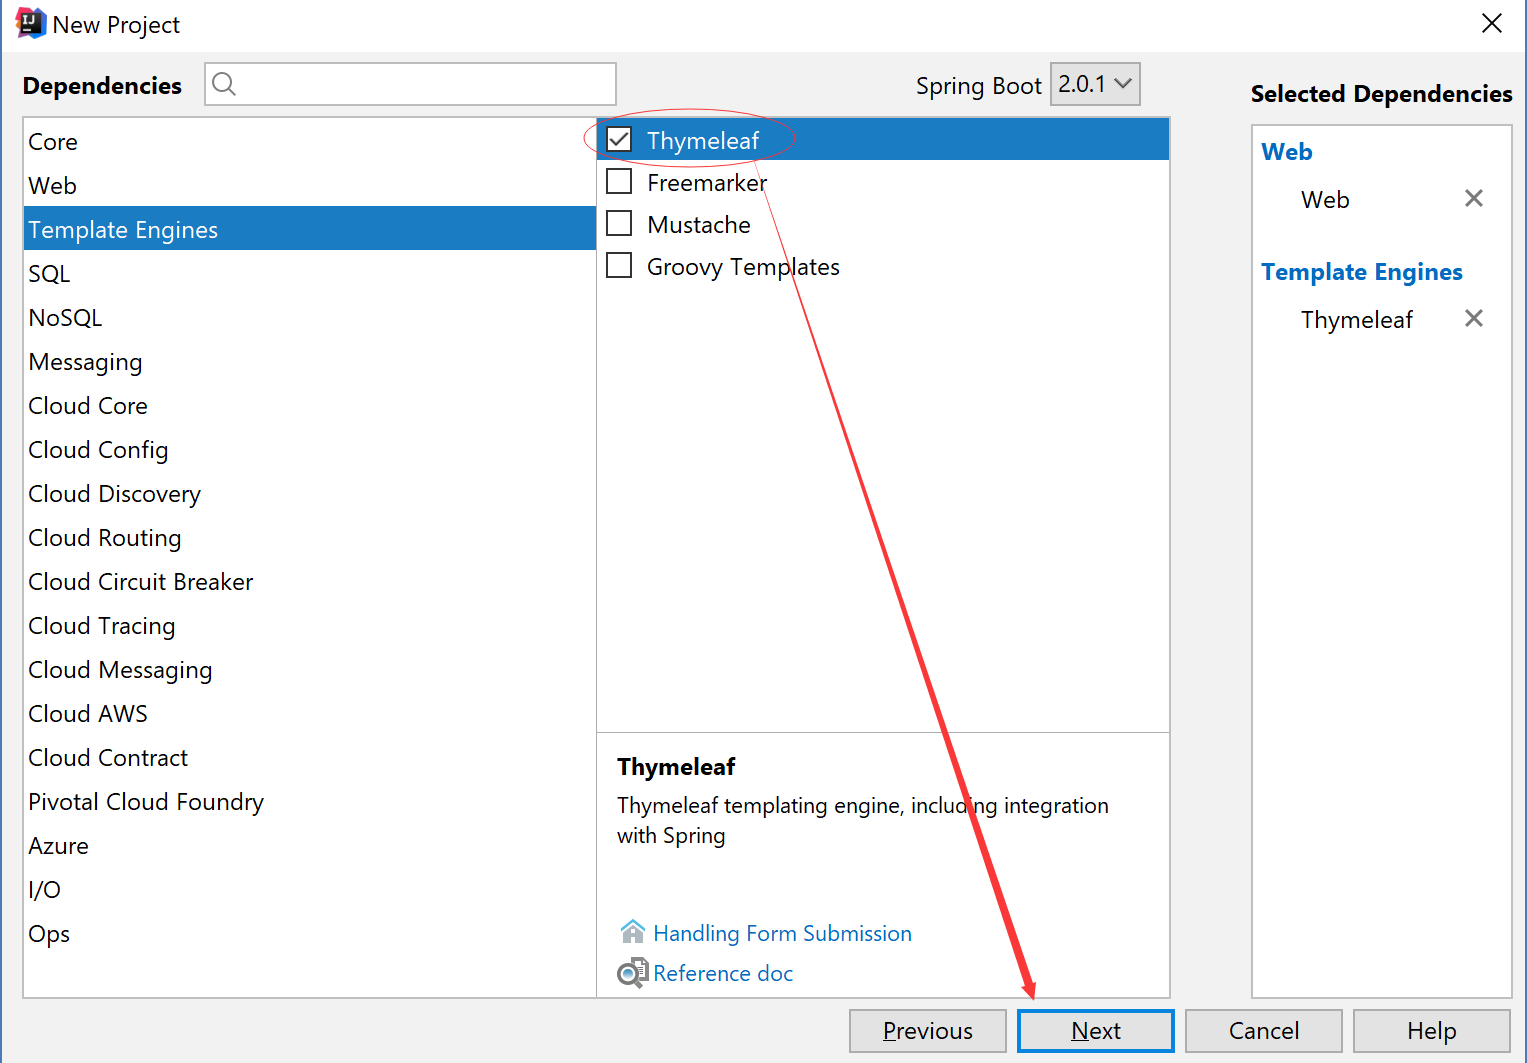
5. 添加thymeleaf 模块
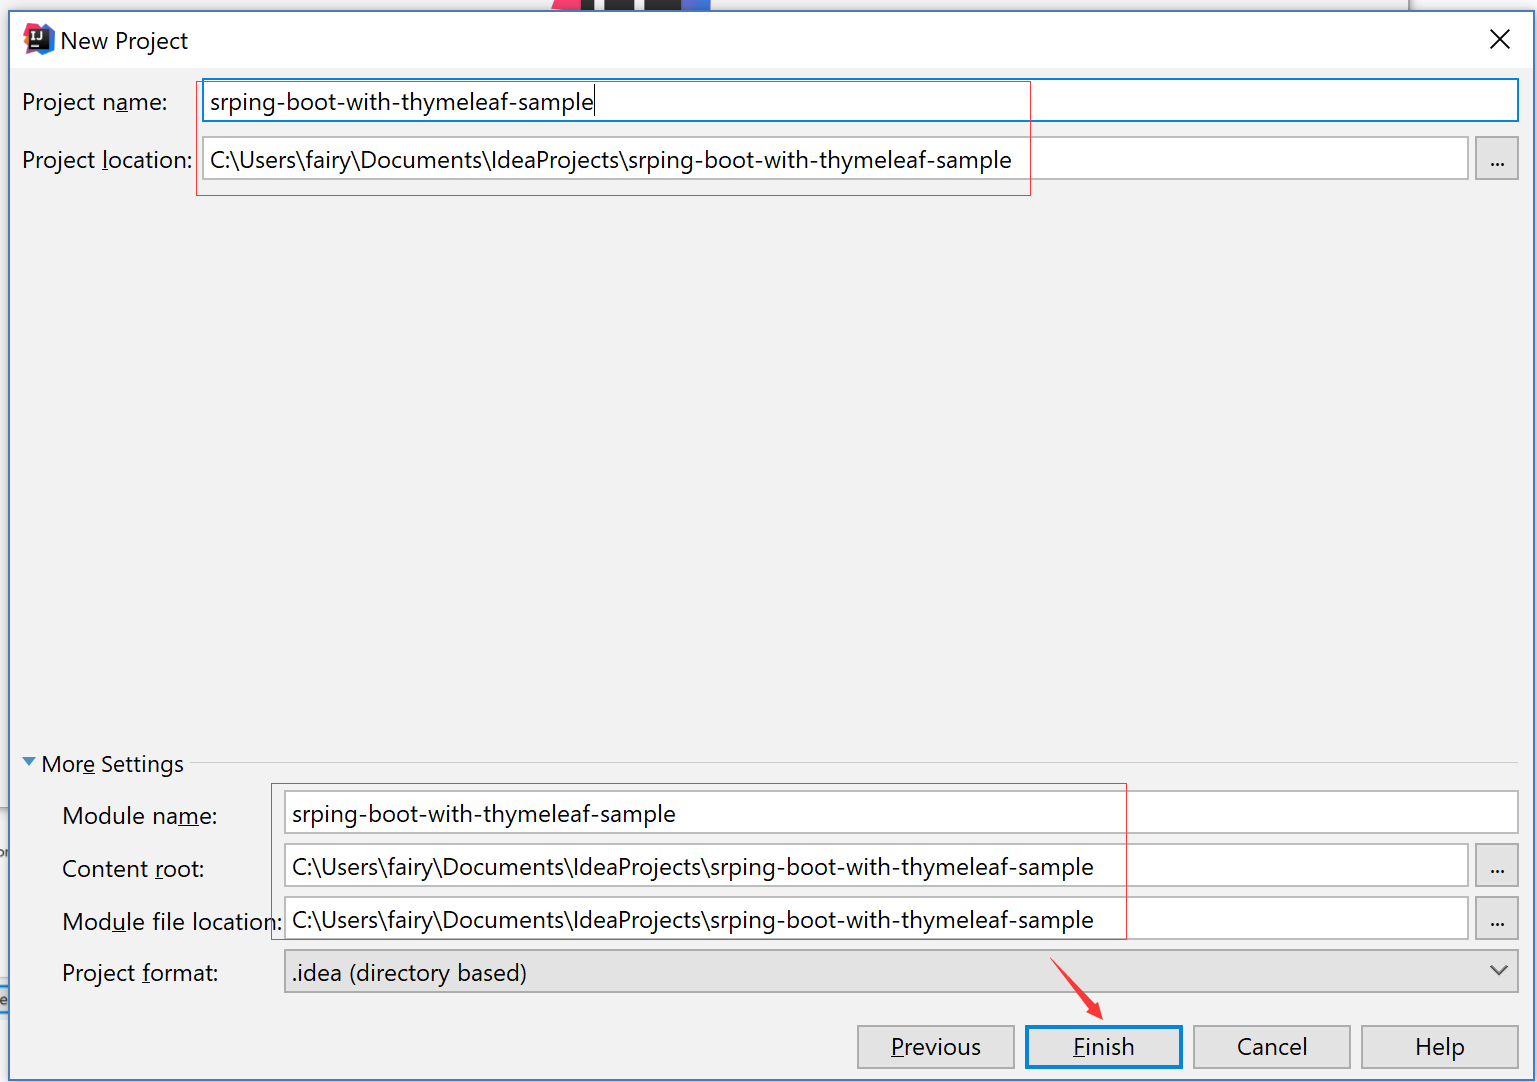
6. 项目保存路径
7. POM.xml 添加thymeleaf依赖
<?xml version="1.0" encoding="UTF-8"?>
<project xmlns="http://maven.apache.org/POM/4.0.0" xmlns:xsi="http://www.w3.org/2001/XMLSchema-instance"
    xsi:schemaLocation="http://maven.apache.org/POM/4.0.0 http://maven.apache.org/xsd/maven-4.0.0.xsd">
    <modelVersion>4.0.0</modelVersion>

    <groupId>com.xingyun</groupId>
    <artifactId>srping-boot-with-thymeleaf-sample</artifactId>
    <version>0.0.1-SNAPSHOT</version>
    <packaging>jar</packaging>

    <name>srping-boot-with-thymeleaf-sample</name>
    <description>Demo project for Spring Boot</description>

    <parent>
        <groupId>org.springframework.boot</groupId>
        <artifactId>spring-boot-starter-parent</artifactId>
        <version>2.0.1.RELEASE</version>
        <relativePath/> <!-- lookup parent from repository -->
    </parent>

    <properties>
        <project.build.sourceEncoding>UTF-8</project.build.sourceEncoding>
        <project.reporting.outputEncoding>UTF-8</project.reporting.outputEncoding>
        <java.version>1.8</java.version>
    </properties>

    <dependencies>
        <dependency>
            <groupId>org.springframework.boot</groupId>
            <artifactId>spring-boot-starter-thymeleaf</artifactId>
        </dependency>
        <dependency>
            <groupId>org.springframework.boot</groupId>
            <artifactId>spring-boot-starter-web</artifactId>
        </dependency>

        <dependency>
            <groupId>org.springframework.boot</groupId>
            <artifactId>spring-boot-starter-test</artifactId>
            <scope>test</scope>
        </dependency>
    </dependencies>

    <build>
        <plugins>
            <plugin>
                <groupId>org.springframework.boot</groupId>
                <artifactId>spring-boot-maven-plugin</artifactId>
            </plugin>
        </plugins>
    </build>


</project>
8. 配置application.properties
spring.thymeleaf.prefix=classpath:/templates/
spring.thymeleaf.suffix=.html
spring.thymeleaf.mode=HTML
spring.thymeleaf.encoding=UTF-8
spring.thymeleaf.servlet.content-type=text/html
# 关闭缓存,即时刷新,上线生产环境需改成true
spring.thymeleaf.cache=false
9. 创建模板文件
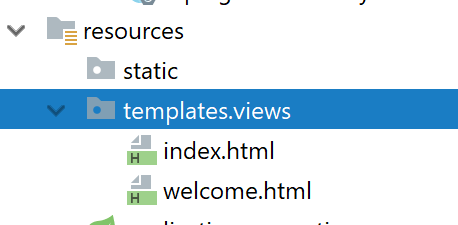
index.html
<!DOCTYPE html>
<html lang="en">
<head>
    <meta charset="UTF-8">
    <title>Title</title>
</head>
<body>

this is index.html
</body>
</html>
welcome.html
<!DOCTYPE html>
<html lang="en">
<head>
    <meta charset="UTF-8">
    <title>Title</title>
</head>
<body>
this is welcome.html
</body>
</html>
10.创建Controller
package com.xingyun.srpingbootwiththymeleafsample;

import org.springframework.stereotype.Controller;
import org.springframework.web.bind.annotation.GetMapping;
import org.springframework.web.bind.annotation.RequestMapping;

@Controller
public class HomeController {

    @GetMapping(value = "/")
    public String index(){
        return "/views/index";
    }

    @GetMapping(value = "/welcome")
    public String welcome(){
        return "/views/welcome";
    }
}
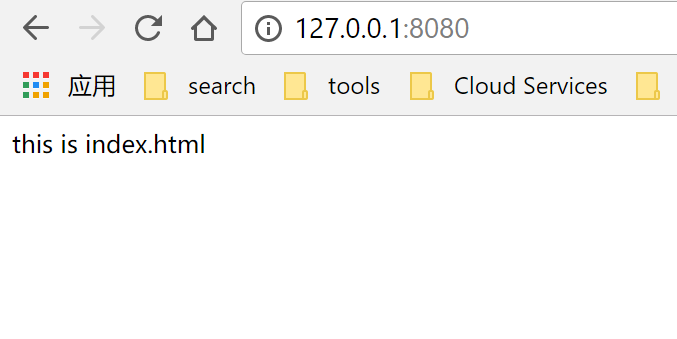
11. 访问 http://127.0.0.1:8080
12. 访问http://127.0.0.1:8080/welcome

*********************
交流即分享,分享才能进步!
不对之处,还请各位前辈多多指教。
by 星云
********************

