
jupyter notebook 安装配置使用,+目录插件安装
1、安装
pip3 install jupyter
2、配置
2.1. 生成一个 notebook 配置文件
jupyter notebook --generate-config
/root/.jupyter/jupyter_notebook_config.py
2.2. 生成密码
从 jupyter notebook 5.0 版本开始,提供了一个命令来设置密码:jupyter notebook password,生成的密码存储在 jupyter_notebook_config.json。
$ jupyter notebook password
Enter password:  ****
Verify password: ****
[NotebookPasswordApp] Wrote hashed password to /Users/you/.jupyter/jupyter_notebook_config.json
2.3. 修改配置文件
在 jupyter_notebook_config.py 中找到下面的行,取消注释并修改。
c.NotebookApp.ip='*'#163行
c.NotebookApp.password = u'sha:ce...刚才复制的那个密文'  #217行
c.NotebookApp.open_browser = False#208
c.NotebookApp.port =8888 #可自行指定一个端口, 访问时使用该端口228行
3、jupyter运行
juputer notebook --allow-root --port=8889 --ip 192.x.x.x
OR
/usr/local/bin/jupyter-notebook --allow-root --port=8890 --ip 192.xxx
4、升级 【插件】
1. pip install jupyter_contrib_nbextensions
2. jupyter contrib nbextension install --user --skip-running-check
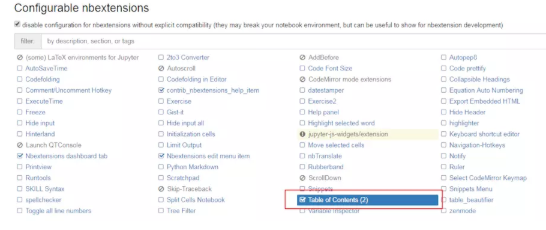
3. 上面两个步骤都没报错后,启动 Jupyter Notebook,首页选项栏会出现 Nbextensions 的选项
4. 点开 Nbextensions 的选项,并勾选 Table of Contents
5.打开一个 .ipnb 文件,工具栏就会出现目录选项,点击就会生成目录。

