Spring——注解代替XML配置文件,Spring与JUnit整合
使用注解代替XML配置文件
1、导包
spring-aop.jar
2、为主配置文件引入新的命名空间(约束)
<beans xmlns:xsi="http://www.w3.org/2001/XMLSchema-instance"
       xmlns="http://www.springframework.org/schema/beans"
       xmlns:context="http://www.springframework.org/schema/context"
       xsi:schemaLocation="http://www.springframework.org/schema/beans http://www.springframework.org/schema/beans/spring-beans-4.2.xsd http://www.springframework.org/schema/context http://www.springframework.org/schema/context/spring-context-4.2.xsd ">

3、开启使用注解代替配置文件
<!-- 指定扫描cn.x5456.domain包下的所有类中的注解.
     注意:扫描包时.会扫描指定报下的所有子孙包
 -->
<context:component-scan base-package="cn.x5456.domain"></context:component-scan>
4、在类中使用注解完成配置
1)将对象注册到容器
@Component("user")      // 注册当前类到容器中
@Scope(scopeName="singleton")   // 指定对象是单例还是多例
public class User {
相当于Xml配置文件中的
<bean name="user" class="cn.x5456.domain.User" scope="singleton" />
单例与多例的区别
- singleton:单例(放在容器中)
- prototype:你用的时候初始化一个对象,交给你,他就不管了(不在容器中)
一下的三种注解与Component是相同的,只是代表不同的意思
@Service("user") // service层
@Controller("user") // web层
@Repository("user")// dao层
2)值类型注入
方法一:

方法二:

3)引用类型(对象)注入
如果字段中包含除8大基本类型以外的对象,则需要将那个对象也注册到容器中。
1>注册到容器中

2>将Car对象装配到User中的字段中
方法一:

方法二:

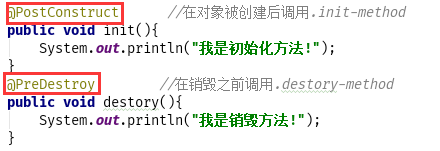
4)初始化与销毁方法

相当于
<bean name="user" class="cn.x5456.domain.User" init-method="init" destroy-method="destory"></bean>
Spring中整合的JUnit
1、导包
4+2+aop+test
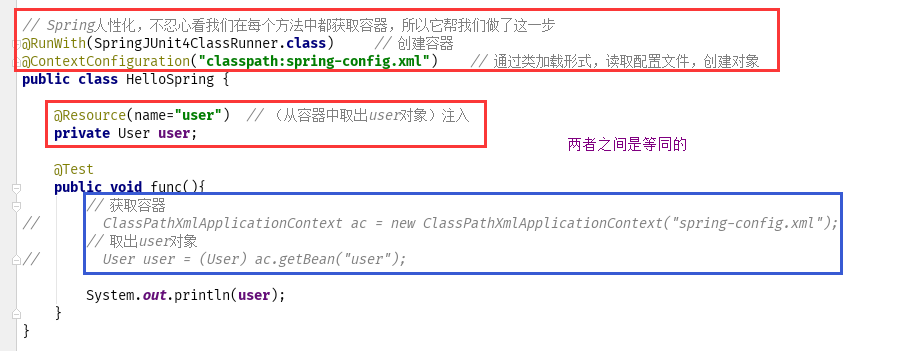
2、配置生成容器的注解


 1 // Spring人性化,不忍心看我们在每个方法中都获取容器,所以它帮我们做了这一步
 2 @RunWith(SpringJUnit4ClassRunner.class)     // 创建容器
 3 @ContextConfiguration("classpath:spring-config.xml")    // 通过类加载形式,读取配置文件,创建对象
 4 public class HelloSpring {
 5
 6     @Resource(name="user")  // (从容器中取出user对象)注入
 7     private User user;
 8
 9     @Test
10     public void func(){
11         // 获取容器
12 //        ClassPathXmlApplicationContext ac = new ClassPathXmlApplicationContext("spring-config.xml");
13         // 取出user对象
14 //        User user = (User) ac.getBean("user");
15
16         System.out.println(user);
17     }
18 }


