FragmentTabHostBottomDemo【FragmentTabHost + Fragment实现底部选项卡】
版权声明:本文为HaiyuKing原创文章,转载请注明出处!
前言
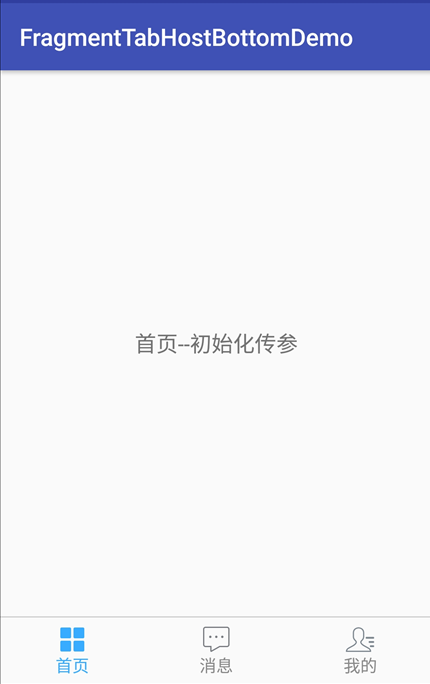
使用FragmentTabHost实现底部选项卡效果。
备注:该Demo主要是演示FragmentTabHost的一些设置和部分功能,实际中需要参考其他Demo。
效果图
代码分析
1、该Demo中采用的是FragmentTabHost的布局方案之一【命名为非常规布局写法】;【建议使用常规布局写法,见《FragmentTabHostTopDemo【FragmentTabHost固定宽度且居中】》】
2、未使用自定义的FragmentTabHost;【建议使用自定义的FragmentTabHost,见《FragmentTabHostUnderLineDemo【FragmentTabHost带下划线】》】
原因是FragmentTabHost切换时执行的是attach/detach,而不是show/hide。而atach触发的执行顺序:attach()->onCreateView()->onActivityCreated()->onStart()->onResume()
使用hide()方法只是隐藏了fragment的view并没有将view从viewtree中删除,随后可用show()方法将view设置为显示。
3、ContactFragment演示的是:使用FragmentTabHost时,Fragment之间切换时每次都会调用onCreateView方法,导致每次Fragment的布局都重绘,无法保持Fragment原有状态。
小结:对于2和3,都是解决切换fragment的时候重载的问题,两种方案各有利弊,选择其中一个即可。
4、演示设置选项卡区域的自定义宽度和高度;
5、演示初始化时、切换时传参;【切换时传参,可能一般用不到】
6、自定义选项卡子项类【获取底部选项卡的布局实例并初始化设置、更新文字颜色】;【这个思路参考别人的,思路比较好】【更新每个选项卡的背景需要额外写另外的方案,见《FragmentTabHostTopDemo【FragmentTabHost固定宽度且居中】》】
7、演示点击选项卡子项不切换到相应的fragment,而是打开一个新的界面;【用作个别情况】
使用步骤
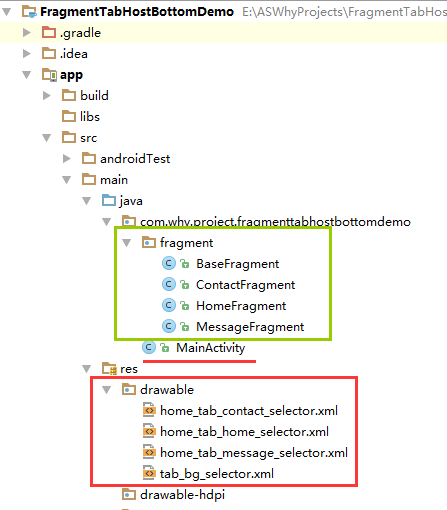
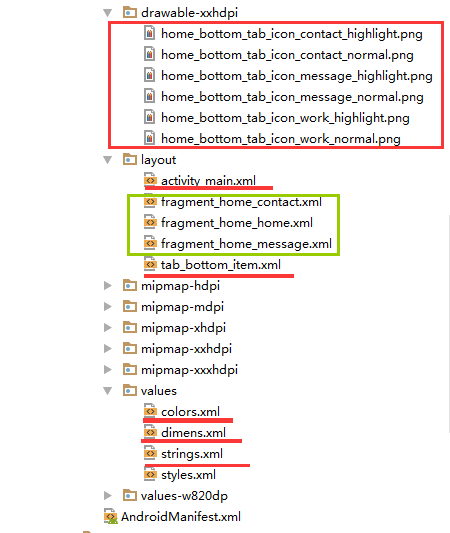
一、项目组织结构图
注意事项:
1、 导入类文件后需要change包名以及重新import R文件路径
2、 Values目录下的文件(strings.xml、dimens.xml、colors.xml等),如果项目中存在,则复制里面的内容,不要整个覆盖
二、导入步骤
将选项卡子项布局文件tab_bottom_item.xml文件复制到项目中

<?xml version="1.0" encoding="utf-8"?>
<!-- 底部选项卡区域的子选项卡布局文件 -->
<RelativeLayout xmlns:android="http://schemas.android.com/apk/res/android"
    android:layout_width="match_parent"
    android:layout_height="wrap_content"
    android:background="@color/tab_bg_normal"
    android:gravity="center" >

    <!-- android:checkMark="?android:attr/listChoiceIndicatorMultiple"代表多选
         android:checkMark="?android:attr/listChoiceIndicatorSingle" 代表单选
         该属性不添加的话,不会显示方框或者圆点
       -->

       <!-- android:drawableTop的属性值使用drawable目录下的selector选择器 -->
       <!-- android:tag="tag1"用于checkedTextview的索引 -->

       <!-- 选项卡的内容(图片+文字)类似RadioButton -->
    <!--android:textAlignment="center" 文本居中-->
    <CheckedTextView
        android:id="@+id/bottomtab_checkedTextView"
        android:tag="tag1"
        android:layout_width="wrap_content"
        android:layout_height="wrap_content"
        android:gravity="center"
        android:text=""
        android:textSize="@dimen/tab_text_size"
        android:textColor="@color/tab_text_normal"
        android:textAlignment="center"
        />
</RelativeLayout>
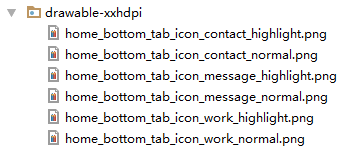
将图片资源和selector文件复制到项目中【后续可根据实际情况更换图片】
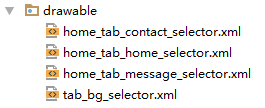
在colors.xml文件中添加以下代码:【后续可根据实际情况更改背景颜色、文字颜色值】
<?xml version="1.0" encoding="utf-8"?>
<resources>
    <color name="colorPrimary">#3F51B5</color>
    <color name="colorPrimaryDark">#303F9F</color>
    <color name="colorAccent">#FF4081</color>

    <!-- *********************************底部选项卡区域********************************* -->
    <!-- 底部选项卡底部背景色 -->
    <color name="tab_bg_normal">#00000000</color>
    <color name="tab_bg_selected">#00000000</color>
    <!-- 底部选项卡文本颜色 -->
    <color name="tab_text_normal">#8a8a8a</color>
    <color name="tab_text_selected">#38ADFF</color>

</resources>
在dimens.xml文件中添加以下代码:【后续可根据实际情况更改底部选项卡区域的高度值、文字大小值】
<resources>
    <!-- Default screen margins, per the Android Design guidelines. -->
    <dimen name="activity_horizontal_margin">16dp</dimen>
    <dimen name="activity_vertical_margin">16dp</dimen>

    <!-- *********************************底部选项卡区域********************************* -->
    <!--底部选项卡高度值-->
    <dimen name="tab_bottom_background_height">56dp</dimen>
    <!-- 底部选项卡文本大小 -->
    <dimen name="tab_text_size">14sp</dimen>
    <dimen name="tab_medium_text_size">16sp</dimen>
    <dimen name="tab_larger_text_size">18sp</dimen>
    <dimen name="tab_larger_small_text_size">20sp</dimen>

</resources>
在strings.xml文件中添加以下代码:【后续可根据实际情况更改底部选项卡的文字内容】
<resources>
    <string name="app_name">FragmentTabHostBottomDemo</string>

    <!-- *********************************底部选项卡区域********************************* -->
    <string name="home_function_home">首页</string>
    <string name="home_function_message">消息</string>
    <string name="home_function_contact">我的</string>
</resources>
至此,选项卡子项的布局所需的文件已集成到项目中了。
三、使用方法
在Activity布局文件中引用FragmentTabHost【此Demo采用的是非常规(自己命名的,以便于区分)的布局写法】
<?xml version="1.0" encoding="utf-8"?>
<LinearLayout
    xmlns:android="http://schemas.android.com/apk/res/android"
    xmlns:tools="http://schemas.android.com/tools"
    android:id="@+id/activity_main"
    android:layout_width="match_parent"
    android:layout_height="match_parent"
    android:orientation="vertical"
    tools:context="com.why.project.fragmenttabhostbottomdemo.MainActivity">

    <!-- 碎片切换区域 -->
    <FrameLayout
        android:id="@+id/center_layout"
        android:layout_width="match_parent"
        android:layout_height="0.0dp"
        android:layout_weight="1">
    </FrameLayout>

    <!-- 分割线 -->
    <View
        android:layout_width="match_parent"
        android:layout_height="1dp"
        android:background="#cfcfcf">
    </View>

    <!-- 底部选项卡区域 -->
    <android.support.v4.app.FragmentTabHost
        android:id="@+id/tab_bottom_ftabhost_layout"
        android:layout_width="match_parent"
        android:layout_height="wrap_content"
        >
        <!--
            这个FrameLayout其实是切换区域
            且其id必须为@android:id/tabcontent
        -->
        <FrameLayout
            android:id="@android:id/tabcontent"
            android:layout_width="match_parent"
            android:layout_height="0dp"
            android:layout_weight="1"
            />

    </android.support.v4.app.FragmentTabHost>

</LinearLayout>
创建需要用到的fragment类和布局文件【后续可根据实际情况更改命名,并且需要重新import R文件】
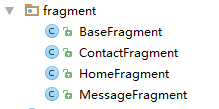
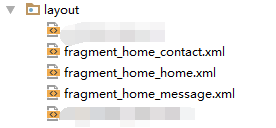
特别的是ContactFragment类,用来演示使用FragmentTabHost时,Fragment之间切换时每次都会调用onCreateView方法,导致每次Fragment的布局都重绘,无法保持Fragment原有状态。【解开注释代码,注释选中的代码,会看到不一样的效果】
package com.why.project.fragmenttabhostbottomdemo.fragment;

import android.os.Bundle;
import android.util.Log;
import android.view.LayoutInflater;
import android.view.View;
import android.view.ViewGroup;
import android.widget.TextView;

import com.why.project.fragmenttabhostbottomdemo.R;


/**
 * Created by HaiyuKing
 * Used 首页界面——我的碎片界面
 */

public class ContactFragment extends BaseFragment{

    private static final String TAG = "ContactFragment";
    /**View实例*/
    private View myView;

    private TextView tv_homef;

    /**传递过来的参数*/
    private String bundle_param;

    //重写
    public View onCreateView(LayoutInflater inflater, ViewGroup container, Bundle savedInstanceState) {
        //使用FragmentTabHost时,Fragment之间切换时每次都会调用onCreateView方法,导致每次Fragment的布局都重绘,无法保持Fragment原有状态。
        //http://www.cnblogs.com/changkai244/p/4110173.html
        if(myView==null){
            myView = inflater.inflate(R.layout.fragment_home_contact, container, false);
            //接收传参
            Bundle bundle = this.getArguments();
            bundle_param = bundle.getString("param");
        }
        //缓存的rootView需要判断是否已经被加过parent, 如果有parent需要从parent删除,要不然会发生这个rootview已经有parent的错误。
        ViewGroup parent = (ViewGroup) myView.getParent();
        if (parent != null) {
            parent.removeView(myView);
        }
        //普通写法,如果换成这个方式,那么bundle_param的值不会发生任何变化
//        myView = inflater.inflate(R.layout.fragment_home_contact, container, false);
//        //接收传参
//        Bundle bundle = this.getArguments();
//        bundle_param = bundle.getString("param");

        return myView;
    }

    @Override
    public void onActivityCreated(Bundle savedInstanceState) {
        // TODO Auto-generated method stub
        super.onActivityCreated(savedInstanceState);

        //初始化控件以及设置
        initView();
        //初始化数据
        initData();
        //初始化控件的点击事件
        initEvent();
    }
    @Override
    public void onResume() {
        super.onResume();
    }

    @Override
    public void onPause() {
        super.onPause();
    }

    @Override
    public void onDestroy() {
        super.onDestroy();
    }

    /**
     * 初始化控件
     */
    private void initView() {
        tv_homef = (TextView) myView.findViewById(R.id.tv_homef);
    }

    /**
     * 初始化数据
     */
    public void initData() {
        Log.w("tag","{iniData}bundle_param" + bundle_param);
        tv_homef.setText(tv_homef.getText() + "--" + bundle_param);
    }

    /**
     * 初始化点击事件
     * */
    private void initEvent(){
    }

    public void setBundle_param(String bundle_param) {
        this.bundle_param = bundle_param;
    }
}
在Activity中使用如下【继承FragmentActivity或者其子类】
package com.why.project.fragmenttabhostbottomdemo;

import android.content.Context;
import android.graphics.drawable.Drawable;
import android.os.Bundle;
import android.support.v4.app.Fragment;
import android.support.v4.app.FragmentTabHost;
import android.support.v4.content.ContextCompat;
import android.support.v7.app.AppCompatActivity;
import android.util.Log;
import android.view.View;
import android.widget.CheckedTextView;
import android.widget.LinearLayout;
import android.widget.TabHost;
import android.widget.Toast;

import com.why.project.fragmenttabhostbottomdemo.fragment.ContactFragment;
import com.why.project.fragmenttabhostbottomdemo.fragment.HomeFragment;
import com.why.project.fragmenttabhostbottomdemo.fragment.MessageFragment;

import java.util.ArrayList;

public class MainActivity extends AppCompatActivity {

    private FragmentTabHost mBottomFTabHostLayout;

    //选项卡子类集合
    private ArrayList<TabItem> tabItemList = new ArrayList<TabItem>();

    @Override
    protected void onCreate(Bundle savedInstanceState) {
        super.onCreate(savedInstanceState);
        setContentView(R.layout.activity_main);

        initTabList();
        initFTabHostLayout();
        setFTabHostData();
        initEvents();

    }

    /**
     * 初始化选项卡数据集合*/
    private void initTabList() {

        tabItemList.add(new TabItem(this,getResources().getString(R.string.home_function_home),
                R.drawable.home_tab_home_selector,HomeFragment.class));
        tabItemList.add(new TabItem(this,getResources().getString(R.string.home_function_message),
                R.drawable.home_tab_message_selector,MessageFragment.class));
        tabItemList.add(new TabItem(this,getResources().getString(R.string.home_function_contact),
                R.drawable.home_tab_contact_selector,ContactFragment.class));
    }

    /**
     * 初始化FragmentTabHost*/
    private void initFTabHostLayout() {
        //实例化
        mBottomFTabHostLayout = (FragmentTabHost) findViewById(R.id.tab_bottom_ftabhost_layout);
        mBottomFTabHostLayout.setup(this, getSupportFragmentManager(), R.id.center_layout);//最后一个参数是碎片切换区域的ID值
        // 去掉分割线
        mBottomFTabHostLayout.getTabWidget().setDividerDrawable(null);

        //设置选项卡区域的自定义宽度和高度
        LinearLayout.LayoutParams params = new LinearLayout.LayoutParams(LinearLayout.LayoutParams.MATCH_PARENT,
                getResources().getDimensionPixelSize(R.dimen.tab_bottom_background_height));
        mBottomFTabHostLayout.getTabWidget().setLayoutParams(params);
    }

    /**设置选项卡的内容*/
    private void setFTabHostData() {

        //Tab存在于TabWidget内,而TabWidget是存在于TabHost内。与此同时,在TabHost内无需在写一个TabWidget,系统已经内置了一个TabWidget
        for (int i = 0; i < tabItemList.size(); i++) {
            //实例化一个TabSpec,设置tab的名称和视图
            TabHost.TabSpec spec = mBottomFTabHostLayout.newTabSpec(tabItemList.get(i).getTabTitle()).setIndicator(tabItemList.get(i).getTabView());
            // 添加Fragment
            //初始化传参:http://bbs.csdn.net/topics/391059505
            Bundle bundle = new Bundle();
            bundle.putString("param","初始化传参");

            mBottomFTabHostLayout.addTab(spec, tabItemList.get(i).getTabFragment(), bundle);

            // 设置Tab按钮的背景(必须在addTab之后,由于需要子节点(底部菜单按钮)否则会出现空指针异常)
            mBottomFTabHostLayout.getTabWidget().getChildAt(i).setBackgroundResource(R.drawable.tab_bg_selector);
        }

        //默认选中第一项
        mBottomFTabHostLayout.setCurrentTab(0);
        tabItemList.get(0).setChecked(true);
    }

    private void initEvents() {
        //选项卡的切换事件监听
        mBottomFTabHostLayout.setOnTabChangedListener(new TabHost.OnTabChangeListener() {
            @Override
            public void onTabChanged(String tabId) {
                //重置Tab样式
                for (int i = 0; i< tabItemList.size(); i++) {
                    TabItem tabitem = tabItemList.get(i);
                    if (tabId.equals(tabitem.getTabTitle())) {
                        tabitem.setChecked(true);
                    }else {
                        tabitem.setChecked(false);
                    }
                }

                Toast.makeText(MainActivity.this,tabId,Toast.LENGTH_SHORT).show();

                //切换时执行某个Fragment的公共方法,前提是先打开过一次
                //对于更改参数的情况,还需要实现Fragment保存原有状态,否则Fragment接收到的始终是初始的bundle的值,因为Fragment之间切换时每次都会调用onCreateView方法。
                int currentTabPosition = mBottomFTabHostLayout.getCurrentTab();
                Fragment fragment = getSupportFragmentManager().findFragmentByTag(tabItemList.get(currentTabPosition).getTabTitle());
                if(fragment instanceof ContactFragment){
                    Log.e("tag","fragment.isDetached()="+fragment.isDetached());
                    if (fragment != null) {
                        ((ContactFragment)fragment).setBundle_param("切换时更改bundle_param的值");
                    }
                }
            }
        });

        //如果想要不切换到相应的fragment,而是打开一个新的界面
        //http://www.jianshu.com/p/3b0ff7a4bde1
        mBottomFTabHostLayout.getTabWidget().getChildTabViewAt(1).setOnClickListener(new View.OnClickListener() {
            @Override
            public void onClick(View v) {
                Toast.makeText(MainActivity.this,"打开一个新的界面",Toast.LENGTH_SHORT).show();
            }
        });
    }

    /**
     * 选项卡子项类*/
    class TabItem{

        private Context mContext;

        private CheckedTextView bottomtab_checkedTextView;

        //底部选项卡对应的图标
        private int tabImgRedId;
        //底部选项卡对应的文字
        private String tabTitle;
        //底部选项卡对应的Fragment类
        private Class<? extends Fragment> tabFragment;

        public TabItem(Context mContext, String tabTitle, int tabImgRedId, Class tabFragment){
            this.mContext = mContext;

            this.tabTitle = tabTitle;
            this.tabImgRedId = tabImgRedId;
            this.tabFragment = tabFragment;
        }

        public Class<? extends Fragment> getTabFragment() {
            return tabFragment;
        }

        public int getTabImgRedId() {
            return tabImgRedId;
        }

        public String getTabTitle() {
            return tabTitle;
        }

        /**
         * 获取底部选项卡的布局实例并初始化设置*/
        private View getTabView() {
            //取得布局实例
            View bottomtabitemView = View.inflate(mContext, R.layout.tab_bottom_item, null);

            //===========设置CheckedTextView控件的图片和文字==========
            bottomtab_checkedTextView = (CheckedTextView) bottomtabitemView.findViewById(R.id.bottomtab_checkedTextView);

            //设置CheckedTextView控件的android:drawableTop属性值
            Drawable drawable = ContextCompat.getDrawable(mContext,tabImgRedId);
            //setCompoundDrawables 画的drawable的宽高是按drawable.setBound()设置的宽高
            //而setCompoundDrawablesWithIntrinsicBounds是画的drawable的宽高是按drawable固定的宽高,即通过getIntrinsicWidth()与getIntrinsicHeight()自动获得
            drawable.setBounds(0, 0, drawable.getMinimumWidth(), drawable.getMinimumHeight());
            bottomtab_checkedTextView.setCompoundDrawables(null, drawable, null, null);
            //bottomtab_checkedTextView.setCompoundDrawablesWithIntrinsicBounds(null, drawable, null, null);

            //设置CheckedTextView的文字
            bottomtab_checkedTextView.setText(tabTitle.toString());

            return bottomtabitemView;
        }

        /**
         * 更新文字颜色
         */
        public void setChecked(boolean isChecked) {
            if(tabTitle != null){
                if(isChecked){
                    bottomtab_checkedTextView.setTextColor(mContext.getResources().getColor(R.color.tab_text_selected));
                }else{
                    bottomtab_checkedTextView.setTextColor(mContext.getResources().getColor(R.color.tab_text_normal));
                }
            }
        }
    }


}
混淆配置
无
参考资料
Android的FragmentTabHost使用(顶部或底部菜单栏)
Android_ FragmentTabHost切换Fragment时避免重复加载UI
使用FragmentTabHost+TabLayout+ViewPager实现双层嵌套Tab
如何自定义FragmentTabHost中某一个Tab的点击效果
FragmentTabHost+fragment中获得fragment的对象
fragment中的attach/detach方法说明(网上拷贝,只为作笔记)
FragmentTabHost切换Fragment,与ViewPager切换Fragment时重新onCreateView的问题


