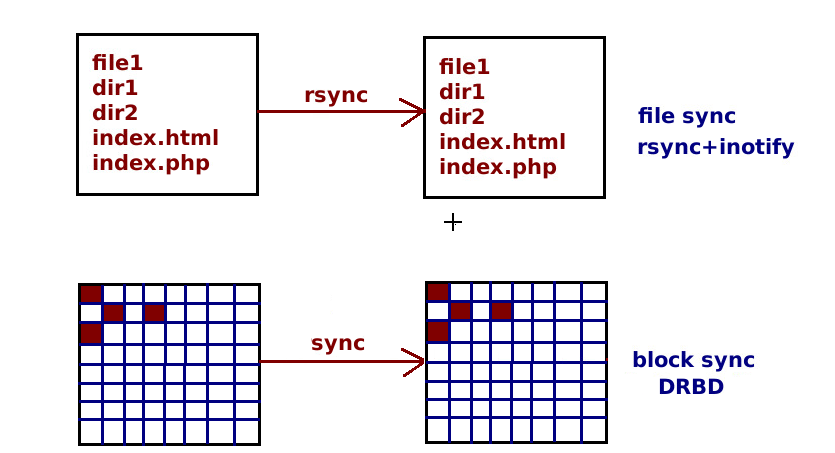
[rsync]——rsync文件同步和备份

实验环境
(1) Rsync服务器:10.0.10.158
(2) Rsync客户端:10.0.10.173
Rsync服务器端的配置
1. 安装xinetd和rsync
# yum install xinetd
# yum install rsync
2. 创建配置目录和文件
# mkdir /etc/rsync
该目录下包含3个文件:
- rsyncd.conf # rsync主配置文件
- rsyncd.secrets # 密码文件
- rsyncd.motd # 服务信息定义文件
下面逐一编辑这些文件:
2.1 编辑主配置文件
# vim /etc/rsync/rsyncd.conf
  pid file = /var/run/rsyncd.pid    #pid文件的存放位置
  port = 873                        #通信的端口
  address = 10.0.10.158             #监听的地址/服务器的地址
  uid = root                        #运行rsync守护进程的用户
  gid = root                        #运行rsync守护进程的用户组
  use chroot = yes                  #是否使用chroot
  read only = no                    #是否只读
  hosts allow=10.0.0.0/255.255.0.0  #设置允许访问的主机(可以是一个范围也可以是一个IP地址)
  hosts deny= *                     #设置拒绝访问的主机(这里的*表示除了allow以外的都拒绝)
  max connections = 51              #最大连接数
  motd file = /etc/rsync/rsyncd.motd  #指定信息显示文件
  log file = /var/log/rsync.log       #指定日志文件
  log format = %t %a %m %f %b %l      #设置日志文件格式
  syslog facility = local3            #设置日志级别
  timeout = 600                       #设置连接超时时间(单位:s)

  [webroot]               #目录的标识/认证模块名
  path = /var/www/html    #要同步的目录名
  list=yes                #是否允许列出文件
  ignore errors           #忽略一般的IO错误
  auth users = admin      #认证的用户名
  secrets file = /etc/rsync/rsyncd.secrets  #密码文件
  comment = web root directory              #说明信息
  exclude =   secret/     #需要排除的目录(排除后就不同步它了)
2.2 编辑密码配置文件
# vim /etc/rsync/rsyncd.secrets
  admin:123123         #格式是“用户名:密码”
2.3 编辑服务信息定义文件
# vim /etc/rsync/rsyncd.motd
  welcome access
3. 修改密码配置文件的权限
# chmod 600 rsyncd.secrets
4. 启动Rsync服务
# /usr/bin/rsync --daemon --config=/etc/rsyncd/rsyncd.conf
# vim /etc/xinetd.d/rsync
  service rsync
  {
	disable	= no
	flags		= IPv6
	socket_type     = stream
	wait            = no
	user            = root
	server          = /usr/bin/rsync
	server_args     = --daemon --config=/etc/rsync/rsyncd.conf
	log_on_failure  += USERID
  }
# service xinetd restart
Rsync客户端配置
1. 创建目录、编辑密码文件
# mkdir /etc/rsync
# vim /etc/rsync/password
  123123     #格式是“密码”
# chmod 600 /etc/rsync/password  #修改密码文件的权限
Rsync同步命令的参数
-v 表示verbose详细显示
-z 表示压缩(reduces the amount of data being transmitted)
-r 表示recursive递归
-t 表示保持原文件创建时间
-o 表示保持原文件属主
-p 表示保持原文件的参数
-g 表示保持原文件的所属组
-a 归档模式
-P 表示代替-partial和-progress两者的选项功能
-e ssh建立起加密的连接
--partial 阻止rsync在传输中断时删除已拷贝的部分(如果在拷贝文件的过程中,传输被中断,rsync的默认操作是撤消前操作,即从目标机上删除已拷贝的部分文件)
--progress 是指显示出详细的进度情况
--delete 是指如果服务器端删除了这一文件,那么客户端也相应把文件删除,保持真正的一致
--exclude 不包含指定目录
--size-only 这个参数用在两个文件夹中的差别仅是源文件夹中有一些新文件,不存在重名且被修改过的文件,因为这种文件有可能会因为内容被修改可大小一样,而被略过。这个参数可以大大地提高同步的效率,因为它不需要检查同名文件的内容是否相同
--password-file 来指定密码文件,内容包含server端指定认证用户的密码
验证
1. 同步服务器的文件到本地
# ll /var/www/html/   #看服务器上的/var/www/html目录下有啥
总用量 8
-rw-r--r--. 1 root root    0 12月  1 01:05 index.html
-rw-r--r--. 1 root root    0 12月  1 01:05 page.html
# rsync -vzrtopg --progress --delete admin@10.0.10.158::webroot /var/www/html/ --password-file=/etc/rsync/password   #在客户机,执行同步操作,使得获得服务器的文件
welcome access

receiving incremental file list
./
index.html
           0 100%    0.00kB/s    0:00:00 (xfer#1, to-check=1/3)
page.html
           0 100%    0.00kB/s    0:00:00 (xfer#2, to-check=0/3)

sent 105 bytes  received 227 bytes  664.00 bytes/sec
total size is 0  speedup is 0.00
# ll /var/www/html/            #在服务器端我们试着添加一下新的目录和文件(包括设置了不同步的目录secret)
总用量 8
drwxr-xr-x. 2 root root 4096 12月  1 01:41 haha
-rw-r--r--. 1 root root    0 12月  1 01:05 index.html
-rw-r--r--. 1 root root    0 12月  1 01:40 page_2.html
-rw-r--r--. 1 root root    0 12月  1 01:05 page.html
drwxr-xr-x. 2 root root 4096 12月  1 01:40 secret
# rsync -vzrtopg --progress --delete admin@10.0.10.158::webroot /var/www/html/ --password-file=/etc/rsync/password  #在客户端执行同步命令,以获得服务器的更新
welcome access

receiving incremental file list
./
page_2.html
           0 100%    0.00kB/s    0:00:00 (xfer#1, to-check=0/4)

sent 80 bytes  received 207 bytes  191.33 bytes/sec
total size is 0  speedup is 0.00

# rsync -vzrtopg --progress --delete admin@10.0.10.158::webroot /var/www/html/ --password-file=/etc/rsync/password
welcome access

receiving incremental file list
./
haha/

sent 65 bytes  received 203 bytes  536.00 bytes/sec
total size is 0  speedup is 0.00

# ll /var/www/html/                 --------->#确实没有同步secret这个目录
总用量 4
drwxr-xr-x. 2 root root 4096 12月  1 2009 haha
-rw-r--r--. 1 root root    0 12月  1 2009 index.html
-rw-r--r--. 1 root root    0 12月  1 2009 page_2.html
-rw-r--r--. 1 root root    0 12月  1 2009 page.html
2. 同步本地的文件到服务器
# touch new.html    #在本地新增一个文件
# rsync -vzrtopg --progress --partial --password-file=/etc/rsync/password /var/www/html/ admin@10.0.10.158::webroot #在本地执行同步命令,使本地的更新同步到服务器
welcome access

sending incremental file list
./
new.html
           0 100%    0.00kB/s    0:00:00 (xfer#1, to-check=3/6)

sent 165 bytes  received 31 bytes  392.00 bytes/sec
total size is 0  speedup is 0.00
# ls /var/www/html    #在服务器上看到了这个new.html
haha  index.html  new.html  page_2.html  page.html  secret
常见错误
问题一:
@ERROR: chroot failed
rsync error: error starting client-server protocol (code 5) at main.c(1522) [receiver=3.0.3]
原因:服务器端的目录不存在或无权限。创建目录并修正权限可解决问题。检查服务器那个密码文件的权限是否为600
问题二:
@ERROR: auth failed on module tee
rsync error: error starting client-server protocol (code 5) at main.c(1522) [receiver=3.0.3]
原因:服务器端该模块(tee)需要验证用户名密码,但客户端没有提供正确的用户名密码,认证失败。提供正确的用户名密码解决此问题。
问题三:
@ERROR: Unknown module ‘tee_nonexists’
rsync error: error starting client-server protocol (code 5) at main.c(1522) [receiver=3.0.3]
原因:服务器不存在指定模块。提供正确的模块名或在服务器端修改成你要的模块以解决问题。
问题四:
password file must not be other-accessible
continuing without password file
Password:
原因:这是因为rsyncd.pwd rsyncd.secrets的权限不对,应该设置为600。如:chmod 600 rsyncd.pwd
问题五:
rsync: failed to connect to 218.107.243.2: No route to host (113)
rsync error: error in socket IO (code 10) at clientserver.c(104) [receiver=2.6.9]
原因:对方没开机、防火墙阻挡、通过的网络上有防火墙阻挡,都有可能。关闭防火墙,其实就是把tcpudp的873端口打开。
问题六:
rsync error: error starting client-server protocol (code 5) at main.c(1524) [Receiver=3.0.7]
原因:/etc/rsyncd.conf配置文件内容有错误。请正确核对配置文件。
问题七:
rsync: chown "" failed: Invalid argument (22)
原因:权限无法复制。去掉同步权限的参数即可。(这种情况多见于Linux向Windows的时候)
问题八:
@ERROR: daemon security issue -- contact admin
rsync error: error starting client-server protocol (code 5) at main.c(1530) [sender=3.0.6]
原因:同步的目录里面有软连接文件,需要服务器端的/etc/rsyncd.conf打开use chroot = yes。掠过软连接文件


 浙公网安备 33010602011771号