Nutch-1.6在Hadoop环境下的安装配置
1.下载Nutch-1.6-src.tar.gz http://www.linuxtourist.com/apache/nutch/1.6/
将Nutch-1.6-src.tar.gz复制到usr/目录下
sudo cp /home/franklin/Documents/apache-nutch-1.6-src.tar.gz /usr/
并解压
sudo tar -zxf apache-nutch-1.6-src.tar.gz
改变apache-nutch-1.6的权限
sudo chown hadoop:hadoop apache-nutch-1.6
2.使用ant对nutch进行编译
ant的安装:
下载 ant-1.9.0 http://ant.apache.org/bindownload.cgi
将apache-ant-1.9.0-bin.tar.gz复制到usr下
sudo cp /home/franklin/Documents/apache-ant-1.9.0-bin.tar.gz /usr/
解压之
sudo tar -zxf apache-ant-1.9.0-bin.tar.gz
配置ant的环境变量
sudo gedit /etc/profile
加入如下内容
export ANT_HOME=/usr/apache-ant-1.9.0
在PATH后添加
:$ANT_HOME/bin
验证ant是否配置成功
ant -version
出现如下提示即配置成功
![]()
使用ant对nutch进行编译
进入apache-nutch-1.6.0目录下,运行ant命令,就会根据build.xml对nutch进行编译(需要等一段时间,因为要通过网络下载)
![]()
编译成功 总共花了15分钟 编译完后 会在apache-nutch-1.6.0目录下看到一个runtime目录 进入该目录会发现一个local目录和
一个deploy目录,一个是本地模式,一个是分布式模式。
3.本地模式下运行nutch的爬虫进行爬取
进入runtime/local/conf下配置nutch-site.xml
sudo gedit nutch-site.xml
在configuration中加入如下内容:
<property>
<name>http.agent.name</name>
<value>My Nutch Spider</value>
</property>
创建爬虫爬取的Url
新建urls目录
sudo mkdir urls
在urls目录下新建seed.txt
sudo touch seed.txt
改变seed.txt的读写权限
chmod 777 seed.txt
写入爬取Url
sudo echo http://nutch.apache.org/ > seed.txt

设置爬取的规则
进入apache-nutch-1.6.0/runtime/local/conf目录下
sudo gedit regex-urlfilter.txt
将这两行内容
# accept anything else
+.
替换为 +^http://([a-z0-9]*\.)*nutch.apache.org/
运行ant重新编译一下
开始爬取
进入apache-nutch-1.6.0/runtime/local 运行 bin/nutch crawl /data/urls/seed.txt -dir crawl -depth 3 -topN 5

爬取的过程中出现错误:
![]()
这是由于上一次运行爬取命令生成了一个不完整的segments/20130434113019造成的,到相应目录下将该文件夹删除即可
爬取完毕:

在输出结果的文件夹中可以看见:crawldb/ linkdb/ segments/
4.分布式模式下运行nutch爬虫进行爬取
启动hadoop的所有节点
bin/start-all.sh
进入apache-nutch-1.6.0/conf下配置nutch-site.xml
sudo gedit nutch-site.xml
在configuration中加入如下内容:
<property>
<name>http.agent.name</name>
<value>My Nutch Spider</value>
</property>
将爬取的url复制到hadoop分布式文件系统中
![]()
设置爬取规则:
进入apache-nutch-1.6.0/conf目录下
sudo gedit regex-urlfilter.txt
将这两行内容
# accept anything else
+.
替换为 +^http://([a-z0-9]*\.)*nutch.apache.org/
运行ant重新编译一下
开始爬取
进入apache-nutch-1.6.0/runtime/deploy 运行 bin/nutch crawl /data/urls/seed.txt -dir crawl -depth 3 -topN 5
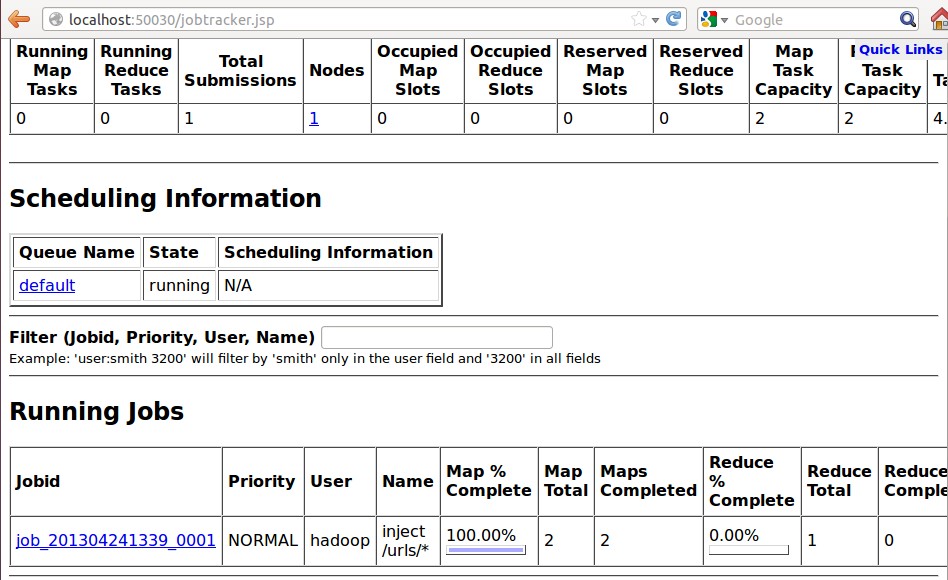
可以看到爬取任务被提交给hadoop的mapping和reducing

通过50030端口可以看到jobtracker运行的状态

运行完毕:
![]()

可以看到总共提交了18个任务
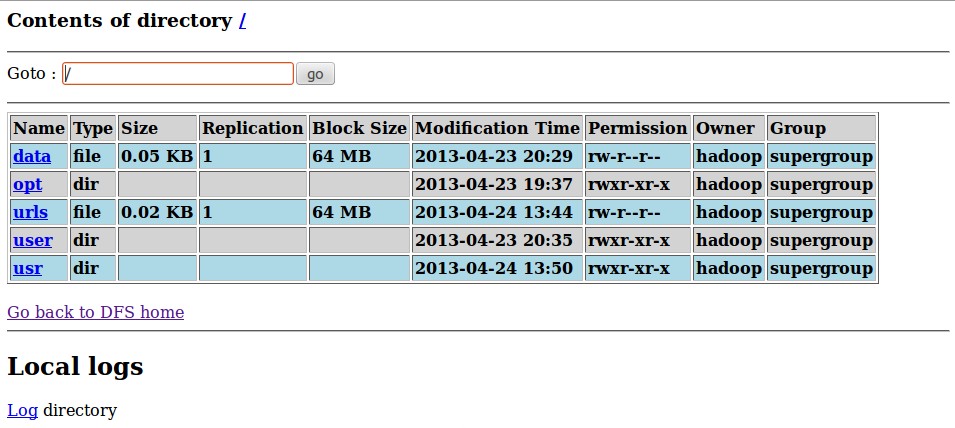
爬取完毕后可以通过50070查看hadoop的分布式文件系统

点击Browse the filesystem:可以看到分布式文件系统下的文件

进入该目录下可以看到爬取输出的内容

至此所有配置测试完毕。


