基于FPGA的DW8051移植(一)
最近 半个月都在移植8051,看到DW8051内核资料比较齐全又是新思发布的,所以就开始玩弄
可是这半个月的努力几近白费 —— 移植失败了,不知道从何着手这个内核。可能大家能找到不同的版本,我的是最初的版本,里面包含了datasheet 以及一些说明文档,看上去貌似是最原始的(可能已经修改过了),本想传上来,但是我一直到偶没有找到哪里可以上传文件。
我没有添加片外memory,只有片内64k的rom 和256k的ram
首先来看看我的tb
  1 `timescale 1us/100ns
  2
  3 module dw8051_tb ;
  4
  5 reg         clk ,            reset ;
  6 reg         int0_n,        int1_n ;
  7 reg      rxd0_in ,   rxd1_in ;
  8 reg      t0 ,        t1     ;
  9
 10 wire         rst_out_n ;
 11 wire         stop_mode_n,   idle_mode_n ;
 12 wire     rxd0_out ,     txd0    ;
 13 wire     rxd1_out ,     txd1    ;
 14 wire     t0_out  ,      t1_out  ;
 15
 16 integer i ;
 17
 18 DW8051_top  cpu_core(
 19
 20              .clk (clk)         ,
 21              .reset (reset)       ,
 22              .rst_out_n (rst_out_n)    ,
 23              .stop_mode_n (stop_mode_n) ,
 24              .idle_mode_n (idle_mode_n) ,
 25
 26            //int
 27              .int0_n (int0_n)      ,
 28              .int1_n (int1_n)      ,
 29
 30            //serial port
 31              .rxd0_in (rxd0_in)     ,
 32              .rxd0_out (rxd0_out)    ,
 33              .txd0 (txd0)        ,
 34
 35              .rxd1_in (rxd1_in)      ,
 36              .rxd1_out (rxd1_out)    ,
 37              .txd1 (txd1)        ,
 38
 39            //timer/counter input/output
 40              .t0 (t0)          ,
 41              .t1 (t1)          ,
 42              .t0_out (t0_out)       ,
 43              .t1_out (t1_out)      ,
 44
 45
 46        //sfr interface
 47                .sfr_data_in () ,
 48              .sfr_addr ()    ,
 49              .sfr_data_out () ,
 50              .sfr_wr ()      ,
 51              .sfr_rd ()      ,
 52
 53            //external ram interface or user-defined peripheral reg
 54                .mem_data_in () ,
 55              .mem_addr ()    ,
 56              .mem_data_out (),
 57              .mem_wr_n ()     ,
 58              .mem_rd_n ()
 59             );
 60
 61 always #10 clk = ~clk ;
 62
 63 initial   begin
 64     i = 0  ;
 65     clk = 0 ;     reset =0 ;
 66     int0_n=0 ;    int1_n=0 ;
 67     rxd0_in=0 ;   rxd1_in=0 ;
 68     t0 =  0  ;    t1  = 0   ;
 69     #180 reset =1 ;
 70
 71
 72
 73 //**********测试1 : 发现无论如何修改idata初始化空间大小,程序都会进入29-2a-2b-2c 这个循环,无法跳出
 74     // while (i<8'hff) begin
 75             // @(cpu_core.irom_addr == 16'h0029)   i = i+1 ;
 76             // if (i>8'h7f) begin
 77                     // $display ("rom loop at 0029 is over 7f time ");
 78                     // $display ("  i = %d \n", i );
 79                     // end
 80             // end
 81 //---------------------------------------------------------------------------------------
 82
 83 /**********测试2: 依据测试1追查27这个地址上的循环次数数值去了哪里
 84     1,@(cpu_core.core.irom_addr == 16'h0027) 测试发现跑到最后一个displays里面去了 ,屏蔽掉所有的if
 85 打印具体数据信息结果显示 cpu_core.core.i_cpu.biu_instr == 8'h78
 86 而cpu_core.core.i_cpu.biu_data_in == 8'h00
 87     2,@(cpu_core.core.irom_addr == 16'h0028) 测试发现cpu_core.core.i_cpu.biu_instr == 8'h3f而
 88 cpu_core.core.i_cpu.biu_data_in == 8'h00。由1和2对比可知数据有一个周期的停滞期
 89 */
 90 //@(cpu_core.core.irom_addr == 16'h0028) begin
 91 //        //if (cpu_core.core.int_rom_data_out == 8'h3f) begin
 92 //                //if (cpu_core.core.i_cpu.biu_instr == 8'h3f)
 93 //                        $display ("the rom data 3f have get to biu_instr = %h  \n ",cpu_core.core.i_cpu.biu_instr );
 94 //                //if (cpu_core.core.i_cpu.biu_data_in == 8'h3f)
 95 //                        $display ("the rom data 3f have get to biu_data_in  = %h\n", cpu_core.core.i_cpu.biu_data_in);
 96 //                end
 97 //        else  begin
 98 //                $display ("operation error ! rom data 3f at address 27 have not load in ");
 99 //                end
100 //                end
101
102 /********测试3 依据测试2追查内核执行情况
103
104
105 */
106 $display ("display  data  :  \n");
107 $monitor ("%h",cpu_core.core.i_cpu.i_opdec.op);
108 #8000 $stop ;
109
110
111
112
113     @(cpu_core.irom_addr == 16'h0019)
114     #80000  $stop ;
115
116
117
118
119 end
120
121 endmodule
最后的一个stop 是始终执行不到那里去,也就是说代码根本没有执行到程序存储地址19这里来。
当然需要解释一下我为什么要这么测试,不懂为什么tb这么写,可以先忽略掉。我们一步步来追究,首先看看我的c程序
 1 #include <reg51.h>
 2 #define uchar unsigned char
 3 #define uint unsigned int
 4
 5 sbit LED = P0^0 ;
 6
 7 void DelayMS (uint x )
 8 {
 9     uchar i ;
10     while (x--);
11     {
12         for (i=0;i<2;i++) ;
13
14     }
15 }
16
17 void main ()
18 {
19    LED = 1 ;
20    while (1)
21     {
22
23         DelayMS(5);
24         LED=~LED ;
25     }
26 }

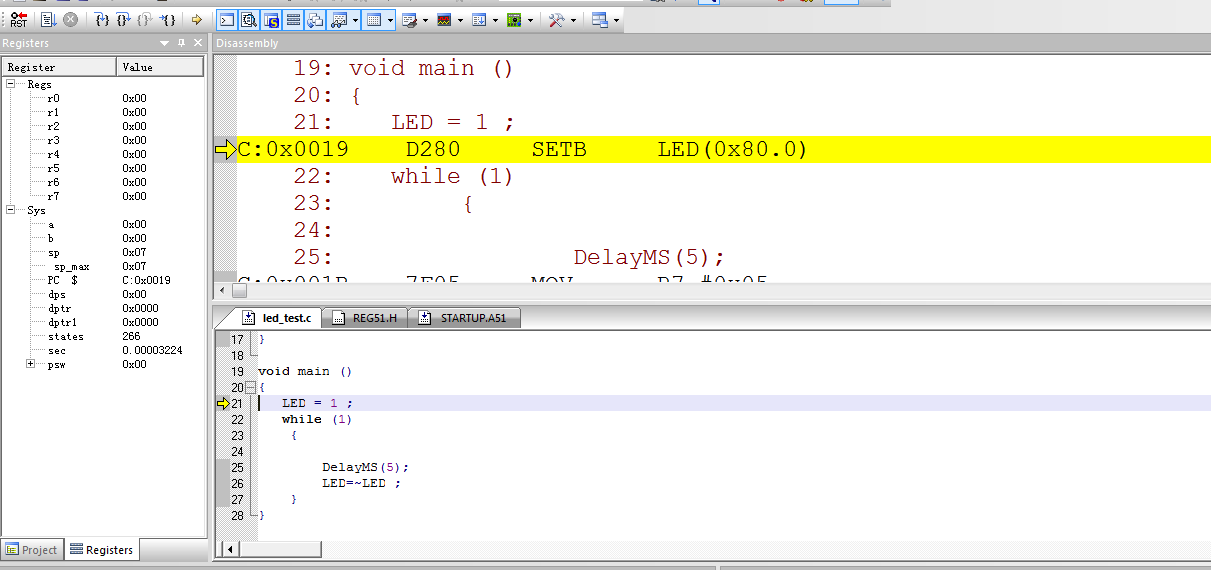
调试窗口中显示我的程序起始地址是19,也就是说如果执行我的main函数要从19这个地址作为入口进行执行。在后面的step按钮下一步步调试发现,我的子函数起始地址是 03 。整个用户程序的起始地址是03,终止地址是25.
下面来看看keilC输出的hex
:03000000020026D5
:0C002600783FE4F6D8FD75810702001950
:10000300EF1FAA0670011E4A600BE4FDEDC39402C4
:0500130050EE0D80F726
:0100180022C5
:0D001900D2807F057E00120003B28080F5CA
:00000001FF
依据我查到的资料上说: 03000000020026D5
03 代码数据数目 0000 代表存储地址,00代表数据类型 020026代表数据 D5代表校验码
依据上述的意思去查QuartusII里面的信息

经过对比发现两者是一致的,说明QuartusII 对hex档的读取是没有问题的(当然我的C程序也是调试过没有问题的)
下面让我们看看modelsim仿真出来的结果

modelsim中仿真可以看到,程序执行地址 00- 01 - 02- 26 -27 - 28 - 29 - 2a - 2b - 2c - 29........然后就是这个循环一直都没有退出,也就是说根本没有执行用户程序。
继续追踪这个程序段

reset之后一切明白了,程序从00地址开始执行 转跳到地址26——记住用户程序是从03到25,所以这个时候执行的是startup程序段,现在追踪startup,这个startup.a51是每个单片机上电的时候都需要进行执行的代码段,也就是初始化单片机的程序(具体的操作大家自己找资料看,网上很多人对这个文件有了中文的解析,比如这位大虾的http://www.cnblogs.com/heiyue/p/3262389.html)
在调试中发现

立即数3f给了r0 ,也就是地址段27这个地方的数据,它表示的是我的ram的大小(startup.a51里面默认的是80编译出来是7f,改成40编译出来是3f),也就是我的初始化执行这个loop的次数。
好,现在可以解释一下为什么有了我的程序中的测试1
依据程序中规定的,这个loop应该是执行3f次—— 我也可以把这个loop直接停止掉,不用去初始化我的ram。因为我不管怎么修改这个loop都跳转不出来,所以我就开始追踪 3f去哪里了,所以才有了测试2
测试2发现这个3f居然进了decode模块的op端口(biu_instr和op相连),为了证实所以有了测试3

3f居然进了decode模块当操作码(op)处理了,它应该是一个立即数才对啊、再进入decode模块证实是否真的当操作码处理了,当我进入decode模块的时候发现真的悲剧了,没有使能信号控制,3f直接进入了操作码的case语句。
初步认定核有问题
在我写这个博客的时候觉得还有一丝希望的是,这个3f虽然当做操作码处理了,loop里面的所有数据都当操作码处理了,但是没有初始化完成,最后有一个使能把执行结果屏蔽了,—— 后待验证


