如何使用MiniProfiler(附最新版MiniProfiler使用心得)
MiniProfiler这个工具早就久仰大名,不过之前一直没有动力去用,正好最近手上有个ASP.NET MVC的项目,正好拿来试试手,下面是使用最新的4.0.138版本的心得体会以及踩到一些小坑的解决过程,希望能对大家有所帮助。
开发环境如下:
Visual Studio 2017: 15.8.6
MiniProfiler家族:4.0.138
项目框架:4.6.1
注意:MiniProfiler 4.0.138版本要求项目框架不能低于4.6.1
在使用过程中主要参考了以下资料:
使用MiniProfiler给Asp.net MVC和Entity Framework号脉(附源码)
MiniProfiler工具介绍(监控EF生成的SQL语句)--EF,迷你监控器,哈哈哈
MiniProfiler官方文档(不过官方文档不够完善,有些坑还是靠着上面的资料解决的)
下面开始吧!
写在前面:
0、建议每做一步都编译下项目,确定一切OK!
1、首先从Nuget安装 MiniProfiler.Mvc5 包,顺带会把 MiniProfiler、MiniProfiler.Shared 包也一并装上。
2、按照官方文档的说明,编辑项目的Global.asax文档。
注意:这里会遇到第一个小坑,官方文档里面居然有typo错误
    .AddViewPofiling()              // Add MVC view profiling (you want this)  错误

    .AddViewProfiling()              // Add MVC view profiling (you want this)  正确,函数少了一个r
注意:增加相应的命名空间
using StackExchange.Profiling;
using StackExchange.Profiling.Mvc;
3、在布局页当中加入以下代码:
@using StackExchange.Profiling;
<head>
 ..
</head>
<body>
  ...
  @MiniProfiler.Current.RenderIncludes()
</body>
注意:在上述的第二份资料中代码是这样:
@MiniProfiler.RenderIncludes()
但最新4.0版本的MiniProfiler应该是有了改动,关于RenderIncludes函数有更多参数可用,具体可以参考官方的ASP.NET MVC示例
小提示:MiniProfiler是可以隐藏的,可以使用键盘的ALT+P来切换显示。
4、修改配置文件Web.config,在节点<handlers>中加上如下配置
<add name="MiniProfiler" path="profiler/*" verb="*" type="System.Web.Routing.UrlRoutingModule" resourceType="Unspecified" preCondition="integratedMode" />
注意:这里的path有可能会有变化,因为RenderIncludes函数会生成类似于下面这样的脚本代码,需要根据生成的文件路径进行调整,上面的两篇文档使用的是MiniProfiler 2.0及3.0版本,所以这里与上面的资料中的路径不同,
如果将来遇到MiniProfiler不能生效的情况,可以通过Chrome的开发者工具查看Console上的提示来确认这里是否有错误
<script async="async" id="mini-profiler" src="/profiler/includes.min.js?v=4.0.138+gcc91adf599" data-version="4.0.138+gcc91adf599" data-path="/profiler/" data-current-id="2a324576-7a4e-41d6-abef-bcc82e205080" data-ids="4388d9aa-5b59-405f-b27f-6a05959910fb,2a324576-7a4e-41d6-abef-bcc82e205080" data-position="Right" data-authorized="true" data-max-traces="10" data-toggle-shortcut="Alt+P" data-trivial-milliseconds="2.0" data-ignored-duplicate-execute-types="Open,OpenAsync,Close,CloseAsync"></script>
更新:
不需要添加handlers配置,使用runAllManagedModulesForAllRequests即可
  <system.webServer>
    <validation validateIntegratedModeConfiguration="false" />
    <modules runAllManagedModulesForAllRequests="true" />
    <!--<handlers>
      <add name="MiniProfiler" path="profiler/*" verb="*" type="System.Web.Routing.UrlRoutingModule" resourceType="Unspecified" preCondition="integratedMode" />
    </handlers>-->
  </system.webServer>
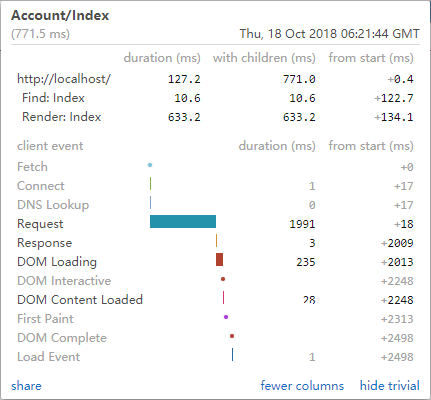
5、到这里按理说就能看到页面的右上角的MiniProfiler面板了,完全展开大概会像这样:

可以看到整个页面的加载时间和流程中各个步骤的耗时。
6、不过对于真正的项目来说,上面这些数据还是不够的,我们还需要对SQL语句进行调优,下面来看看怎么做。
首先我们需要封装一个可以返回DbConnection的函数来让profile的代码能够注入到项目代码中,对于一个结构良好的项目来说这完全不是问题
提示:因为使用的项目是直接使用原生ADO.NET访问数据,所以需要这个步骤,如果是使用EF6的话,只需要添加 MiniProfiler.EF6 的引用,不需要任何配置就可以在面板上看到EF生成的SQL语句。
public DbConnection GetConnection()
{
    DbConnection connection = new System.Data.SqlClient.SqlConnection("这里是数据库的连接字符串");
    return new StackExchange.Profiling.Data.ProfiledDbConnection(connection, MiniProfiler.Current);
}
然后在实际查询数据的代码周围使用如下代码:
            var profiler = MiniProfiler.Current;
            using (profiler.Step("查询数据"))
            {
                var sqlSelect = string.Format("SELECT * FROM table");
                var data = SqlHelper.Query(sqlSelect);
            }
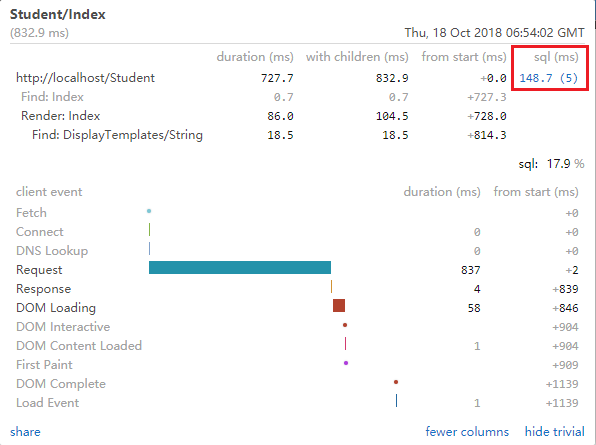
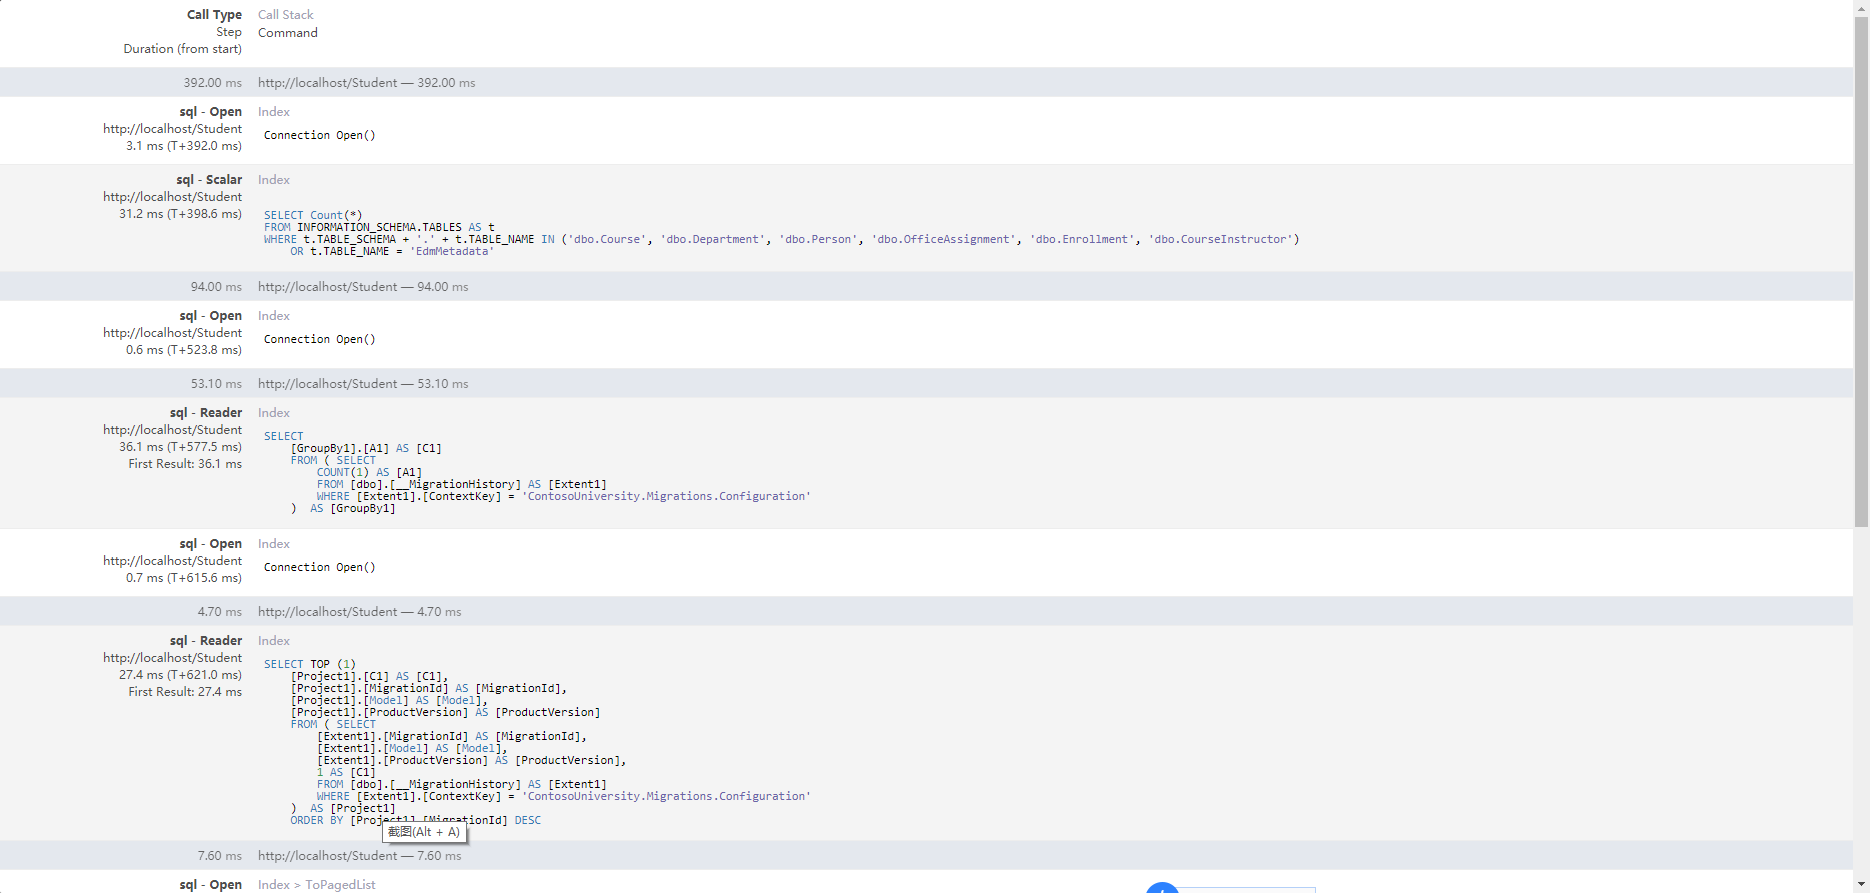
然后就可以看到类似这样的效果:


(以上截图来自微软官方ASP.NET MVC教程项目,可以很直观的看到EF生成的代码)
一些在后面的话:
1、资料中提到的同类的NanoProfiler,还有Glimpse,不过Glimpse已经不再活跃了,下面有空的时候准备再看下NanoProfiler。
2、MiniProfiler的源代码及示例项目运行的时候会提示以下错误,查了下这个错误看起来和.NET Core有关系,但是没有找到如何解决的办法,如果有朋友能告知的话,感激不尽。
---------------------------
Microsoft Visual Studio
---------------------------
无法运行项目。"RunCommand" 属性未定义。
---------------------------
确定
---------------------------


