latex中插图心得
熟悉latex后真心觉得word好费事,一般latex论文都会有模板,只需要替换把原有内容替换一下,就会生成比较好看的文档。
废话不多说,总结一下使用后的体会
1、先说说插图
插图的话,我插入的是".esp"格式。
当然先导包\usepackage{graphicx},
我把图片都放在了fig2文件夹中,fig2的文件夹与latex文档在同一目录下。
(1) 、插入一张图片
\begin{figure}[htbp]
\centering
\includegraphics[height=6.0cm,width=9.5cm]{fig2/Xbee.eps}%fig2文件夹下的xbee.esp图片,
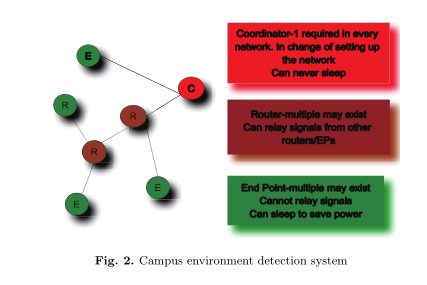
\caption{Campus environment detection system}
\end{figure}
宽度,高度自己调节。
(2)、 并排插入俩张图片
\begin{figure}[htbp]
\begin{minipage}[t]{0.4\linewidth}
%并排插图时,线宽很重要,自己慢慢试,俩张图就不要超过0.5,三张图不要超过0.33之类的,自己看着办
\centering
\includegraphics[height=7.5cm,width=2.5cm]{fig2/xitong1.eps}
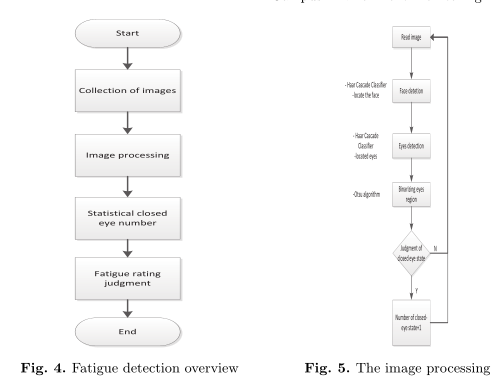
\caption{Fatiguedetection overview}
\end{minipage}
\hfill%分栏的意思吧
\begin{minipage}[t]{0.5\linewidth}
\centering
\includegraphics[height=7.5cm,width=5.5cm]{fig2/tupianchuli1.eps}
\caption{The imageprocessing}
\end{minipage}
\end{figure}
(3)、并排插入三张图片,线宽很重要,要不然插不进去
\begin{figure}[htbp]
\begin{minipage}[t]{0.2\linewidth}
\centering
\includegraphics[height=7.5cm,width=2.5cm]{fig2/xitong1.eps}
\caption{Fatigue detection overview}
\end{minipage}
\hfill
\begin{minipage}[t]{0.2\linewidth}
\centering
\includegraphics[height=7.5cm,width=2.5cm]{fig2/tupianchuli1.eps}
\caption{The image processing}
\end{minipage}
\hfill
\begin{minipage}[t]{0.2\linewidth}
\centering
\includegraphics[height=7.5cm,width=2.5cm]{fig2/tupianchuli1.eps}
\caption{The image processing}
\end{minipage}
\end{figure}

(4)、 插入并排子图
导包 \usepackage{graphicx}和\usepackage{subfigure}
\begin{figure}
\centering
\subfigure[图1]{
\label{figa} %% label for first subfigure
\includegraphics[width=1.5in]{figs/tupianchuli1.eps}}
\hspace{1in}
\subfigure[图2]{
\label{fig:subfig:b} %% label for secondsubfigure
\includegraphics[width=1.5in]{figs/tupianchuli1.eps}}
\caption{说明介绍}
\label{figb} %% label for entire figure
\end{figure}
(5)、 并排三张子图,第一个占一般空间
\begin{figure}
\centering
\subfigure[]{
\label{fig:a} %% label for first subfigure
\includegraphics[width=2cm]{fig2/Seeed_Stalker3.eps}}
\hspace{1in}%使第一个子图占一半空间
\subfigure[]{
\label{fig:subfig:b} %% label for secondsubfigure
\includegraphics[width=2cm]{fig2/temper_humidity_sensor1.eps}}
\subfigure[]{
\label{fig:subfig:c} %% label for secondsubfigure
\includegraphics[width=1.5cm]{fig2/xbee_s1.eps}}
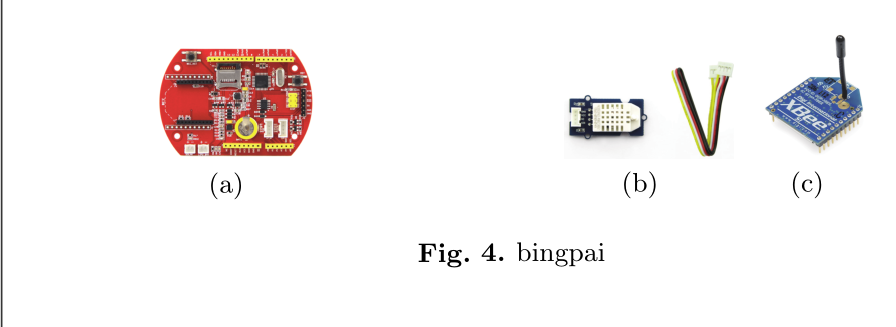
\caption{bingpai}
\label{figb} %% label for entire figure
\end{figure}
5.2 并排三张子图
\begin{figure}
\centering
\subfigure[]{
\label{fig:a} %% label for first subfigure
\includegraphics[width=2cm]{fig2/Seeed_Stalker3.eps}}
%\hspace{1in}%使第一个子图占一半空间
\subfigure[]{
\label{fig:subfig:b} %% label for secondsubfigure
\includegraphics[width=2cm]{fig2/temper_humidity_sensor1.eps}}
\subfigure[]{
\label{fig:subfig:c} %% label for secondsubfigure
\includegraphics[width=1.5cm]{fig2/xbee_s1.eps}}
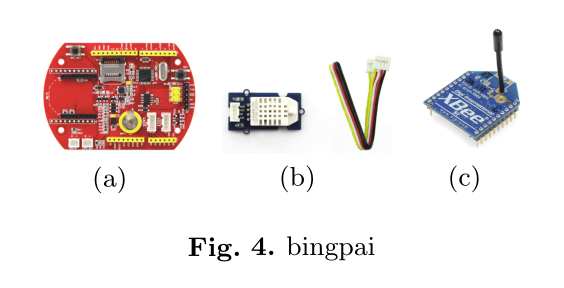
\caption{bingpai}
\label{figb} %% label for entire figure
\end{figure}
5.3 四张子图,分行
\begin{figure}
\centering
\subfigure[]{
\label{fig:a} %% label for first subfigure
\includegraphics[width=3cm]{fig2/Seeed_Stalker3.eps}}
%\hspace{1in}%使第一个子图占一半空间
\vfill%分行命令
\subfigure[]{
\label{fig:subfig:b} %% label for secondsubfigure
\includegraphics[width=2cm]{fig2/temper_humidity_sensor1.eps}}
\subfigure[]{
\label{fig:subfig:c} %% label for secondsubfigure
\includegraphics[width=2cm]{fig2/xbee_s1.eps}}
\subfigure[]{
\label{fig:a} %% label for first subfigure
\includegraphics[width=1.5cm]{fig2/ESP_01.eps}}
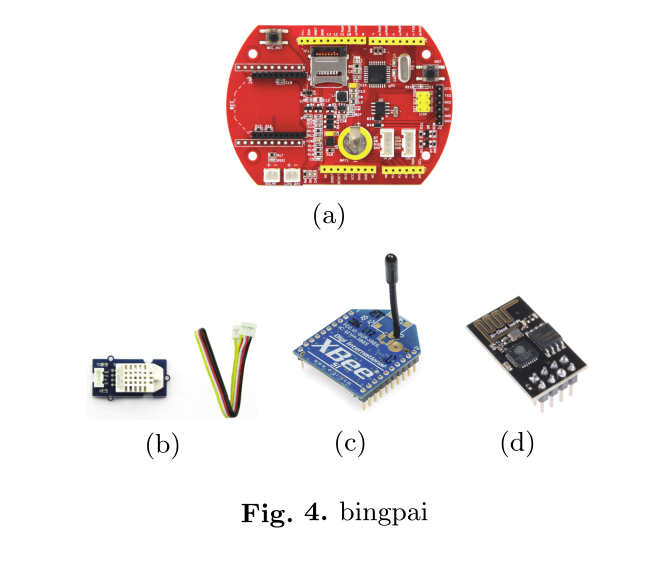
\caption{bingpai}
\label{figb} %% label for entire figure
\end{figure}
6.文本文档分俩栏
导包\usepackage{multicol}
\begin{multicols}{2}
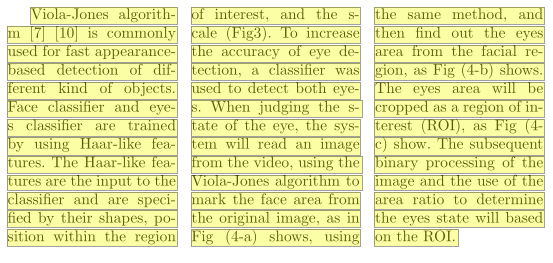
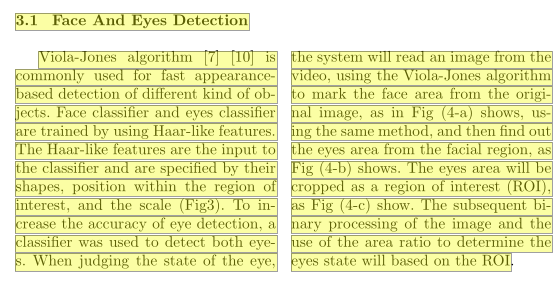
Viola-Jones algorithm [7] [10] is commonlyused for fast appearance-based detection of different kind of objects. Faceclassifier and eyes classifier are trained by using Haar-like features. TheHaar-like features are the input to the classifier and are specified by theirshapes, position within the region of interest, and the scale (Fig3). Toincrease the accuracy of eye detection, a classifier was used to detect botheyes. When judging the state of the eye, the system will read an image from thevideo, using the Viola-Jones algorithm to mark the face area from the originalimage, as in Fig (4-a) shows, using the same method, and then find out the eyesarea from the facial region, as Fig (4-b) shows. The eyes area will be croppedas a region of interest (ROI), as Fig (4-c) show. The subsequent binaryprocessing of the image and the use of the area ratio to determine the eyesstate will based on the ROI.
\end{multicols}
6.1文本文档分三栏
\begin{multicols}{3}
。。。。。
\end{multicols}